Your cart is currently empty!
Cattle Panel Tomato Trellis: A Summer to Experiment
Get updated by email whenever there’s a new post
Another summer garden and a new approach to growing tomatoes. Each garden season invites tweaks and changes not only to the varieties of vegetables we grow, but also to how we approach growing food.
With the explosion of tomatoes in our garden this year, it really forced our hand on how we will manage over 25 indeterminate varieties. Vertical gardening has always been a large part of our growing adventures. And there are endless ways to grow up. Just use your imagination, and your resources. And that’s what we did: we pivoted this year from our single leader twine setup to a new method.

We knew our single leader technique worked, but it had its challenges, most notably the twine would give way at the height of summer when the plants were dripping with ripe fruit. We’d awake to one or more tomato plants having ripped themselves off the trellis in the middle of the night, snapping the twine in two.
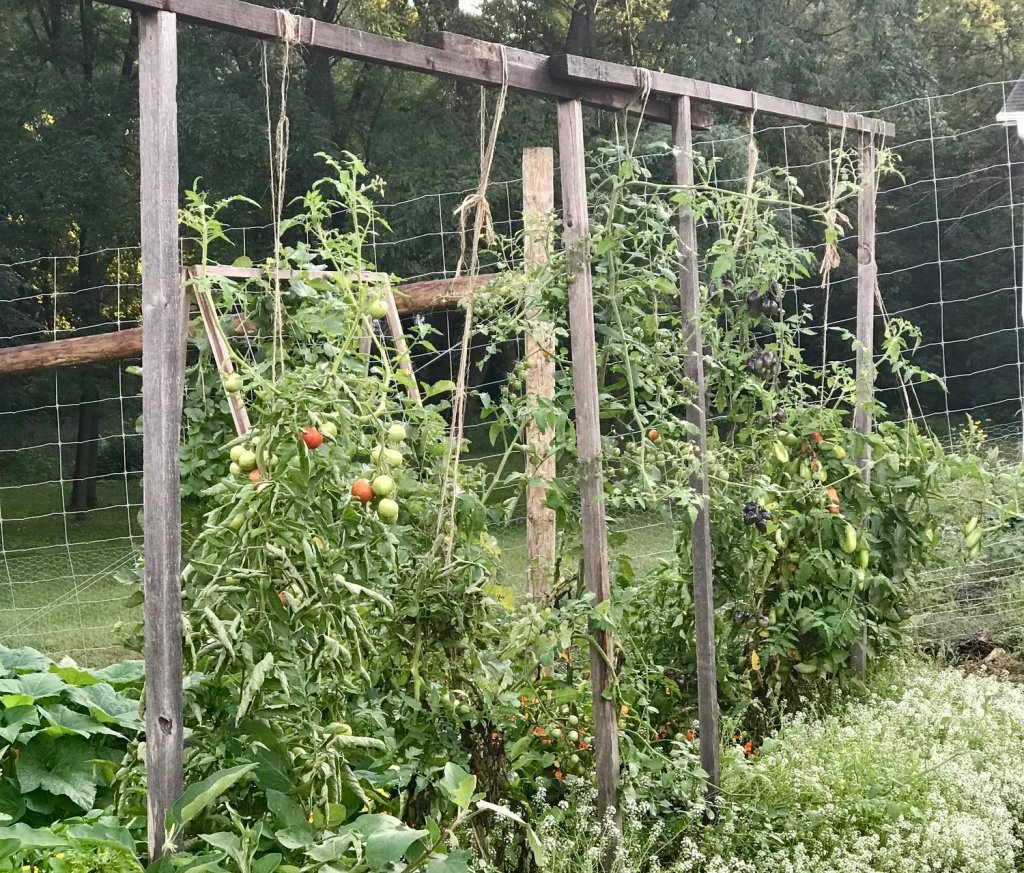
This was our ENTIRE 2018 tomato garden. You can see some of the tomatoes have double twine. That’s because they had already fallen one or more times. This has been our method of tomato trellising for about 15 years now, that is, until this year. These were trained as a single leader and twisted up the twine as they matured. A few suckers always got away in the heat of summer, and we were okay with that.
I used to tell myself this twine breaking happened slowly, though I doubt that was really the case. We’d consistently respond by doubling the twine up, and that would hold for a week or more and then, often, the changed landscape in the morning was an indication of yet another fallen tomato plant.
Tired of the failing vines and not wanting to build 30 tomato cages – though the notion sounded completely plausible while the snowstorms were burying us every other day in February – we decided to give two dimensional growing a try, like how we espalier our fruit trees. I had considered weaving twine horizontally with t-posts like I’ve seen large farms do, but then we thought why not train them up a cattle panel which is certainly sturdier.
We might have some trauma from the twine incidents, too, though you didn’t hear it from me.
We had a few extra lengths of cattle panel seeking purpose in the summer garden, so it was not too much more of an added expense to invest in the t-posts and one extra panel.
High Hopes for the New System
The benefit of the new trellis system we designed is that it’s neither open grown nor a single leader. Instead, I can train more than one leader, like with an open grown (caged) tomato, yet because I am training it to only 3 or fewer leaders we will potentially be producing more fruit per plant in a single season. Ideally, the productivity will be higher than in past years yet I can attempt to tame it, perhaps in vein, by tying it to the panel.
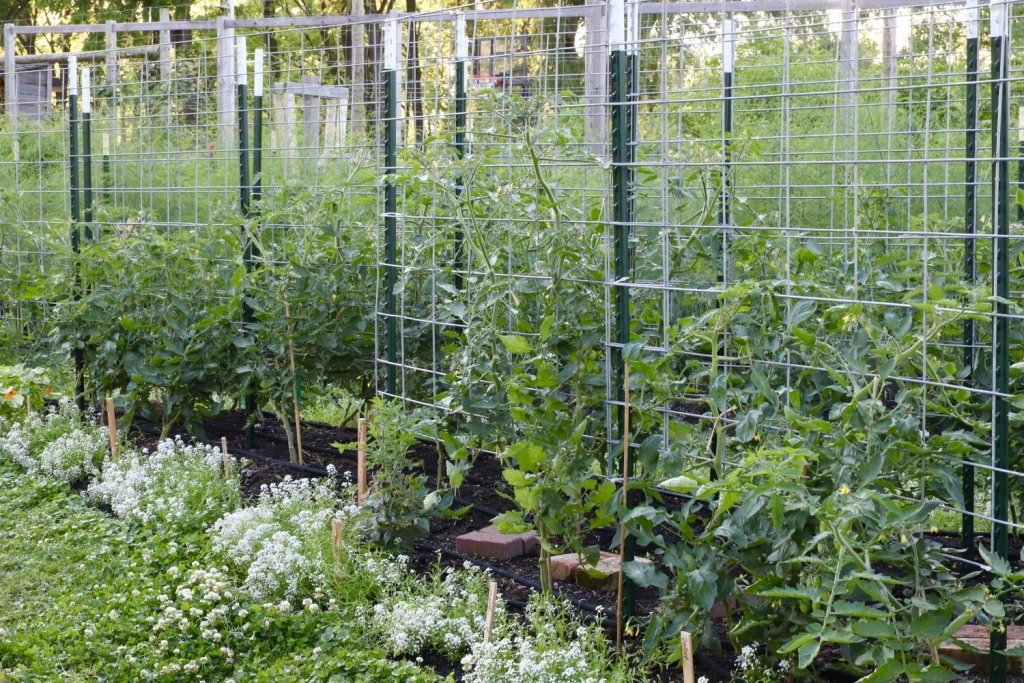
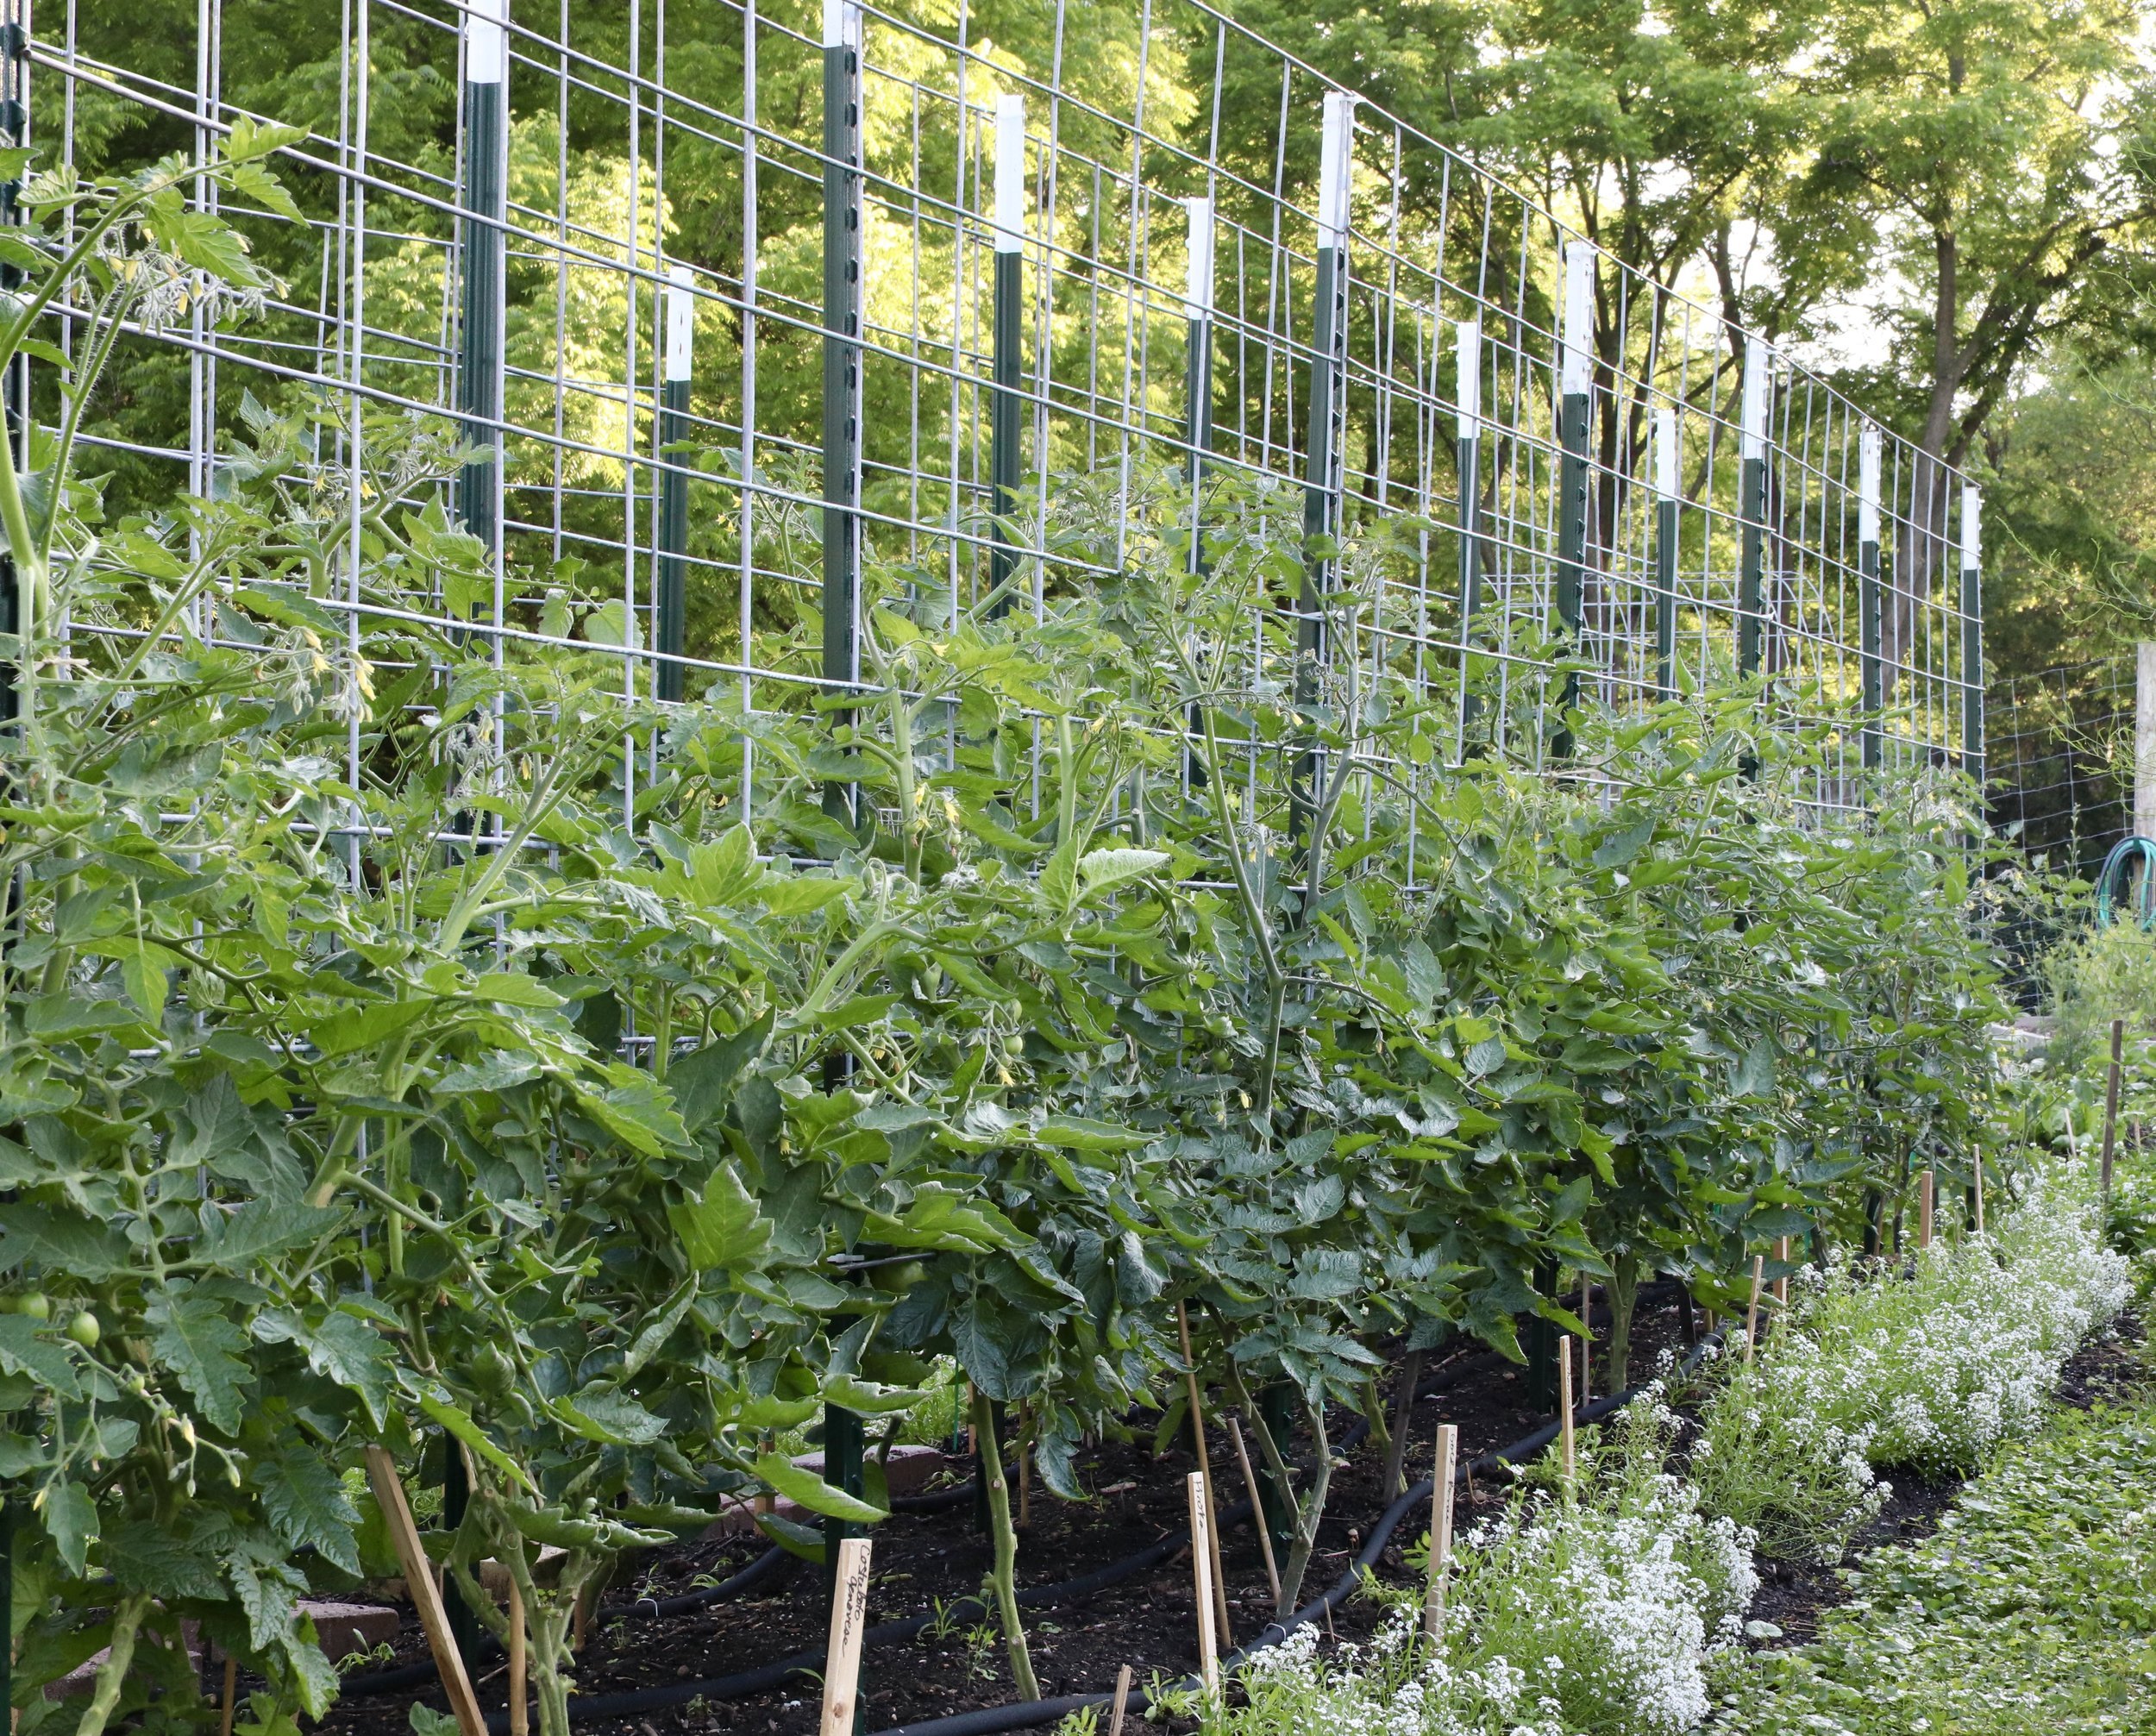
Taken yesterday, this is the south side of the tomato bed. You can see multiple rows of support, and a path between the south and middle rows of tomatoes. It’s been a cool spring but the tomatoes are finally starting to really take off.
The potential downside is that it’s not tall enough. We know this. And we have a plan. We will top the plants when they reach the top of the cattle panel, and allow new suckers to grow up from the main stem at that point. One of our sungolds is already almost at the top of the trellis. And yeah, it’s still squarely June.

What is most exciting about this new system is that is is a play off our espalier orchard. As with our fruit tree trellis method, you grow your plants out in a single plane, two-dimensionally. While these are certainly growing out and up, the effect on the garden design is, so far, really pleasing to the eye.
Materials & Installation
We had extras cattle panels which was the impetus for growing tomatoes a new way this year, so our investment was largely in the T-posts, a one-time investment that already feels worth it. In a matter of an hour, we had 23 tomatoes trellised in a very orderly and beautiful layout.
- 7’ t-posts
- 50” wide cattle panel, cut into 8’ lengths
- zip ties
- tape measure, and
- a level and string if you need to take the install precision to the next level
- Set the two outer posts first and run a string line so you can ensure the posts are all in a line. This helps when you go to set the panels in place.
- Using a pile driver, pound the posts in to just under 6’ and space them no more than 4’ apart, keeping the heights even all along the bed.
- (This takes two people): Carefully set the panel up from the top down.
- Zip tie one of the top corners in place, and then carefully zip tie the other top corner, being careful if the plants are tall to not damage any of the leaders.
- Use zip ties to secure the bottom of the panel to the t-posts, and repeat as necessary if you are building a trellis for a bed longer than 8’ (like we did).
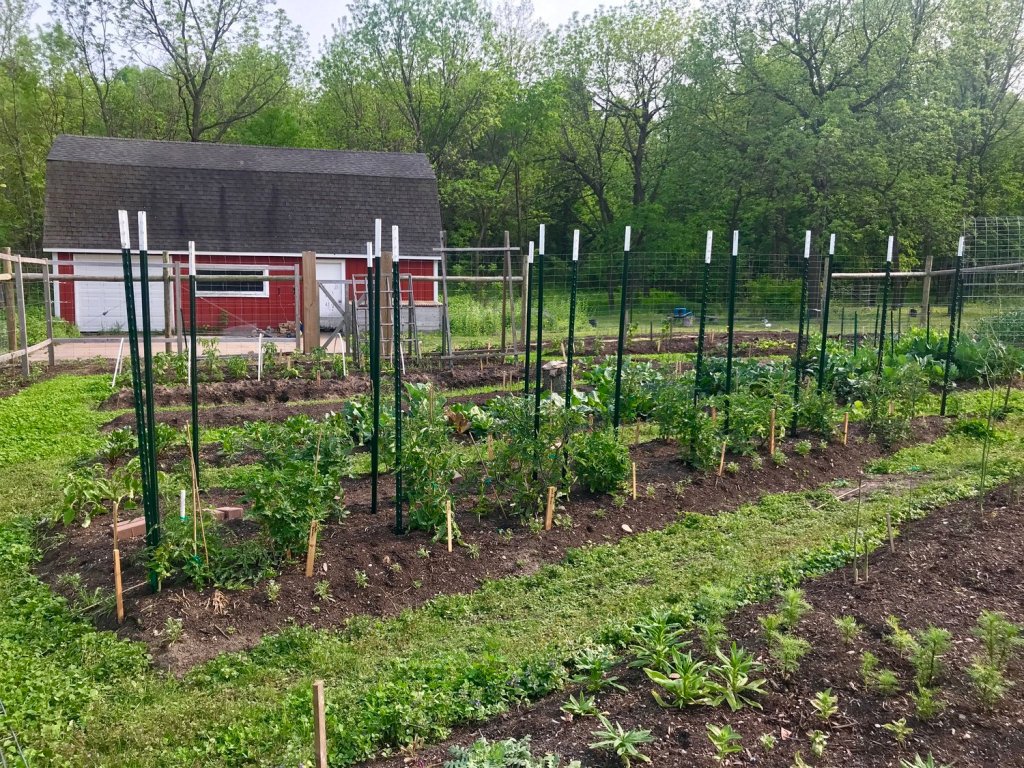
Here you can see just the posts set, by and large, at the same height – and plumb. Well, they were as plumb as I could get them. We didn’t actually put a level to the t-posts while we were pounding them into the ground.
Since our plants were so tall from the uncanny vigor exhibited indoors earlier this year, we set the panels horizontally and positioned them at the top of the t-posts, leaving the bottom 18” or so open to the ground. The 8’ length was then secured with zip ties on all the posts: at each end and one in the middle. We repeated this, adding smaller length panels as need be.
While not all the tomatoes were tall enough to reach the panel just yet, we used bamboo stakes to help get the plants up to the panels. By dong this, we used the minimal amount of cattle panel for the trellis.
Plant Spacing, Training, & Maintenance
Our tomato plants are spaced 30” on center, planted in a modified checkerboard pattern due to the irregular shape of the tomato bed – it’s triangular. I was pushing the limits of spacing a bit, but since we are growing them vertically rather than letting them bush out, we are anticipating this spacing will work well. Of course, I’ll keep you posted if we learn otherwise.

Because this is a long, irregularly shaped triangle bed (over 20’ in length), we decided to grow two rows back to back and then set the third and shortest row parallel with the south side of the bed. The northern row is accessible from the mowed path, as is the southern row. The middle row is accessible by this cobbled together brick path.
We are training two rows back to back, one row to the north while the other row will, theoretically, be harvested easily from the south. The third and shortest row is accessible from both the north and south.
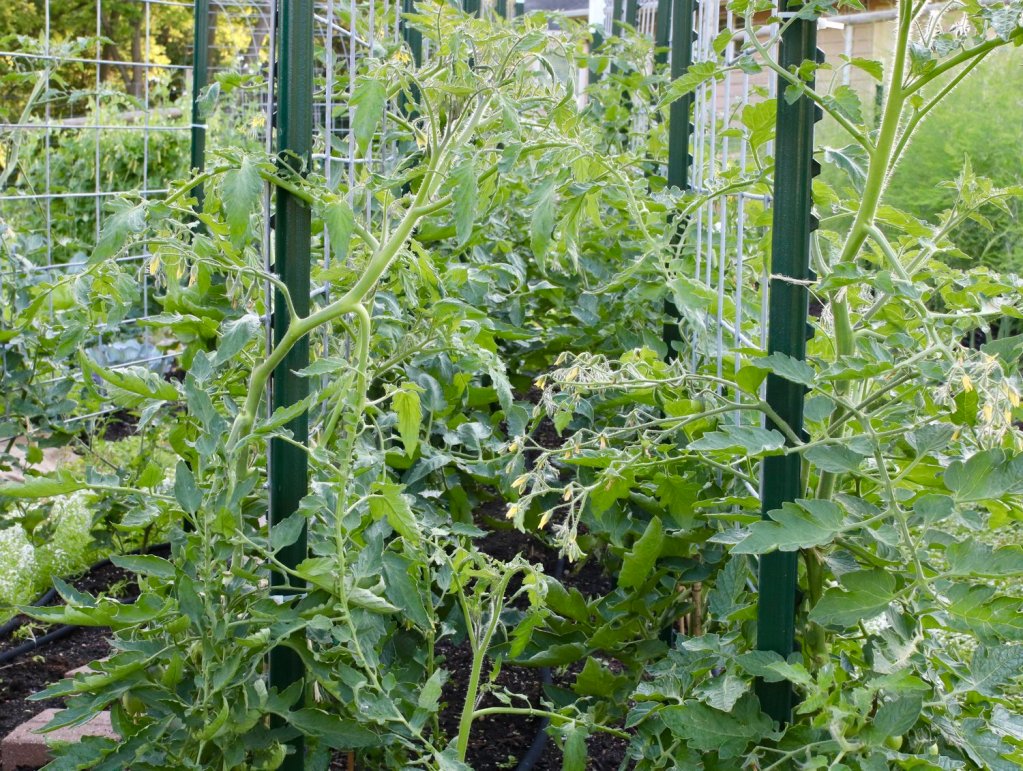
Yeah, so maybe not so tamed, huh? This is a recent photograph between the two back to back rows. I am working to minimize any tomatoes that may set fruit in this now inaccessible tomato alley.
Once a week after the morning dew has evaporated and ideally when a nice warm, dry breeze is blowing, I hang out in the tomato garden to do my training. The drier the conditions, the less risk of any possible disease spread in your tomato garden. I bring my pruning shears, a paper towel, rubbing alcohol, and dozens of twine lengths cut to about 6-8” long for tying the leaders to the cattle panel.
I always clean my pruning shears before starting. Always. And I clean them between each plant, regardless of whether it’s the same variety or not. Too hygiene is a non-negotiable for me, and this is an extra step this year, but it helps me slow down and really see what the plant is up to before cutting anything back. It hasn’t prevented me from accidentally whacking off a leader, but it largely helps me make the best decision for the plant.
We have been bit by disease in our tomato garden, and as we become more serious tomato gardeners, so our precautions have equally ratcheted up to protect our investment. I do not ever just meander through the tomato bed breaking suckers off anymore. I only do this with my pruning shears.

Oh yes, the irony is not lost on me. We are in fact still using twine! In smaller amounts but hopefully with much less dramatic results, I am training the tomatoes up on side of the trellis as best I can. Some tomatoes have grown on both sides, and where we have access on both sides, I am in support of this mess.
The beauty of the returning to the garden year after year is that accumulation of knowledge. And this tomato garden is informing us in ways yet to be fully discovered. We always enjoy this aspect of gardening so much, forever a student in our own playground, and here to share our trials and triumphs as they reveal themselves to us.
Get updated by email whenever there’s a new post
Comments
If you’re a subscriber, you can discuss this post in the forums



Leave a Reply