
Your cart is currently empty!
How To Renovate Strawberries

Get updated by email whenever there’s a new post
Strawberries are the most vigorous perennial fruits we grow. They give and give. But they do require some attention to give at the annual robustness of a 2 year old planting.
It seems counterintuitive, but as soon as you’ve harvested your last ripe berries in early July from your June bearing plants, you have to cut them down. Yes, that’s right.
When our beds were all in-ground, we were able to use our lawnmower set high (we keep ours set to 4”) and trim off above the crown. The crown is what you don’t want to disturb, the base of the plant at ground level. It should also not be buried deeply. Now that we have the weathered steel edging throughout our orchard, it’s not as easy to maneuver a lawnmower in there so we are now renovating by hand. Definitely a little more time, but weeding is a necessary step alongside pruning back all the old green foliage.
Why do I need to do this?
Renovating strawberries serves several purposes. First and foremost, it removes disease from your bed. Strawberries have a lot of fungal diseases, and by carefully removing the leaves you can take diseases and pests out of the bed and the new growth will be less susceptible to develop the diseases.
Second, the new growth will help develop the roots, new runners, and most importantly, the fruiting buds for next year!
Finally, this is also the time to add compost and/or fertilizer to help spur this flush of growth we are looking for to continue to grow and expand and renew the strawberry patch.
I will note that for us these plantings are only a few years old — I think this is our second year harvesting from our north orchard and third from the east, though the east orchard had immense quack grass pressure last year and so we nearly removed all strawberry plants. We only harvested this year from the transplanted plants. There is a lot of room for runners to establish this summer for a more robust harvest next year.
As such, we haven’t had to take out the oldest plants yet, but if your strawberry bed is more than 3 years old and you’ve never removed the parent plants, that is also an essential step to maintaining vigor. I look for the smaller plants (last year’s runners) and would select those as my keepers, and remove the oldest, largest ones as I’m weeding.
Step by Step Instructions
-
Cut back all strawberry foliage down to the newest leaf the crown. Do not sever any runners (if you can avoid it).
-
Thoroughly weed the bed.
-
Add slow release organic fertilizer to the bed (1/2 gallon per 4×8 bed (32 square feet) or 1-2 gallons per 100 square feet).
-
Top with 1-2” compost.
-
Bring the runners above the compost and rest on top.
-
Irrigate regularly (at least 1” per week) until September.
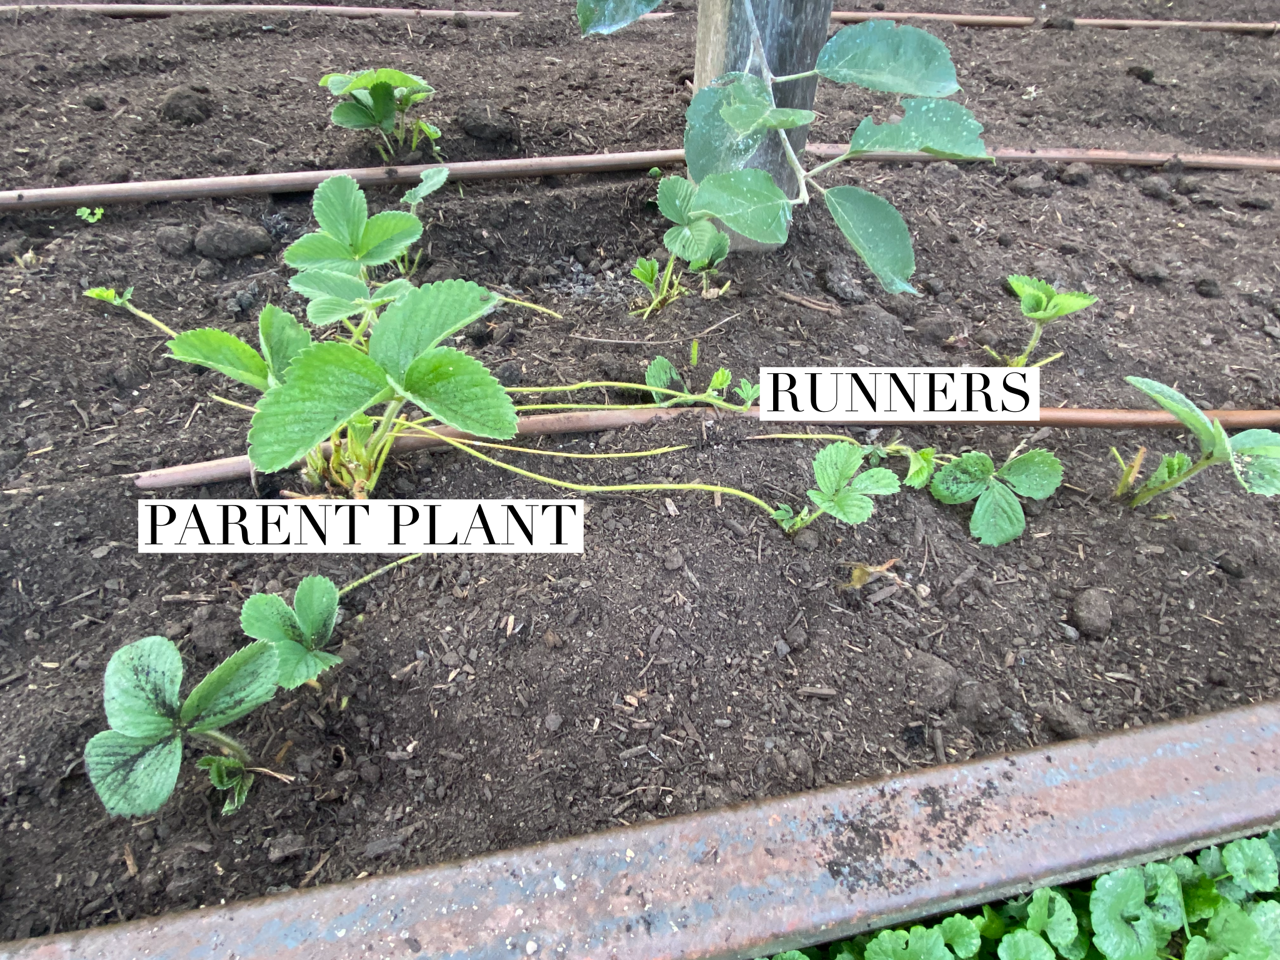
It gets a little loose with how old our plants are because we do move them around every year it seems, but this parent plant was moved to this location either late summer 2020 or summer of 2021. The runners you see are not yet rooted down, but will be before long and will produce berries for us next spring.

These are all young runners that have rooted down. As you can see, we aren’t holding fast to the 12” x 12” mantra.
Post Renovation
After you renovate, watering the plants is key. This helps set roots for runners and allow for the plants to uptake all the fertilizer and compost you added to the area, critical for strong foliar growth, bud formation, and even for vigorous runner development.
With our drier summer (again), we will be able to just turn on the orchard zone in the garden to supplementally irrigate that bed if the dry weather persists throughout the month of July and August, the key months for growth of these plants.
Get updated by email whenever there’s a new post
Comments
If you’re a subscriber, you can discuss this post in the forums
Leave a Reply