
Your cart is currently empty!
Welcome to Meg’s Blog
-

Weekly Videos: Week of April 21, 2025
See what happened last week
This weekly video update is a part of your Seed to Fork subscription. You can always look back on previous weekly garden updates here. -

Chicken tagine
This chicken tagine has been made and refined over the last 8 years in our kitchen. We often use it when entertaining, and every time our guests ask for the recipe. We always serve this with our rice pilaf, a recipe you already have.
Chicken Tagine with Olives & Lemons

This recipe is remarkably quick for the flavor it packs. It's adapted from a NY Times recipe.
Ingredients
- 10 cloves garlic, minced
- 1/2 tsp saffron threads
- 1 tsp ground ginger
- 2 tsp sweet paprika
- 1 tsp ground cumin
- 1 tsp turmeric
- 1/2 tsp salt
- 1/2 tsp freshly ground pepper
- 8 chicken thighs, skin on and bone-in
- 1/4 cup olive oil
- 4 medium onions, sliced in thin rounds
- 2 cinnamon sticks
- 1 cup kalamata olives pitted and halved
- 1 cup castelvetrano olives, pitted and halved
- 1 preserved lemon peel, sliced thin (optional)
- 2 lemons, seeds removed, slicked in thin rounds
- 2 cups chicken stock
- 1 lemon, juiced
- fresh parsley for garnish
Instructions
- Debone chicken thighs and set aside in a shallow bowl or platter. Mix together the garlic through salt and pepper and rub on chicken thighs. Set in refrigerator for 20 minutes (up to several hours) to marinade. Chop lemon, onions, and olives, juice the lemon, and set it all aside.
- Heat the oil in a large, shallow skillet. (We like our Le Creuset dutch oven for this). Add chicken and brown on both sides, about 5-8 minutes each. Remove and set aside on a plate while you brown the onions.
- Once onions are lightly browned, add cinnamon sticks and arrange the chicken thighs in the skillet. Next spread the onions out evenly and place the lemons all around the chicken. Pour the chicken broth and lemon juice into the skillet and bring to a boil.
- Cover and let on low and cook for 20-30 minutes. During this time, prepare your rice pilaf.
- Garnish with fresh parsley and serve with rice pilaf.
-
Weekly Videos: Week of April 14, 2025
See what happened last week
This weekly video update is a part of your Seed to Fork subscription. You can always look back on previous weekly garden updates here. -

What I’m Sowing Now
We are anywhere from 1-4 weeks from our last frost. In recent years our last frost has been before May 1.
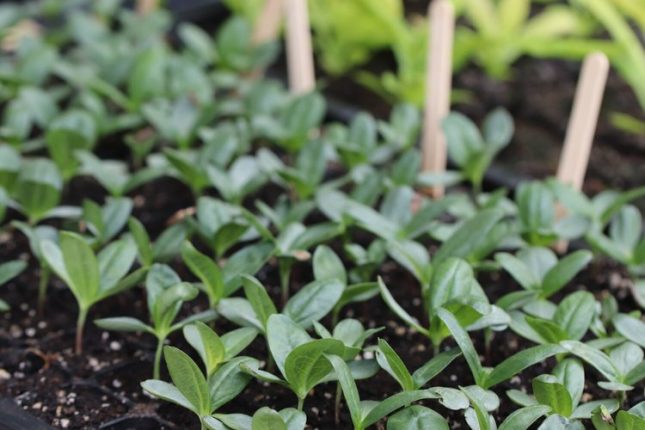
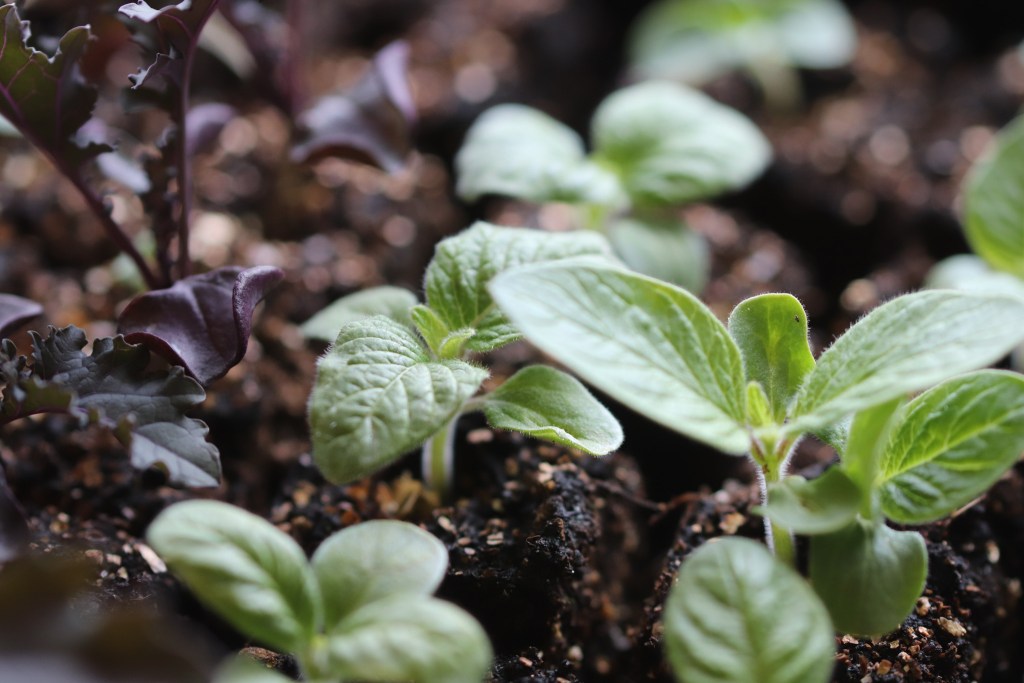
That means I’m shifting my focus to main season flowers, which is what I spent 2 entire days this week doing: sowing trays and trays of flowers! All told, I started over 500 flowers, many like the alyssum had a sprinkling of seeds in each pot (so probably sowed 100 seeds in total).
It’s one of my favorite parts of spring because it marks the shift from longer season starts to quicker maturing plants. My indoor seed starting marathon is more than halfway through; I’ve made it up heartbreak hill and now just have have to endure the steady commitment to sowing my indoor trays for a robust fall garden. My indoor seed starting will finish in late June or early July when I sow my last tray of head lettuce and broccoli.
Most of what I sow from now on will be direct seeded, and that’s a joyful shift, one that is much easier to manage for me.
Direct Seeding Vegetables
I’m delighted that our peas we sowed in late March germinated in about 2 weeks under cover with our season extending tunnels. It’s all so heartening, and honestly, quite simple.
At this point in spring, a cover is no longer needed to plant cold hardy crops. I am studying our extended forecast and our low overnight was 29 here, but the forecast will be frost free after tonight. It’s not uncommon for us, even in this cold low microclimate, to have our last frost during the fourth week of April!
Now this doesn’t mean I can plant out my tomatoes, because i haven’t warmed the soil in the tomato bed yet. Though when I take the cover off the peas, I will surely move it to where I plan to plant tomatoes to get that bed ready for transplanting. I do like to give my tomatoes and even peppers a month of added heat until summer arrives. This is what I use the low tunnels for. I keep the main plastic on but leave the side doors/end panels off for ventilation. This helps them accelerate growth and flowering and helps us get the maximum amount of fruit from them as our short season offers.
With the soil and day and nighttime temperatures steadily warming, continue to choose from any of these seeds to jump start the growing season:
- Arugula
- Cilantro
- Radish
- Scallions/green onions
- Bok choy
- Pac Choi*
- Tatsoi*
- Kale
- Cabbage
- Kohlrabi*
- Broccoli raab*
- Mustard greens*
* The next few weeks are your final chance this spring to sow broccoli raab, mustard greens, kohlrabi, pac choi, and tatsoi. These are all heat intolerant, so won’t grow well come June.
Of note is while I say you can direct seed cabbage, I generally don’t direct seed them (yet, who knows, maybe one day I will!). If you choose main season cabbages right now, something like Adaptive’s Primax or Amarant or Johnn’ys hybrid, Farao, those could be seeded now and probably will produce for you by August, so right in the height of summer cole slaw season.
Main season vegetables to direct seed now include:
- carrots
- beets
- parsnips
- onions
- corn
- snap beans
I might sow corn and beans by next weekend! I keep trying to get sweet corn by Fourth of July and miss, but maybe this year I’ll finally achieve it. It means I need to sow it possibly today (April 18!). This does feel uncomfortable and a bit off schedule, but I think it’s what local farmers do with their fastest/earliest maturing sweet corn varieties — April sowings.
Sowing Indoors: Vegetables
As we round out April, my list of indoor sowed vegetables dwindles significantly because I’m really heading into direct-seeded season. There are a few key late season crops that I will be sowing late this week, including:
- Brussels sprouts:
- Early Half Tall, Darkmar 21, and Red Bull, all new varieties to me from Adaptive
- Peanuts:
- Saved Red Valencia
- Heat tolerant lettuces:
- Coastal Star
- Concept
- Jericho
Sowing Indoors: Flowers
Mid-April is my go time for all of my main season flowers, those frost intolerant, fast growing flowers that are the foundation of color in our garden.
I have a very specific goal in mind with my. flowers: I want orange, pink, and purple hues in the garden. I let yellow come in the form of squash blossoms, clusters of tomato flowers, and our surrounding prairie that blazes yellow come August.
I am trying for a second year to grow more flowers, though last year I felt the attempt grossly failed. I am scaling back our tomato garden further, and also reducing our potato beds as well, so that will help with my flower goals, on paper anyway. Things always get a bit wild when it. comes time to planting.
Zinnia Benary’s Wine Benary’s Purple Benary’s Orange Benary’s Bright Pink Benary’s Salmon Rose Oklahoma Carmine Oklahoma Pink Queen Lime Red Queen Lime Señora Thumbelina Pink (saved seed!) Alyssum Carpet of Snow Rosie O Day Calendula Alpha Marigold Tangerine Gem Cosmos Afternoon White Apricotta Nasturtium Cherries Jubilee Potting Up
It’s also time for some of my longer term indoor starts to get larger pots so they can develop healthy root systems. This week, I potted up my tomatoes, eggplants, and peppers. And I’ll also be potting up my dahlia seedlings too so they are as large as possible before going into the ground next month.
I am very particular about how I pot things up. I don’t use newspaper pots for my peppers because I’ve found that they. tend to hold more water than soil blocks or plastic pots, both of which dry out faster. And it turns out that peppers aren’t fans of excessive moisture. In fact, I now understand that they thrive with less water than more water. So I even go so far as to deprive them of water. I don’t mean I stress them out, but I am sparing with watering them. By way of example, I potted them up this week on Monday, using damp potting soil. And it wasn’t until Friday that I lightly watered them. They looked happy all week long and I knew that giving their roots time to expand and grow and soak up the existing moisture was better than flooding the soil with water which might give them soggy roots.
I do the same thing with my tomatoes into 4″ soil blocks. Those soil blocks are very very wet and heavy so I know the roots will quickly spread out into the surrounding soil. I just watered those as well on Friday, though they are significantly more soil than the 4″ plastic pots.
What I’m Transplanting
After properly hardening off, I am starting to make a plan for transplanting:
- Onions
- Cabbage
- Broccoli (Spigariello, Waltham, Umpqua, Kailaan, and Piracicaba)
- Napa cabbage (Nozaki)
- Bok Choy
- Cauliflower (Earlisnow)
What I’m Not Sowing Yet
I’m still holding off on sowing any tomatillos, squash, cucamelons, peanuts, cucumbers, melons, or brussels sprouts.
Resist the urge to sow warm season spices like cumin, nigella, or fenugreek. I’m going to try direct seeding ALL of these in May.
-
Weekly Videos: Week of April 7, 2025
See what happened last week
This weekly video update is a part of your Seed to Fork subscription. You can always look back on previous weekly garden updates here. -
Weekly Videos: Week of March 31, 2025
See what happened last week
This weekly video update is a part of your Seed to Fork subscription. You can always look back on previous weekly garden updates here. -

April Monthly Task List
If March felt busy, welcome to the beginning of our gardening lives, starting now! April is when I start to fire on all cylinders, when my winter hibernation crafts take a back burner for the season, and when, finally, we take daily walks in the garden to witness life emerging right before our eyes.
We are enduring a downright languid spring arrival, no thanks to the week of cloudy, snowy and damp weather we’ve had. It’s felt more wintery that springlike, which, in turn, does a number to my mental game. I’m feeling tired of winter’s lingering and yet, when I look at my teeny hot season seedlings germinating there’s more than an ounce of me that is screaming, you’ve waited too long. (This voice will never go away, I’m just learning to say ‘hey, what’s up. settle down. it’s gonna be fine.’)
Instead of rushing to get my main season flowers started, I’m sitting back and trying to decide if I roll the dice with my battered earliest brassica succession and transplant them … with a low of 22F forecast for Monday night. (I think I will roll the dice, since they’ve endured round one of near-death experiences, what could possibly go wrong in round 2?)

These first two trays of brassicas were left outdoors on a frigid night in late March due to my distractions (it’s a saga … I’m locked out of Facebook and can’t get back in). I lost about 70% of my earliest brassicas, a deep wound to my gardening heart. These plants got torn up by being left outside, uncovered, when the low was close to 20F. It was one of my gravest gardening errors in years, but also, as you can see above, not all is lost. The most hardy of the bunch include my bok choy and kailaan sprouting broccoli. You better believe I turned around and sowed more kaikaan broccoli! I completely lost all red cabbages, but my celery seems to have limped itself back to life, along with the thyme. The parsley also made it.
In addition to sowing many more vegetables, April is when the vast majority of my annual flowers get seeded too, mostly indoors because I’m not ready to test out everything direct seeded. Though, to be fair, you can direct seed all of the flowers I’m indoor sowing this month. The catch is you need to wait another month to sow them, and that’s around the time I’m transplanting mine which yields a garden of flowers by July.
All that being said if you’re feeling behind, take heart. I feel extremely behind with a LOT of my seedlings this season, in particular my celery, brassicas, and flowers. And even my peppers, tomatoes, and eggplants that are just germinating this week give me pause. They seem so tiny and delicate, but I know from experience they will grow quickly this month and be garden-ready before long.
Last chance to prune
If you’e put off pruning fruit trees or shrubs, this is the last weekend, especially up north, to do it. Be sure to time it for a stretch of sunny, breezy days so the cuts will heal over quickly and without moisture, that boisterious disease-carrier.
Check out our espalier pruning video from last year to see how we go about pruning our fruit trees.
Spring Cleanup & Garden Planning
This is a task I didn’t finish in fall, so I’ll be joining you in tidying up beds, weeding, and adding a solid 1-2″ of compost atop all our beds before we plant. And speaking of empty beds, this is prime garden planning season too.
I encourage you to use this month to visualize the space (across the seasons!). Where will your tomatoes go this year? What about your cucumbers or beans? Are you dreaming of a wheelbarrow of pumpkins? Where will they ramble? Do you need to build or add trellises to your space? You get the idea here.
While we wait for soils to warm, assuming your garden is built, this is a great time to really dig into the full season plan so when you drop those seeds or transplants in the ground you know whether you’ll be utilizing that space in mid-summer for a second or third quick succession of crops.
Hardening Off / Cold Vernalizing
Taking the proper time to harden your seedlings off is vital to a smooth transplant. Be sure to follow my tips here.
Here’s a hardening off schedule for you to follow.
- Early brassica tray including bok choy, broccoli, cabbage, kohlrabi, and kale
- Alliums: onions, shallots, leeks, and garleek
- Cold vernalizing artichokes (in same tray as brassicas)
- Early sweet alyssum, snapdragons, and poppies (all sown indoors in soil blocks)
Potting Up
If you have tender annuals that are growing like crazy and your last frost isn’t for another month or so, potting up is in your future. For the first time ever (!!), I don’t have a slew of plants outgrowing their soil blocks right now, so potting up isn’t on my radar right now.
It will be in a few weeks, at which time I expect to pot up tomatoes and possibly peppers into 4″ soil blocks. I wait as long as possible because this ends up taking up a LOT of space under our lights.
What to Sow Now
Cold Hardy Crops
We remain in great position to direct seed cold hardy crops, especially here where we are having a slow warm up. Seeds should germinate quickly so long as you water them well in the coming week or two.
While I’m not sowing all these things direct seeded, this is a list of what I consider possible to plant right now if your soils are reading between 45-55F with a meat or soil thermometer.
Direct Seed
(soil temps 45F or warmer)
- Radish
- Salad turnips
- Green onions
- Arugula
- Spinach (last chance for most varieties)
- Cilantro
- Bok Choy
- Broccoli
- Kohlrabi
- Kale
- Broccoli Raab
- Mustard Greens
- Leaf lettuce
- Head lettuce
- Parsnips (must NOT forget to do this!! Now until mid-May is a good time to sow for a fall harvest)
- Peas^
- Beets^
- Carrots^
^Soil temps at 50F for direct seeding
Indoor Sowing
- Head lettuce (while you can direct seed, I prefer to give this an indoor head start)
- Cabbage (red, green, savoy)
- Napa cabbage — last call for an early summer harvest
- Broccoli (heat tolerant varieties like Covina or Belstar)
- Beets
- Fennel
- Tomatoes (will be sowing our determinate paste tomatoes at some point … might direct seed all of them this year)
- Peppers
- Eggplants
- Peanuts (in 3.25” newspaper pots), late April
- Brussels sprouts (my one and only succession planting of this for the year happens in late April), late April
Herbs
- Lemongrass
- Parsley
- Basil (mid-April for a late May transplant)
I’m also starting to try to grow my own sweet potato slips from the locally-grown sweet potatoes I bought at our coop last fall and that overwintered in our dry root cellar really well. It should take about 6 weeks to grow slips, which should time out perfectly for a June planting.

Zinnia are one of my very favorite seedlings, with their soft edges and hopeful arms stretched wide. Flowers to Sow in April (2-4 weeks before last frost)
Well, this is probably the biggest thing on my mind aside from potting up tomatoes and peppers right now. I have high ambitions of having even more flowers in our garden this year, because looking at it bare all winter has me questioning what the heck we were thinking in 2021 expanding our garden. I don’t regret it. The solution is simple: more flowers! And it will be stunning.
Here are the flowers I sow in April every year. I’ll be sowing all of these next week. Sometimes I sow them the first week of April, though that’s not happening this year. My drop dead date is April 15, 2-4 weeks before my last frost:
- Sesame
- Cosmos
- Zinnia
- Nasturtium
- Marigold
- Sweet alyssum
- Sunflowers (sow in newspaper pots end of April)
What Not to Sow Yet — waiting until May
I am not sowing any cucurbits just yet – watermelon, muskmelon, summer squash, zucchini, winter squash, and cucumbers all wait until around Mother’s Day and all get sowed into a 3.25” newspaper pot.
I won’t sow any potatoes, corn, or snap beans or dry beans until the very end of April, unless the soil temperatures warm up quickly. I used to sow all these around mother’s day weekend (second sunday in May) though I’ve been pushing it earlier for snap beans and corn over the past several years.
Lastly, I am holding off on a number of herbs, notably the ones I trialed last year and quickly learned direct seeding is likely a better route. This includes fenugreek, cumin, nigella, and mustard seed.
We are also growing Red Fife Wheat this year (if I remember to do this!) and I’m not sure when to plant that. I’ll let you know when that happens and why.

I hope this list gives you a lot to consider. There are innumerable possibilities for both indoor sowing and transplanting as well as just direct seeding a garden this spring.
The more you add some quick maturing crops, the easier it will be to succession plant in June, July, and August, the sweet spot for turning beds over for a true fall garden.
-

The First Flower of Spring
The first flower of spring isn’t a crocus. It’s not a viola. Nor is it an apricot blossom. Those surely those will be the first blossoms the pollinators seek out on a warm April day.
The first flower of this season is, instead, an unfurling of winter, a stretching of the past into the present, in the form of an intricate ghost flower.
A dahlia blossom the milkweed made. The wind swept seeds arrange themselves in perfect harmony at the base of the hill, so perfect I mistook it for a flower.
It tumbles around where the wind takes it like the glorious weed it is, and now, after the rain and snow and sleet has surely lodged itself into some bare earth to give a go at a new season.
It’s time we all made a go of this new season ahead. Where will. you lodge your seeds in these warming weeks?
-
Weekly Videos: Week of March 24, 2025
See what happened last week
This weekly video update is a part of your Seed to Fork subscription. You can always look back on previous weekly garden updates here. -

What I’m Sowing Now
Well, here we are. It’s the last week of March. March Madness is not only a collegiate thing, it’s a gardening thing too. If you flip to any one of my seasonal sowing charts in my book, you’ll see how heavily-weighted March is, not only for vegetables, but also for flowers.

Not pictured are my head lettuce seedlings: Romaine and Iceberg varieties. Direct Seeding
I’m amazed at how early I now sow seeds directly into the garden under the protection of our season extending tunnels and cold frame. Even just five years ago I wasn’t sowing or transplanting anything before the end of March. Now I have germination of direct-seeded, cold hardy crops before the Vernal Equinox. These seeds will go on to nourish us in April and May, before our last frost! Before my tomatoes are transplanted. Before my cucumbers are seeded, and before our blueberries have set fruit. It’s all so incredible, and honestly, quite simple.
I’m sowing these under cover, both in our cold frame and in our low tunnel. The low tunnel with its increased mass and more sun exposure has warmer temperatures than the cold frame, but anything that is providing protection while expediting soil warmth will do. But I want to empower you to consider direct seeding things like cabbage and broccoli, even if you usually indoor sow them. Yes, you can do that too, perhaps a side by side if it feels too risky to direct seed it all or if your environment makes direct seeding challenging from local fauna or pest pressure. But keep direct seeding these crops in your mind, and when you’re ready and the soil’s warm enough (45-50F minimum), I’ll be cheering you on.
Choose from any of these seeds to get a jump start on the growing season:
- Arugula
- Cilantro
- Radish
- Scallions/green onions
- Bok choy
- Pac Choi
- Tatsoi
- Kale
- Cabbage
- Kohlrabi
- Broccoli
- Broccoli raab
- Mustard greens
If you don’t want the hassle — trust me, I get it! — then just pencil these seeds into your calendar for 2-3 weeks before your last frost. Use a meat thermometer to probe the soil. You want soils to be at least 45F but ideally over 50F for faster germination. They can germinate in soil as cool as 40F, but it will take longer. With the sun returning north, every week our ground is warming and thawing, even without cover. Hope is on the way!
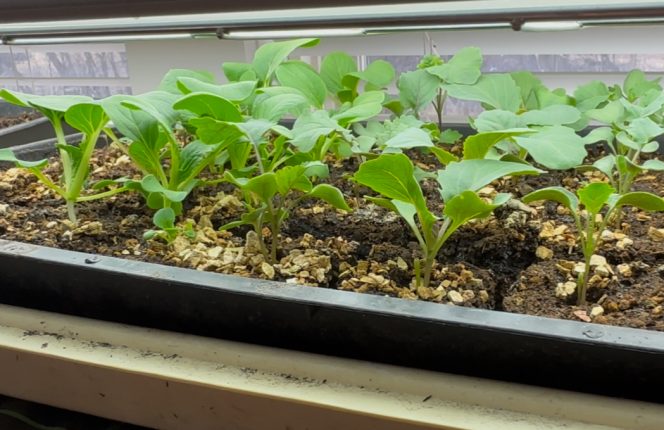
Sowing Indoors: Vegetables
Alliums
I’ve been chatting up my onion seedlings already, but now it’s really true: If you want to indoor sow onions, leeks, or shallots, it’s call time for you! I still haven’t sowed any shallots, so between soil block trays I’ll be tossing some seeds into a few 4″ pots this week too.
Beets
I’ll be doing my sowing of beets this weekend. These will get interplanted in between some of my brassicas under cover in mid-April I’m guessing. If I was more organized, they would have been seeded last weekend. I rely on having beets by mid-June annually, so will be a good test to those sowing times and if there’s flexibility in starting them later and yielding the same early harvest.
Lettuce
As you may know, I am a head lettuce zealot. I really love the crisp, watery crunch of a romaine or iceberg, and that’s 90% of what we grow. I also love how beautiful head lettuce grows up planted in blocks under trellises and between my broccoli. It’s as much fun to interplant as it is to enjoy on our plates. This can be indoor sowed anytime now, and it’s quite frost hardy so even a mid to late April transplanting without cover should weather those last few dips in temperature without any issues.
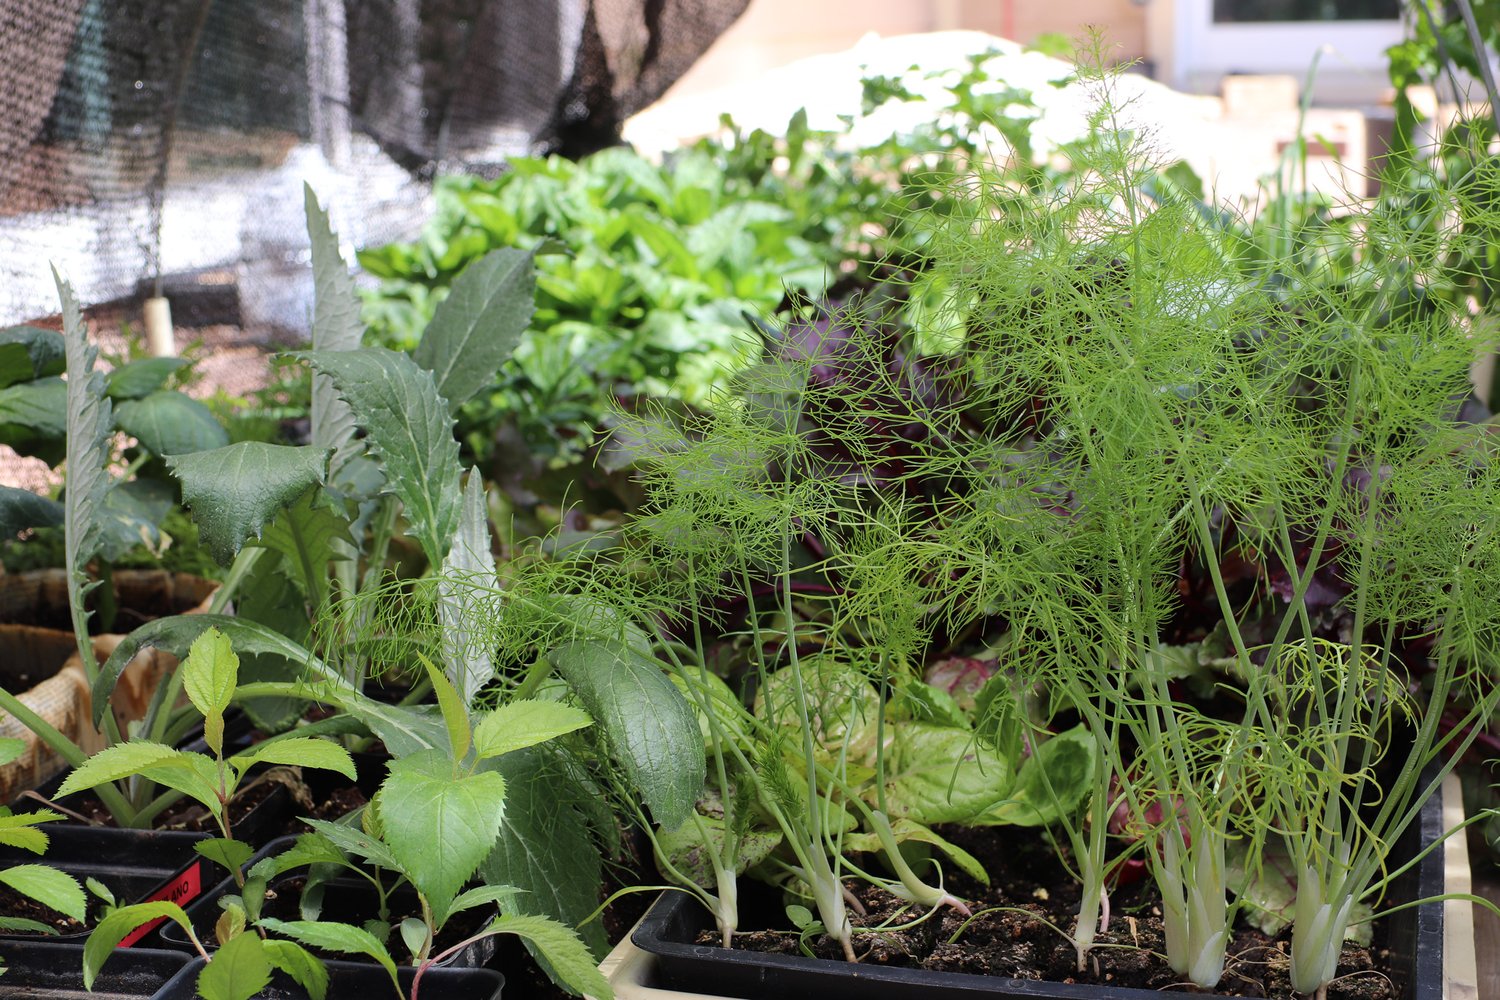
Fennel
One of my very favorite vegetables to grow, bulb fennel is highly ornamental and such a unique vegetable to cook with. Admittedly we only do a few different things with it, but I just love watching it grow in the garden. More information on growing fennel coming soon to the blog too, if this is a vegetable you’re curious about growing. I plan to put it in the same tray as the beets and lettuce.
Tomatoes, Peppers, Eggplants
I haven’t started a single nightshade yet (the plant family that includes tomatoes, peppers and onions). If you’re in zone 4 or 5, getting tomatoes seeded in the next 2 weeks is a good idea. But, wait. You can wait until mid-April too. As you’ll see with me, I am going on year 2 of direct seeding ALL my paste tomatoes, the ones I need for summer canning.
Eggplants are a little slower to get going, as are some peppers, so they will get seeded by the weekend. And I will direct seed a few more bell peppers this spring in our cold frame to continue that long-term experiment to try and direct seed as many crops as I can.
Celery
We’re nearing the closing window for early summer celery. So if you’re heart is set on some celery by July, get sowing! Be sure to follow my advice in my grow guide.
Honorable Mentions
There are lots of vegetables that don’t make my grow list, but that you might enjoy growing. Swiss chard comes to mind, and when I was digging through my seeds I thought, if I LIKED swiss chard, now would be a great time to sow it!
Also brassicas, Asian greens, and slow to establish herbs remain a great option for seed starting now too. This includes thyme, marjoram, lemongrass, cilantro (for us I sowed it to harvest indoors in April), and parsley. Parsley and cilantro have the distinct advantage of being cool tolerant so can get planted out early too.
Indoor sowing a flat of brassicas now and transplanting them in late April is an excellent plan for bulking up your early summer harvests. I might drop a few more broccoli seeds in one of my trays today to keep the broccoli train flowing.
Sowing Indoors: Flowers
Because of our July 8 garden tour, I really have flowers on the brain. I want as many different flowers in bloom for that tour, and that means that I’ll probably be sowing some of my flowers earlier than usual and in larger pots to accomodate more indoor time. This is likely to include my prized zinnia, which I am considering doing in 2” soil blocks on April 1.
But for this weekend, here are the flowers I’m planning to sow indoors, all in 2” soil blocks:
- Gomphrena (globe amaranth): Raspberry Cream, Purple-Red, Audray White, QIS Pink and QIS Carmine
- Tithonia (Mexican torch sunflower)
- Dahlia (Siskiyou Seed)
- Strawflower: Seashells Mix, Silvery Rose, and Cranberry Rose
- Snapdragon, Orange Wonder and Black Prince
- Poppies (I cannot get them to germinate direct-seeded so I’m taking extreme measures this year and sowing indoors…to be continued): Elka White and Hungarian Blue
- Sesame (I’ll succession plant this, so some now, some again in mid-April)
What I’m Not Sowing Yet
I’m holding off on indoor sowing any tomatillos, squash, cucamelons, peanuts, cucumbers, melons, or brussels sprouts.
Resist the urge to sow warm season spices like cumin, nigella, or fenugreek. I’m going to try direct seeding ALL of these this spring.
I’m not ready to sow zinnia, cosmos, marigolds, nasturtiums, or my main season alyssum. Those won’t be for another 3 weeks or so. So for now, things are manageable indoors, but in 4 weeks time it’s going to be a rightful nursery in here, and I won’t be mad about it.
-
Weekly Videos: Week of March 17, 2025
See what happened last week
This weekly video update is a part of your Seed to Fork subscription. You can always look back on previous weekly garden updates here. -

Reaching Within
For too long, I extended myself. Not just physically and emotionally, but also by reaching for meaning. To help me gain direction, bearings. To feel a sense of belonging. Sometimes, begrudgingly, to keep up with trends.
It was no different in gardening. I spent years on the tomato merry-go-round thinking I’d never find the right tomatoes, that the next big yellow one was the one I *just had to grow*. Then, slowly, and I mean every season for a decade, a little bit of tinder, a proverbial rebuttal, sparked in me. Some might call it resentment, but I think it was a kinder thing. Curiosity. It was the curiosity it takes to be courageous. The curiosity it takes to push back against the tide of trends. And it can feel like swimming upstream, but it also brings new vantage points, unique angles, and a sense of returning home.
It’s with this sense of returning that I’m awakening to the gardening season, that I’m reaching into my seed stash excited to grow mostly old friends. That I didn’t need to order tomato seeds because I have more than enough variety to keep our counters overflowing and our tummies satisfied for a few years, easily. It’s this easy feeling that washes over me, a sense of satisfaction not unlike my epic cable knit I recently finished, knowing that I’ve spent years exploring and yearning for more tomatoes, more variety, more color, and in a way that process got me here. To a state of satisfaction not with something new and exciting but with just a few steady varieties that we know exactly how to enjoy them. And that’s why we grow them. We are in relationship with them.
There’s the Plum Perfect for ketchup and oven roasting. The sungold for snacking and risottos. The Paul Robeson for a tomato sandwich. The Whittemore or Afternoon Delight or Pink Berkeley Tie Dye for some very delicious BLMTs (bacon, lettuce, mozzarella, tomato). And anything beyond that is gravy. It doesn’t take much to satisfy when you distill it down to a few key meals, a few classic ways to use them, meals that get worn out from July through September, and then fade to nostalgia until it starts all over again. Which it’s about to do. And I’m salivating just thinking of it.
-
Weekly Videos: Week of March 10, 2025
See what happened last week
This weekly video update is a part of your Seed to Fork subscription. You can always look back on previous weekly garden updates here. -

Sesame Grow Guide
This was originally published in Northern Gardener Magazine, Winter 2024.
Want to harvest the most flavorful seed from your flower garden this summer?
Flower lovers, this one’s for you. Wait. Vegetable gardeners, here’s an uncommon edible plant to grow. Let’s not be confined by what type of grower we are. This is a plant for every garden, and every gardener.
And that’s exactly why I’ve fallen in love with growing sesame. And hope you do too.
I first learned about sesame from my friend Brie Arthur who gardens in North Carolina. She sows a beautiful direct-seeded bed that blooms into a gorgeous late spring and summer parade of colors, harvested for seeds and grains. When I saw her sesame in bloom, I immediately knew it was destined to become a mainstay of my food garden.
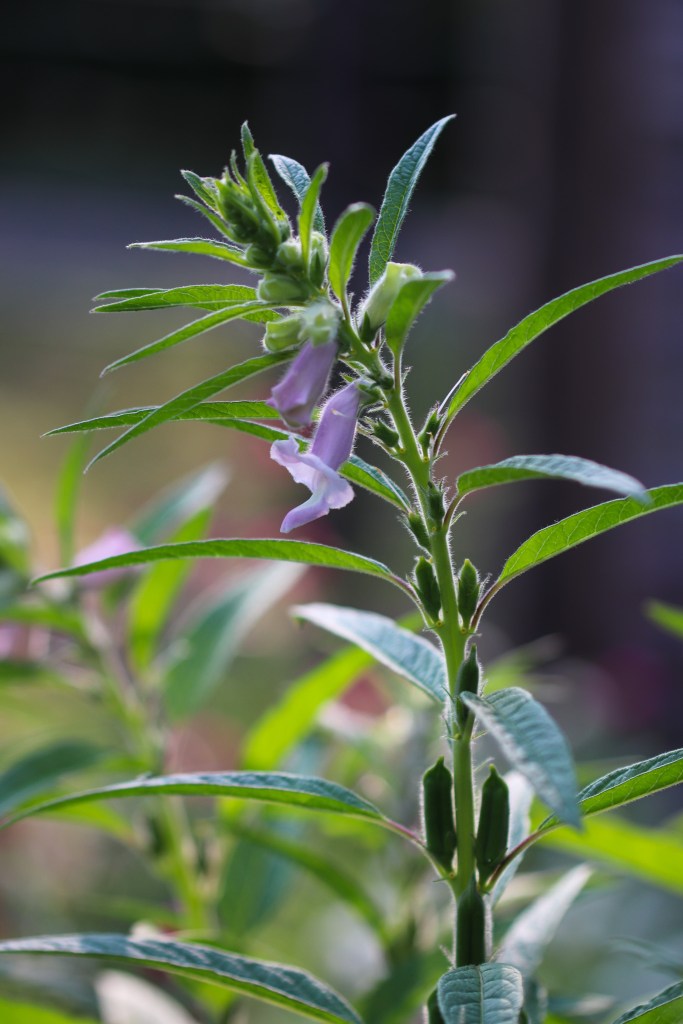
I was mesmerized by its hood-like, foxglove vibes. I was ecstatic that one of the flowers in my food garden could also produce food – and a novel food, no less. And I was curious to understand how well it would grow here in zone 4.
As it turns out, a wonderful small seed company in the Finger Lakes region of upstate New York, Fruition Seeds, sells sesame seeds adapted for cold climates. With their Black and Tan sesame seeds in hand, I embarked on my first attempt at growing sesame in Minnesota 3 years ago.
And my garden has never been the same.
The Seeds of Antiquity
Sesame heralds from Sub-Saharan Africa, and has been in cultivation for well over 4,000 years. It remains integral to many cultures, including India, southeast Asia, and tropical Africa. Heat and drought hardly dent its productivity, instead they can increase it. Studies showed it not only handles drought without crop losses, it produces amid monsoon season too. And it’s highly nutritious, can be made into a paste, oil, and eaten whole. Can a seed crop be any more endearing?
We owe a debt of gratitude to the enslaved people of African descent who courageously carried sesame seeds on their harrowing passage across the Atlantic. Sesame was cultivated and introduced into our culture thanks to their seed stewardship and tending.
It has deep cultural significance in the south, notably prominent in historical gardens such as Thomas Jefferson’s Monticello in Virginia where it was strategically planted as an ornamental border plant. Seeds are available today from several sources.
- Experimental Farm Network: Kurogama, Monticello White and Benne
- Southern Exposure Seed Exchange: Shirogama White, Black, and Benne
. Sowing Tips
To produce an enviable crop that will floor your dinner guests, give sesame an indoor head start. Any seed company will encourage you to sow them indoors 4-6 weeks before your last frost. Some go further and recommend transplanting under cover until nights are well above 50F. Knowing this is a plant that is happiest in subtropical regions, I discredit that advice and instead aim for transplanting right when the heat will arrive, which lately seems to be in early June.
Sow sesame in a 2” soil block or pots at 1/8” deep. Be sure to use a seedling heat mat for this tropical plant. Thin to one plant per cell. Consider keeping them on heat for a few weeks after germination, and even after you pot them up a few weeks later. Pot up about 4 weeks from germination – or once several sets of true leaves have emerged — into a 3 or 4” pot.
Sowing seeds in mid-April has proven early enough for me, although it’s hard to resist not sowing sooner, and sometimes a few soil blocks of sesame seeds get sowed in early April with my second succession of brassicas. I’ve always wondered if I could sow them later and still get a decent crop. In warmer climates this plant is direct seeded, but we just don’t have enough warmth in September or October for the plants to reach their full potential. It could be a fun project for winter sowing, if that’s your preferred seed starting method. In fact, I might give that a try this season to compare side by side with my indoor sowed seedlings. Because gardeners are never done learning.
By mid-May, I pot them up into small newspaper pots. This gives them more legroom for their month ahead waiting for soils to warm. Pot bound seedlings is a common mistake for new gardeners who try indoor seed starting. So when in doubt, take the time and space to pot your seedlings up into larger pots.
Being a subtropical native, sesame will protest cool soils, so don’t even try to get them planted until your soils are in the 70s. A simple kitchen meat thermometer is all you need to probe your soil to know if the time is right. Early June is when I end up transplanting them into the garden.
Interplanting
Sesame deserves a prominent home in the middle of a flower bed, anchoring the space with its spiky form. With its consistent yet modest flowering, summer blooms dot each stalk throughout summer. Plant them with at least 12” spacing.
By late August this plant commands long pauses to marvel at the accumulating pods that seem to be sending up prayers, their green, pubescent seed capsules clasped shut until the seed is ripe. And if that wasn’t enough, pause to admire the maneuvering bees who land, creep inside, pollinate, and eventually back out and carry about their busy days.

One of my main interplanted flower beds, this one includes hues of purple, pink, and white: scarlet kale, thai basil, Rosie O’ Day alyssum, QIS Gomphrena series, and sesame, which is just starting to send up multiple spikes and will soon dominate this planting. Not unlike the conditions needed for seedlings to thrive, be cognizant of your space and allow these beauties to sprawl a bit. They will send up multiple stems so I like to give these plants 18” between neighbors to account for the inevitable creeping that will happen.
If tidy is your aesthetic, staking them once they start sending up multiple stems will yield maximum vertical impact to your bed. I tend to be too busy succession planting and processing our produce so ours end up flopping over, giving it that cottage garden vibe by early September. And since I’ve embraced this destiny, I have grown to love this little bit of whimsy amid my whimsical rambling vegetables and flowers across the landscape.
Timing the Harvest
Just like the flowers, the seed capsules ripen from the bottom up. And like other indeterminate plants, it happens over many weeks throughout the growing season. By early September, start looking for brown pods that have just started to crack open at the tip. Gently twist these off – and you’ve just harvested your first sesame seeds.
I usually pull a few pods early like that, but as the weather starts to cool off, regardless of maturity, I’ll simply cut the stalk in 12” lengths, invert each piece into a garbage bag, and set in a cool dark closet until the capsules desiccate and the seeds fall out.
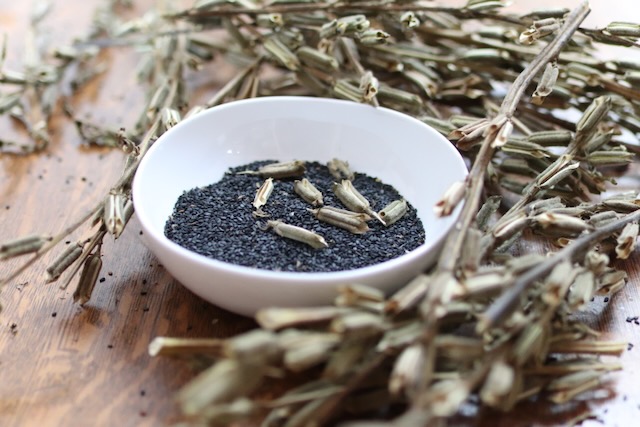
Sesame seeds mature about 90 days after transplant. The plant would happily continue to flower for us, but our seasons are short and they stop producing in September here.
If you think you love sesame seeds, you’re in for a delightful sensory awakening this fall. The flavor of homegrown toasted sesame seeds exposes store bought seeds’ long shelf life and staleness. Prepare to be blown away at the first-hand knowledge of what sesame really tastes like.
-
Weekly Videos: Week of March 3, 2025
This week’s garden updates: feels like Spring. Seedlings sprouted indoors, seeds sown in cold frame, and fresh snow signals warmer days ahead.
See what happened last week
This weekly video update is a part of your Seed to Fork subscription. You can always look back on previous weekly garden updates here. -
March Monthly Task List
It’s hard to believe it’s almost March.
March is a busy time in the garden as we have to prune the fruit trees and shrubs as well as start a large portion of the summer garden.
If you didn’t get to cleaning up your garden beds last fall, this is the month to do it. Trim out dead veggie and flower plant material and try and get your hands on some compost as soon as it’s available. Any and all preparation tasks that can be completed now, should be. This really does ease the overwhelm and help you focus on seed starting, hardening off, and your garden layout as the weeks fly by and the days warm up.
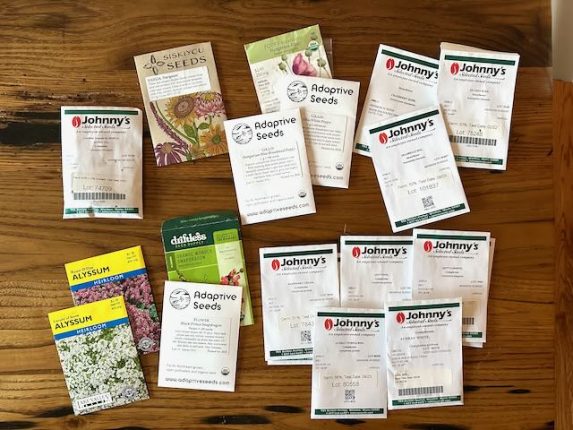
I bought a lot of new-to-us seeds again this year and I haven’t had the time to get them all into a list, but I as I struggled to locate all my brassica seedlings this morning, I’m determined to dump ALL our seeds onto our dining room table tomorrow and make sense of it all.
What to Sow Now
Cold Hardy Crops
The majority of my focus remains on cold hardy crops both indoors and direct seeding. From scallions to cabbage, I’ve started many seeds both indoors in 2” soil blocks as well as direct seeded into our cold frame. And all of these veggies can be sowed now (or try them under cover if your soil temperatures are over 45F):
Direct Seed
(soil temps 45F)
- Radish
- Salad turnips
- Green onions
- Arugula
- Spinach
- Cilantro
- Bok Choy
- Mustard Greens
- Leaf lettuce
- Head lettuce
- Peas^
- Carrots^
^Soil temps at 50F for direct seeding
Indoor Sowing
- Artichokes
- Cape gooseberries
- Lemongrass
- Celery (I’m waiting another week)
- Storage onions
- Fresh eating onions
- Shallots
- Leeks
- Head lettuce
- Kohlrabi
- Kale
- Cabbage (red, green, savoy, and napa)
- Cauliflower
- Broccoli
- Beets
- Fennel

Flowers to Sow in mid-March (6 weeks before last frost)
Come mid-March, I will embark on a pretty intense seed starting weekend with my peppers, eggplants, and some tomatoes. And, also, a group of slow to establish flowers including my beloved gomphrena (globe amaranth), finicky strawflower (I usually have terrible germination on those), slow to start snapdragons (which also self-seed but I have a few favorites I’ve saved seed from), and my wild card, dahlias from seed. If I decide to grow it, Mexican torch sunflower, a pollinator magnet, also needs about 6-8 weeks before last frost to do well so that would be another to plan for a mid-March sowing.

Zeolights calendula and a carpet of alyssum in our June garden. If you yearn for super early blooms, try your hand at starting sweet alyssum and calendula in mid-March; they can withstand many light frosts and could get planted here by the end of April. If I start them soon, they will be flowering in early May. That’s a fun idea, and I may have to do just that! Join me.
What Not to Sow Yet — waiting until mid-March/8 weeks before last frost
I am not sowing my tomatoes, peppers, or eggplants just yet. And honestly, it’s killing me! I’m waiting until Monday, March 24 this year.
I am really trying to limit the amount of resources needed to get our garden going, using less energy, soil, and time while still aiming to have ripe tomatoes before July off my cherries. It worked last year, so should work again this year, right? It’s a test of my trust of these plants, and of my years of accumulated knowledge to take this leap of faith. My end-goal is two fold: I’d love to try to develop a system for direct seeding everything (if possible) to be as environmentally friendly as possible. Secondarily, someday, John and I will be “retired” and will likely snow bird for a few months in winter so I want to know I can return here in March and still have a dynamite garden by mid-June. So this is my proving ground for our future lifestyle changes.
While I certainly don’t need to sow any herbs yet, I’ve decided to add some to an early tray for us to use now, which include thyme and parsley. In my experience, herbs don’t need a huge indoor head start – maybe 6 weeks before last frost. I’ve seen a lot of gardening experts say to start herbs in January and that is not at all what I would do, ever.
It’s important to remember that what I am choosing to sow or omit is a direct reflection of our family’s culinary palate. Your grow list I would expect to look differently. For example, maybe the act of sowing tomatoes in winter really fuels you and buoys your mental health. By all means, sow it. I’ll keep you posted on my direct seeding sowing schedule too, as I do fully intend to direct seed just about everything (minus celery, eggplants, and some of our peppers) out in that extra low tunnel as a side by side experiment to witness the seasonality of direct seeding compared to an indoor head start and transplanting.
-

Shallot & Greens Soup
I crave this slightly bitter, nutritiously dense soup many times across the seasons. I first started making a version of this in January when I was still drinking alcohol and would relentlessly rely on January as a detox from alcohol and sugar month, two closely linked addictions of mine that tended to spike between November and December. Incidentally, thanks to my current lifestyle, I didn’t need this to detox, I just wanted it as a winter comfort food.
This recipe was inspired and modified from a recipe from the Splendid Table, called the Basic Green Soup.
Yield: 1 quartShallot & Greens Soup
 Prep Time 15 minutesCook Time 45 minutesTotal Time 1 hour
Ingredients
- 2-3 large shallots, cut into 1/8” rounds for caramelizing, about 2 cups
- 1, 24-ounce package Power Greens or similar mix of baby chard, baby spinach, and baby kale
- extra few cups of frozen kale, deribbed, for bonus greens (optional, but recommended — I use my frozen kale for this)
- 1/4 cup Extra virgin olive oil
- 2 T unsalted butter
- 2 cups vegetable (or chicken) broth
- 1 T smoked paprika
- Salt and pepper to taste
- Juice of 1 lemon
Instructions
- In a large stockpot, melt butter with 2-3 T olive oil and set to medium low. Add shallots and saute until caramelized, about 30 minutes, stirring frequently. You can adjust to low and cover and check every 5 minutes or so.
- Once shallots are done, add the greens along with half the broth. Bring to boil and let the greens cook down. Repeat with rest of broth and greens. This should be pretty thick.
- Let boil for 5-10 minutes then run in batches through a vitamix or blender. I run it on high for a good 20 seconds as I prefer this soup to be a silky texture.
- Finally bring back to pot and reheat, adjusting for thickness if needed (Add more broth if you find it too thick). Add in the paprika, salt, pepper and fresh squeezed lemon juice. Adjust these seasonings to your liking.
Here are a few recommended additions to add protein and healthy fats to this meal:
- Serve with two poached eggs or half an avocado
- Add 1/4 cup pepita seeds
- Sprinkle with cilantro
-
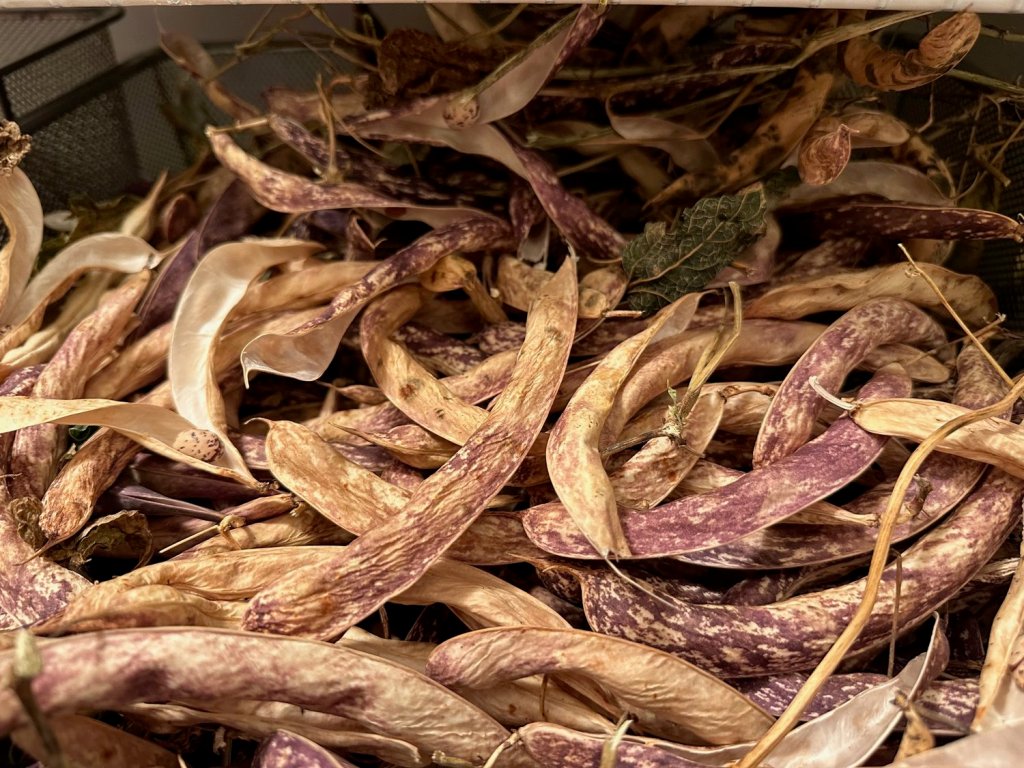
Weekly Videos: Week of January 6, 2025
Updates on our down time, and processing our legumes from the fall. Plus our ginger and turmeric harvests!
See what happened last week
This weekly video update is a part of your Seed to Fork subscription. You can always look back on previous weekly garden updates here. -

Meg’s Caramel
I hope this makes many of you happy this holiday season! I really love the slow time I spend making and wrapping and gifting caramel this time of year.
Yield: 100 piecesMeg's Caramel

Ingredients
- 2 cups cream, divided
- 1 1/2 sticks of butter (3/4 cup)
- 1 cup light corn syrup
- 2.5 cups granulated sugar
- pinch salt
Instructions
- In a large stockpot, bring 1 cup cream and rest of ingredients to a rolling boil over medium high heat. When in doubt, start with a larger pot than you think you need.
- As the ingredients are coming to a boil, get your 9×9 pan and line it with parchment so it won’t stick. Crumble the parchment gently so it will lay flat into the corners. Set aside but nearby on a heat proof surface. You won’t need this for at least 45 minutes.
- Once it’s at a steady boil, you can check the temperature. It will probably read in the 210-220F range. You’ve got a good 20 minutes to go before our first boil is done.
- Stirring occasionally until the mixture reaches 242F. Lower temperature to low.
- Add the remaining one cup cream while stirring vigorously so as not to scorch the cream.
- Bring the heat back up to medium high and raise to 242F again.
- As soon as it’s reading 242F, turn off the heat and carefully pour the piping hot caramel into your prepared pan. Let cool for several hours until at room temperature before cutting. It can go into fridge or even freezer and be pulled out later to cut up.
Notes
If you want to make an infused tea caramel (chai, earl grey, etc), just increase your amount of cream by 50%, and steep with tea bags on a simmer for 5 minutes. Turn off and let stand for 10 minutes, and then strain with cheesecloth and a fine mesh strainer. You want to get as much of the oil out as possible. I use about 6 tea bags to infuse a recipe this size. Then measure out the 2 cups and you can proceed with the recipe. But be SURE to get as much of the oily goodness as possible because that’s where the flavor is. This will also naturally make a darker caramel too.
I prefer to use a digital thermometer than a candy thermometer. Digital are more accurate and help produce a consistent product.
This recipe will yield about 100 caramels from a 9×9 pan. It takes about 45 minutes to make. Wear comfortable shoes.
I pick up caramel wrappers locally from a candy supply store. You could cut them yourself from wax paper too.
-
A Barebones Garden
We closed the gate on the garden the weekend before Thanksgiving, grateful for what transpired: a massive learning season. I took more chances than usual with my vegetables, and was surprised, delighted, and equally disappointed too.
As I peer through the chicken wire gate at the mostly tidy beds, I can now clearly see the bones of the garden. The season is laid bare, the structures no longer enveloped in life, obscuring the foundation that supports the life we foster. Instead, the beds now feel the shunt of winter pushing south as much as I do when I venture outdoors each day. There’s no escaping yourself in winter, and that’s true for the garden too. It sits in earnest, months in waiting, for attention, for life to return. Waiting for the microorganisms to awaken and bring life back to the soil, I can’t help but wonder what that feels like. It bears the brunt of winter, along with the numerous perennials that dot the garden too. I wonder what it might feel like to be a deciduous tree in the depth of a long, brutally cold night. Do they feel the same sting my face does as I tuck my chin into my parka, trying my best to protect the slivers of skin that I left uncovered? Does their bark sting like my nose as it protects their xylem and phloem, or do they get the bone-chilling effects of a -20F breeze just like me?
And what about those strawberries? Evergreen leaves thinner than a paper bag, as dark as a green avocado this time of year, sometimes forced to tolerate arctic blasts without any snow for protection. How do they do it, and then go on to produce the most luscious fruits come mid-June? What’s the secret to enduring such strife, and keep on finding a way to flourish? Surely it’s some kind of antifreeze, an in-house resilience that was passed down through the millennia. Somehow, miraculously, inspirationally, being stung over and over again does not result in death, but instead becomes part of the fabric of the seasons. Something to endure. Something to accept even, the inevitablilty of pain. Perhaps and probably for many, a detested reality of residing in cold climates, this winter sting is a season all it’s own. We are at once stripped back and bare and equally protective and cautionary – but most importantly, still alive no matter how it might seem to an onlooker. It reminds me of grief, that now familiar bodily ache that washes over me in every season when I’m reminded of my late father. A bitterness that stings as brutally as the day he passed, and yet, here I am. Living and loving life, finding happiness and setting my own metaphorical fruit. We are, like strawberries, built to endure unrelenting strife and go on to flourish and bear fruit.
And what did this garden of ours really say to me this season, anyway? It said funny things like trying to rekindle old friendships can be harder than you’d hoped because your decades-long kinship may have sunset for good. This is another kind of grief being served to me because I was listening to the universe. I’m specifically wondering about my beloved Fortex pole beans, a dependable workhorse I benched because of Japanese beetles only to invite back this year to the most dismal row of unproductive green beans in my entire gardening career!
The garden also whispered in my ear that I don’t have to have the biggest pepper seedlings by mid-April to ensure ripe peppers before a frost, inviting me to break from habits I’ve held so dear I don’t even know if I can garden without them. It appears the garden is laughing at my extraordinary seed-starting efforts, trying to reassure me that my deeply entrenched tardiness can come waltzing out to play, finally. That I can direct seed peppers and they will ripen! Sure, I’ll need to pay attention and select fast-maturing varieties, but isn’t that what winter dreaming is for, anyway?
This season wasn’t a carte blanche to abandon indoor seed starting, though. It cautioned me to not give up on my onion seedlings. I learned that the 2-month indoor head start is a significant contributor to the biggest and best storage onions. The garden also got a good laugh when I transplanted some tomato seedlings I arrogantly mistook for plum perfect seedlings. These plants engulfed an entire 4×6’ bed with their tentacles reaching out like a family of octopuses, an unruly corner I turned my back on for far too long. The plant was an F2 sun gold and I’ve saved some of the seeds to grow out next year as a kind of nod to the chaos I embraced this year. And I won’t soon forget this misfortune because I’ll be weeding tomato seedlings from that bed for years to come. This particular sting reminded me there are limits to incorporating a laissez-faire mindset to this garden after all.
The garden doles out respite and entertainment, nourishment and distractions, throughout summer. But there’s an equally potent energy about a winter garden, especially one that goes dormant like ours. It was one of the bigger influences in my life in my mid-40s, one that, after several years learning to garden on such a large scale, taught me that it’s okay to do less. Taught me that we can take the space we need to feel the sting of loss, to drop our leaves and go quiet. In other words, it’s okay to make change. It’s more than okay, it’s a natural part of the rhythm of life.
To uphold a homeostasis is to work against nature. But to push open the gate, to feel your way into a new mindset, that is the kind of growth and ease a garden calls us to do in every season of our lives.
-
Weekly Videos: Week of December 2, 2024
Behind the seasons candymaking updates, plus the very late garden cleanup and more.
See what happened last week
This weekly video update is a part of your Seed to Fork subscription. You can always look back on previous weekly garden updates here. -
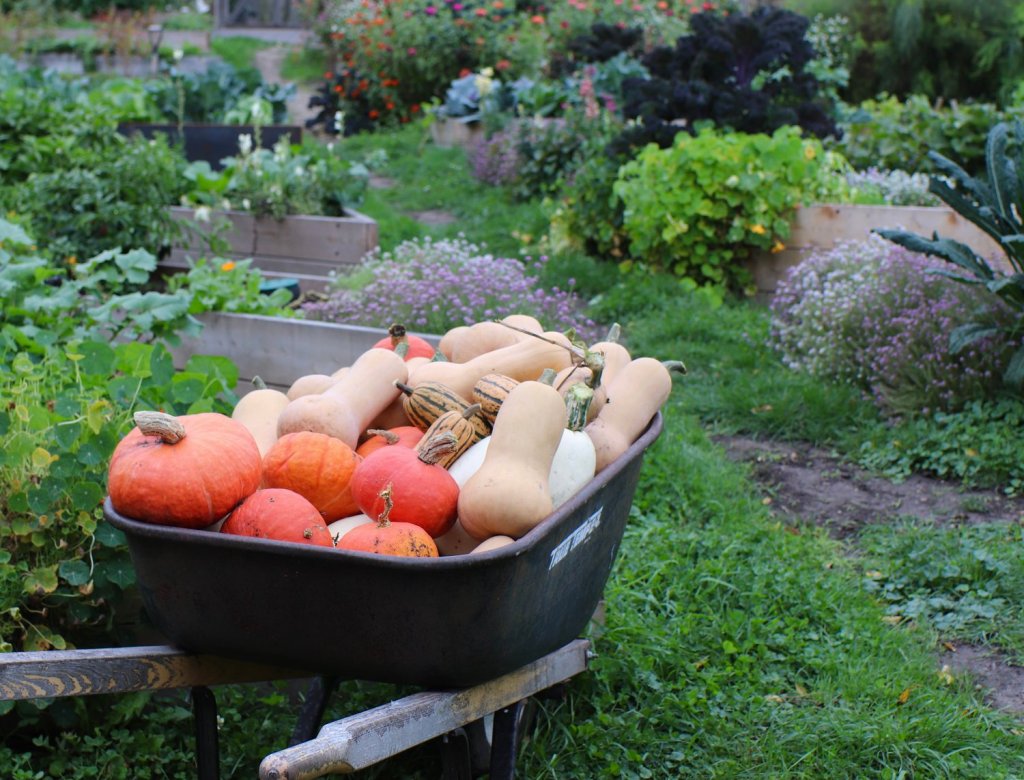
How to Store Your Harvest
So you grew an insane amount of carrots or have a wheelbarrow full of winter squash. Now what? Knowing how to store harvests properly will help maintain nutrition and best eating quality.
In this guide, I’ll go from easy to hard, from dry goods to downright produce aisle tricks. I hope this will give you some confidence in how you work with your food, and perhaps even in helping you plan for future seasons knowing how easy or hard certain foods are to store.
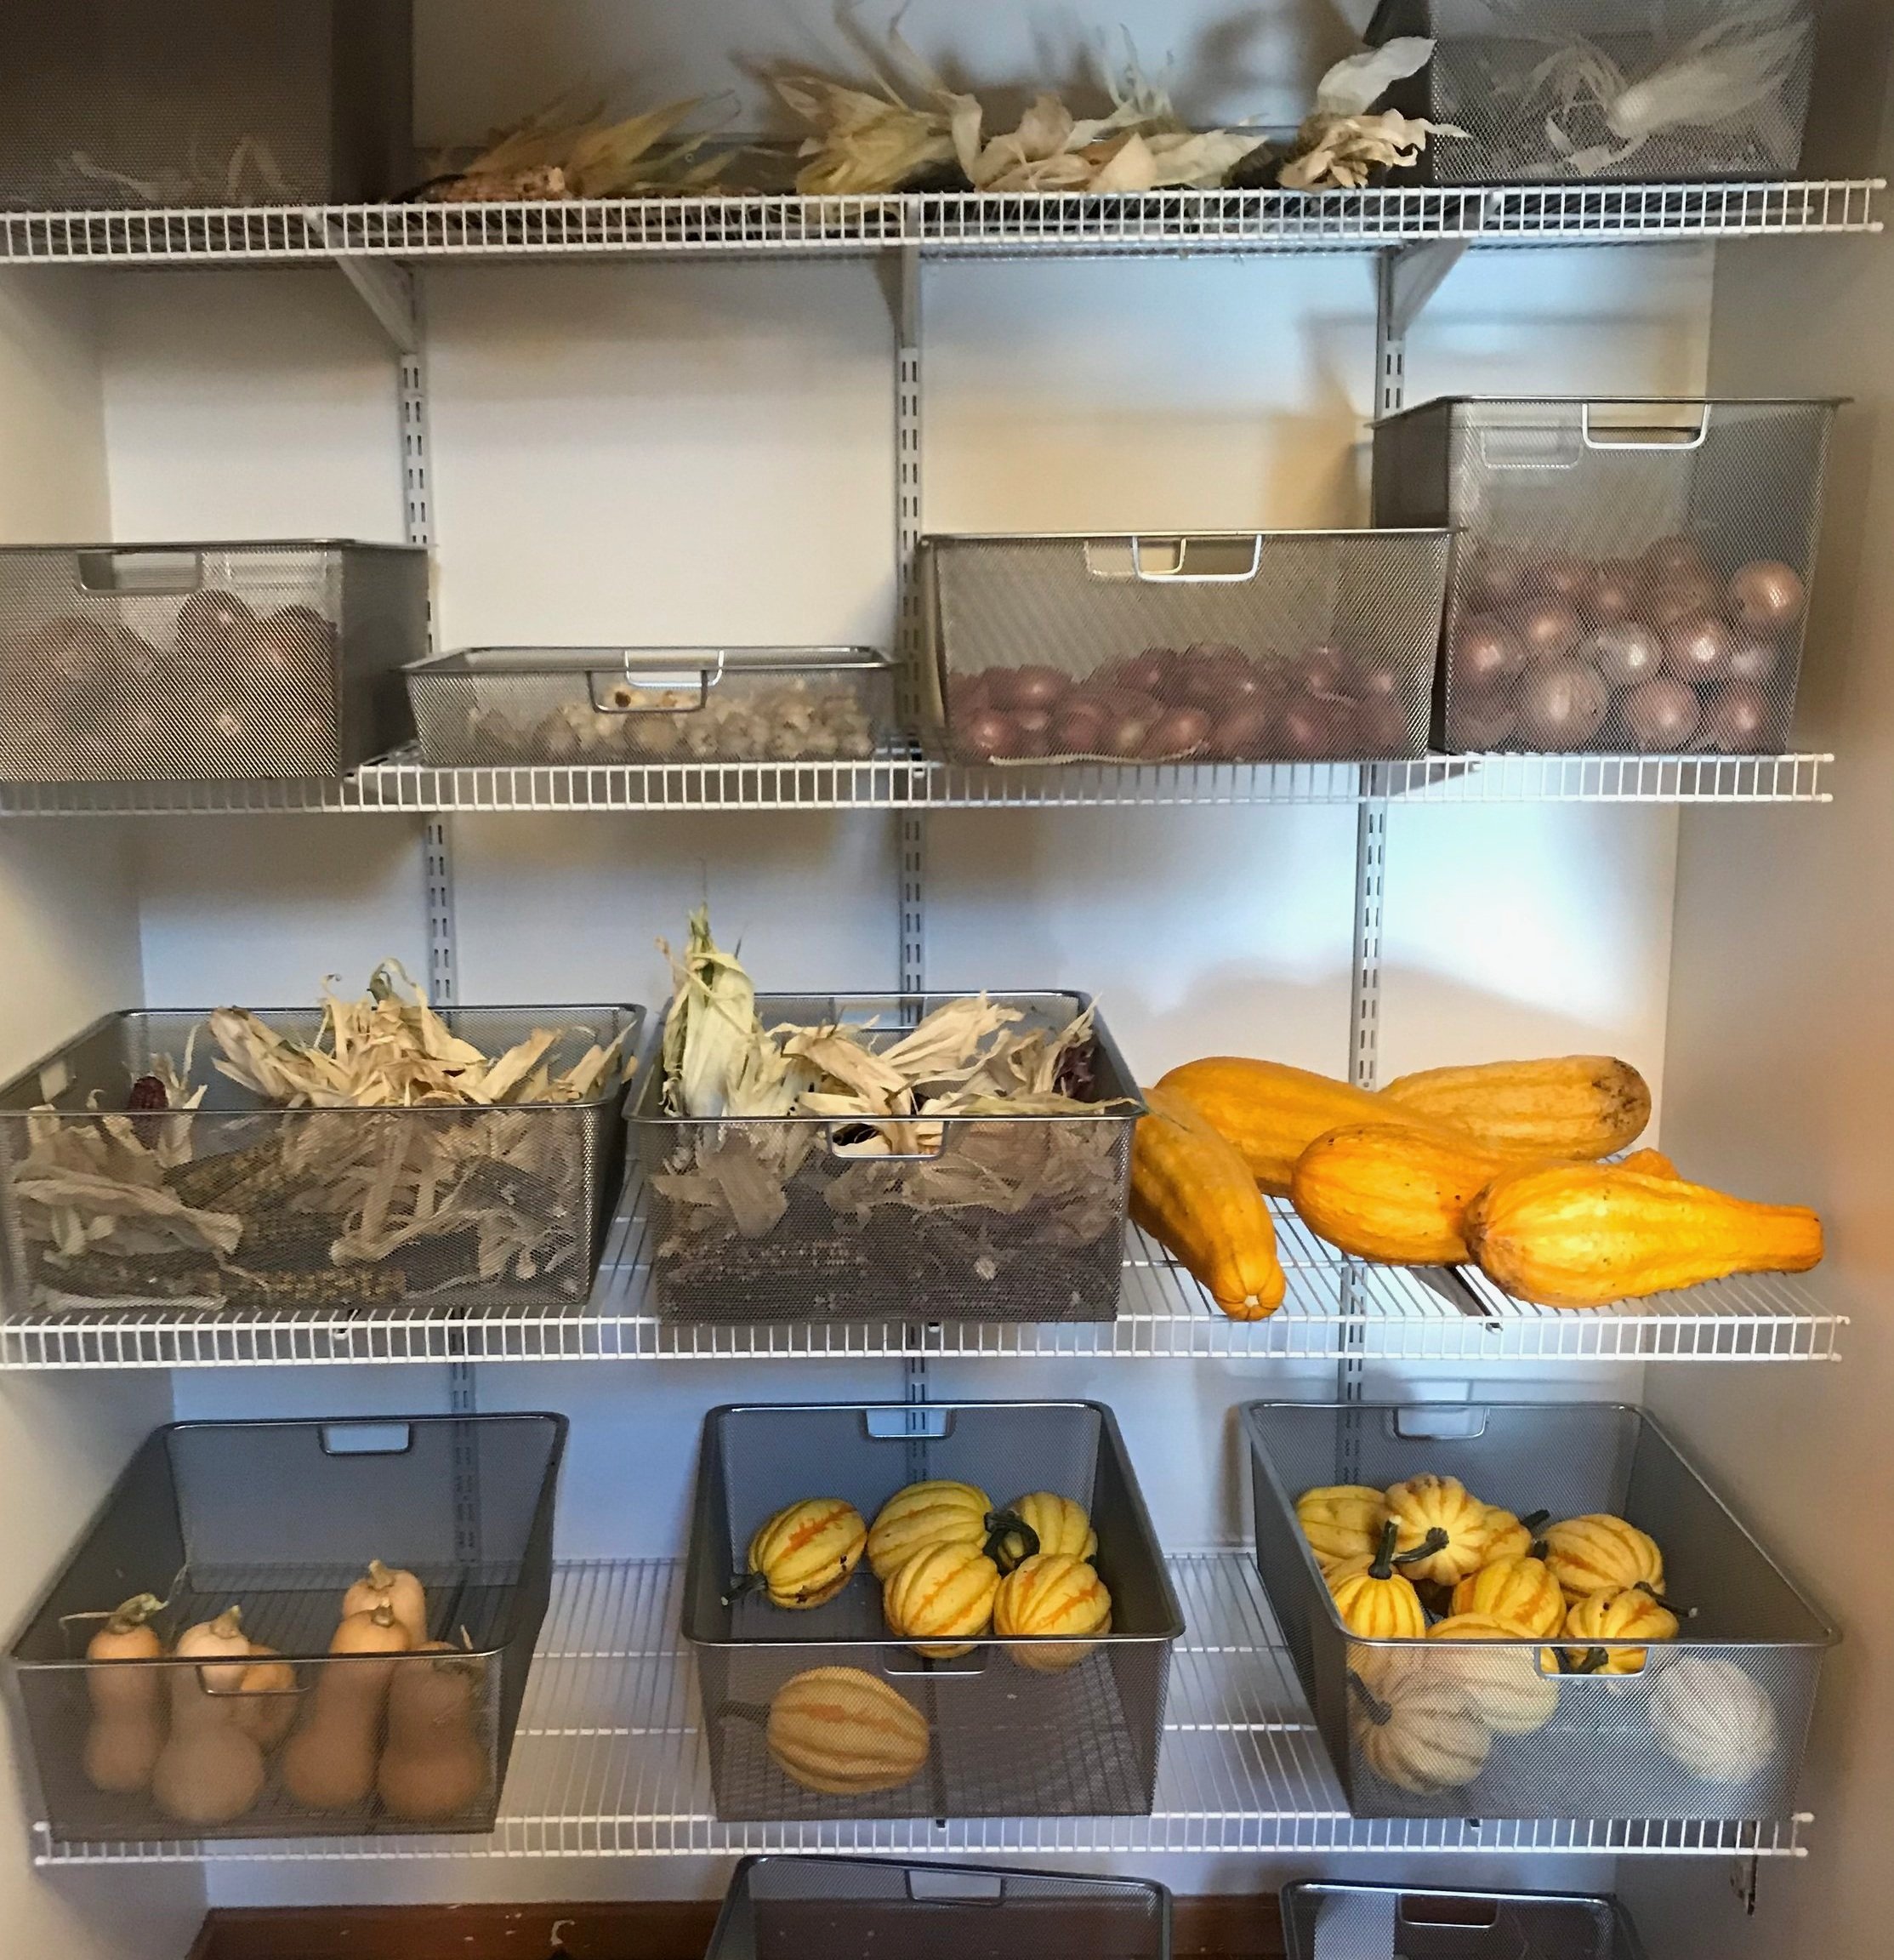
Dry Goods
Some produce is just really easy to store. These are vegetables that we harvest dry. Think cooking beans (dry beans). Cobs of popping corn. Onions that we grew for storage that we cure and tuck away. Herbs even, are a crop that we can think about how best to harvest and store.
In general, the following crops do well stored in an unheated closet at normal indoor humidity levels (35-50%):
- Dry beans, all kinds
- Dry corn, popping and flint/flour
- Shallots, Onions, Garlic
- Onions
- Peanuts
- Sesame seeds
- Sweet potatoes*
- Winter Squash
The theme here is pantry staples, hence, you might find them in a pantry area/non-humidified area of your local grocery store or co-op. These items do not require refrigeration, which also, naturally, means they don’t need high humidity. In fact, if we expose some of these things to high humidity like, say, the beans, they might break dormancy, just the thing we don’t want.
Beans
I store my beans in plastic or paper bags before we shell them, and then in glass jars once shelled. You do not have to shell them anytime soon. In fact, I have some beans to shell from last year still!
Dry Corn
I’ve read in a few places that it’s recommended to pull popping corn off the cob and store it in airtight containers, but we store it both ways – some in a glass jar, and also some still on the cob. I always put a few droplets of water into my jar of popping corn before using it to add that little bit of moisture needed to pop well (the water is what expands the kernel!). All this to say, don’t get too hung up on the process. As I hope you’re reading, we do many different things. But the most important thing we do is follow the humidity and temperature recommendations as best we can. We don’t hit 50F and 40% humidity for these things, but our storage closet is cooler than our main living area, and food lasts for many many months.
Onions
With onions, garlic, and winter squash, keep an eye on them, and hunt around for produce that’s starting to go bad. How many times have you bought a bag of onions and more than one has already started rotting?! For me, it’s every time, even when I carefully inspect the bag. This rot will naturally start to happen in late winter/early spring for us, so sometimes I move some of them into the fridge, but not until we’re nearing the end of storage season.
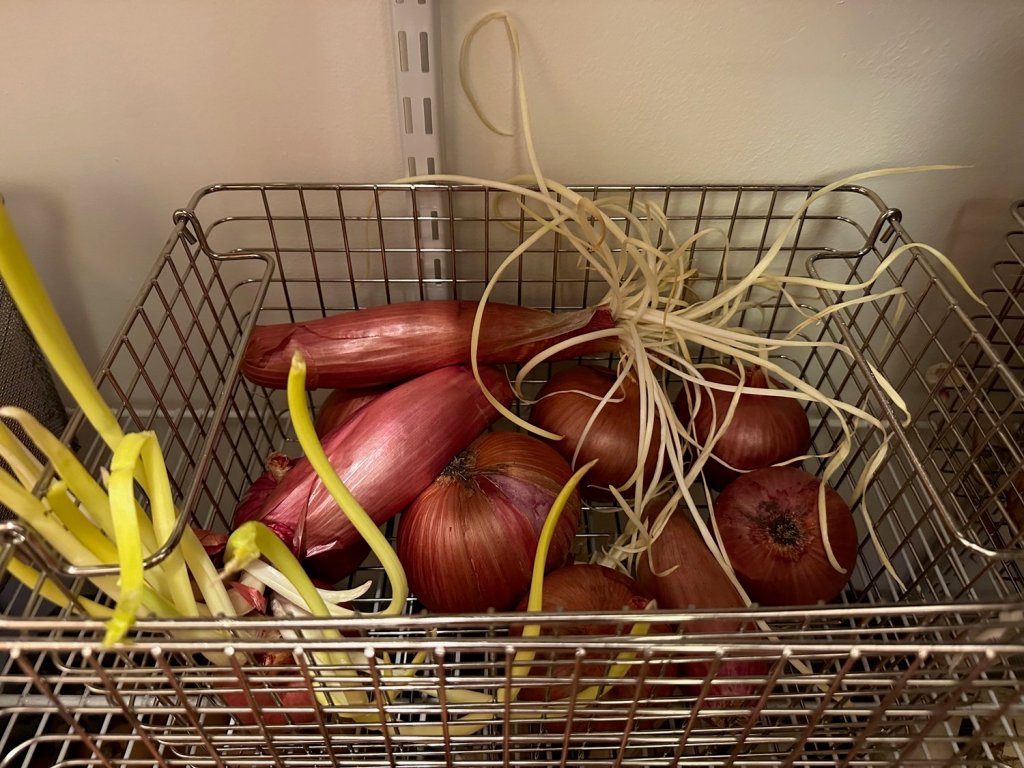
My non-storage onions are already sprouting tentacles, reaching and stretching for sunlight as they go for round 2, seed-making. Instead, they will head out to the compost bins!
Garlic
For garlic, I like to keep an eye on it and either peel and freeze cloves whole or chop and dehydrate and grind for powder. You can also puree it up and freeze in cubes or in little servings on parchment and then toss into a labeled storage bag or container. This is something that might need to happen anytime between now and February, depending on how well it’s storing for you (and me!). I think our closet it a bit too dry for our garlic, as it doesn’t store as well as it “should”. But now that we have more softneck garlic, we tend to use the hardneck for garlic powder and save the soft neck for fresh cooking and late winter consumption.
Curing for Dry Storage
Sweet potatoes, winter squash, garlic and onions all need to be cured in order to store for long periods of time. For onions and potatoes, you are working to dry out the central stalk/outer papery layers that will help seal in the remaining moisture. This is done in a warm, shady place on a surface that has ample airflow, like an old screen on sawhorses setup in your garage. For winter squash, you will want to harvest a bit before the first fall frost but when it’s still warm out, because winter squash need to harden their skin off to seal in their moisture. This is done by sitting out in the warm humidity for a week or so, at warm temperatures (80s). You’re suppose to lay them in a single layer and turn them every few days, so you give any nicks a chance to cure. Finally, for sweet potatoes, it’s really high humidity and high temperatures, similar to winter squash. Again, we are curing the skin and sealing in moisture. I achieve this in our bread proofing area: I spritz the sweet potatoes several times a day with water while the heat mat it maintaining temperatures in the upper 80s. This is a 2-week process, but it worked great for me a few years ago when I first tried it.
If doing all this work sounds like too much, just plan to enjoy your winter squash by sometime in January. You’ll know if they are starting to go bad … they will feel softer and when you cut into them they’ll be drying out (or worse).
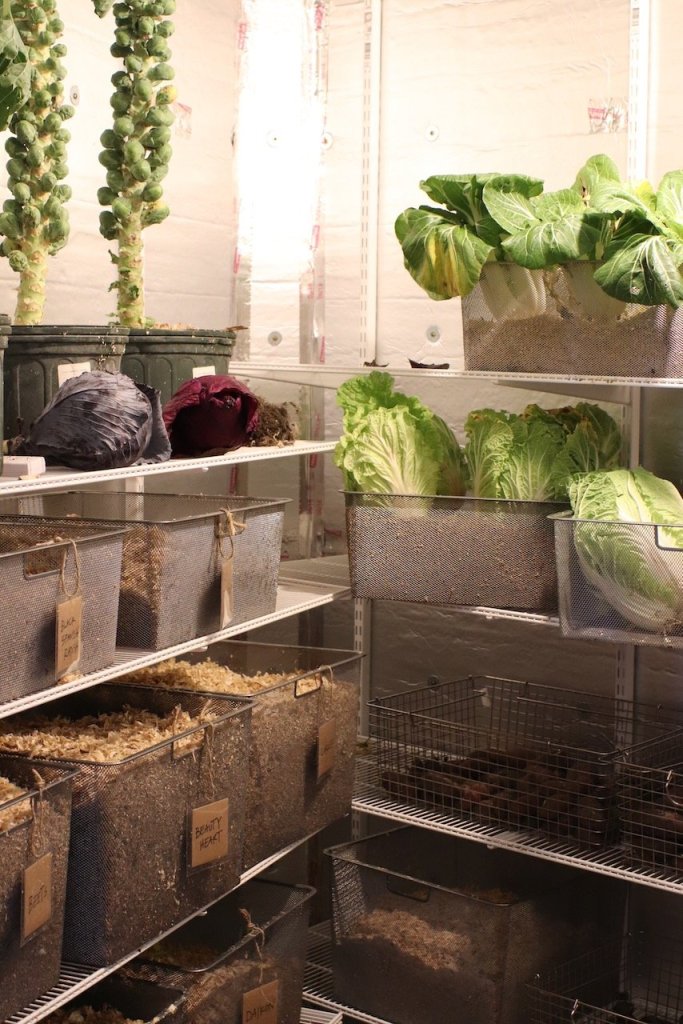
Damp Vegetables
The other major group of storage vegetables are those that require humidity. This produce should be stored, ideally, between 33-40F and at extremely high humidity levels, 95% or higher. Think of all the produce that gets misted with water every 15 minutes at the grocery store. These are also foods that generally speaking, have roots that are buried in damp soil this time of year. Yes, there are exceptions like the magical ability to store napa cabbage and bok choy in our root cellar for 6 weeks, but mostly I use it for roots, as the name suggests. The name of the game is to emulate the conditions in the garden: a dark, cool, and humid environment (birdsong optional).
Potatoes are an odd exception to my produce aisle visual because they are presented alongside drier crops like onions, winter squash, and sweet potatoes in the grocery store. But for best quality and long-term storage, they require humidity. I imagine they came out of a damp cooler to travel to the store. And, they are stored differently than our other vegetables – just tossed into a bin inside our damp root cellar, no burying needed.
Along with our potato harvests, we also store the following in our damp root cellar (length of time listed parenthetically):
- Potatoes (4-6 months)
- Green or Red Cabbage (up to 2 months)
- Leeks (2-3 months)
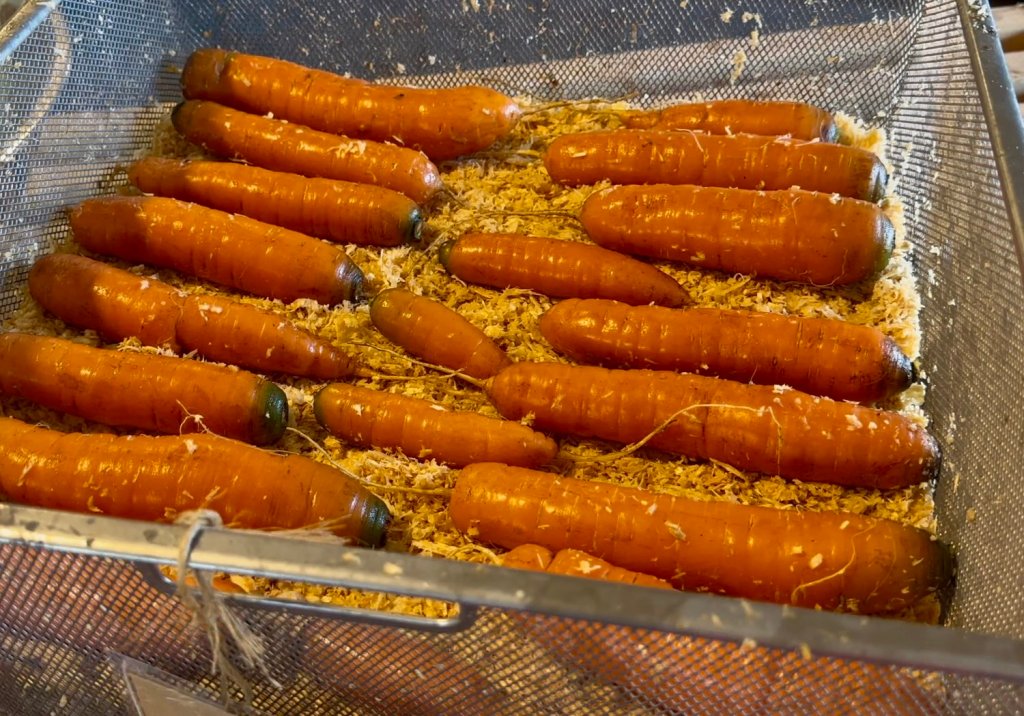
- Carrots (4-6 months)
- Daikon/Storage radish (3-4 months)
- Beets (3-4 months)
- Kohlrabi (2-3 months)
- Brussels Sprouts* (2 months)
- Napa Cabbage* (6 to 10 weeks)
- Bok Choy* (6 to 8 weeks)
There are 3 different ways we put food up in this damp root cellar:
Potatoes and cabbages
Just lay in bins on the shelves, as is. No burying in damp sawdust or damp sand needed.

Carrots, kohlrabi, beets, daikon, watermelon radish, turnips, and parsnips
Bury a layer of clean vegetables — not touching each other — in damp sand or sawdust. We use sawdust for ease of lifting, and then compost it the following year.
brussels sprouts, napa cabbage, bok choy, & leeks
Dig up part of the root ball and bury it in damp sand/sawdust, thus replanting it in the root cellar. These don’t store as long as potatoes or roots, but it sure saves on space in our refrigerator.

How to Put Food by Without A Root Cellar
I recognize it’s both not feasible and not an interest for some (many?) to have such a large space for storing food. Most reasonable people rely on others to store vegetables and make them available in a steady stream in the produce aisle. And, the volume at which we grow is also a bit of an outlier too. So if you have maybe 10-20 pounds of carrots, how can you make them last in peak condition?
For veggies that require damp conditions, use your refrigerator for shorter term storage. Rinse off dirt by soaking in a sink and gently brushing any stuck dirt with a vegetable scrubber, then place them in a plastic bag. I can get 1-2 months storage from carrots, cabbage, kohlrabi, potatoes, beets, and daikon just in our fridge in lightweight produce bags. I’ve found it essential to not use a Ziploc bag, as that may (and has for me) cause the produce to rot, especially if they are very wet when placed into their bags.

If you live in slightly warmer climates that we do, you can also try to extend your actual harvest by placing a heavy layer of mulch over your carrots and leeks and harvest as needed, maybe one more harvest in January or so. This is something I’ve not tried and honestly don’t have much interest in doing — my hands go numb very quickly in winter, and so I prefer my no-jacket-required root cellar alternative.
I hope this gives you some ideas for how to take your growing to new levels, and perhaps will shift your growing focus to rely on easier to store foods next year.
-
Root Cellars: Putting up the Harvest, My Way
It’s pretty simple, really. I like the easy road. Grab a carrot, a few potatoes, and some onions and cook up dinner. And sometimes that easy road requires a little extra upfront planning and execution. For me, the easy road in terms of gardening is storing my vegetables straight from the garden. No fuss. No processing. I want a head of cabbage in December, not a jar of sauerkraut. I want a crisp carrot for my January garden salad or stir fry, not the shredded and fermented version. While I do dabble in lacto-fermented foods, I find it so simple and idyllic to have a passive refrigeration system in our home that will help us extend our rather short growing season well into the fall and winter. It’s like a farmers market in our own home.
How Root Cellars Work
Roots and other storage vegetables require different types of storage conditions, depending on the vegetable. Roots require similar conditions to their outdoor growing conditions: a dark, moist environment where humidity approaches 100%. Imagine creating a space that emulates still being in the ground after a fall frost. It’s chilly, but not freezing, you’re surrounded by damp but not soaking soil, and it’s pitch black. All those things you’ve plucked from the ground like potatoes, carrots, beets, parsnips, rutabaga, winter radish, and so on need a root cellar with more or less those conditions to remain at peak harvest conditions while storing. Included in this damp, moist environment are other veggies — mostly brassicas — that are known to store well including brussels sprouts, cabbage (several kinds), leeks, kohlrabi, broccoli, and cauliflower.

Flip to the other side of storage and you have vegetables that require low humidity (think: the inside of your winter home with low humidity and a chilly, dark closet), vegetables who would grow moldy if kept in a moist environment. And thankfully these vegetables do well in warmer conditions than the humid-loving roots. Vegetables in this category include your onions, garlic, shallots, winter squash, sweet potatoes, and dried hot peppers.
If I had one bit of advice to share with gardeners, it would be to start with those roots easiest to store. It costs nearly nothing to put up a basket of onions for the winter, save some strategic space for curing them in August/September in your garage or barn. The biggest thing is to make sure your house is dry – so for southern growers that’s in an air conditioned space. We converted an oversized, underused double door closet into our dry cellar; it is notoriously chilly in this closet in winter, which will only increase the storage effectiveness for the food we store there. As the years go by, this will also be a great place to store our canned tomato sauce and other canned goodies, should I ever motivate to take that route (I think we will for tomato sauce as it’s a weekly ingredient in our family meals).

Our double-wide, extra deep closet that we simply repurposed for food storage. It was empty (well, it had our soil block ingredients in it all last winter), so it was an easy transition to dry cellaring. Long-term there is also plenty of space for canned goods, if I ever get there (I think I will).
Confession: last year we stored our onions in an old milk carton on the floor of our mudroom. It was low humidity and warmer temps (60s). and they did remarkably well, lasting well into February. This year I don’t think I cured them long enough and I can see some are already showing signs of improper storage, spots where mold is forming from high moisture. I’m sure like me, you have cut open a store-bought onion only to find it molding – yes, it happens to homegrown onions, too, if not cured properly. I don’t think I cured ours long enough before cutting off the stems this year. Lesson learned, the hard way. Ours aren’t ruined, but I am cutting off more than I’d like on many of the red onions, though we also have a huge crop, so a little loss for this learning is hardly crushing.

Delicata and other winter squash are storage-friendly in a low humidity, dark space that keeps a little cooler than the rest of the house. Ideal temperatures for these would be 50F, dark, and dry.
We will be prioritizing our menu around vegetables that aren’t lasting as long as expected, and it’s looking like caramelized onions are going to be making a big splash sooner than later. This is all part of how we learn, and this concept of storing food is still a very new skill for us, and we have a lot to learn and hone, though we’ve learned so much already.
Last year I also attempted to store our butternut and kabocha squash in the garage inside a large plastic bin, but we got bitterly cold before the Holidays and they froze. Solid. I had not read Root Cellaring a year ago, and also hadn’t done any research on how to store my winter squash and ended up ruining about half a dozen kabocha and butternut squash. Let’s just say I am sort of stubborn, and really love experiential knowledge, enjoying the path of self-learning even when it includes failures like my frozen winter squash rather than reading in a book. I’m a doer, what can I say. Now I know what happens to winter squash when it goes below freezing for a few nights.
This summer, in an effort to feed ourselves deeper into Winter than ever before and ideally becoming more self-sufficient with each passing year, we built a walk-in closet in an unused corner of our oversized garage. This was just one step of many toward a more self-sufficient lifestyle. I don’t anticipate us every being fully self-sufficient, but the process of exploring food storage and the challenge of feeding ourselves for as many months as possible throughout the year drives our yearning to expand what is possible here in Minnesota.
What We Did
Our new root cellar is not in an ideal location as the exterior wall is south-southeast facing and gets a good pounding of sunlight from very early in the day, thus driving the temperature up on sunny days. However, we (I mean, my husband!) insulated both the walls and ceiling really well, loosely following the guidelines laid out in the wonderful resource from Storey Publishing called Root Cellaring by Mike and Nancy Bubel (affiliate link).
Here’s the root cellar in progress: wired, insulated, fresh air intakes installed. We built this in such a way as to be ready to add a second one adjacent to it when the time comes for when our fruit orchard is in full production.

Here’s the root cellar in progress: wired, insulated, fresh air intakes installed. We built this in such a way as to be ready to add a second one adjacent to it when the time comes for when our fruit orchard is in full production (apple storage!).
We foresee needing to add a cooling system to it in order to store food in the shoulder months, and currently we are using a thermostat timer attached to a growing mat to keep it between 34-37 degrees. The heating pad turns on when the temperature hits 34 and shuts off when it reaches 38. So far, it seems to be doing the job well. I had hoped after our immense investment of time and resources to build it, that this would be more passive than it is, but apparently it isn’t uncommon to need to supplement heating/cooling to storage systems.
We chose to utilize materials that would not absorb moisture, thus minimizing any risk of mold forming in the cellar. For the walls, we installed foil-lined insulation panels and used metal tape (hvac tape) in lieu of sheetrock and mud. For the shelves, we invested in metal shelving systems and metal baskets instead of wood. We built this to hopefully last the many and numerous decades ahead where we will hone our skills and, year by year, learn how to both eat well during the summer months while also planning for crops that can be stored away for later consumption as fresh vegetables.
As you recall, it needs to be as close to 100% humidity as possible for those precious roots to retain moisture and peak storage conditions. We have a digital thermometer with hygrometer; it is essential you have a way to measure your humidity. One way to measure would be the firmness of your roots, though once they begin to lose moisture, they won’t regain it.

Here’s the back shelf of our root cellar today, December 16, 2018. The middle shelf is storing black radish and turnips in the sawdust bins. Potatoes like air circulation, not tightly packed damp wood shavings as seen on the bottom row. The kale I pulled a while ago, and still haven’t processed. That’s my true colors showing through, who I am and how I garden and my drive for ‘putting food by’.
Currently our root cellar is maintaining around 85% humidity, which is a bit lower than it should be, but the roots are packed in baskets with dampened sawdust and are holding their moisture well. The sawdust is slowly drying out, but our consumption of some of the roots such as carrots is far exceeding the drying process.
It is the middle of December and we have turnips, black radish, watermelon radish, daikon, leeks, brussels sprouts, potatoes, ground cherries, and carrots in the high humidity root cellar. Inside the dry cellar, we have a ton of onions and shallots, over a dozen delicata squash, our dried beans, some peanuts, and our popping corn. My goal was to also have cabbage and beets in the root cellar, but our cabbages didn’t produce very well this fall and the voles ate my beets, which was a devastating turn of events this fall, one I’m still contemplating how to mitigate for next year.
That’s the beauty of gardening: there’s never an end. Instead, it’s the joy of witnessing what’s around the next bend.
-
Weekly Videos: Week of November 11, 2024
See what happened last week
This weekly video update is a part of your Seed to Fork subscription. You can always look back on previous weekly garden updates here.