
Your cart is currently empty!
Welcome to Meg’s Blog
-

Potato Grow Guide
A staple crop for our “homestead”, potatoes are something we love growing. But it’s taken many years of trial and error to find varieties that grow well for us and that store well. We spent the past 3 seasons growing out a large variety of yellow fleshed and russet style, and have come to consensus on which potatoes are our favorites. But this post is all about how to grow them, so let’s dig in.
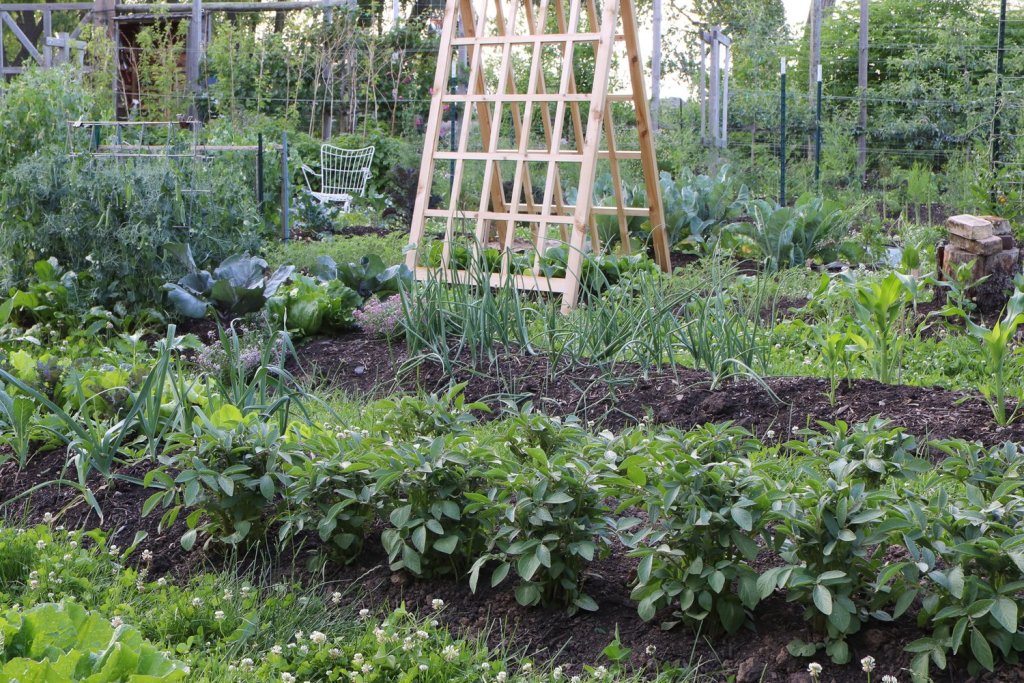
Early late June through early July is my favorite time of potato season. Such tidy tufts of vegetation! Seasonality and Timing
Potatoes, like many foods we eat, have seasons within seasons. There are early potatoes, mid season potatoes, and late season potatoes. You can grow a few of each and enjoy a succession of potatoes all summer long, or focus on storage potatoes for winter consumption, or stagger plantings a bit and use some in late summer while still yielding plenty for winter enjoyment.
I take a bit of an unconventional approach to potatoes in that I plant them ALL on the same day and generally don’t harvest them until right around my first fall frost. We do pull off some plants, inevitably, for dinners, starting in late July through the end of the season. However, I tend to do that with plants that have died back early (which I often attribute to disease and also means they aren’t actively growing more spuds so why not eat them now, right?).
We grow mostly mid- and late season potatoes here, so it makes a lot of sense to just let them ride it out and cure in the ground before lifting them.
Site Prep
Well-amended and well draining soil, ideally free of large rocks that will impede burgeoning tubers will yield the best crop. Potatoes like it slightly acidic too, just under a neutral pH. If you don’t know your soil’s pH, consider getting your soil texted at your local extension agency.
Chitting
Ever wondered what this business was all about? Chitting is the simple process of pre-sprouting tubers to speed up the germination process. It’s particularly useful if you suffer from wet soils in spring where the tubers might be prone to rotting, and is purported to hasten your yield by up to 2 weeks!
Apparently, in the US it’s called “greensprouting”. Who knew? Certainly not me. This is a common British tactic, perhaps popular to their very maritime, rainy weather which might result in rot before sprouting otherwise. I’ve never been impeded by soggy spring rains for potato sprouting here. If you live with really saturated soils in spring, chitting might be something you should consider.
Johnny’s Seeds has a nice write up about it here.
Planting and Plant Spacing
Potatoes, like garlic and sweet potatoes and dahlia tubers and heck, even apple and other fruit varieties, are grown from clones. We use our saved potatoes from the previous season, as we do our garlic, to plant the next year’s crop. I select small to mid-sized potatoes (because we often have a large surplus in spring) for planting. I generally do not cut my seed potatoes in half, because excess. If you need to, and with ordered seed potatoes you might, you can cut a potato up into about a golf ball (1-1 1/2” size ball) and plant those. They are ideally cut the day before you plant and should have several eyes on them.
The more space you give later maturing potatoes, the better yields you’ll likely have. I should take this advice myself, and maybe I will this year. I tend to plant my potatoes about 9” apart and 30” between rows. It’s recommended you give potatoes anywhere between 12-18” between plants for highest yields. The larger the seed potato, the further apart you should plant them. Perhaps we plant fewer spuds but further apart and still yield a ridiculous bounty of produce.
I dig a 6-8” deep trench and fertilize the entire trench generously (about 1/4 cup for each 12” section). Trenches run parallel to our garden beds. I set a tape measure in the bed and place a potato every 12” (we’re pretending I’m doing it right and so you will too!). I gently replace some of the mounded soil to the trench and water regularly. I will continue to add more soil as the plants grow (more on this in a minute).
Because I don’t chit (pre-sprout) my potatoes, they usually take a few weeks to sprout. Some varieties naturally wake up sooner but we usually get 100% “germination”.
You can plant seed potatoes several weeks before your last frost — if they sprout and get hit by a late frost, they will re-sprout but if it happens many times, your overall yield will likely be negatively impacted.
Hilling
Hilling potatoes does a few things. First, it helps the plants grow strong roots. The first time you hill, you will pretty much bury the plant excepting the top few sets of leaves, just like you might bury your stout tomato seedling upon planting so it, too, will put out new roots along its stem.
As the plants grow taller (if planted in early May by early July they should look gorgeous), I continue to add soil back to the trench, eventually starting to mound around the base of the plants to help protect any shallow tubers that develop from being exposed to sunlight which turns them green and concentrates solanines which can be harmful (cut out any green skin before cooking with them).

Early June and growing by the minute, they are ready to be hilled up to the tippity top of their foliage. I leave about 6″ exposed including a full set of leaves. This is also a great time to inspect for any Colorado potato beetle eggs or larvae. The second and final hilling, which is when you end up mounding it, could be done with straw or leaf mulch too. This method might work better for weed suppression and to disrupt the thorny but sluggish Colorado potato beetle. We usually just rely on our soft and pillowy top few inches of compost to do the trick.
Fertilization
Unsurprisingly, this heavy producer loves a lot of fertilizer and well-draining soils. We rely on our fall topping of compost to prepare our beds, and then fertilize only once, at transplanting. If your soil seems to be lacking nutrition, doing a fish emulsion foliar feeding is a common practice for potatoes about once a month during the growing season. Be sure to apply on a dry evening or early morning so as to not burn the foliage.
Disease Pressure
Colorado potato beetle and early blight are two diseases we’ve faced with potatoes over the year. For blights and other fungal diseases, it seems to be correlated to certain varieties. For example, we no longer grow Yukon Golds here, despite their prominence in the grocery store because they seem excessively disease prone. We’ve replaced them with Baltic Rose and Huckleberry Gold, two great yellow potato alternatives.
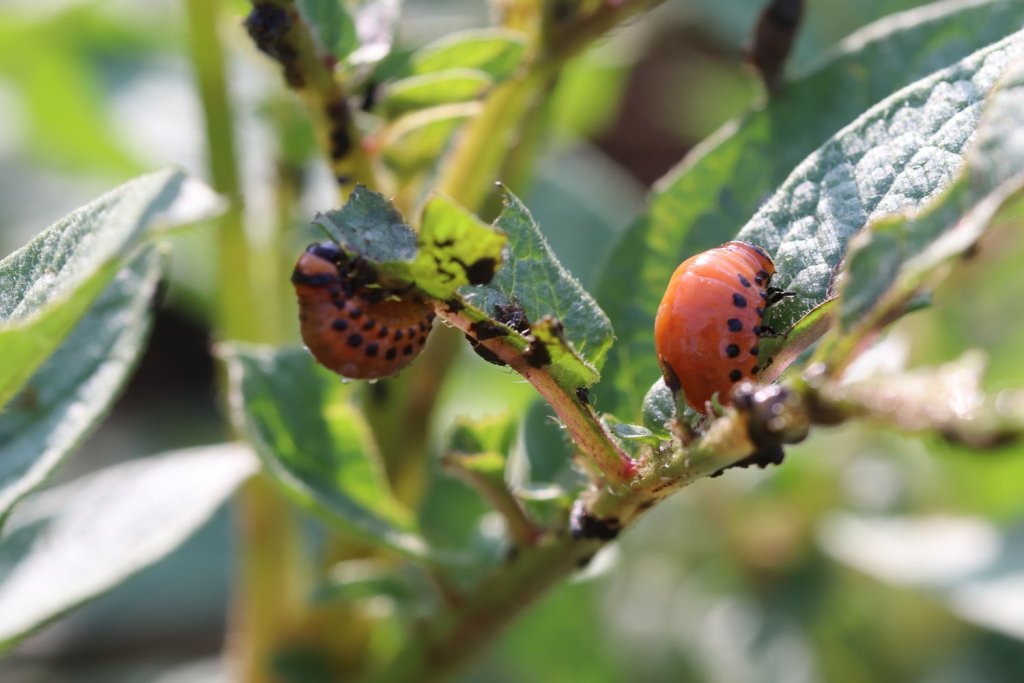
These are Colorado potato beetle larvae (olrder larval stages) and their disgusting frass. They are easily removed into a soapy pail of water.
Colorado potato beetles, like Japanese beetles, overwinter in the soil and emerge in late Spring. Their one redeeming quality is that they are sloth-like. Despite flying they don’t fly away or pee on you when you grab them. Their eggs are easy to spot on the underside of leaves (unlike Japanese beetles, come to think of it, where the heck do they lay those eggs?), and their many larval stages are equally easy to spot, catch, and plunk into a pail of soapy water.
A consistent, daily effort to control them will go a LONG way for future seasons. We got behind on them in 2021, the year my dad was dying of cancer, and 2022 was brutal but we did daily beetle pickings and 2023 was much mellower.
Harvesting
As I’ve alluded to, I prefer to leave my mature potatoes in the beds until pretty late in the season. I’ll even wait until after our first (light) frost to harvest our potatoes. A light frost won’t damage potatoes that are growing under the soil. It’s never been an issue for me. But colder air, say below 27, I’d probably be rushing to pull them out. Potatoes — the actual tubers — cannot withstand a frost.

To harvest, use a spade and dig a deep hole around the outside perimeter of the foliage. Some potatoes will be harmed in this process. You’ll separate them out and eat them first. As expert of a gardener as I am, I spear more than half a dozen potatoes annually during harvest season.
Ideally, your foliage dies back and you wait several weeks before harvesting. If you’re nearing your first frost and they are still green, you might want to cut the foliage down to tell the tubers to toughen up (this is akin to topping tomatoes, I’d say).
The advantage to waiting to harvest is that this gives the tubers lots of time to harden their skin. Potatoes that are harvested early have more tender skin. Think a new potato: super enjoyable to work with in the kitchen but not strong enough to sit around for 6 months waiting for the turn under the santuko knife.
Storing
Potatoes do best in cool temperatures (35-50F) and high humidity (>90%). They are one of our staple crops for our damp root cellar, and fared relatively well this season even with the warmer temperatures overall in the damp root cellar. Now that it’s mid-April, this is usually the time when I take the remaining potatoe and put them into our basement refrigerator (not a great place for longterm storage because it’s not humid enough).
But you don’t need a damp root cellar in order to store them. Here is what the root cellar is doing: it’s dark, so there’s no sunlight to spark greening of the skin. It’s cool, which is another signal that it’s not time to grow. And it’s damp, so that they hold their water content.
You can try and use a cooler corner of your basement or garage for this (garage only in warmer climates). Use a bin or box and layer them with newspaper. Be sure there’s airflow too. Check on them often to be sure they are storing well. Some people will take older fridges and add a bucket of water inside them to increase the humidity and it can act like a damp root cellar.
There are numerous ways to try and store potatoes without a root cellar, though I do believe it takes a lot of the guesswork out of it. If you’ve stored potatoes in your basement or some other corner of your home, please comment and let us know your tricks!
-

How to Maximize Your Interplantings
Interplanting on the brain all the time, but particularly in early spring when I’m capturing space under my low tunnels to extend my seasons as efficiently and robustly as possible.
Hope you find this video inspirational and useful in your spring garden this season. Happy sowing!
-

Double Chocolate Brownies
Because chocolate brownies aren’t chocolatey enough. We got on a brownie kick sometime last fall, and I started playing with proportions and chocolates. While you can use something like a bittersweet chocolate, the darkest flint (the gorgeous, crunchy texture on top) comes only from using something like a Baker’s unsweetened chocolate like I did here.
Double Chocolate Brownies

Ingredients
- 4 ounces unsweetened chocolate, chopped into small pieces
- 3/4 cup salted butter
- 2 cups sugar
- 4 eggs, whisked
- 2 tsp vanilla
- 1 1/2 cups all purpose flour
- 1/2 tsp salt
- 2 cups bittersweet dark chocolate chips
Instructions
- Preheat oven to 350F (convection or regular bake).
- Butter and flour a 9×13 metal baking pan.
- In a medium sized mixing bowl, melt the 3/4 cup butter and unsweetened baker’s chocolate either in microwave or on stove top. For microwave, do it in increments of 45 seconds on a reduced heat (power 7 or 8). If need be, let cool for several minutes.
- Add the sugar to the melted butter-chocolate mixture. It should be close to room temperature after you add the sugar.
- Next, with a wooden spoon or spatula, add the whisked eggs and vanilla until well blended.
- Fold the flour and salt in until fully combined.
- Finally, fold the 2 cups of bittersweet dark chocolate chips.
- Bake at 350F for 28 minutes or until a toothpick comes out clean.
- This recipe makes a decadent brownie that can be cut into 30, 1.5” squares.

-

Sourdough Pizza
Sourdough pizza is a mainstay in our rotating winter menu, along with the beans and rice and stuffed delicata I’ve shared.
We are fans of bulk sourdoughing, and this recipe makes 6 roughly 14 ounce doughs each.

Just like with every sourdough endeavor, we use our high gluten Sir Lancelot bread flour throughout the feeding and dough-making process. You can read more about that in my sourdough starter post.
This recipe makes 6 pizza crusts.
We have started to do two Refresh feedings on Day 1. If you can’t do this, it’s not a deal breaker, we’ve just found it helps to get the starter even more active ahead of the bulk proofing.
Here we go:
Refresh Sourdough, 11am, Day 1:
- 3/8 ounces starter (11 g)
- 1 ounce high gluten bread flour (we use Sir Lancelot flour for ALL sourdough recipes) (28 g)
- 3/4 ounce filtered water (21 g)
Refresh Sourdough, 4pm, Day 1:
- 3/8 ounces starter (11 g)
- 1 ounce high gluten bread flour (28 g)
- 3/4 ounce filtered water (21 g)
Day 1, FIRST FEEDING (8-9pm):
Ingredients listed in ounces (grams)
- 7/8 ounces starter (25 g)
- 2.375 ounces bread flour (67 g)
- 1.75 ounces water (50 g)
***Remember to SAVE the remainder of the starter and place back in your fridge for your future sourdough needs.***

This is a wetter dough like the bread recipe. I will use a small spatula to mix these first few feedings together. I also use my kitchenaid bowl for this first feeding and will use it for the remaining additional feedings. Day 2, SECOND FEEDING (7am):
- 5 ounces starter (all from overnight) (142 g)
- 10.5 ounces bread flour (298 g)
- 9 ounces filtered water (255 g)
Mix together by hand again and return to warm proofing station for 4 hours or so.
Day 2, FINAL FEEDING (10:30am-11:30pm):
- All of previous feeding
- 32 ounces bread flour (907 g)
- 22.5 ounces warm filtered water (638 g)
- 1 ounce sea salt or kosher salt (28 g)
- 7/8 ounce sugar (25 g)
- 2 1/4 ounces olive oil (64 g) ***keep separate and don’t add yet***
Warm the water in the microwave for about 30-45 seconds. This will speed up the fermentation process.

Click image to download this recipe chart. IMPORTANT: Mix together all ingredients EXCEPT the olive oil.
Measure olive oil out in a separate bowl/cup and wait to incorporate until you switch to the bread hook.
Mix with a paddle attachment in Kitchenaid for about 30-45 seconds.
Let stand for a minute or two. Switch to bread hook attachment.
Add olive oil and mix until combined.
Remove from mixer and bring to sink. With wet hands, stretch the dough for the first of three times.

As I mentioned, this is a wetter dough. I use wet hands and gently stretch it. This is essential for developing the gluten and for ease of shaping and stretching the dough.
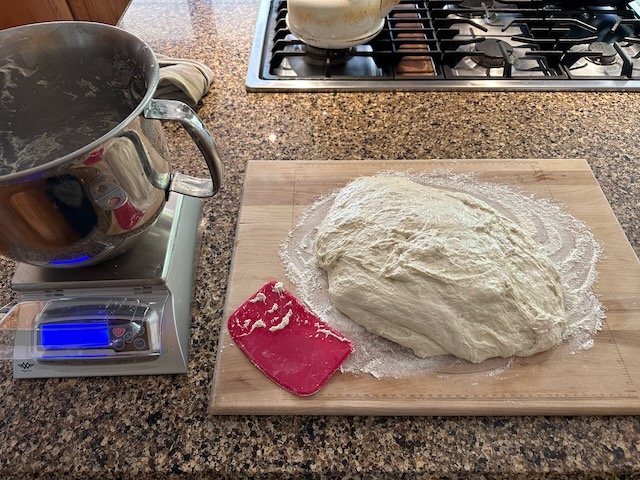
Set in a warm area to proof. Repeat stretches every hour. After the third stretch, you’re ready to measure out the dough and refrigerate for a cold proof.
We purchased a new scale this winter and love it. It has a baker’s percentage which means we can set it to 100% and then simply measure out the percent we need. For example, for bread, we make that in 3 loaves, so we measure out 33.3%.
For pizza, it’s 6 doughs, so we measure out 16.6%.
You can pick this scale up via Amazon. Here’s a link to my storefront.

We have invested in Pyrex snapware and ordered half a dozen for pizza dough. Clearly they are popular and had leftovers in them (they nest so well in the fridge they are in high demand here). I also put these square containers in my Sourdough list on Amazon.
We refrigerate at least overnight before baking. Usually we have pizza on a Sunday / Thursday or a Tuesday / Friday.
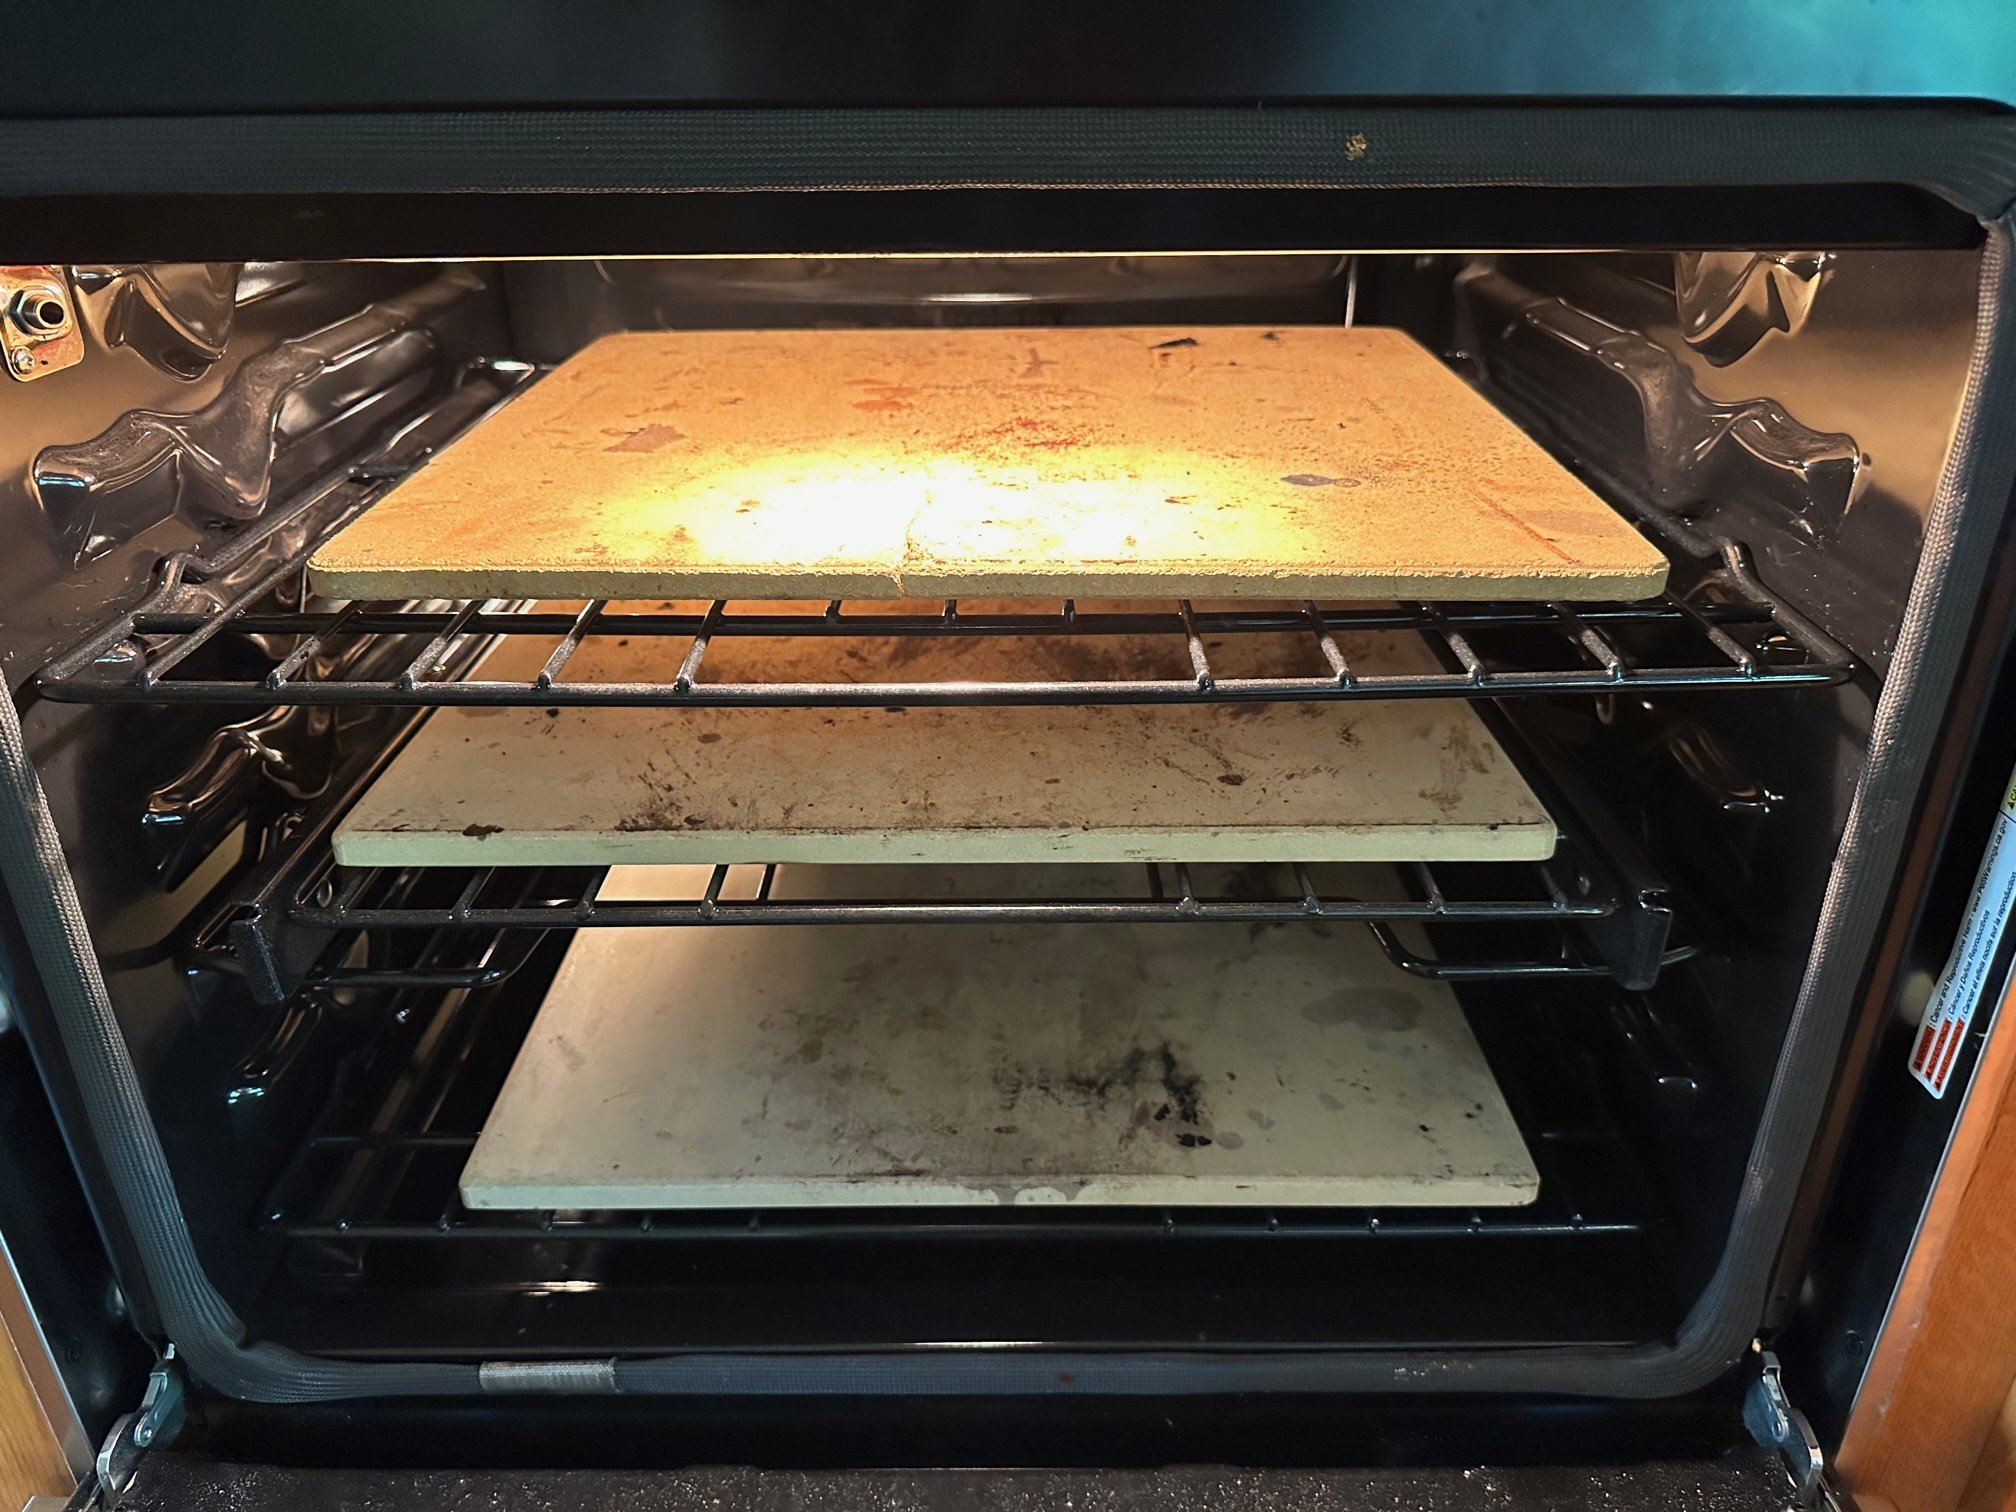
Bring as many doughs as you need out of the fridge one hour before you want to shape them. This will make them easier to work with. We bake 3 at a time and our oven has 3 baking stones too.
Baking the Pizza
Preheat oven to 550 with your pizza stones inside.
Stretch your dough out on a well-floured surface. We like to stretch them by hand but you can also use a rolling pin. When to the size you like (they make 12-14” pizzas each), place it on a sheet of parchment and set aside.
Repeat for the number of doughs you’ll be baking.
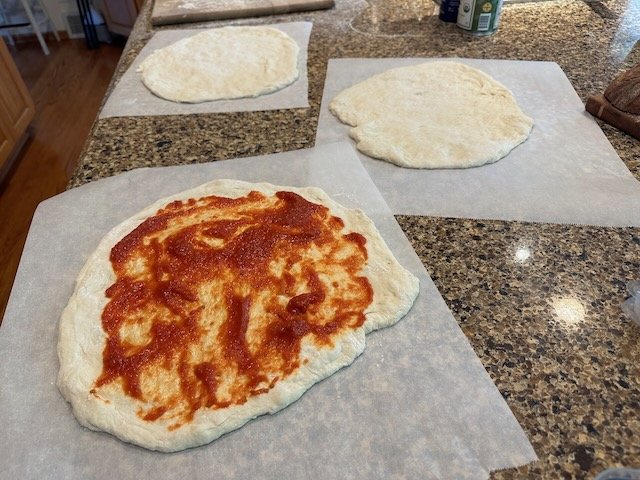
Top each pizza as desired and bake for 8 minutes. Check for doneness and even baking. Our new (and not so great) oven bakes inconsistently from top to bottom shelf, even with convention bake so we have to take some out and move some around during baking for even and consistent baking results.
Hope this becomes part of your family’s routine and makes weeknight dinners a little easier with dough at the ready in the fridge!
-

Carrot Grow Guide
A staple year round for us, I’m penning this grow guide to help you grow your best carrots yet.
Carrots are a tamed version of a well-known roadside weed (here in North America): Queen Anne’s Lace. Both in the Apiaceae family, along with fennel, dill, parsley, lovage, celery, and more. Carrots have umbelliferous blooms covered with a mass of with white flowers that often attract predatory wasps, hover flies, and other beneficial insects.
A biennial like cabbage and onions, carrots don’t flower (usually) until the second year. Inevitably, one or a handful of my summer carrots will decide to bolt. I usually pull them out because we grow plenty of flowers for pollinators. All this to say, carrots are consumed for their nutrient dense roots, the very energy that would be used for seed production. This knowledge always makes me extra grateful. Grateful for the seed producers, the seed tenders, and those that first started to cultivate wild carrots into what we all love today.
Timing, Seasonality & Square Footage Needs
Once you get familiar with their germination needs, they often, for most many zones (conservatively zone 6 and cooler), be a solid 3 or 4 season crop. You just need to get them germinated early and often.

I do love to interplant carrots with my scarlet kale after the earlier brassicas come out. This has been a steady succession planting win for me for nearly a decade now. I can direct seed carrots from April until late July here. I’ve tried in August and can grow some pretty small baby carrots with a fast variety like Mokum, but not larger storage carrots which take an extra few weeks.
Lately, my first sowing is on April 1, without any cover. I just prep the soil and get them set up, and hope for some spring rains because it’s always before our irrigation is back on.
My April sowing ends up being a June through August steady summer harvest. Even though they are all ripe by early July, I simply let them sit in the garden and harvest as needed. Last spring I sowed a 4×6 area with carrots, 30 linear feet (5 rows of carrots across the 6’ long stretch of the bed). I’ll be honest: it was probably a little too much, so I’m dialed our first planting back to about half that in 2024 and it was plenty of fresh carrots for the growing season. Then I sow more carrots around the 4th of July for our big fall harvest / root cellar.
For overwinter eating, we usually sow about a 4×12 bed of carrots. This is the equivalent of 60 row feet (linear feet) of carrots. We are still eating a LOT of carrots as I write this, and not all carrots store equally, which leads me right into my next topic.
Varieties
There are numerous carrot varieties out there. Plenty of open pollinated varieties and lots of hybrids, sort of like tomatoes and peppers. I grow just a few open pollinated varieties, but honestly our best keepers for winter continue to be hybrid varieties like Bolero. Many carrots sprouted even by January in our not-so-cold root cellar (zero gratitude for the extra hot winter, which has been hard on our passively cooled damp root cellar). Caught early enough, they are still edible but it’s not ideal.
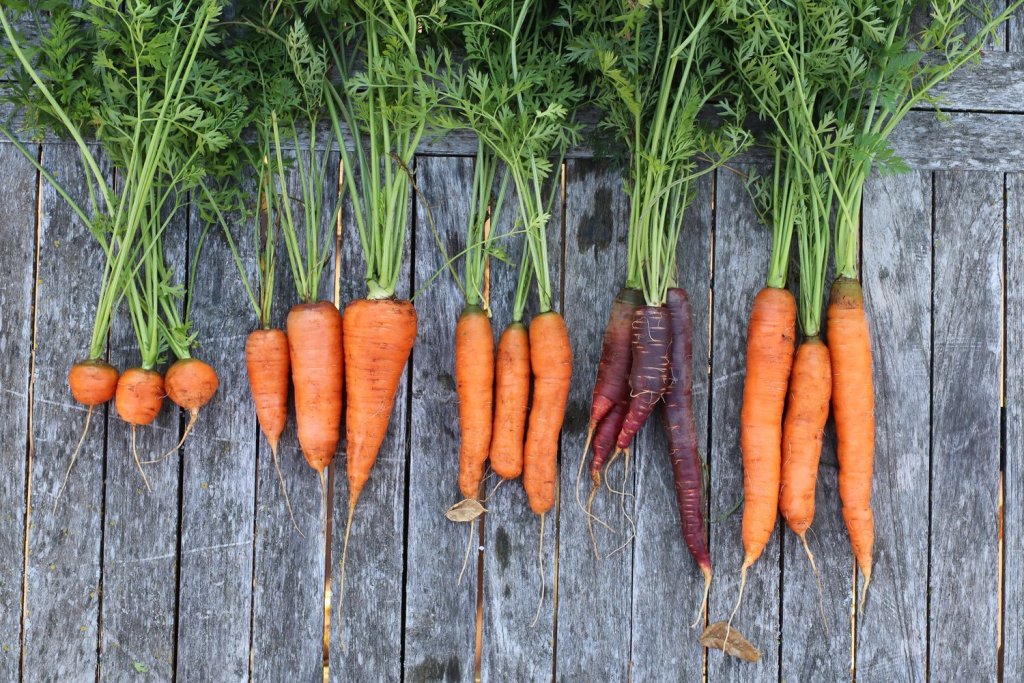
Atlas, Charentay, Nantes, Purple Haze and probably Bolero carrots (left to right).
We’ve tried pink carrots and other purple varieties, but we really love the extra sweetness orange carrots provide. Interestingly, orange carrots are highest in Vitamin A, more so than any other carrot color, making them the most nutrient dense carrot.
My favorite varieties are:
- Mokum F1 for early spring and summer harvests
- Purple Haze for fresh summer eating (short term storage is ok too)
- Bolero F1 for winter storage
- Danvers 126 for short term storage and potentially massive carrots!
- Chantenay a tapered shape that performs pretty well in heavy soils
- Atlas (Parisian) for clay soils or container gardening (round carrots, kinda novel but hard to peel)
Site Prep
Before planting, it’s important to be sure your soil is well amended and pitchforked. Carrot root tips are very fine and any obstacle will result in a hard right or left, that you will later unearth as a disappointing, albeit entertaining, forked or twisted root.
I use a pitchfork and sink it all the way in and pull back several inches, repeating every few inches around my planting area, hopefully, without puncturing our irrigation lines that are slightly buried. There’s no need to turn the soil over or dig it up, not even after you’ve just harvested something (unless there are large root balls from previous crop, then digging those out would be beneficial, such as large cabbage or broccoli roots from a spring planting, which is often where my fall carrots go.
If you have really heavy clay or rocky New England soil, I’d recommend starting with the Atlas carrot. All that carrot flavor packed into the top 2” of soil, your best shot at growing carrots in challenging conditions.
Sowing Tips
Probably the hardest part of growing carrots is getting the seeds to germinate. Even and constant moisture — not to be confused with super saturated soils — is paramount. Irrigation is also key for growing good carrots. Deep, consistent watering throughout the life cycle.
Seeds should be lightly covered with soil, too — aim for a planting depth of 1/4”. I sow seeds as thinly as possible so less thinning is needed later, but it still inevitably ends up being a densely planted area. If you have the patience to aim for a seed every 1/2” that would give you room to play as germination rates may vary.
Row spacing should be about 8-12” apart. Seed packets might say more, but I’ve been growing them more densely for many years now without any diminishing returns.
Soil temperatures should be at least 50F before sowing seeds, otherwise you can expect even slower germination rates.
Place a piece of burlap over the seeded area and water well, fully soaking the burlap. Repeat 1-2 times a day depending on cloud cover, temperatures, and season. This is a fair bit easier in the early season as the soil tends to retain moisture for longer in spring (when it rains, that is).
I’ve had carrot seeds germinate in 8 days in summer, which blew my mind last year. Normally, they will take closer to 14 days, even in summer. In the early season, they can take up to 3 weeks. Patience and moisture are keys to success.
Thinning/Plant Spacing
The second most important thing for carrot success is to thin the seedlings out. They are tiny, grass-like cotyledons, and it’s hard to tell the apart. I often wait a little while before thinning, but I always thin from the base of the plants. One stem = one carrot.
Stems that are too close together will be competing for nutrients and sunlight. Even as seedlings, they may grow a bit leggy on you.
By about 3 weeks after germination, you can start to thin. I thin over a few different times. The first time is to get to about 1/2” between plants.
The next thinning usually doesn’t happen until we have baby carrots ready to harvest, so another month to six weeks, depending on the varieties (Mokum works great for this strategy, by the way.)
My end goal is 1 plant every inch and rows, as mentioned, about 8-12” apart. This means 4-5 rows running parallel in the 4’ wide raised bed.
If weed pressure is high for you, beware that carrots are a low-growing crop and thus susceptible to weed pressure. I’d aim to weed every time you thin (at least 2 times in that first 6 weeks), and then again as needed as they reach their mature height of around 12” tall.
Fertilization
I amend the bed with slow release organic fertilizer at planting time and that’s it. No more fertilizing needed for carrots here. Our soil is rich with compost, too, and holds water well but not excessively so it’s a nearly-perfect growing medium for carrots. I’d say less is
Succession Planting
Carrots are one of our most important succession planting crops here. As mentioned, I start them in early April for summer eating. That’s about 4-6 weeks before our last spring frost.
But any time from about a month before your frost through to about 10 weeks before your first fall frost is fair game for sowing. You definitely don’t need to adhere to my spring and summer sowing, it’s just what seems to work well for me in that I remember to sow them (Fourth of July is when it starts to make its way toward the top of the mental sowing list).
Harvesting and Storage
Carrots store really well in the fridge, as long as you cut the green tops off (they make a pretty tasty pesto, if you’re into that … recipe will come out early this summer!). We tend to harvest about a week’s worth, cut the green tops and store in a gallon ziploc bag. If I’m not too frantic with life, I will lightly rinse them off before storing short term, but it’s also OK to just take a dirt-clinging carrot and plunk it right into your storage container and wait to wash until you’re ready to snack or cook with it.
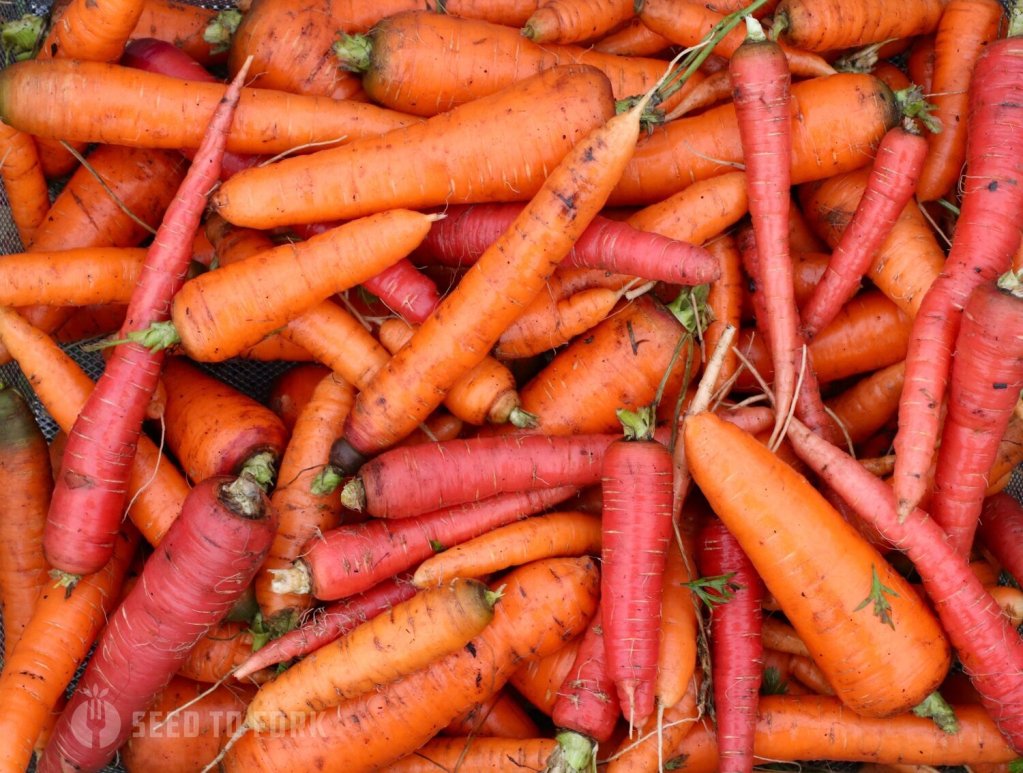
Beautiful as they are, we haven’t grown these pink carrots since we used up the seed several years ago. TIP: Limp carrots can be revived by plunging in water and putting in fridge for a little while (like how we similarly revive limp lettuce).
For super long storage, a high humidity situation is needed, like our root cellar. Or, alternatively, you can mulch and leave carrots in the ground for the winter. I did this with some that I cut the tops off of last fall. I haven’t dug them up yet, but I probably should to do a taste test between those and our root cellar ones to see if it’s worth leaving more in the ground in future years.
Here is a video I put together for one of my corporate clients two summers ago — the first 5 minutes demonstrate the prep, sowing, watering, and eventual thinning of carrots at both seedling and baby carrot stage. I think it’d be useful for the visual learners here.
-

Carrot + Sesame Salad
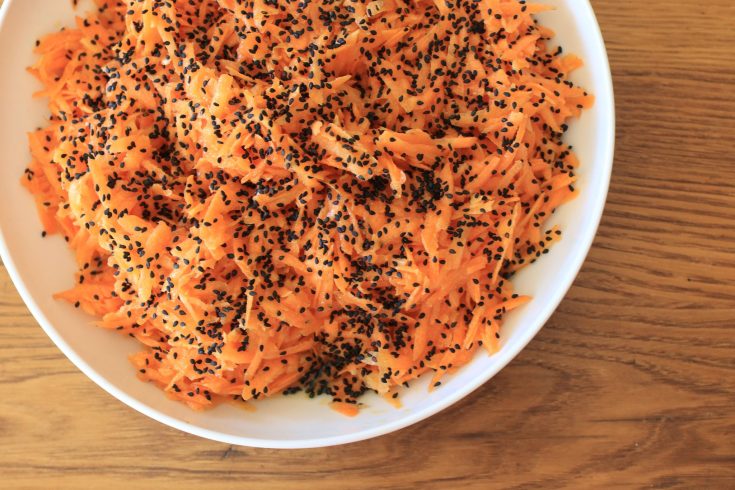
Carrot & Sesame Salad
Ingredients
- 8-10 cups shredded carrots (8 large carrots, or more if medium sized)
- 1 T sesame, toasted
- 2/3 cup avocado oil
- 1/3 cup rice wine vinegar
- 1 T honey
- 1-2 T shredded ginger
- 1/2 tsp sesame oil
- 3/4 tsp salt
- fresh ground pepper to taste
Instructions
- Wash and then shred carrots in a large mixing bowl.
- Toast sesame seeds in a dry skillet on medium high heat for 2-3 minutes. Keep an eye on them and shake pan to toss occasionally. Let stand.
- Measure remainder of ingredients in a measuring cup. I use a whisk to combine, although you could use a blender of any kind too.
- Pour dressing over shredded carrots and mix to combine.
- Let stand for 30-minutes before serving if possible (half a day would be ideal, though that rarely happens here.)
- Right before serving, sprinkle on the toasted sesame seeds. Keeps well in fridge for several days too!
-

Establishing a Fruit Orchard
It’s not as simple as just digging up a little earth and tossing a tomato plant in the ground. Orchards take more time, more planning, and more resources to establish than an annual flower or vegetable garden. But the rewards of fruit over many years is worth the head-scratching antics that are needed to set you up for success.

This post will go over what I see as the essential steps you need to take to prepare yourself and your site for a future fruit tree orchard. This post will focus mostly on apples, but the rules apply to all fruit: you’ll need to consider your site and soils carefully, ensure cross-pollination, and decide what kind of rootstock and purchase you want to make.
Site Location
Fruit trees, like almost all food, love sunlight. And because they are trees, be sure to plant them far away from any drip lines from other nearby trees. Give them the full overstory of the area, thus reducing underground competition with other trees or shrubs.
Another important factor related to location is drainage. Fruit trees do not tolerate wet feet, the term of endearment for soggy, waterlogged or poorly draining soils. The easiest way to remedy this is to ensure your location has a slight slope so the water won’t stagnate after heavy rains. This is likely a non-issue if you have sandy soils and more of a perennial thorn if your soils are heavy clay (like ours).
Soil Considerations
Soil drainage is equally important, and should drain well. Consider doing a soil test to understand your pH and adjust if needed (use of lime or sulfur can raise or lower your pH, respectively). Plan to add organic matter to the soil annually. We top dress annually with a few inches of fresh compost.
Even though our soils are heavy, our orchard is set on a compound slope so water never stagnates. We also amended the planting holes with a few scoops (garden spade-fulls) of compost in each planting hole. It’s recommended to plant your trees with no more than 30% compost in the planting hole along with your native soil (assuming it’s not super sandy or super heavy clay) so the roots don’t stop growing once they hit the edge of the amended soil. Roots sense the change of soil type and if the native soil is much heavier roots have been known to just circle around the comfy, amended soil and avoid the tougher life, basically being root bound even though they are in the ground.
You can plant directly into your native soil and amended lightly, adding some slow release organic fertilizer and compost. This is what we did for all our trees and they are all growing really well. Our native soil is heavy clay here.
Cross-pollination & Choosing Varieties
Apple trees need another variety to successfully cross-pollinate its fruit.
The easiest way to achieve this is through crabapples. If you live in an urban or suburban setting, it’s likely that your neighborhood already has enough nearby crabapples for your future apple tree. In this case, you could get away with planting as single tree in your yard and have successful cross-pollination. If you’re in a more rural setting and you’re planning to grow many apple trees, you need to consider pairing your varieties by the timing of their flowering so that the bees will have pollen for successful cross-pollination.

These are Haralson blossoms, it’s a semi-dwarf tree that often profusely flowers, which is a good thing since it’s such a key pollinator for our orchard. This is a tale of succession planting — but we’re looking at the succession of pollen across our spring weeks. Apple varieties are categorized by when they flower. Early and Late season flowering trees are more rare; mid-season apple fruiting is the largest category. So if you choose your varieties carefully by looking at when they flower, you should be fine.
I think our Haralson, the largest and most prolific producer of flowers, is probably our best pollinator for the majority of the orchard. Other trees that flower at the same time include our Snowsweet, and William’s Pride. We have a younger Zestar!, but it hasn’t produced fruit yet — interestingly a William’s Pride is listed as a good pollinator for that but not a Haraslon.
We have other apple varieties too, but they haven’t flowered yet because they are younger trees or were grafted onto other trees (a topic for another time). However I saw on this list that the Haralson is a good pollinator of most of our apple varieties. here.
Here’s a link to a really helpful fruit tree pollinator cross-check from Orange Pippin. It works for apples, pears, plums, and more. You type in the tree you want to grow and it lists all the trees that it can cross-pollinate with.
Succession Planting
This is really important in choosing your fruit trees. You need to consider when the fruit will be in season. Some fruit trees can easily produce over 150 pounds of fruit! So ideally, in our world, you space that out across a month or more. Otherwise, it’s possible you will be overrun with fruit in a really short window of time, making this glorious notion of fresh homegrown fruit more of a headache than a joy.
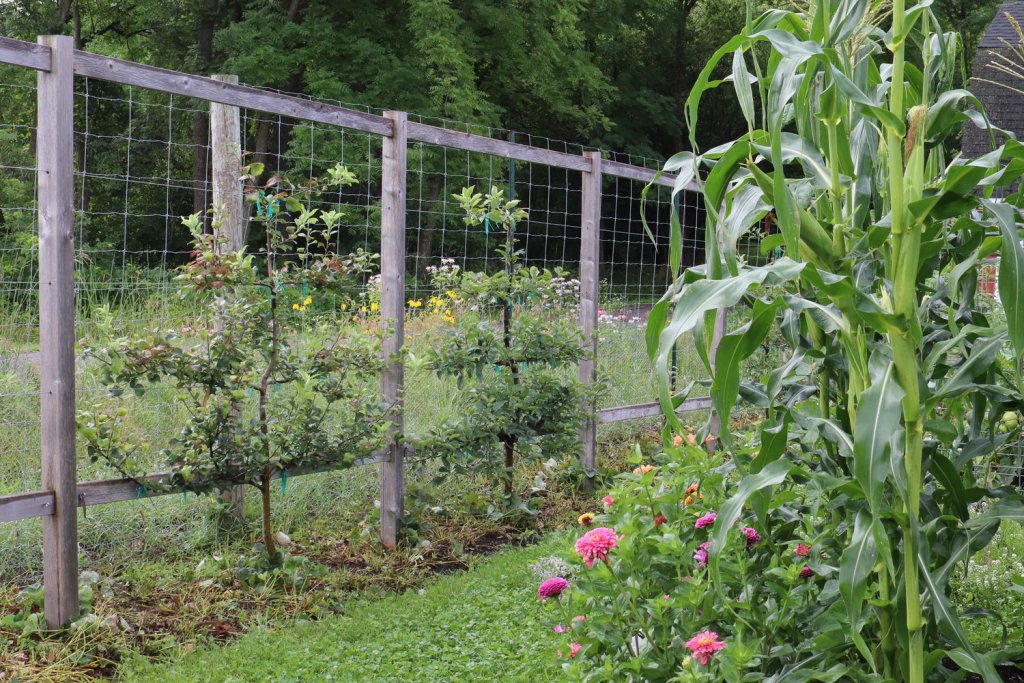
The tree on the left has a newly grafted variety on the third and fourth branches, making this tree half Honeycrisp and half Black Oxford, I believe. Neither have produced fruit yet, though. Here’s how our varieties produce across the season. Now that I’m writing this out I’m thinking to myself our main (mid) season will one day be overflowing, as astutely noted by our oldest this summer when he witnessed how many apples we pulled off 2 trees and asked us how many apple trees we had total.
Our Varieties
Apples
William’s Pride -mid- to late August
Zestar! – late august to early September
Honeycrisp – mid-September – mid-October (hasn’t produced and it’s 8 years old; don’t recommend growing one)
Haralson – late September – early October
Mountain Rose – late September – early October
Calypso – late September – early October
St Edmund’s Russet* – late September – early October
Triumph* – late September – early October
Snowsweet – mid to late October
Black Oxford* – mid-October
Gold Rush – late October – November (stores for 6-7 months)
*Grafted onto existing trees
Apricot
Brookcot
Pears
Luscious – mid- to late September
Gourmet* – mid- to late September
Flemish Beauty – late September
Celine – early October
Plums
Black Ice – early August
Toka (Bubble Gum) – late August
*Grafted onto Luscious
Bare Root or Potted Tree
Like with buying seeds rather than nursery-bought starts, you will have the greatest access to variety when you order fruit trees bare root. It also saves you money, and especially for training/pruning into espalier, there’s no reason to buy a potted plant 3x the cost of a bare root.
We purchase bare root trees, unless we’ve lost a tree and want to replace one quickly. But even then, we end up losing an entire year because the buds inevitably don’t align with our espalier needs.
Further down the line once you get a tree growing, you can try your hand at grafting — this is adding new branches to your tree that are different varieties. Several of our fruit trees are now grafted with two varieties sharing the same root system. It’s a fun way to increase diversity in the orchard.
Plant Spacing & Rootstock
How you layout your orchard depends on what type of trees you buy. You want more than enough room so the canopies remain open, meaning they don’t touch at maturity. For our espalier trees, we control the canopies pretty intensively so we space them 8’ apart for dwarf rootstock, which are trees that mature to 8’ tall. But if they were open grown, we would have spaced them 10 or 12’ apart on center.
Our Haralson and Gold Rush are both semi-dwarf, open grown trees and they are both in their own beds that are about 15’ square (technically, they are triangular beds, but they are larger than their canopy will be at maturity).
All apple trees are grafted onto rootstock. Rootstock determines how tall the tree grows, among other things. Rootstock plays an outsize role in the overall vigor of the variety too.
Semi-dwarf rootstock is pretty common. These trees mature around 12 feet tall, though unchecked will grow much taller than that (as seen by our first espalier that the new owner doesn’t maintain and it’s easily 16’ tall up the side of the house). You will need to space them about 12’ apart if open grown, or plant them on 12’ long trellises if going the espalier route.
Dwarf rootstock is great for smaller homesteads as the trees only mature to about 8’ tall. Easier to fit more trees in, easier to manage pests and harvest at this smaller height, but of course there are downsides too. You have to be more active with thinning out your fruit otherwise risk breaking branches. And these trees require staking, so while ideal for espalier, they require more work due to shallow root systems for open grown trees. They are what we grow here as espalier trees, and the trellis gives their shallow roots the stability they need to thrive.
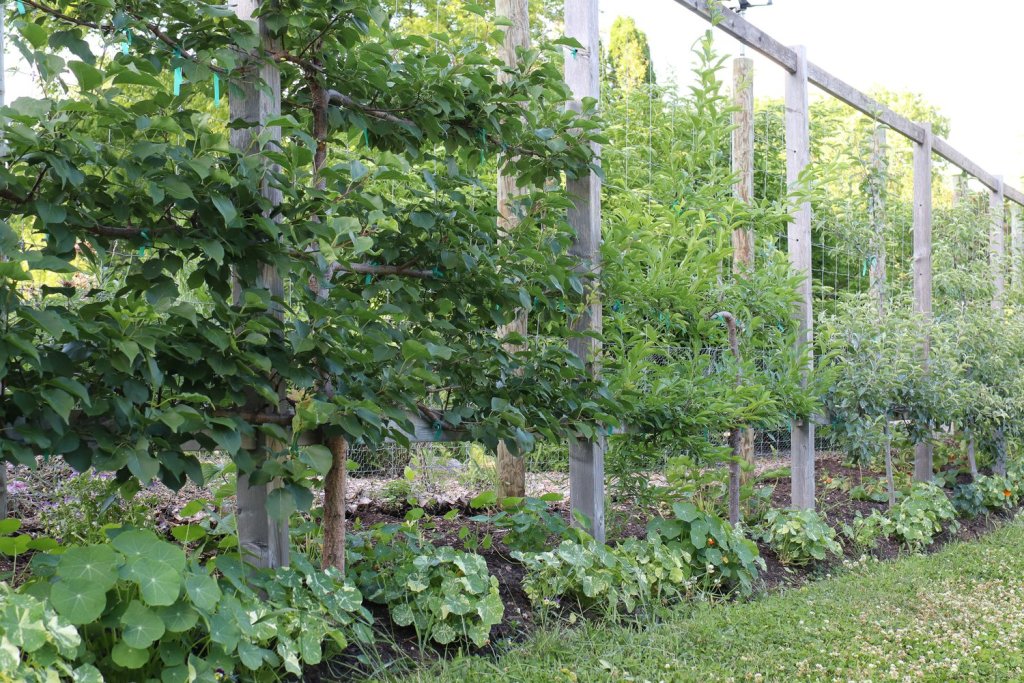
If you want to espalier, dwarf rootstock is the way to go. If you have ample space and want a beautiful classic orchard look that will require a harvesting ladder someday, then I’d definitely choose semi-dwarf trees. We have some of each here, two open-grown semi-dwarf apples and about 12 espalier fruit trees (most of which are apples too).
Trellising for Espalier Orchards
Before those holes are dug for your trees, it’s a great idea to get your trellis system set up. We have used several different methods for our trees over the decades. In our current garden we used the extra high tensile wire that was for our corner posts of the deer fence and some turnbuckles. It’s more or less invisible and we love that. It’s connected to 4×4 posts that are 8’ tall.
For this orchard, we intentionally left 30” behind the trees so we could get behind them to work and prevent deer from reaching through the deer fence for any snacks. We also grow strawberries underneath our fruit trees and that space behind is key to our strawberry productivity.
You can also use bamboo, rebar, or other materials — you could even use a fence and attach something to it. We did this at our last house. John used metal tubing and screwed it to the fence. It was very industrial and looked great!
Pest Pressure
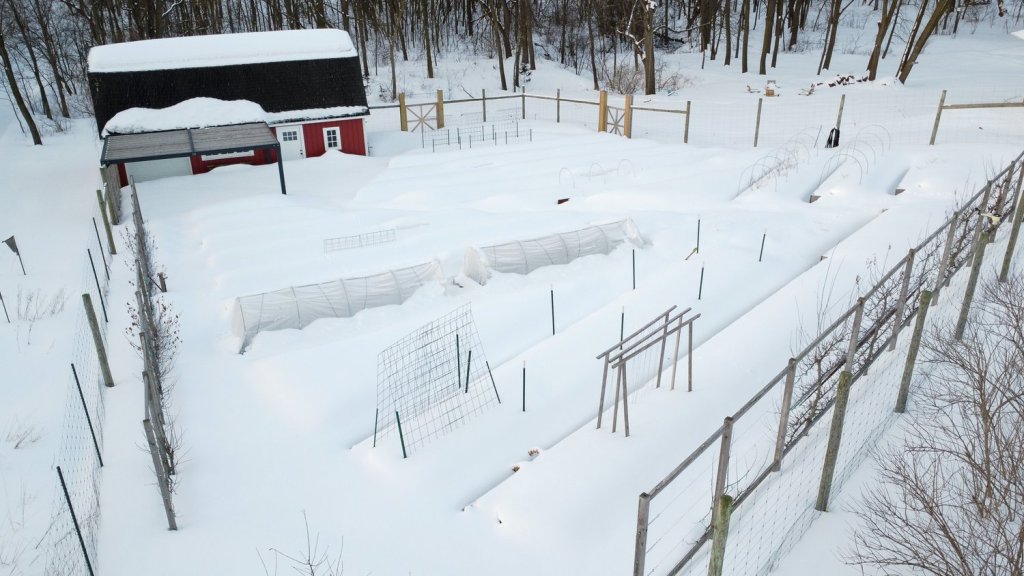
Voles sometimes like to girdle trees during the hungry gap in winter. Deer will definitely browse and damage fruit trees. Protection from pests is highly recommended. Most (all?) commercial orchards are protected by deer fence. Even some extra apple trees we have planted outside our main garden have been individually caged off with extra deer fence and some t-posts (at 6’ high because it’s a smaller area and the deer can’t jump inside the cage).
Further Reading
I highly recommend the book The Apple Grower by Michael Phillips. (affiliate link to my Amazon storefront)
I hope this post gets you thinking about what you will need for your future orchard! I’m sure I left some details out, so please leave comments below and we can keep the discussion going.
-
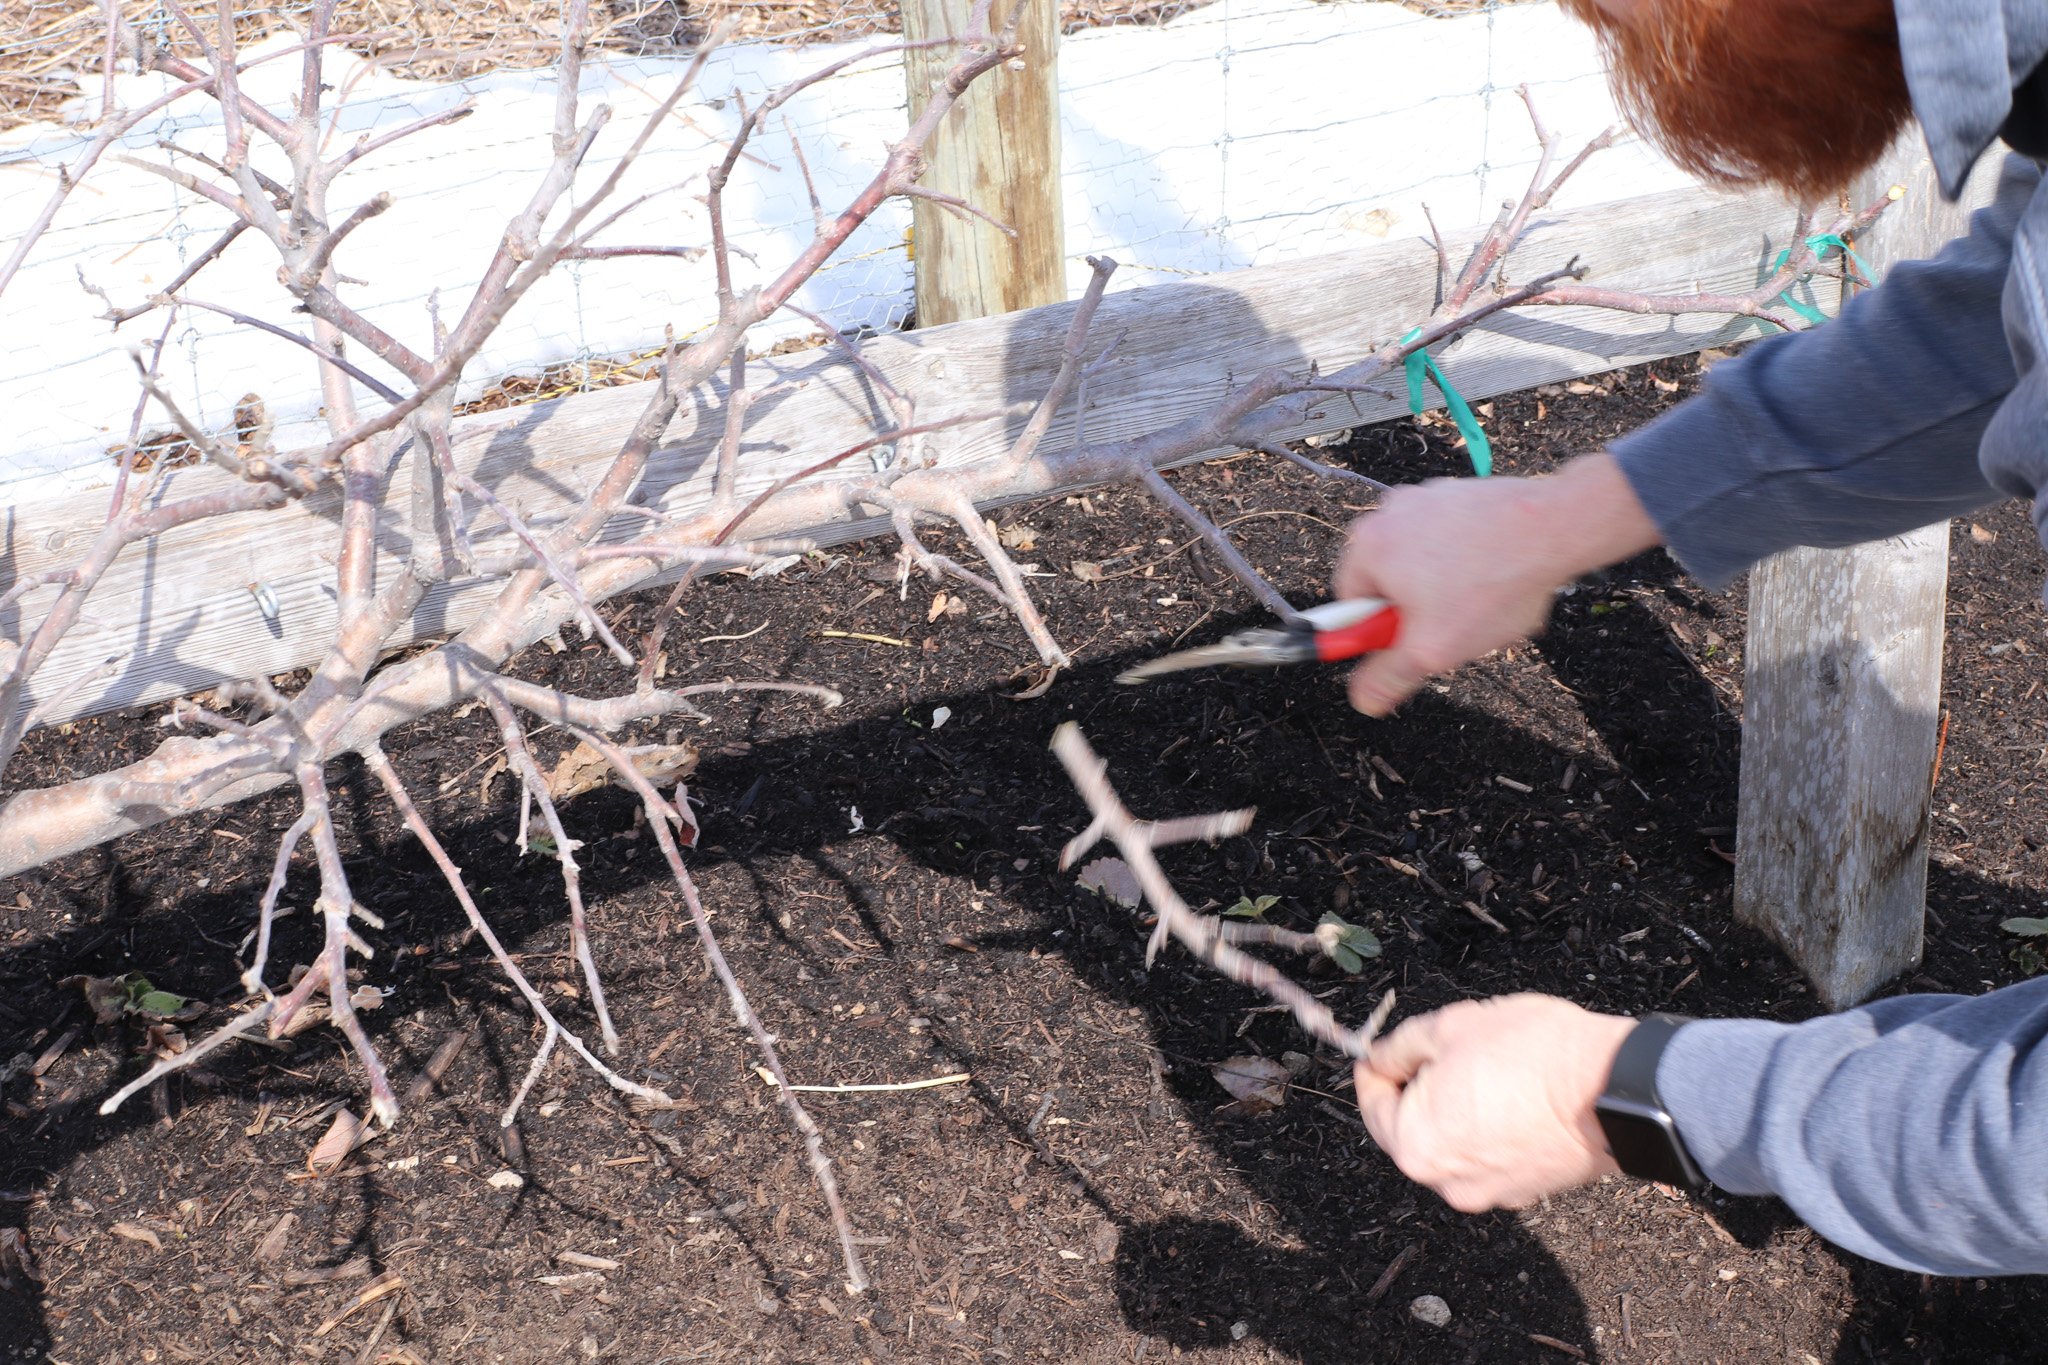
Pruning Espalier Trees
First in what will likely be a series of videos on how we maintain structure of our espalier fruit trees while also, hopefully, pruning for vigorous flowering and thus fruiting.
As you’ll see, this is very much an art form. John has been training espalier since about 2004, so for about 20 years. This is his third garden where he’s started trees; we had some honeycrisps off our first tree in our first home, moved before our second trees produced, and have lived with these trees the longest. It’s been a joy to watch them mature under his careful tending.
I mention the time because he will tell you that a lot of what he does is intuition. Even when he thinks some buds look like fruiting spurs (more rounded buds rather than pointy), it doesn’t always turn out that way. And, conversely, some buds that look vegetative (pointy) decide to surprise us and they flower. So what is shared here is really an authentic capture of how much he takes off, and for you to see the before and after of these trees.
It’s possible when you watch this you’ll be shocked at how much he cuts back. Sort of like how much space I give our annual vegetables and flowers in the garden.
You really need to cut back the suckers every year (sometimes in vigorous trees you’ll cut back a second time in early July). And for the fruiting spurs, which are about 3-5” long side branches off the main cordons (the horizontal leaders), he maintains them annually by cutting them back to various lengths – sometimes letting them grow longer and other times cutting back to include several years’ growth.
The other thing he is simultaneously doing is thinking in 3 dimensions and pruning for shape. It’s great to have these fruiting spurs angling out in multiple directions. This gives the fruit the space it needs to thrive. I tried to capture these angles as best I could in this video.
More videos to come in a few more weeks — I’ll likely update this post and add more videos here when he starts pruning more trees.
-

Grow Lights for Indoor Seed Starting
One of the most common questions I field is what we use for lighting. Lighting is an absolute non-negotiable for all our indoor seed starting. There’s just no good way to produce healthy and strong plants without supplemental lighting.
Because we have repurposed existing lights, I will share our current lighting setup and the types of lights we use and their strength. I admit it’s a bit of a rat’s nest, sorting through lighting options online. My husband spent weekends, plural, taking notes and scouring lighting companies to find the right level of brightness to mimic our tried and true fluorescent system.
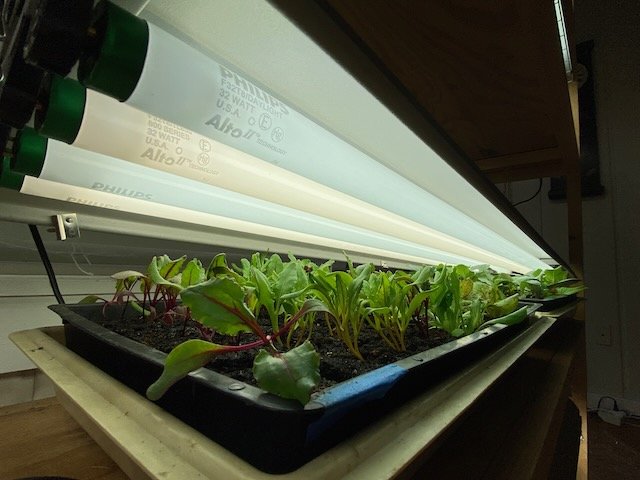
Our grow lights currently include a combination of 4-bulb T8 fluorescents, 4-bulb T8 LED equivalents, and one full spectrum LED.

For the first 20 years of our gardening career, we successfully grew under our 4-bulb, 4-foot T8 shop lights with half cool white and half bright white (fluorescent) 32W bulbs. We purchased these at a big box home improvement store. Each fixture cost $60, plus about $50 more for lights. For each light fixture, we have the capacity to grow 2, 1020 trays, or larger plants that fit in those trays (like 16 tomato plants potted up).
We did have a T5 fixture for a few years early on, but the bulbs were more expensive to buy and we were frugal. Knowing our less expensive lights did the same job for us, we stopped using it. (If I’m recalling correctly, it also broke and was out of warranty.)
So the simpler, fluorescent lights were a tried and true method for so long that it’s been hard to shift our mindset away from something that works so well. However, as the bulbs have started to die out, it’s been an opportunity to question if we continue with fluorescents or try to re-purpose the lighting unit and transition to LEDs.
We have 12 shelves in total, across 4 plant stands of varying height and capacity. One stand rarely gets fully used, unless we are doing a lot of perennial germination like for our burgeoning native edible food forest. Two stands with 3 shelves each have adjustable light heights up to 2 feet per shelf (as seen above); they are the most flexible of all the stands due to the amount of height they can accommodate, and thus the most used. The lights are on chains and eye hooks above allow for easy height adjustment, which sometimes occurs several times a week. The newest shelf was a test: it has four shelves, each with less vertical play, a design I thought would be great for things like brassicas and flowers that are only indoors for a short period of time. But it presents a challenge when growing under LED lights. I’ll explain more below.
In the past five years, we also saw the lifespan of many of the bulbs sunset and the need to replace them became clear. We knew it was the right time to try LED bulbs in these light fixtures. In order for LED bulbs to work in these fluorescent fixtures, you may need to remove the ballast, which controls the amount of electricity flowing through the bulb. LEDs don’t operate on a ballast. The bulbs we purchased are a ballast bypass type, so my handy husband leaned on his trusted you tube surfing skills to help remove the ballast so the bulbs would work with the existing fixtures. Each new light cost about $10 each. And now about half of our old 4-bulb fixtures are running on LED lights.
This ballast setup will be different for each type of light fixture, but if this is something you’re interested in doing, it’s a quick you tube search to find the right fixture. Here’s how we bypassed our Sylvania fixtures. Surely someone out there has done it for your fixture and posted how to do it, I can guarantee. Thank you, internet.
The Numbers
The key for growing indoors is finding lights as bright as possible. Even the brightest lights won’t come close to a sunny outdoor day, but our plants are forgiving and grow anyway.
For LED purchases, you want to find the Kelvin. This is the brightness of the color. Kelvin between 5,000-6,500 is ideal for vegetative growth, which is what we are doing inside our homes in late winter preparing our plants for summer’s flowering (hello, tomatoes and peppers!).
This turns out to sometimes be a wild goose chase. Information isn’t always presented in the way we need it. So, to possibly save you some time running around in circles on your time off, here are the bulbs we currently use in our fluorescent light fixtures.
Replacement Bulbs
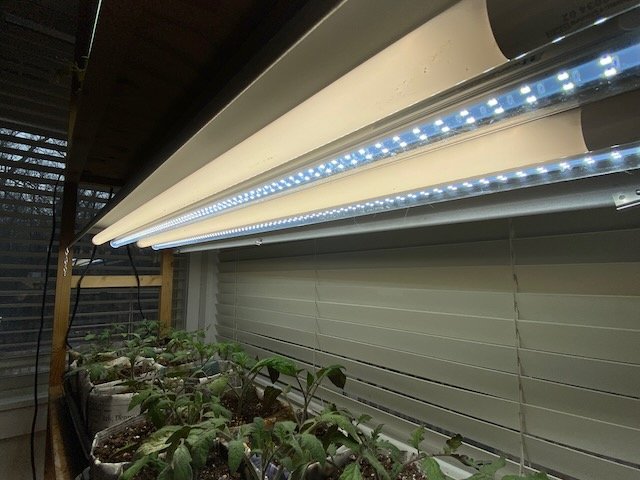
For our old T8 fixtures, here are the LED ballast bypass bulbs we are currently using. We use 2 of each in the fixtures, alternating them so each side has one of each.
Like with our old system, they are half “cool white” and half “bright white”, thus combining to create as full a spectrum as possible:
LED Daylight equivalent: https://www.bulbs.com/product/KT-LED15T8-48GC-865-DX2?cm_mmc=GooglePLA-_-Nonbrand-_-16389752855-_-shopping&affID=6&gclid=EAIaIQobChMI3NvisJba9gIVjCtMCh1MeAuLEAQYAiABEgLbE_D_BwE
LED Cool White equivalent: https://ecoledmart.com/products/led-tube-ballast-bypass-4ft-22w?variant=12032894402602
If you have fluorescent fixtures and want to stick with them (we love ours still!), here are the reliable bulbs we are still using in over half our light fixtures. Like with the rest, we use 2 each of these and alternate them in the fixture.
T8 Fluorescent Cool White: https://www.homedepot.com/p/Philips-32-Watt-4-ft-Linear-T8-ALTO-Fluorescent-Tube-Light-Bulb-Cool-White-4100K-2-Pack-543306/308644136
T8 Fluorescent Daylight: https://www.homedepot.com/p/Philips-32-Watt-4-ft-Linear-T8-ALTO-Fluorescent-Tube-Light-Bulb-Daylight-5000K-2-Pack-543314/308644340
New in 2024:
I ordered some Sunlite T8 lights from Gardeners Supply last year. They replaced 3 of our oldest fixtures’ T8 cool white and daylight bulbs. They only come in one brightness (2850 lumens, 94% of full spectrum) but are supposed to be 20% more efficient and last longer, both bonuses for these fixtures that aren’t as energy efficient as our LED ones. Unfortunately, they are not currently in stock on their website!
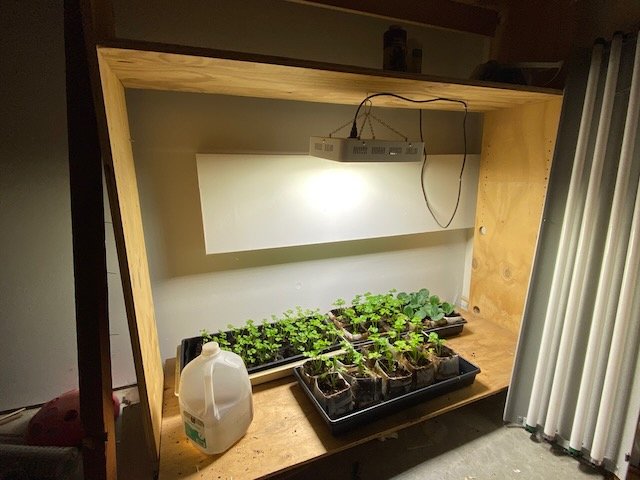
Full Spectrum LEDs:
In 2019, we also dipped our toes into the world of full spectrum LED lights. We went with the Roleadro 300W LED light. It looks like while searching amazon (where we picked this up for $60) that it’s no longer available and they carry a 600W or 1200W one now. I searched the internet and only found our fixture offered second-hand through eBay. I find the fleeting nature of products these days so challenging — many of the items I recommend are not currently available. I am sorry about that!
We keep the lights on 24/7 once seedlings emerge to maximize vegetative growth. This is quite an unusual approach in the home gardening world, but it has always worked for us so we continue to roll with it. Our home does take on a suspicious glow from March – May at night, but it’s all legal.
When to Replace Your Lights
This is an important question to ask yourself. When was the last time you replaced your bulbs? I like to add blue tape and the year I replaced the bulbs on my fixtures so I know when we replaced the bulbs. In general, I try to replace mine every 4 years or so.
You can also look for a darkening of the ends of the fluorescent bulbs as an indication that it’s time to replace them. And, using a light meter will also help you know when they are fading.
Measuring Your Lights
Another way to know how strong your lights are is to measure the light with a light meter. This was discussed in last month’s Q&A but is worth noting here too.
A few years ago I learned about a light meter to gauge brightness, and I bought one off Amazon (links to my affiliate page). It does seem to work on both fluorescent and LEDs.

I set the meter to lux (stands for Luminous Flux). Foot Candles are the other metering option; Foot Candles are like what feet are to meters. FC’s are used in the US and Lux seems to be the worldwide standard.
I use the x100 metering function, which I get to by pushing the range button until I see an x100 on the screen. So when I see a number like 200, it means 20,000 lux.
Here are some values to consider:
- Overcast day: ~1,000 lux
- Daylight: 10,000-25,000 lux
- Direct sunlight: 32,000-130,000 lux
This is a great way to get data and understand your lights. You will be able to see how the intensity drops as you move the meter further away from the light. For our LED replacements, the light is a bit stronger up close and so I can keep them a little further away from my plants compared to the regular T8 fluorescent bulbs.
Light Height: The Key to Strong Starts
The other big question I get asked often from friends who start their plants indoors is why aren’t ours leggy. And the answer is simple: with fluorescents, you must keep your plants as close to the fixture as you can because the light doesn’t penetrate very far down. How close do you keep your light to your plants? If they are fluorescents like ours, keep the light as close to the plants as possible without touching. For these lights, the cage of the fixture is usually just about touching the plants. The light won’t burn the plants, so don’t worry about that, and bringing the light to them eliminates the plants’ need to reach up for the light since this light is not as strong as T5s or high output grow lights. For us, at the end of the day, we are successful enough with this system to not justify the additional cost of the new fixtures and bulbs.
The other thing that is quite different with LEDs is that generally you need to keep your plants much farther from the light than fluorescents. Fluorescent light diminishes rapidly in the first few inches, so in order for the light to do its job as a proxy for sunlight, you have to keep the lights practically touching the plants. LEDs are completely different.
I am still getting accustomed to how far away to keep the LEDs. Couple that with our fixed height of our plant stands, and we have a bit of a challenge with larger plants like our tomatoes and peppers that get quite large come mid-April. That is the largest and next big learning curve for me, to really push the height in both directions for starts growing under LEDs.
And as I said earlier, it’s really hard to experiment on your actual plants for the coming growing season. I mean, which one of us has time to play with a few extra trays for the sake of science? I did a little last winter for the book, but right now, I must learn in real time with actual plants, some of which don’t have backups. Such is life.
-

Bean + Cheese Tamales
Tamales are my new favorite comfort food. It started in Claremont, California this October when we went to a little tiny alley Mexican restaurant recommended by our Pitzer College tour guide. They quickly were the requested birthday food for my oldest who turned 18 a few weeks later.
Then they were the perfect vehicle for leftover Thanksgiving dinner! Corn, butter, and cranberry sauce? Yes please!
This recipe was adapted from the newest edition of Joy of Cooking.
Bean and Cheese Tamales
 Prep Time 2 hoursCook Time 1 hourTotal Time 3 hours
Ingredients
- 1 cup beans
- 1 clove garlic
- 1 bay leaf
- salt to taste
- Cumin and chili to taste
- 1 cup each cheddar and mozzarella cheese, blended
- 3 cups masa harina
- 2 1/2 tsp baking soda
- 1 1/2 tsp salt
- 2 1/2 cups chicken or vegetable broth
- 1 cup salted butter, softened (lard is traditional fat for these; can go vegan with Earth Balance)
- 12-18 individual corn husks
Instructions
- Bring beans to a boil and let stand. A few hours or overnight later, rinse and fill with fresh water, add garlic and bay leaf and boil for about 1-2 hours. You may need to add more water as they boil on medium low heat with the lid off. Salt, cumin, and chili to taste. I added about 2 tsp salt and 1/2 tsp cumin, and 1/4 tsp gochu powder for this recipe.
- In a large shallow container, put corn husks into hot tap water. Let stand for 45 minutes and drain right before you start building your tamales.
- Mix dry dough ingredients together in a medium bowl. Add hot broth and mix until combined.
- Beat softened butter in a separate medium sized bowl on high until creamed.
- Add dough one golfball size at a time while beating on high until all dough is incorporated. You want the consistency of mashed potatoes.
- Assemble tamales on a cutting board. Place one or more damp corn husks down. Add about 1/3 cup dough and spread evenly with your fingertips to about 5” square. Top with 2 T beans and about the same amount of shredded cheese. Be sure to spread the filling out lengthwise so every bite will have some filling. Leave about an inch or more on both the top and bottom of the husks for folding over.
- Gently round the tamale up and pinch the ends together slightly with your fingers and overlap any husk you can to seal it lengthwise.
- Next, take some precut twine (about 8” for one side or 16” for a double wrap), fold up one end, and tie it closed with the twine. I usually tie both ends in but it works to only tie one end. The base of the husk is the end to tie first.
- Once you repeat this (it takes about 20 minutes to assemble them all, place in a steamer and steam for one hour. Let cool for about 10 minutes before serving as they will be piping hot!
-

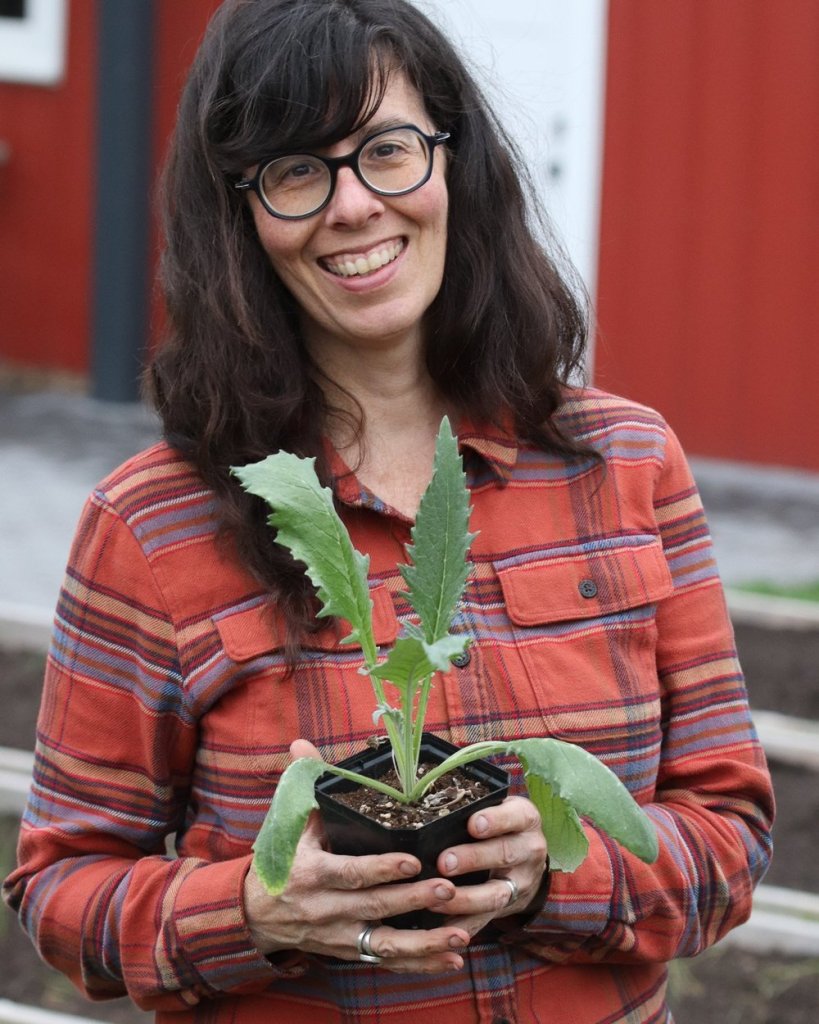
Artichoke Grow Guide
Artichokes have always been more of a fascination to me, something I’d wanted to experience up close, in person, and across the seasons. And that’s why I decided to plant them last year.
Truth be told, I bought the seeds in winter 2021, then forgot to sow them in 2022, so it took an extra year to remember they were in my possession and to time it all right.
This guide should give anyone growing in a cooler zone the skills and timing they need to get ‘chokes in summer.
About Artichokes
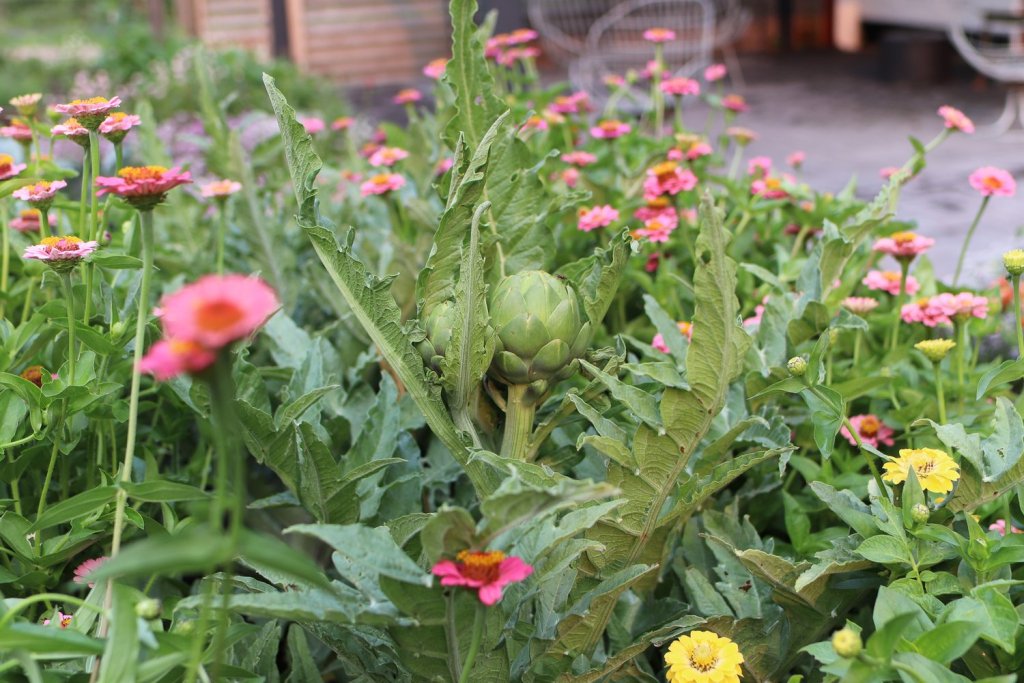
Artichokes are thistle-like perennial native to the Mediterranean that is a domesticated version of cardoon. It’s in the Aster family, so related to flowers including zinnias, sunflowers, cosmos, and prairie plants like black-eyed susans and New England asters. It puts out massive, sometimes 3’ long, leaves that are a silvery green, deeply veined and pointy. Some varieties can be a bit thorny, a nod to their cardoon heritage.
Like most perennials, it doesn’t usually flower the first year — and that’s why it’s often tricky to grow it in cold climates, zones 7 and colder, where it’s not winter hardy.
Varieties
There are lots of artichoke varieties out there, but I am listing just a few that are well-suited to colder climates. If you’re in a warmer zone, you have more variety to choose from. Imperial Star was the first such improved artichoke for northern climates, producing ‘chokes in the first year.
- Imperial Star (OP)
- Tavor (OP)
- Green Globe Improved (OP)
- Wonder (F1) – High Mowing, patent utility variety
I’ve only grown Imperial Star, but I’d guess Tavor would produce similarly for me, given it’s an improved Imperial Star. Seeing as how most of these are open pollinated, I don’t see the need to purchase a hybrid variety, especially one that has a 20-year patent utility (read about that here).
Sowing Tips
Artichokes are cute little seedlings. They do need a good indoor head start — up to 12 weeks, but 8 is sufficient in my experience.
Sow them around the end of February in zone 3 or 4. There’s no need to sow them any sooner. I started ours on February 15 last year, and produced chokes by mid-July with some key cold exposure in the seedling stage. This year I’ll sow them in the end of February, along with my earliest flat of brassicas.
Sow seeds 1/4” deep in 2” soil blocks or the equivalent size pot. Although they need cold exposure to produce buds, they need warmth, like most everything else, to germinate, so be sure to have your seedling mat on once you sow them. They might be a little slow to germinate (over a week).
Potting Up
About 4-5 weeks after they’ve germinated, pot them up into 4” (newspaper or plastic) pots — or a pot of at least double the size they started out in. I know it’s time to pot my plants up when I am seeing a lot of roots coming out of my soil block. This will depend on a few things: how long you keep your lights on (read: how much the plants are photosynthesizing), how warm your grow space is, and how much nutrition the plants have access to. If there’s not enough light, it’s cool, or the soil lacks nutrients the plants will not grow as fast.
This should give them ample space and sufficient nutrition (be sure the soil mix has lots of compost mixed in) to get them ready for your garden bed.
I like to pot my seedlings up into a potting soil mix that is about 1/3 – 1/2 compost (pretty much for all seedlings). This eases the need to fertilize the seedlings.
Vernalization & Hardening Off
Cold vernalization is the process of exposing plants to cool temperatures to promote flowering. This sets their biological clock to think they’ve gone through winter and are now in their second year when they normally produce their crops/flower. In order for us northerners to grow artichokes as an annual, they need 10 consecutive days of cold exposure in spring before they are transplanted. This can happen anytime after germination and before transplanting, so consider your long term forecast carefully.
We were blessed last spring with a long cold stretch in both April and May. It felt too long, but once it warmed up it was summer. (Read: we sort of skipped spring.) I used those weeks in April to set my artichoke seedlings outside on the deck, protected from frost but exposed to temperatures in the 40s for a few weeks. If memory serves, I think it even was cool when I transplanted them. May was dreary and cool.
And here I thought I used newspaper pots, but clearly I used plastic pots for these seedlings!
This is exactly the kind of weather these plants require to fruit as an annual: they need to think they’ve just weathered a Mediterranean/Californian winter. Whether you get there by erecting a little tent on your deck or keeping them in your cooler garage for a 10 days or so, this is a required step to go beyond the gorgeous silvery foliage and achieve the crowning success that is an artichoke bud/flower.
Plant Spacing
If grown as a perennial, artichokes need spacing of 5’, and end up needing to be divided every few years.
As an annual, I planted ours 3’ apart with Thumbelina zinnia tucked in at the edge of the bed. It was a bit rambunctious, but I figured this isn’t like potatoes or carrots, main winter staple foods for us, so the interplanting was intentionally flower-forward.
Harvesting & Cooking
Harvesting artichokes is sort of like harvesting broccoli: you watch it grow and have to decide, is today the day it’s as large as it will get before the flower starts to separate, or can I push it one more day? And they are quite similar, both being flower buds we are consuming. You want to harvest them when they are tight heads. My biggest one was probably the size of a tennis ball.
You might get 3 or so large ones, and then, depending on the season and how much space you gave the plants, should get a few more smaller ones. Just like with broccoli, I suppose, where side shoots are smaller than the main head.
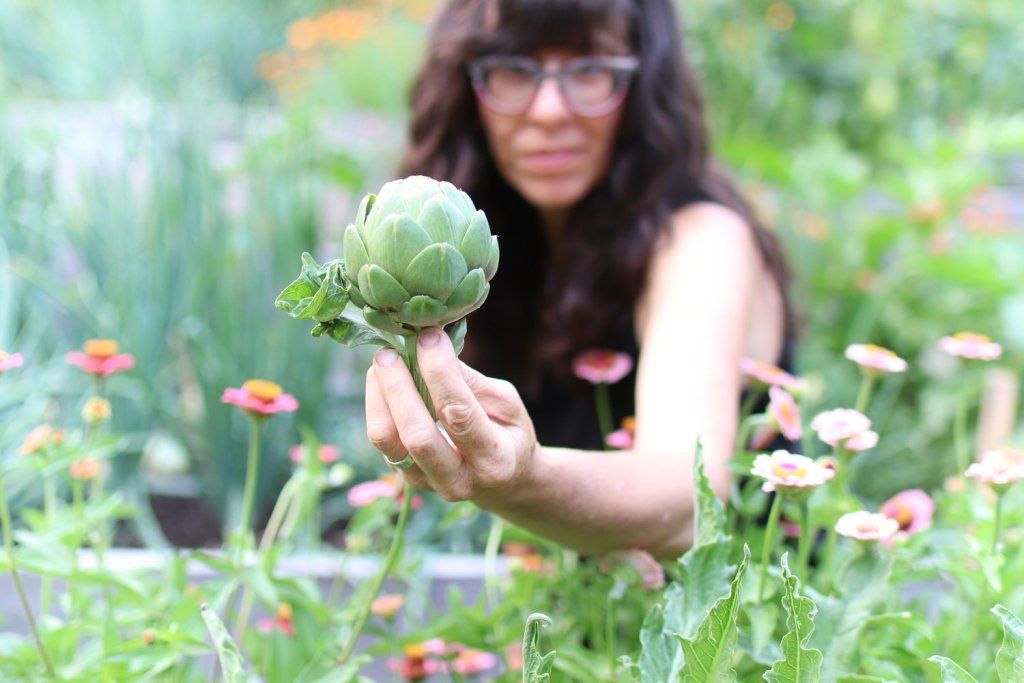
Clip the artichokes just below the flower bud, with about 1” of the stem attached.
Steam in a double boiler for about 40 minutes with some lemon juice mixed in to prevent browning. Enjoy with an aioli or butter as a dipping sauce for the petals.
-
Garden Goals for 2024
I’ve been hatching some of these plans since early 2023, to be honest. Other parts of my goals are a response to what ended up being a challenging year physically for me. And others still are set to protect my creativity and attempt to restore myself and work toward a livelihood that is fruitful without ongoing burnout. Hope these goals help you reflect on your own journey in and out of the garden.
More Shelf-Stable Crops
My affinity for growing shelf stable foods is only increasing. We’ve barely scratched the surface of these foods, having grown cornmeal and dry beans for many years now plus all the peppers we grow and process as spices. And of course our sesame seeds and peanuts.
This year I’m adding Red Fife wheat (from Experimental Farm Network) to our garden. Dovetailing with my goals for my physical health, having more of the garden in these harest-once and process later type of crops is strategic. I am looking to pare back the amount of the garden in indeterminate plants like our summer vining heavy producers. And I hope we enjoy growing and baking with this wheat. Truth be told: we’ve done the math and for our family’s sourdough needs we would need 1/4 acre of wheat to supply us with our hundreds of pounds of flour we use annually, so this is more of a novelty than a true homestead goal.
Breadseed poppies have been at the top of my wish list for many years. I’d hoped to have them in the garden last summer but it didn’t happens. My first year growing them in 2019 yielded less than a tablespoon of poppy seeds from many plants, so I’m hoping for a better crop this year. That was a very very wet summer, so we will what we get in 2024.
Sweet potatoes are another crop that I’m excited to bring back to the garden. It takes a long time to grow, is super disease and pest resistant (huge bonus!), and once cured store well in our dry root cellar. In fact, over the holidays when I saw a massive stash of locally grown sweet potatoes at my coop, I bought a dozen of them and put them in our root cellar. I will be growing slips from one of them later this winter (I’ll show you how to do it too) instead of ordering them online. Sweet potatoes are clones just like garlic, so I know because a farmer in Wisconsin grew these that they will be a variety well suited to my garden too. If you see some local sweet potatoes at your coop, pick some up and store them in a cool, dark closet and we will grow them up together.
The Direct Seeded Garden
I am also taking my direct-seeded experiment to the next level this year. My goal is to record my efforts more thoroughly, and compare harvests. This supports my personal goals for the year, and might free up some time tending indoor seedlings. At least that’s my hope. I’ll be direct seeding more brassicas and other crops, using our cold frame, in late winter, as well as doing tomatoes, tomatillos, and I’ll stubbornly do more peppers this year too. I sort of want to try a whole growing season of only direct seeding, just to see what it will be like. I think it could be an interesting journey. And worth writing about.
Seed Starting Experiments
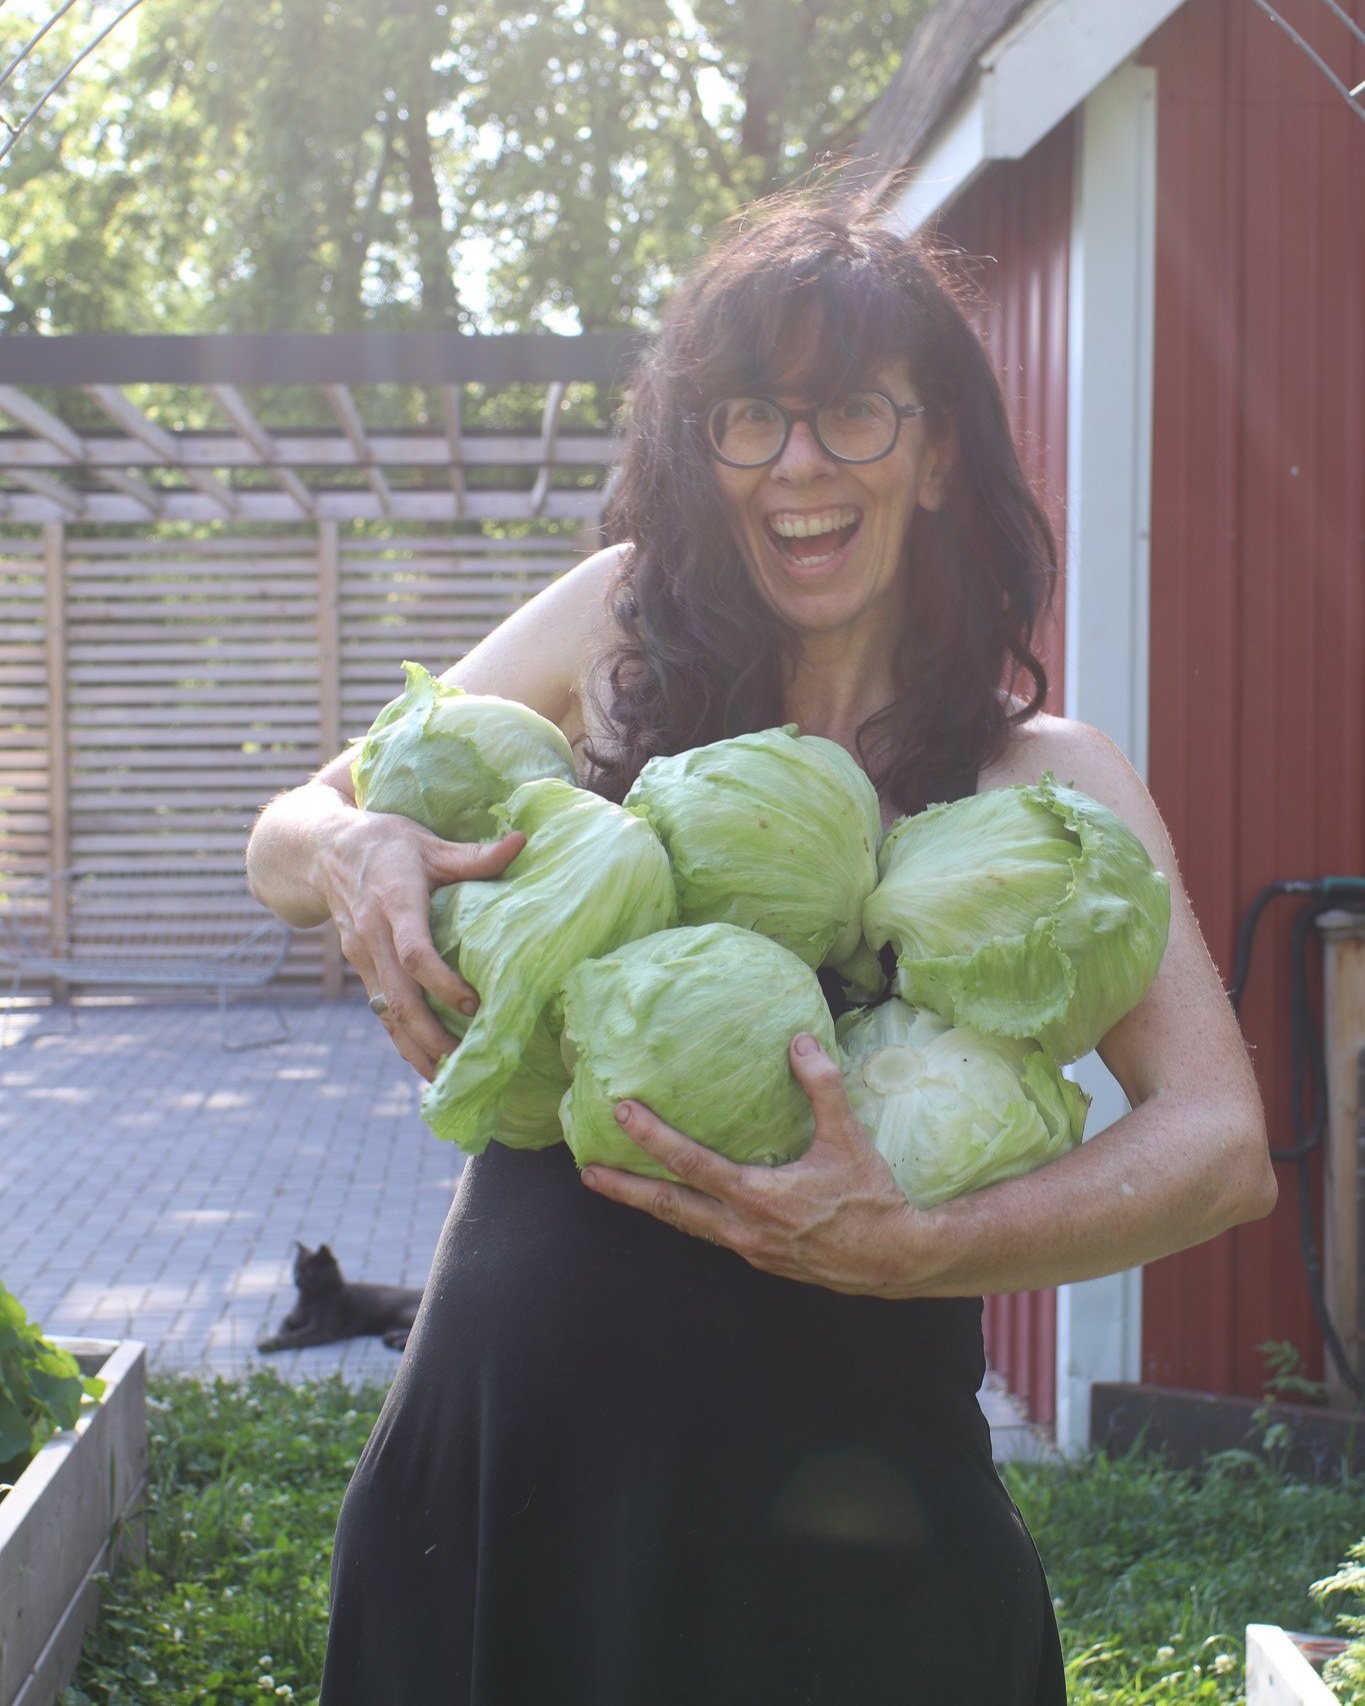
I am also following up my peat-free seed starting attempts with another round of trials. Coco Loco was great for most things, but also terrible for others. I had almost NO iceberg lettuce last year, and it’s because of coco loco. I tried growing it in a peat-based soil block and they germinated quickly, consistently, and did great. Although it was too little too late and we barely harvested any (the late summer 90-degree heat waves certainly didn’t help my cause)
More Flowers
Continuing with my theme of health and wellness, why not grow more flowers? With one teenager college bound, we will be figuring out how to grow the right amount of food for us. I think the garden might be bigger than we need it to be. I’m giggling just typing that. And after a week away in California to come home to a garden as expansive as ours, I am asking myself what kind of crazy did we get ourselves into. The solution is simple: smaller plantings of vegetables and more zinnia, gomphrena, and my favorite pink nasturtium!
Front Entrance Renovation
My office view is of our front entrance to our house. It’s got a very tight turnaround, an imposing black walnut, and oodles of potential. We’ve basically killed 90% of the plants that were there when we moved in. We have one lilac left, and a lot of weeds, safflower from the bird feeder and many dead plants. I am going to give this area a light remodel this year. It drives me crazy. I plan to start perennials (prairie dropseed, butterfly weed, and meadow blazing star) along with tons of extra zinnia for this space. It’s probably 500 square feet or so. For the butterfly weed and blazing star, I’ll be cold stratifying the seeds this week so I can germinate them in March. I’ll share this in my stories where I’ll go into more detail.
We need to heavily weed, pull out the cobbled together drip irrigation, rake out the wood chips and bring in compost. We have bigger hopes and plans for this space, but they are 10 or more years off and I need some kind of beauty here in the meantime.
Above All, Health First
I’m turning 50 in a few weeks. Decade birthdays invite deep reflection and often uncomfortable awareness of where we are along our path. It was a dark few weeks in fall when I sat with the self pity after acknowledging I’m not where I want to be and easily more than halfway through life’s journey. After I picked myself up, I committed to my health. There’s no shortcut for this, like buying starts instead of starting from seed. It’s all on each of our shoulders to take care of ourselves, and the world doesn’t stop competing for our time and attention, especially not our devices.
Adding to the aging, I’m confident this is also the calendar year I will officially be in menopause. Directly tied to this reality is that I am struggling with my weight; the pounds pile on easily, and I haven’t been able to shed them like I used to in my mid 40s. My knees are both on their final dances before I start to consider knee replacement surgery. Extra weight exacerbates knee pain and limits my mobility. So my number one priority this year, possibly even above the garden, is my physical well being.
I do routinely weight lift, a key to reducing age-related sarcopenia (loss of muscle mass, which thus lowers your metabolism and puts you at risk for things like osteoporosis, which runs in my family). But cardio, something I once did for 1-2 hours a day when I was in my 20s, size 4, and 30 lbs lighter, is something that I’ve long hidden in a dark corner of a closet since becoming a mother 18 years ago. I am not naturally a size 4, and maintaining that weight was a part time job, so that’s not my goal. There’s a happy medium where I feel healthier than I do today.
It wasn’t until during covid when we got our peloton that I started to revisit cardio workouts. When I do it, I feel physically, mentally, and spiritually better, the whole day long. And when I don’t do it, the shame and guilt work as effectively on my mental and physical and spiritual health. It can be challenging for me to be consistent. I often have setbacks like flare ups from my fibro/EDS (not sure which it is anymore), and then I lose my stride. Gardening season creeps in and I end up spending my day planting, harvesting, processing, photographing, and chasing cabbage white butterflies.
But if there’s one thing I do right this year, it’s prioritize my body so that I can give it its best shot at a great decade ahead. I’ve already ridden the bike today, and will be going on a 3 mile walk early this afternoon. I’ve even invested in insulated coveralls so I can keep walking when winter eventually descends and the wind chill dips well below zero. Join me in carving out an hour a day (or more) for physical activity. It might be the hardest and best thing we do all year for ourselves and our gardens.
-
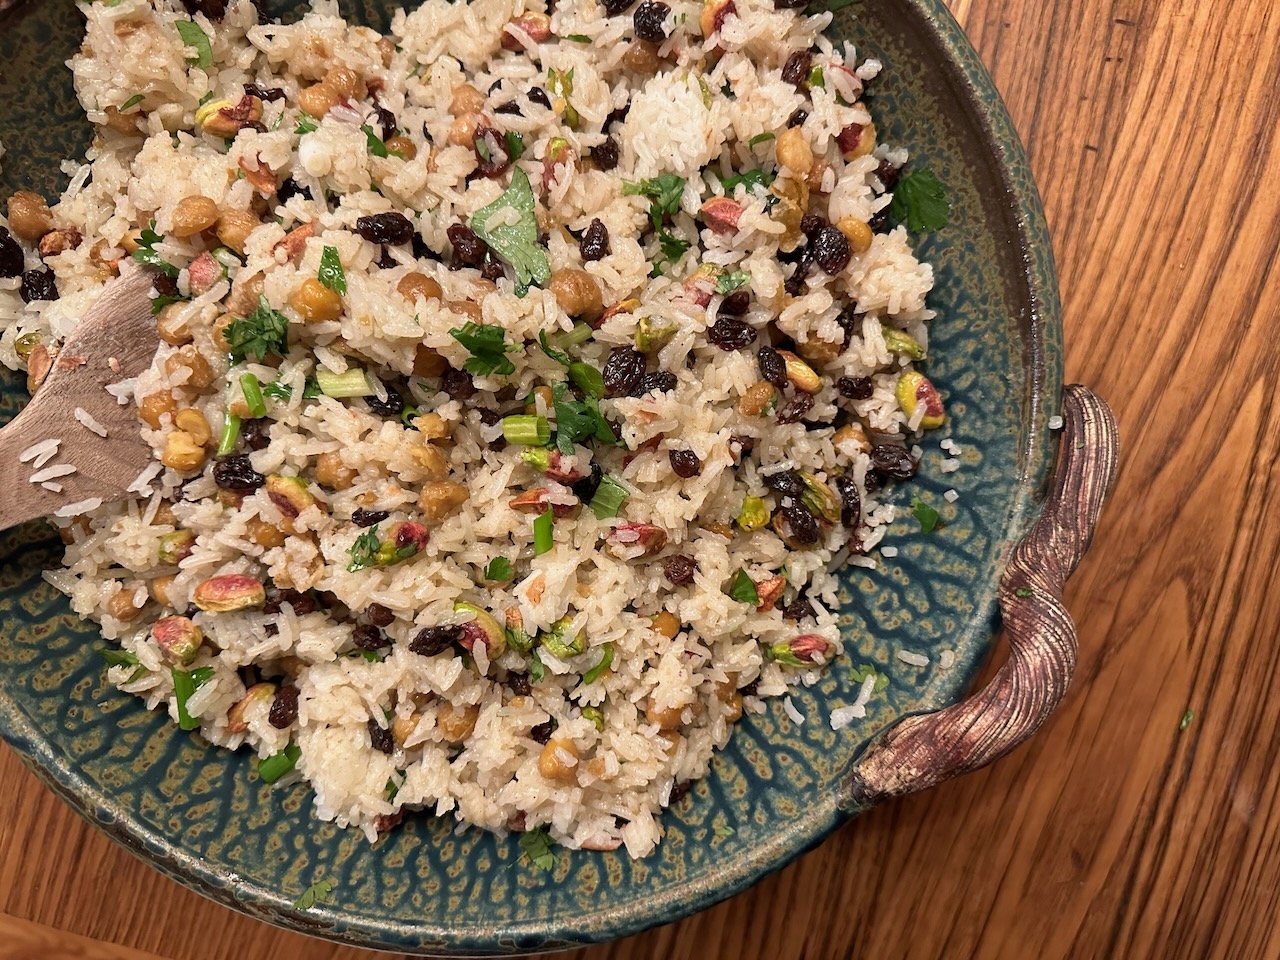
Moroccan-Inspired Rice Pilaf
This rice is a favorite of our family and anyone who tries it. It’s dairy free and vegan and a complete protein and tastes amazing. I hope you enjoy this. It pairs well with so many dishes, but originally we made it to accompany a chicken tagine.
Moroccan-Inspired Rice PIlaf

Ingredients
- 2 cups jasmine rice
- 3 cups water
- 1/2 tsp salt
- 1 32 ounce can garbanzo beans
- 1 cup raisins
- 1 cup pistachios, coarsely chopped
- 3/4 cup minced cilantro
- 3 minced scallions
- 1/2 cup avocado oil
- 6 T freshly squeezed lemon juice
- Zest of 2 lemons
- 1 tsp honey (or to taste)
- 2 tsp cardamom
- 1/4 tsp cinnamon
- 1/2 tsp salt
Instructions
- Make dressing: place avocado oil, lemon juice, zest, honey, cardamon, cinnamon, and salt in a container and immersion blend until emulsified.
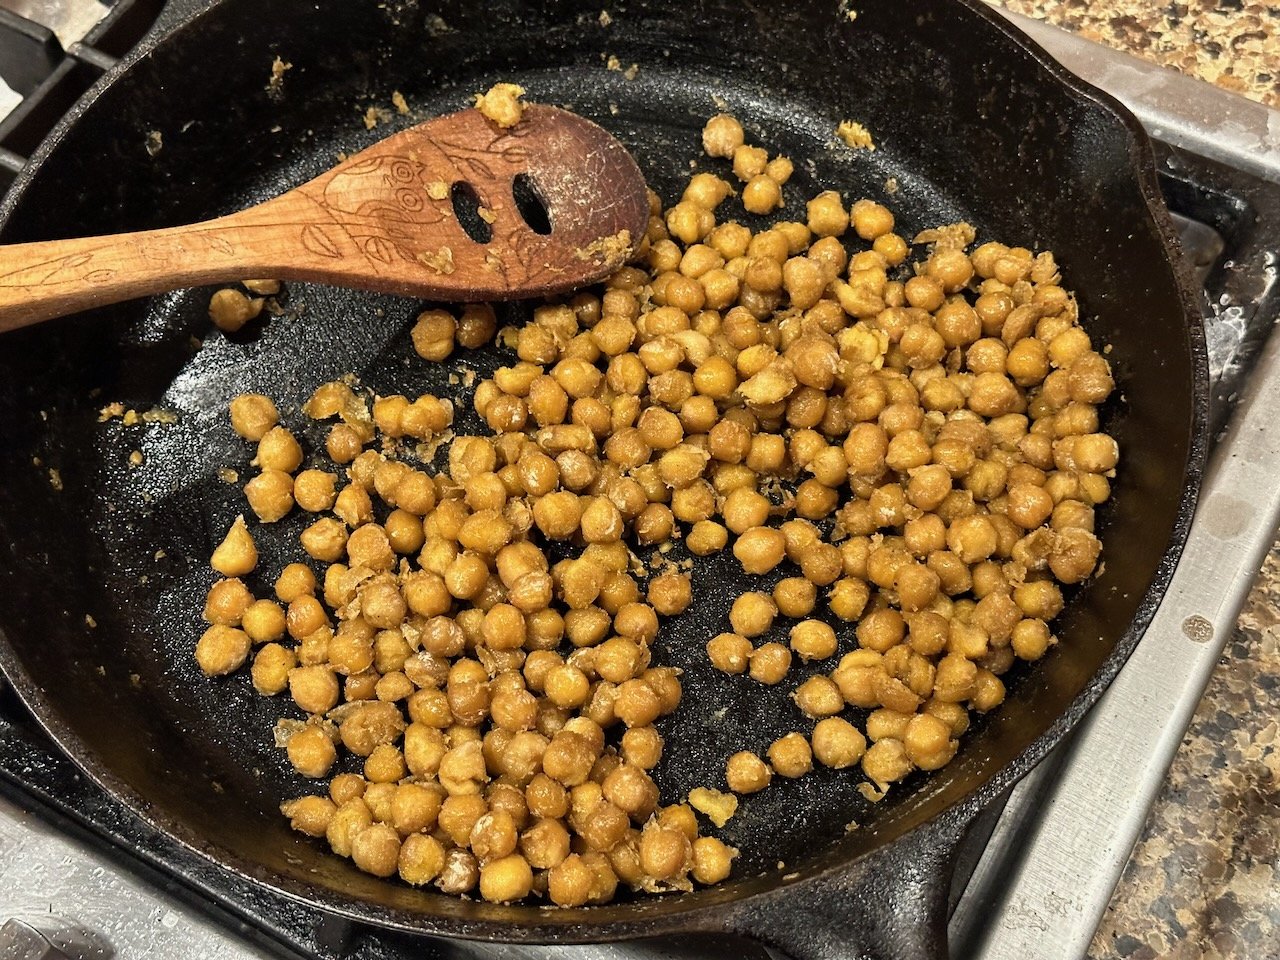
- Drain the garbanzo beans and run in a bowl of water, removing as many skins as possible. Let drain and then start cooking them in oil on medium heat (your preferred vegetable oil) until browned. I usually do this in 2 batches so they all have plenty of contact with the pan. Drain onto sheet pan lined with a paper towel.
- Rinse rice at least twice in the cooking pot you’ll be using. Drain out as much water as possible. Try to get the water to run nearly clean but don’t over rinse it.
- Bring rice, salt, water to boil and reduce to low. Cook for 15 minutes. Let stand.
- While the rice is simmering, chop the pistachios into a medium sized bowl, add the raisins. Chop cilantro and keep in a separate bowl, along with the scallions.
- When the rice has been left standing for at least 5 minutes after the timer went off, open and fluff it with a fork to loosen it up. Transfer to the bowl you will use for serving. Add pistachios and raisins. Mix in dressing until fully incorporated. Finally, mix in the cilantro and scallions
-

2024 Seed Shopping
Well, I’ve done it. Ordered what I think are more than enough seeds for 2024. Let’s see what ridiculous things I ordered.
A few themes you’ll notice is that I’m working on trialing more brassica varieties here. And I continue to try to consider more spices, herbs, and seeds we can grow here too, so you’ll see that as well.
It started at Siskiyou Seeds in southern Oregon, because I had a tab open from earlier this week, and surprisingly, my cart still had the 3 items I’d added on a whim. I was most excited about the Spigariello Broccoli, a version harvested for their tender leaves. I also added a few extra broccoli varieties, then found Dijon mustard, Dahlia seeds, Dwarf greek basil, Mrihani basil, Fennel seeds, Perilla, Stella blue winter squash, Rosa di Milano onions, and Zargana of Nestos dry beans.
I moved north to the Willamette Valley of Oregon and placed my Adaptive Seeds order. There I resupplied my Gernika sweet paprika seed, grabbed a few more breadseed poppy varieties, found a new Gochu to try (Korean Hot pepper), Nigella (black cumin) seed, plus several open pollinated onions and leeks. I’m excited about the Newburg onion and hope it will replace Patterson, which is a hybrid. Anytime I can swap an open pollinated for a hybrid I’m growing, I’m all for it. I really hope these onions impress me this summer.
Then I jumped over to Johnny’s Seeds, and I was a bit disappointed that a few of my favorites were out of stock, but I made do. I resupplied my gem marigolds, strawflower (Seashells Mix), gomphrena (added Audray Purple-Red and got more Raspberry Cream), Halona cantaloupe, tatsoi, Oregon Giant snow pea, KN Bravo daikon, Red King 2 radish, Red meat radish, and a few new watermelons because the didn’t have my Mini Love: Ocelot and Century Star, both hybrids.
Back to Oregon, I jumped over to Territorial Seed. They are where I first tried mustard greens and iceberg lettuce. At this point, I ended up double ordering a few things, like I added Tah Tsai (it’s a tatsoi, which I’d just ordered from Johnny’s), Miz America mizuna, Dragon Tongue mustard greens, Wasabina mustard, Regency iceberg lettuce, Sorrento Raab, and … drum roll … fenugreek seed. I couldn’t resist that one!
I shopped Fruition Seeds for some very very expensive items: turmeric and ginger. I usually just buy ginger from the coop but I am determined to do a side by side growalong in 2024 to see if the seed really does perform better. I also bought more peanut seeds as well as an open pollinated watermelon, Sugar Baby. So now I’ve got too many watermelon seeds.
I didn’t find Fortex pole beans, our old favorite, at Johnny’s, but I did find it at a local MN seed company, North Circle Seeds. I see their seeds in our local coop and love their Musketeer melon so I ordered Fortex pole beans (trying them to see if the Japanese beetles won’t devour them next year), but while I was there I checked other things out and added Red African eggplant and Lina Sisco Bird Egg bean (it’s apparently on the Ark of Taste Slow Food list and is a super short bush bean).
Last but certainly not least, and a company I’ve wanted to support for a few years now, is Kitazawa Seed. I was going for more brassicas, specifically Asian varieties. I ordered a few Chinese broccolis, a Japanese mizuna (Mibuna), more eggplants (Konasu which is super dark black and looks amazing), and Yu Choy Sum seeds, another edible stem, leaf and flower brassica.
I didn’t order any corn, cabbage, carrots, zinnia (proud of myself), potatoes, tomatillos, or tomatoes! I did take the time to go through every seed packet just to be sure we have enough seeds before ordering all of this, too.
I have plans to build more covers for brassicas next summer to hopefully minimize their population here, but I have a feeling they will outsmart me somehow. The good thing is we don’t have any major travel plans (except sending a kiddo off to college, which I can’t even begin to get my head around), so we are really looking forward to a summer in the garden next year and these seeds are making me even more excited to expand our herb and brassica garden next year.
-

Favorite Kitchen Things
I’m not one to run out and shop today. It’s more about knitting by the fire, playing games, and putting away all the special things we used yesterday. And of course, leftovers.
And this post isn’t meant to spur any of you to rush out shopping today, or any day really. But there are some essential kitchen cookbooks and utensils we can’t live without, and today feels like a good day to share all of them with you.
Cookbooks
We have 3 main cookbooks from which we cook. I reach for a cookbook before the internet.
Joy of Cooking, the newest edition (2019)
This book has been revamped by the great grandson and his partner. They have added amazing recipes like kimchi fried rice and really updated the book with some amazing recipes. It’s where I go first when I want to make something I’ve never made like tamales (the recipe is a hit, by the way).
We use it for cakes (genoa, white, devil’s food, olive oil), ice cream (chocolate, vanilla, strawberry, coffee), and crepes. It has plenty of amazing savory dishes too and we use it for baba ganoush, fattoush, basic salad dressings, butternut ravioli, beans, and for learning new methods like caramelized onions (half butter, half olive oil is the key to good browning I’ve recently learned!). This is also where I started from when I developed my ketchup recipe! It really is an amazing resource.
If you only want one cookbook in your kitchen, this one is it. It covers American and ethnic cuisine, and has an extensive baking section too.
The Best Recipe This is a Cooks Illustrated cookbook and is pretty extensively dog-eared and stained. It’s where I go for my yellow cake, northern cornbread, pancakes, waffles, mac n cheese, beef stew, barbequed ribs, and other meat dishes. We were Cooks Illustrated subscribers for about 10 years before we felt all the recipes were started to repeat themselves, at which point we canceled our subscription. We still have many of those magazines too, and one year’s turkey edition remains the method for John to prepare our bird every Thanksgiving.
How to Cook Everything (we have the 1998 edition, purchased used)
This is one of Mark Bittman’s many incredible books. Like Joy, it covers all aspects of cooking and baking, though not as exhaustively. We don’t use it, though it’s definitely one I reach for less often than the other two. We follow his chili con carne, bolognese, and I modify his braised cauliflower. Like Joy, this has a lot of methods in it for learning how to cook.
Here’s a link to the cookbook titles on my Amazon storefront (they aren’t all available as some are older versions currently out of print).
Kitchen Utensils
A few can’t live without items in our kitchen include:
-
fish flipper (once you have one, you won’t want to live without it!)
-
microplaner (I use it for ginger and garlic mostly, but also spices)
-
swivel peeler (ours is an older All Clad version, and I’m only seeing them on eBay)
-
ricer (potatoes, pumpkin, ketchup, tomatoes — a frequently used gadget)
-
vitamix (we use it multiple times a day)
-
dry mill (for vitamix) (for blending spices, grinding corn)
-
kitchenaid stand mixer (from sourdough to pulled meats to candy to cakes)
-
salad spinner (it’s where I keep my salad greens fresh in spring and summer)
-
apple peeler (with our orchard, having a reliable apple peeler and corer is essential. Weekend baked goods are a fall tradition.)
Here is a link to my Amazon storefront Kitchen Utensils list.
-
-
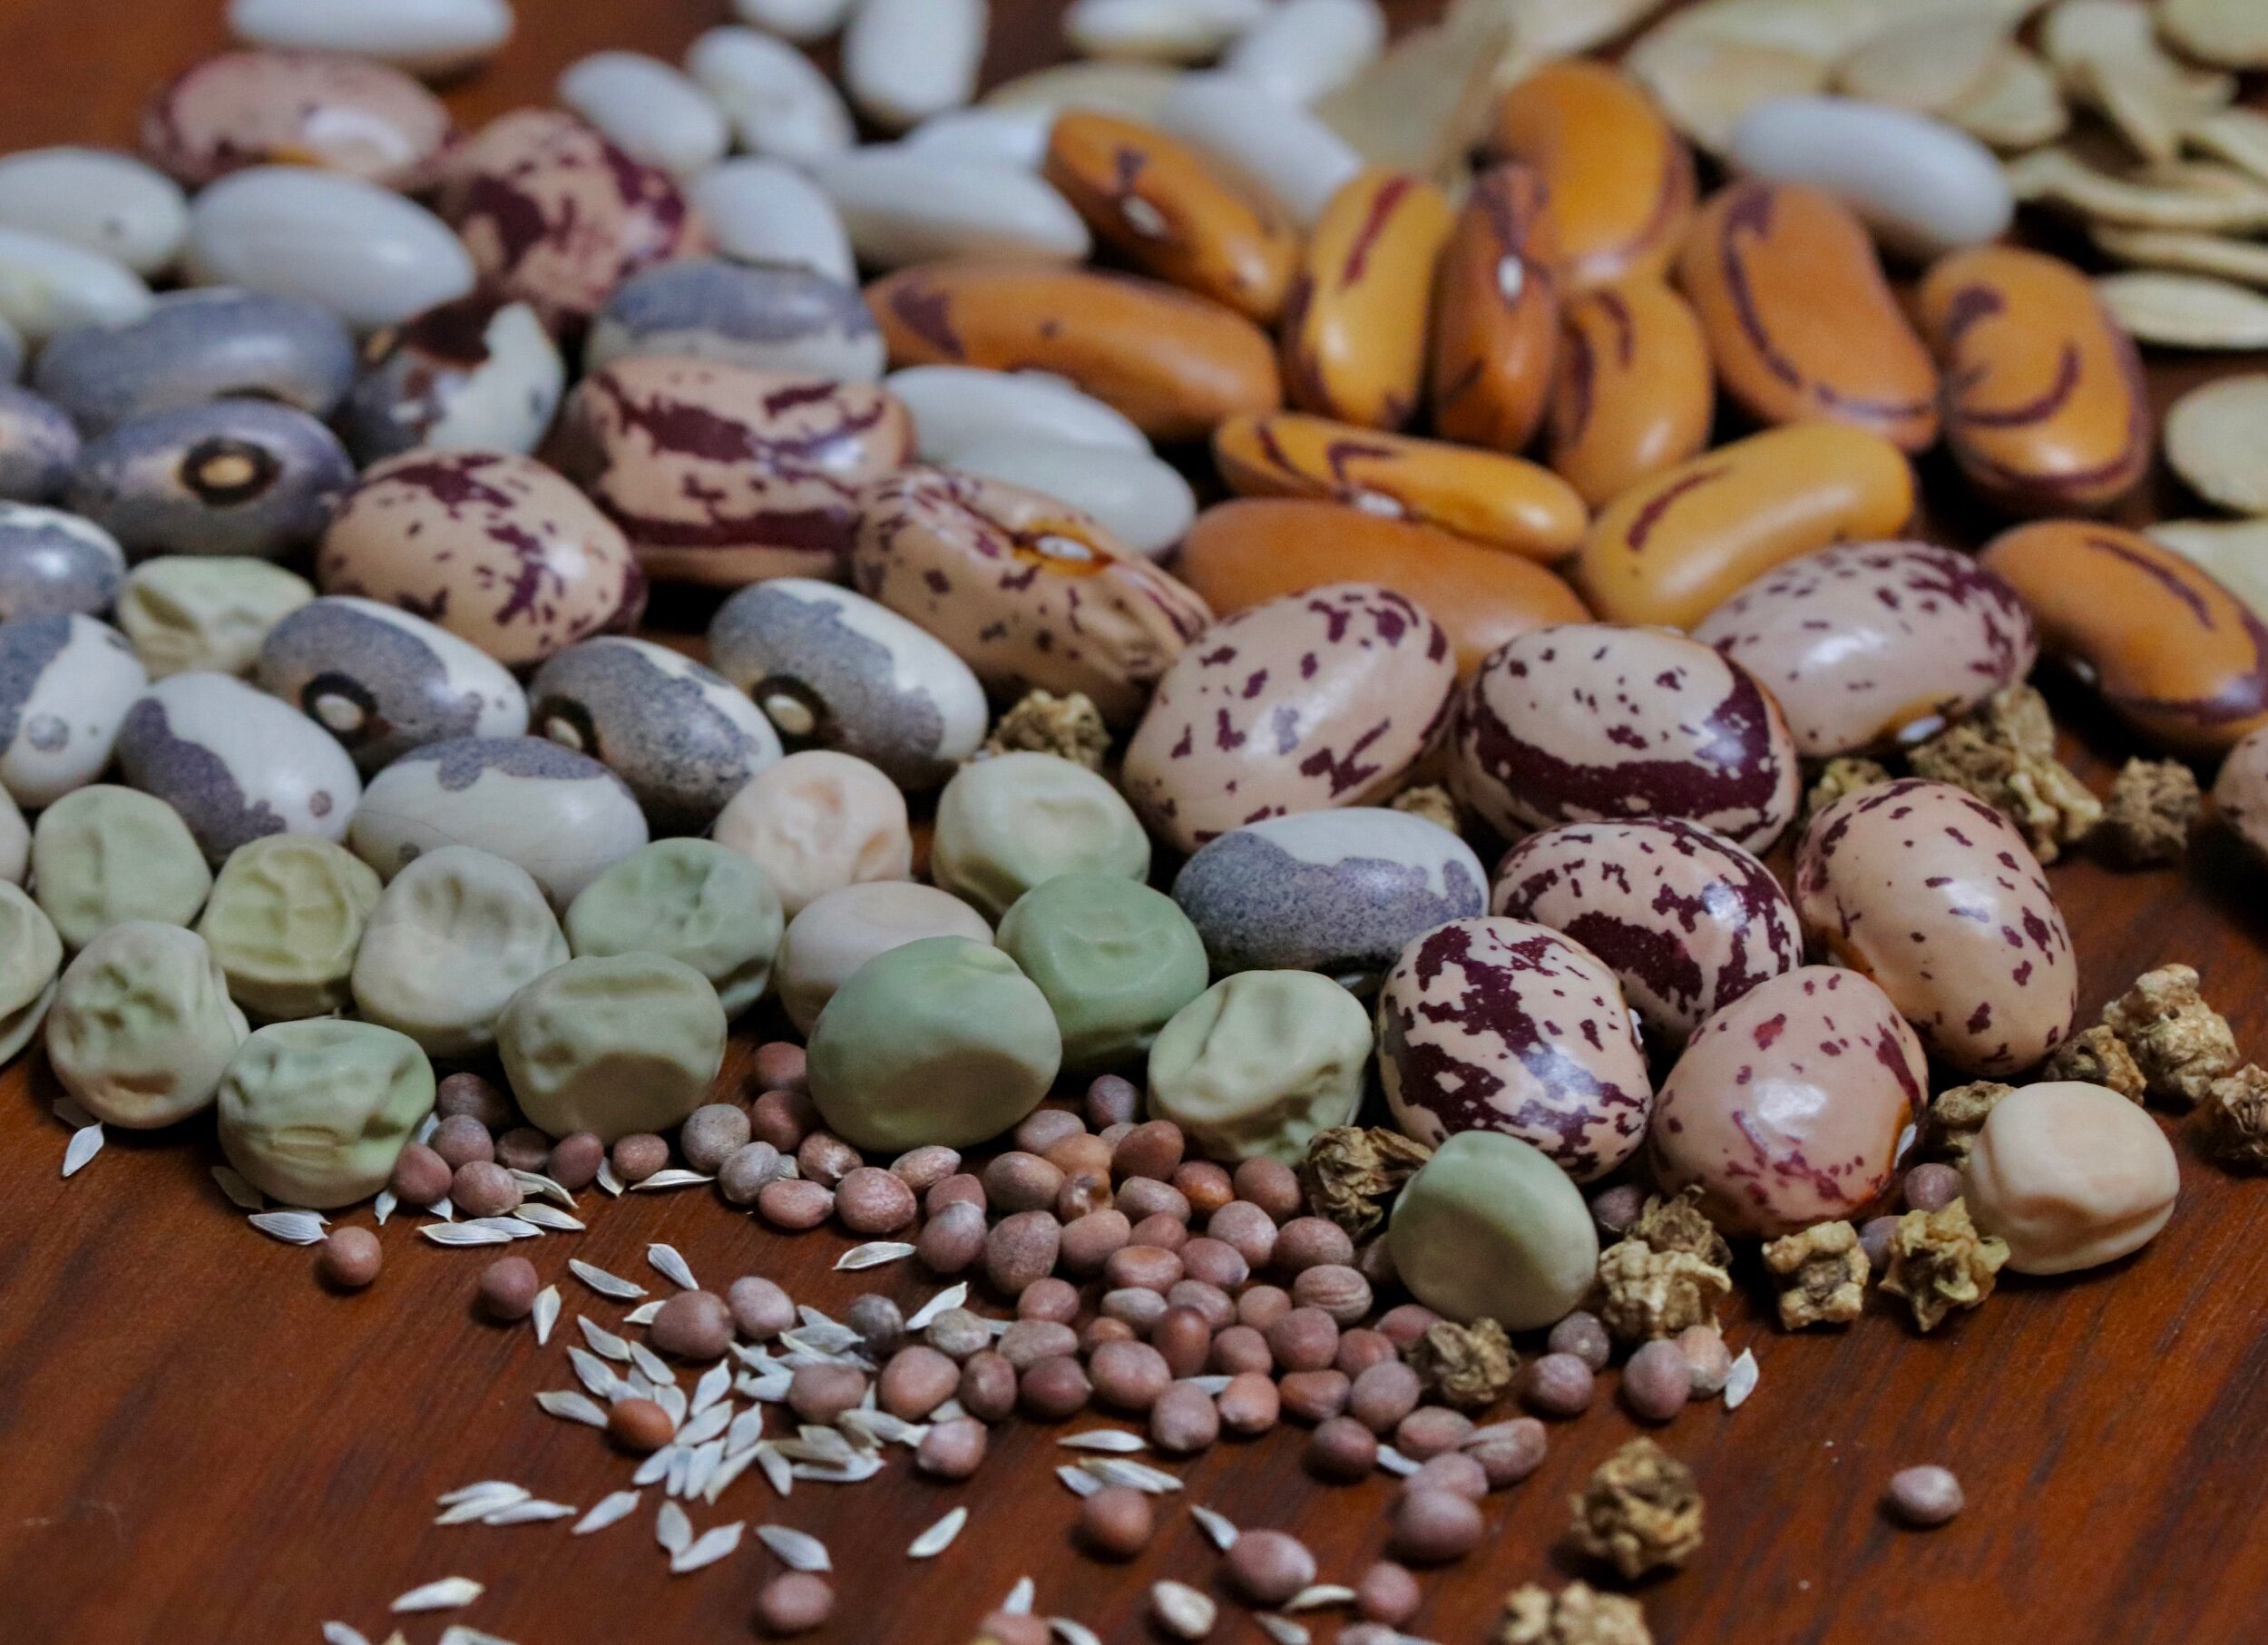
Catalog Season
It’s official. My first seed catalog arrived this week. It was from High Mowing Organic Seeds.
I will page through it by the fire over Thanksgiving, intent on resisting the glossy pages. Undoubtedly, I’ll run for my post-its and a pen, generously circle too many varieties with the right key words, and dog ear the entire thing.
Because of how we store our seeds, they tend to keep for 4-5 years or more. So do I need to buy seeds this winter?
No. Just plain no.
Example: this winter I used the last of my Musselburgh Leeks, seed bought in 2018, They were 5 years old and still sprouting. Leek seeds are suppose to only be viable for “1-2 years”. With proper storage, seeds last much longer.
Part of my job, though, does involve exploring new varieties, trialing things in my garden, and then writing about it, so seed buying in a sense is required work for me. At the same time, we do have a list of favorite varieties that we pretty much always grow, the ones that are not new in this list I posted earlier this year. I will review all the new varieties we grew this year next week, as some will never be grown again and others have found a permanent home among our favorites.
With that in mind, I am often looking with a keen discernment for very specific flowers and vegetables. Heat tolerant brassicas, like an improved broccoli or broccolini, the latter of which I still haven’t spent enough time with to understand how best to grow it here. I am also on a bend to grow a wider range of brassicas, and will be ordering from Kitazawa Seeds for most of those varieties (of course, you’ll be the first to know what I decide to order and why).
Beans well suited to canning or freezing is also bouncing around in my mental wish list, processing I don’t currently do but aspire to someday. Perhaps when our tomato garden is more modest.
One thing is for sure: I’ll be ordering Fortex pole beans again, since our Japanese beetle population precipitously tapered off (they were the reason I stopped growing them). I will likely revisit Kabochas and try to find one for next year, a better alternative to my gorgeous but oversized Musquee de Provence which intimidates the heck out of me (how does one use 46 pounds of squash). Winter squash are quintessential to life here, though, and I have my favorite butternut and delicata already. I probably should just go directly to Row 7 Seeds and order from them, because they have a few lovely squash varieties bred for chefs that I haven’t yet grown.
Carrots, because I grow hybrids, can sometimes switch up on me without warning, one hybrid sunsets and a new variety replaces them. This is how the business churns, and I have come to accept it. It first happened to me with a broccoli variety called Bay Meadows that we used to grow in Oregon. In fact, we successfully grew it the first season of our in-ground, double-dug vegetable garden. We grew it probably until about 2010 and then suddenly I could no longer find the seeds and was so disappointed. That was my initiation into falling in love with hybrid seeds. Some don’t stand the test of time like Sun Gold or Gourmet bell pepper have. I digress.
I did order a LOT of carrot seeds this past winter and have an ample supply of Bolero, which is a stellar carrot variety, Danvers 126, and Mokum, an early variety. But maybe, maybe, I’ll give some other colors a try. Again. Even though I know they don’t taste as sweet as orange carrots because we’ve been down this path more than once.
Or maybe I’ll remember this post and know we have enough carrot seeds for 2024 already. That is also my hope for you as you endeavor into this slippery marketing slope of seed buying season.
-

Organic Pesticide Guide
What to use and when can be an overwhelming experience for gardeners looking to grow organically. Just because thing are organic doesn’t mean it is free of chemicals, or even safe for that matter.
Many organic pesticides are as toxic as inorganic ones. The biggest thing to do is use sparingly and be proactive with understanding the thorniest pests’ life cycles so you can target them with minimal impact on other insects. Also, best practices include treating in the late evening or early morning hours with light to no winds, and without rain in the forecast.
I generally only use microbial pesticides, in addition to minerals. Think Bt, Cease, and kaolin clay. Those are the three we reach for with regularity in our garden. We haven’t utilized horticultural oils or insecticidal soaps here, but I do include them in the guide, though in full disclosure I don’t have much experience with their efficacy.
We very occasionally use Neem in the garden, and don’t use Btg though I would if Japanese beetle populations increased again. Combined, these five are listed on page 1 of the 2-page guide. The second page is a list of mostly oils that we don’t use but seem to have some good applications in home gardens.
Types of Pesticides
Fungicides are effective by preventing the spores from attaching to and populating (colonizing) the leaves of plants. These must be applied proactively, early and often.
Insecticides target and kill larvae and adult insects, and sometimes eggs. They might be effective as a contact insecticide (coating the insect) or when ingested. This varies by product.
Being a Good Gardener
The first way to think about pesticides is: are you going for a preventative or reactive approach?
The second thing to think about is will you try to treat the insect or the plant? Most oils require “contact”, meaning their effectiveness lies in cutting, suffocating, and/or dehydrating the insects and this must be done by spraying them or having them crawl over the powder.
The other main way insecticides are effective is through ingestion, such as Bt. These are sprays that dry on surfaces. There are benefits and drawbacks to both approaches, and I listed the main ones in the guide.
For obvious reasons, if we are dealing with a fungal disease, we won’t be treating an insect (usually), but we will be preventatively treating the plant (eg, spraying Cease to prevent Septoria Leaf Spot from developing on my tomato plants).
Hope this helps you think through what might be best suited for your garden and pests.
-

2023 Garden Review: Missed, and Misses
Well the garden always provides. That much we know. It just doesn’t always provide that which we’d hoped. Or maybe we took a leap of faith and extended ourselves in a way we’d dreamed would be life-changing but it only reinforced that we already had the best approach.
These are the great, expansive parameters in which we grow. The ability to re-define our garden every year is without a doubt why this pasttime turned career has not gone dull, competing for newness and sparkle, it delivers every single year.
Here are some of the things we did differently that didn’t work and the things I didn’t grow that I missed. All these topics are deeply defining our 2024 garden plans.
Needs Work
The Tomatoes
I talk about tomatoes often. We grow a lot of tomatoes. We eat a LOT of tomato-based dishes in winter, hence the tomato talk and growing. Also true: our family size will be changing soon. Our biggest tomato-based fan will be flying the coup, which leaves me sincerely rethinking our tomato square footage.
We used about the equivalent of 3, 4×8 beds for determinate tomatoes this year for 14 plants. The plants, despite our horizontal panels and an increase of space from 30” in parallel rows to 36” offset zigzag type rows, were planted too densely and again were a real pain the you-know-what to harvest. And the disease pressure mounted by late August, around the time the Italian Romas had peaked and the Plum Perfects were just getting going.
I am going to try to grow just 12 Plum Perfects next year, and plant them one plant in the center of the bed 36” apart. It will take more square footage for fewer plants, but I think we will need to start growing fewer tomatoes starting in 2024.
As far as our indeterminates, I am planning on reducing the numbers there too. We had about 4 pastes in that planting, and I’ll likely keep at least 3 Speckled Romans — and then allow myself maybe 7 more plants, 2-3 cherries and the rest beefsteak/slicers. This is a continued reduction of tomatoes in this bed as this year I think I grew 14 there as well.
I attempted — and succeeded — at growing patio (micro) tomatoes along our main path this summer. They were adorably cute, topping out at maybe 24” tall at most, highly productive and would be excellent in containers … yep, you guessed it, on a patio. I will try these on our deck next year and it will allow us to grow one fewer cherry tomato. They were extremely prolific and if I only had a small urban garden, I’d probably be growing more of these and less of the larger tomatoes.
Near Misses
I missed late summer squash. I didn’t plant more in late July and so when I pulled it out to prevent a lot of Squash Vine Borers from pupating in our soil, I had no more squash.
I also succession planted bush beans 3 times but wasn’t very good about harvesting every day and so both the Gold Rush and the Maxibel Haricot Vert got tough, and then I sort of abandoned them. Because the Japanese beetle pressure has subsided, I am going to revisit pole beans next year (Fortex is my old favorite) — and I might try a variety that is good for canning too. More on bean varieties in the winter months.
I think I need to really refine our peppers for next year. We grew more poblanos — and a short-season hybrid at that — and they just didn’t ripen at all (at which point they’d become anchos after smoking and drying). I want more bell peppers too, because if climate change continues to impact my garden the way it did this year, the future for Minnesota bell peppers is looking very very bright.
Complete Misses
How I failed to plant, killed starts, or overlooked crops is really a testament to trying to do too much in any given year.
Parsnips
I just forgot to sow these in May. I am sad because mashed parsnips with my stuffing and other roasted roots was so delicious last year. I will make notes in my sowing spreadsheet so that I don’t forget them. I’ll try to sow them on Mother’s Day along with my buckwheat cover crop to anchor them to a specific time in May that’s easy to remember. They are a late season and somewhat novel crop for me, having only grown them once in 2022 so far. They would be great root cellar companions and store for months in cold storage.
Fall Kohlrabi & Napa Cabbage
Well this was just a complete lack of follow through and overwhelm, with some procrastination mixed in, too. I didn’t get my fall kohlrabi and napa cabbage planted before my knee surgery, and then left them to be devour while desiccating on our patio, much like I did to my fall celery last summer. It’s almost a rite of summer passage to intend to grow it all and watch as a different crop each year falls through the predictable cracks in my system.
Napa cabbage stores like a dream, so I am extra cranky at myself for not following-through on these starts and instead abandoning them.
Wheat
We have Red Fife wheat seeds and I did want to grow some this year as sort of an easy use of space. We’ve done calculations and if we wanted to grow enough wheat for our sourdough needs, we would have to plant the entire garden in wheat. So, for obvious reasons, this is just a novel crop, not one that we will make too much with, though we would use the harvest for some special loaves at the holidays I’m guessing.
In order to make this work, I’ll need to reduce my brassica plantings and/or reduce some other summer planting for next year so I need to. figure out where this will grow.
Poppy Seeds
Poppy Seeds sat out all spring on my kitchen countertop hoping to be sowed — indoors, in a winter sowing jug, or even direct-seeded. Alas, it never happened. But this, like the pepitas and sesame I so enjoyed growing, is a crop that I hope to add to the garden annually for baking needs. Who doesn’t love a lemon-poppyseed cake? I plan to grow poppy seeds in the triangle bed where we grew watermelon this year and interplant with other flowers and sweet potatoes. Like the flowers + watermelon, this combination should work well, and the poppies will be done by sometime in July as the sweet potatoes are just starting to sprawl every which way.
Late summer dill
Probably one of the most disappointing failures of summer is my continually fragile relationship with succession planting dill. And it’s for one reason only: I’ve stopped sowing it, and just let the self-sown dill do it’s thing. This means that I have dill nearly-perfectly timed dill blossoms for the first round of pickles (mid-July), but later in summer (late August and September) we enter the great dill dearth.
So I intend to direct seed dill in the middle of June and again in early July to get us through the season. Dill like to be crowded, so sprinkle heavily and don’t bother to thin them out.
Cumin
I really really wanted this to be a thing I succeeded at, growing my own cumin. It’s probably in our top 3 herbs we use. It’s used in our chili, Latin, Mediterranean, and Asian cuisines. But it just shriveled up and died when I transplanted it. I will keep growing and studying it and hope I can unlock the secret to growing it here. There’s hope, I know I just need more time understanding the plant’s needs.
None of these things broke my heart or ruined our summer. We lived with less dill, using seeds instead of fresh blossoms. We worked around the diseased tomato beds, enlisting the kids to harvest the canning tomatoes. We overdid our fall cabbages, so the lack of napa cabbage is more than accounted for in the heaps of green and red cabbage I’ve put up in the cellar. But I do appreciate the opportunity to witness some common threads through time: that something will always fall through the cracks and that even with failures, abundance prevails.
-
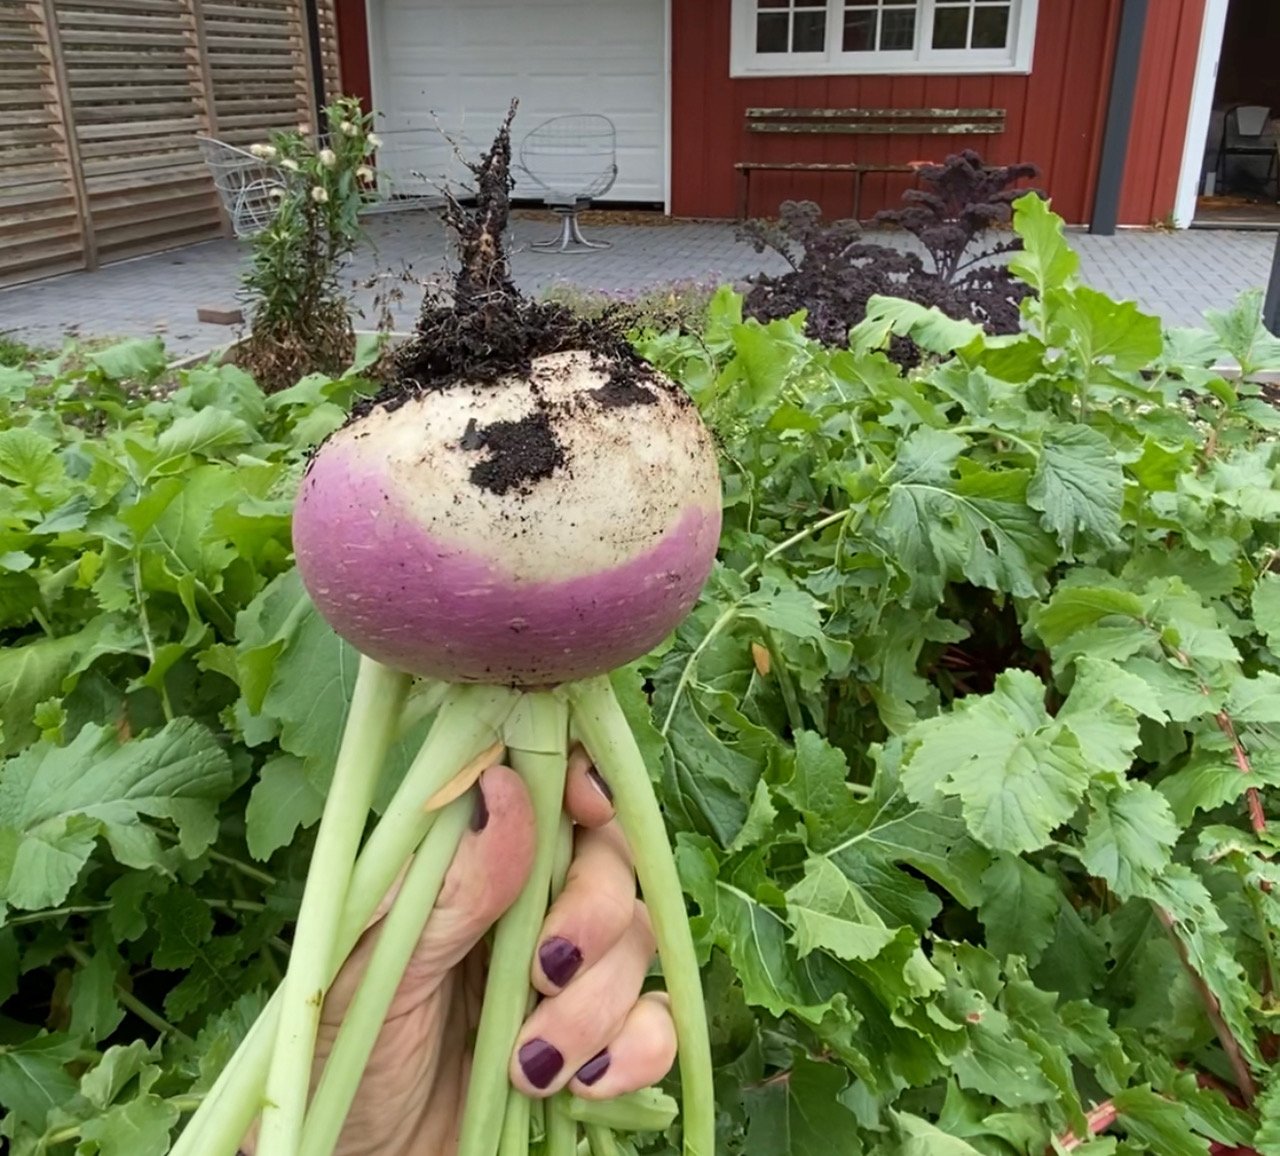
The Harvest Before the Cold
Originally posted on October 19, 2022. Updated October 27, 2023.
With a low of 25 in the forecast for tonight, I am going to be doing a large harvest today of food I intend to store and enjoy this winter. Yes, I could let them endure this hard freeze, but every time I let my cold-hardy brassicas freeze and thaw, I am damaging their tissues, and thus reducing their storage quality.
It’s a fine line between pushing the seasons and preserving the shelf-stability of the harvests. And of course these events occur when I’d rather be curdled up with a book or some knitting or cooking a winter squash soup than bundled up working in 40 degree soil and pulling out cold produce destined for the root cellar.
Now, not all cold hardy vegetables are treated equally in autumn, as some are hardier than others while all share the general property of being frost tolerant. Subsequently, there are stages of harvesting, depending on the low temperature and the crop at hand. So here’s a bit about what I harvested over the weekend (last year) ahead of our very cold air, and what you should prioritize harvesting and/or covering if low temperatures are going to go below 26F.
I did a quick harvest of the best of the root crops, to ensure excellent storage quality of our finest specimens because we grow these foods in fall to last months in our root cellar. While these could have “survived” a low of 22F and as much as I enjoy pushing the limits of food and cold air, the name of the game is nourishment too, so I never gamble with our best looking fall root crops as those are prized winter meals.
For what it’s worth, last fall I did leave brussels sprouts out in the garden and after a night below 20F, they got all kinds of mushy; I’ve decided to pull all but the smallest plants before we dip to 22F on Sunday night, because they are a great winter side dish that 3 out of 4 Cowdens love.
Last fall I also went a little overboard and even covered up our extremely frost-hardy cilantro and spinach because they were growing in between some nice-looking rows of more sensitive fall veggies like salad turnips and radishes, and tatsoi, respectively. While cilantro and spinach can bounce back from lows colder than 15F, their neighbors were the reason why I haphazardly draped some fleece (breathable row cover, AG19 which provides about 4 degrees of protection if installed correctly) over them. The goal was not to prevent frost, it was to prevent temps dipping below 26F. I want the tatsoi to keep well through this cold air for short-term stir fries, and the salad turnips will go into the root cellar eventually.
They probably should have been harvested but I focused on our more fruitful harvests instead. The pounds of food from our daikon and turnips far outweighs our tatsoi and salad turnip harvest, so I focused on our largest returns. I tend to wait until the last possible day to harvest because it’s easier to focus on what needs pulling in the moment, especially because the root cellar isn’t cold enough for all this food just yet.
The trickiest thing with how we store these crops is that the root cellar doesn’t get cold enough until later in November. So we accelerate the cooling with blocks of ice like I shared in my stories yesterday. (Incidentally, they are all nearly melted, but our highs tomorrow are today’s lows, so I will be able to open the space up, turn a fan on and draw in the cooler air over the next 48 hours.)
The biggest question I can’t answer for you is, how comfortable are you with leaving your food in the garden, without knowing for certain how low the nighttime temps will go? Even though your veggies may look “not dead” after a night at 24F, some cell damage occurs from the cold frozen air and slowly shows itself. If I want to store my food for winter, which I do, I try to keep them as free of damage as possible. And, I always always leave some plants to watch and learn. And marvel. We’ve eaten frost-damaged broccoli after a night in the teens. Yes, it’s a little sad, but heck, we stir fry it anyway. I love having this much latitude over when I harvest things. It’s another great reason to grow your own food and push your seasons. There’s always something to learn.

Probably our favorite storage radish, Red King F1. It’s so sweet now that a frost hit it a few times, and we enjoyed them until April this year from our root cellar, though this year I didn’t plant quite as many so we won’t be as lucky I’m afraid.
So in this vein, I harvested our potatoes between rain storms this week, and today will pull all but one or two cabbages, about half of our daikon and watermelon radish, beets, and most of our brussels sprouts. I won’t harvest our carrots, kale, or leeks, because they are super frost-hardy. I’ll grab some carrots and leeks on Saturday or Sunday before the low of 22F, but I’m really not worried about my kale or most of the carrots — just don’t want the carrots getting frozen solid once the soil starts to freeze.
I know from experience temperatures as low as 25F will damage many roots and Brussels sprouts a little, though not fatally. These prized storage-friendly vegetables are destined for our root cellar eventually, to be slowly consumed in late fall and winter, so their storage quality is key for us. However, while we wait for the root cellar to cool off below 40F they will reside in vegetative purgatory, unwashed in large ziploc bags in our basement fridge until the root cellar is consistently under 40F with humidity 95-99%. When I see the weather looks reliably cooler, likely in another week or so, I’ll start the process of packing them in damp sawdust and getting the humidity in there to skyrocket. I’ll share that process in real time in the coming week or two.
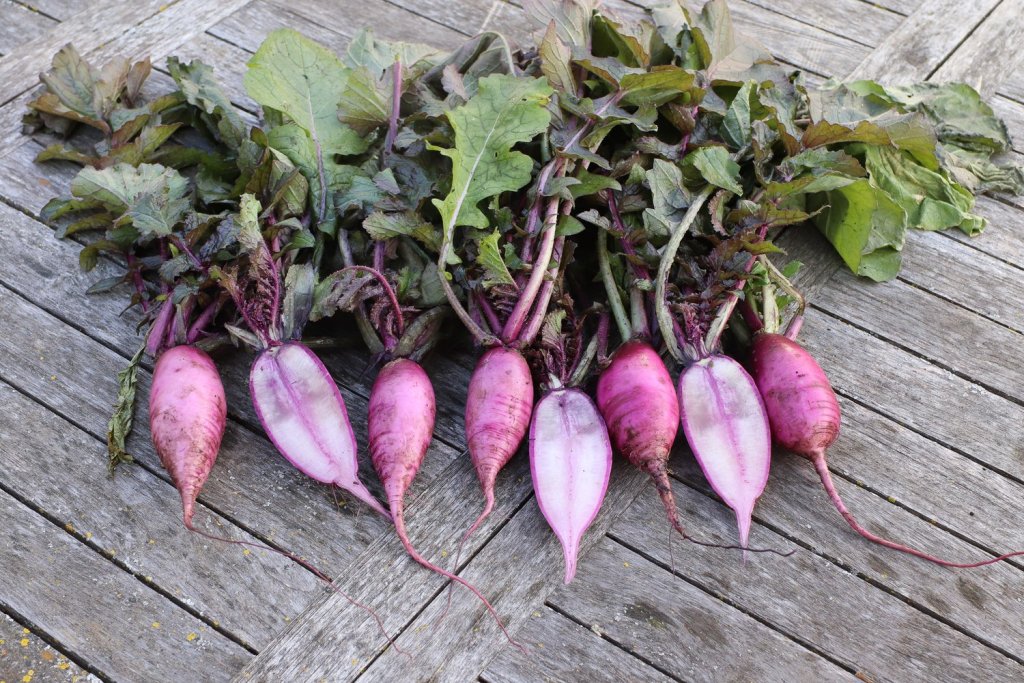
See that line on these roots? I believe that’s how deep the plant froze during a cold night. This was in 2019 or 2020. I was struck by how visible the depth of the frost was, and this has been, ever since, a visual reminder of why while daikon are frost-hardy, predicted temps below 26F is my cutoff for harvesting for maximum storage quality.
-

Blond Brownies
When you want a cookie but don’t want all the fuss, this is my go-to dessert. I love a quick sheet of goodies. One pot to prepare, and ready in under an hour from start to finish.
The first time I had these was the very first day I met my future in-laws, having driven their car back to their house from Corvallis, the one my husband borrowed for a few months before buying his first car. Ginny, my late mother-in-law, had a warm pan of blond brownies cooling on the countertop. Nearly every visit after that first encounter there was a pan of blond brownies awaiting us. They are irresistible.
Yield: 32Blond Brownies

Ingredients
- 3/4 cup salted butter, melted
- 2 1/3 cup light brown sugar
- 2 eggs
- 2 teaspoons vanilla
- 2 cups flour
- 1 teaspoon baking powder
- 1/4 teaspoon baking soda
- 1/2 teaspoon salt
- 8 ounces dark chocolate chips
Instructions
- Preheat oven to 350.
- In a medium saucepan, melt butter and add brown sugar. Let cool to tepid. Mix in beaten eggs and vanilla.
- Combine dry ingredients and fold into the wet batter until just fully combined.
- Spread evenly into a greased and floured 9×13 pan and spread enough chocolate chips to nearly coat the top. As far as I’m concerned, the more the merrier.
- Bake for 26-30 minutes.
-
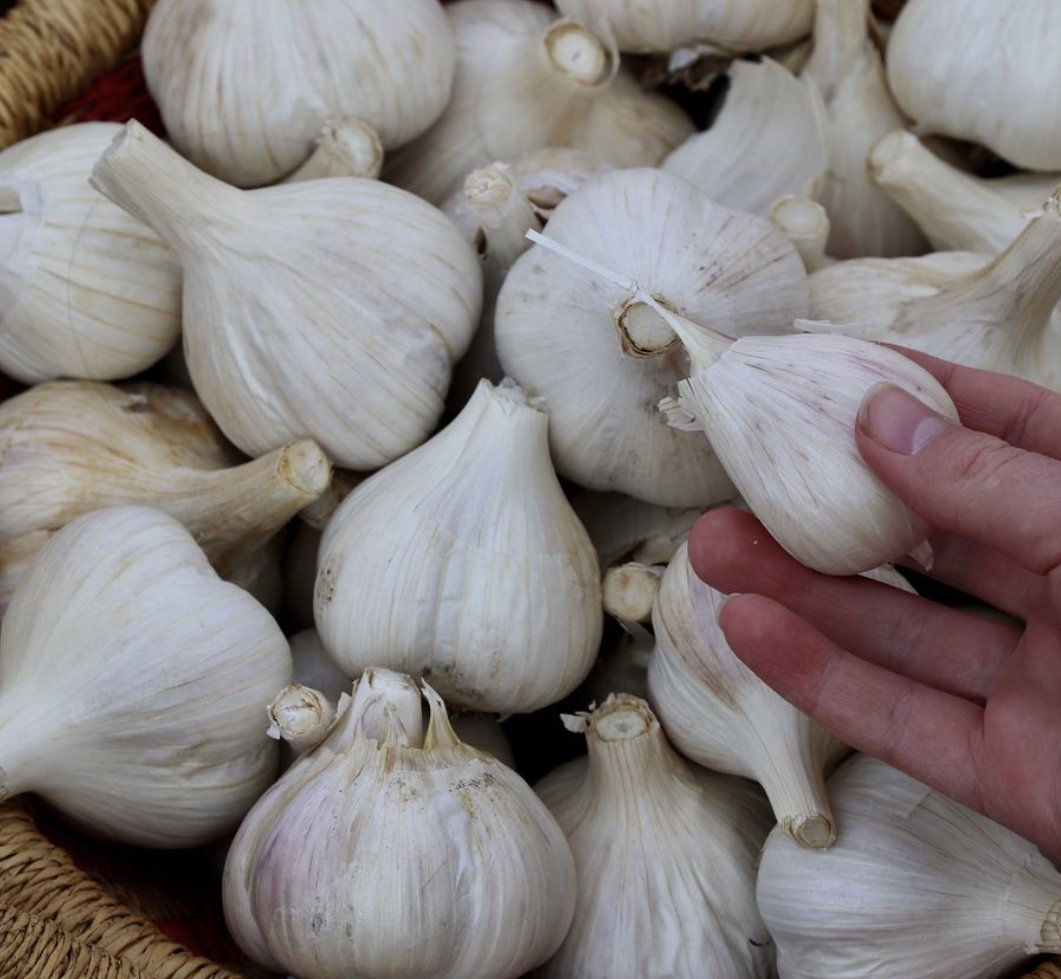
When to Plant Garlic
Probably one of the trickier things is this question of when to plant garlic in the fall. Fall can mean different things to each of us, depending on our growing zone and microclimates. The biggest mistake I see from gardeners is planting garlic too early, so this post is intended to remedy that and help everyone time it so that it’s in the ground at the right time to only set some roots before deep winter hits.
Garlic is a bulb that’s planted from clones and not reproductively from seed, like say a tomato or zinnia. This is largely how garlic is commercially propagated too, the same plant being grown year after year and sold to us as seed garlic. It’s also a bit unusual in the world of growing food in that it needs a cold vernalization period of at least a few months in order for the bulbs to form the following growing season. This is why we plant garlic in the “fall”.
While I read time and again that you can plant garlic after your first light freeze, I recommend waiting several weeks after that first frost before planting — and even longer if your frost happens unseasonably early or you get light frosts yet the ground doesn’t freeze until late December or January (or not at all).
So if you’re in a much warmer zone than me, say zone 6b through 8, I don’t think I’d be planting my garlic until around Thanksgiving or later. How did I extrapolate this timeline? I think of each zone warmer than me as 2 extra weeks of growing in both spring and fall. This is a huge generalization, and if you’re in zone 5 but at elevation, you may need to plant your garlic the same time I do. Elevation and high desert gardening are very different than lower elevation gardens. In general, for zone 5 gardeners, I’d say you comfortably have until mid-November to plant your garlic; zone 6 until end of November; zone 7 until mid-December, and so on. I think zone 7 or warmer can comfortably plant their garlic in December sometime with some latitude there, like I have from mid-October through early November.
The question on your mind may be, but Meg, when do you plant your garlic? I don’t go strictly by the calendar alone. I tend to wait until after we’ve had our first string of cold air before planting. In part, this happens because of all the time-sensitive harvesting that needs to happen right around those hard freezes, like digging up potatoes and such. So even if I wanted to plant my garlic in mid-October, I just don’t think it would make it to the top of my to do list.
For me, that’s this week, since our first really hard freezes (lows of 22) happened exactly two weeks ago. Here in zone 4 (most often 4a), that reliably works out to be Halloween or the first few days in November. If I wanted to, yes, I sure could have planted it two weeks ago, but I have grown garlic here for over a decade and I have never gotten my garlic in the ground much before the hand-cramping, bone-chilling temperatures arrive. I sort of hate the planting process because of it, but I’m always, always grateful come April when their tips emerge, and again in June, when we enjoy garlic scape pesto, and finally in July sometime when we start enjoying fresh garlic.
I could also wait another week to get my garlic in, but again, that would be sort of like garden penance, and I don’t feel I need to subject my joints to that unrewarding work this year, so I’m choosing a mid-60s November 1st planting instead. I just know I need to get it planted before our long-term temperatures read highs in the 40s and lows in the 20s or colder, as those temperatures are the start of the frost building in our soil.
Signs of Garlic Planted too Soon
If planted too early, garlic will sprout due to warm growing conditions. While it’s not ideal, those sprouts can endure frost damage and should go on in spring to fully recover. However, why put your garlic cloves through that if you can time the planting to not sprout until spring after the cold and wet period it needs to thrive?
When we time the garlic planting correctly in fall, we give the plants enough time to wake up, but not so much time that they actually start to visibly grow. We’re just trusting that the roots have begun to establish again, taking up moisture to ensure they overwinter well.I’m timing my garlic this week ahead of what looks like some rain, although honestly probably not enough to penetrate down the 6” depth or so where I’ll be planting my garlic. I may water them in a bit this week, or I may soak the garlic before planting, something I’ve never done but our extreme drought has me concerned, and for good reason. And it seems like a great year to give the cloves the best possible start to what may be a very dry winter. We are probably 10” behind in rainfall for the season, and there’s really no way we can catch up before the ground freezes so this drought will persist into 2023.
How to Plant Garlic
Below is a You Tube video from 2020 where I planted some gifted Keene Garlic and shared all the steps I take when planting garlic. Here are the highlights:
- Space garlic 6”x 6” on center. I achieve this by offsetting my rows so the diagonals between rows are 6”
- Plant it at a total of 6” deep (I don’t ever measure but it’s definitely deeper than 4”) including the several inches of top dressed compost
- Mix a healthy 2-4 Tablespoons of slow release organic fertilizer in the planting hole
- I recommend compost as mulch and including it as part of your depth calculation, so for me that’s usually 6” deep total. It acts as a mulch and it will nourish the hungry bulbs in spring.
-

End of Season Garden Guide
How we close out our growing season is as important as how we start it. In fact, it determines when we can start it in many ways, particularly if you live in a climate where your ground freezes in deep winter like we do here. (Who am I kidding, our ground freezes solid in fall and remains frozen until spring.)
Joking aside, what we do with our diminishing sunlight and working hours matters immensely. The top priorities for me this time of year are removing diseased plant material and dealing with them in an appropriate way and disinfecting my trellises against any lingering fungal spores said diseases left on our trellises. Lastly, and equally important, I try to get as many beds as possible ready for spring planting as possible — this allows my springtime to be focused on tending to hardening off seedlings and sowing more plants as needed both indoors and direct seeding.
If I didn’t take as much time to clean up and prepare my raised beds in fall as I do, more of spring would be spent cleaning up debris from last fall and hauling in compost, resulting in later planting dates. This has a cascade effect as it will push out my earliest harvests and then limit my options for succession planting come July or August when those first seeds/plants mature.
So let’s get into my 3 areas of focus I hope you’ll all adopt or consider as part of your fall garden routine.
How to Remove your Spent Plants
I hope the idea of not tilling and minimal soil disturbance are things that I’ve familiarized you with over the course of my videos and stories. We don’t till and we try to keep as many plant roots in our beds as possible. Sometimes, yes, I go for the thrill of yanking a plant out, but a true “No Dig” garden always cuts plants at the base and keeps the roots in place and intact to feed the soil microbiome.
If you can control yourself in the heat of the moment, I highly recommend you do this, even for things like corn. We leave our corn stalk remnants in place for several seasons and by the time we take them out, it’s really just the material above ground that’s left. It’s a good feeling to know we are supporting our soil that so generously supports us.
You can read more about this topic in this Blog Post from last fall.
What to Do with all Your Plant Material
Not all plant material in the garden is treated the same. The biggest area of focus (read: concern) is any diseased plants. The most important diseases for me include foliar tomato diseases and foliar cucurbit diseases. They both spread by (microscopic) spores, often propelling themselves out of the little sclerotic dots on the leaves out onto other plants and likely also right into the soil below.
One of the main reasons we crop rotate is exactly this reason: to separate our host plant (say, tomatoes) from the lingering spores (say, Septoria leaf spot) by moving them to a different raised bed each year, thus making it harder for the spores to reach their host plant, the thing they need to successfully reproduce and live on.
The reality is that spores can persist in our soil, yes, even my very frozen and cold soil, for years. That’s right. Up to five years, to be exact. So how we deal with this season’s diseased plant material is imperative for the health of next year’s garden.And many years after that too.
I recommend you take care of your diseased plant material in one of four ways this fall:
- Compost on-site. If you do this, your compost either needs to get hot enough to kill pathogens (131-170F for 15 consecutive days, turning the pile a handful of times during this process), OR you need to let it passively compost for those five years I mentioned above. Your choice. I realize neither is an easy ask. Here’s an article from the Rodale Institute on Composting: https://rodaleinstitute.org/science/articles/compost-management-in-certified-organic-operations/
- Bury the diseased plant material to mitigate spores spreading by wind or rain. If you do this, just be careful not to disturb nearby tree roots. This seems like a viable and logical option for folks who want to keep the material on their land in a way that utilizes the biomass, a way of maintaining a closed-loop system.
- Compost via your municipal compost. Most cities and even many rural towns now have industrial composting options. This is a great place for your diseased plant material because their systems get hot enough to kill pathogens, so they won’t spread further.
- Your municipal trash or a burn pile is the last option for these wary plants. Use these alternatives if they feel like your best option for your home landscape.
What about “Leave the Leaves”?
Now that we’ve covered diseased plant material, you may be wondering if you can leave the rest of it to stand all winter long. Yes, you sure can. As discussed above, this will delay your spring garden season a bit. I know we hear a lot these days about leaving the leaves and waiting to cut down perennials until spring. And that’s also true too. The reality is that it’s practically implausible that beneficial insects such as native bees have burrowed into my tomato, kale, or brussels sprouts stems. Plant material to leave through winter is hollow-stemmed perennials, the likes of joe pye weed and native grasses.
This is where our prairie plays a key role in our food garden, to supplement it so that when I give the garden a good clean up in fall I am still leaving a lot of plant material standing everywhere else on our property, thus providing critical habitat while also getting the most out of my growing season.
Now, if you prefer to clean up in spring, or if your winter is mild then it might make sense for you to keep your disease-free frost tolerant flowers and brassicas standing to enjoy. And, because your climate is milder, it’s likely you’d be able to clean that up come late February when it’s time to start direct seeding your earliest spring veggies.
Like with most options I give you, I hope you take or leave this as it suits your growing style, while armed with the pros and cons of each approach.
The Importance of Disinfecting Trellises
Besides the actual plant material, spores can lie dormant on both metal and wooden structures for years, just like they can on our soil surface. So in addition to removing the diseased plant material, the next step we’ve started doing here is taking the time to disinfect our trellises before we take them down in the fall. (Well, mostly, some have already come down that need to be disinfected.)
For this method, we have chosen 3% hydrogen peroxide. (A 10% bleach solution is an alternative, but I don’t like to use it in the garden for many reasons, including that it doesn’t breakdown like peroxide and it can damage metal, among other things.)
You can buy hydrogen peroxide in bulk, like a 1-gallon container, online via the jeff bezos empire, or you can purchase it in quarts at a pharmacy for a similar price (about $2/quart or $8/gallon). We use a few gallons each year during our disinfecting.
It’s as easy as pouring hydrogen peroxide into a spray bottle or backpack-type sprayer and generously spraying the entire surface. Hydrogen peroxide needs to be in contact with the metal or wood for 10 minutes to be effective. This is a great activity for late afternoon or early evening. After they are fully dry, the next day, we will take them down and store them for the winter. I like to leave my trellises in place until this task is complete, which makes this work much easier and ergonomic.
This is definitely a task you could put off until spring, but that’s just that much more time you’re allowing the spores to hang out on your property and in your garden. Seize the day, my gardening friends.
Protecting Your Soil
As important is how we tend to our soil in the off-season. For some, they like to plant cover crops that will die with a hard freeze. Since I push my garden so hard all season with succession planting, we don’t feasibly have time for fall cover crops here. Again, if you’re in a climate where the soils don’t freeze, winter cover crops are a great idea too.
Instead of cover cropping, we cover our soil with a generous amount of compost — I always add a minimum of 2” (5 cm) of compost directly on top of the beds in fall (and for some beds, it happens in spring). Laid directly on top of an empty garden bed, this is for me the equivalent of adding straw or leaf mulch to my beds. The soil that has been feeding our plants all summer is chock full of life, and I want to protect it this winter, and for that I use compost. It’s a fabulous way to add more nutrients to your soil and for both sandy or heavy soils, adding a generous amount of compost annually is one of the best things you can do to build your soils.
I follow the steps above before adding the compost, usually: I take all plant material out, sterilize my panels if present, take them down, and then finally, the compost is added on top. This is the second to last step in preparing beds for spring, and it’s one of the best things you can do to get the earliest and easiest start to your growing season next year. (The last step I’ll share next week, which is how to get low tunnels set up in fall for late winter so they’re in place and ready to go as well).
I know for many we are tired this time of year, but with the rapidly decreasing daylengths — we’re losing 2 minutes a day — I find these tasks even more urgent. I have very little time to get these tasks done except on the weekend (or weekdays if my schedule allows). Once dinner’s dishes are cleaned up it’s dark out and time to unwind — a very different season than summer when sometimes I wait until after dinner to work because it’s too hot.
-

Creating Space to Reflect
Are you starting to take out your summer garden? I know for some in warmer climates it happened a while ago. But for us northerners who’ve had a pretty long (by local standards) season, we may be clinging onto those summer plants … simply because a frost hasn’t swooped in and taken those plants down.

This overgrown path will need my attention soon. I hope to cut more of these flowers to dry for arranging and gift-giving this holiday season, and that kale has also been nagging me to cut it down though I see so much winter food there that I am trying hard to accept its late-season fatigue with grace.
Every autumn, I spend a lot of energy mentally processing the season that is coming to a close. And the processing works best when I have the space to do the processing. I am very visual-spatial, so do a lot of my creative planning in the garden. And if I can’t see across the garden, I can’t fully envision the garden in a new way, which is critical to how I grow as a gardener and garden designer. And usually it’s the hot season crops dangling, drooping, and slowly senescing on their 7’ tall trellises that get in my way.

Even though the Italian Romas have been out for several weeks, this space still has a nagging vibe for me. Maybe it’s the remnant gem marigolds or perhaps it’s the rotting fruit lingering on the ground. But I leave the panels up so I can disinfect them with ease later this fall before storing them for winter.
Recently, I have come to believe we cling to our annual plants in a somewhat irrational way. By contrast, we expect — and even willingly accept — the dormant period of our perennials to arrive. Perhaps because they go off with colorful fireworks, I don’t know, but they seem easier to swallow than losing my cucumber plants in fall.
But of course because the seasonal shift isn’t the end, it’s the beginning. It’s the continuation of life. Perhaps because our perennials are still visible, in the form of bare tree branches that now reveal the squirrel nests and perched hawks. Or the dried echinacea seed pods that now feed the finches and chickadees, the fluffy goldenrod seeds that are drying on their plants, and the tufts of milkweed seeds exploding from their pods. What about those beautiful bare branches of espalier fruit trees that tell the story of seasons of John’s hands sculpting the trees into their double-cordon structure they now demonstrate.
Then we beg our annuals, those whose life cycles are truly ephemeral by nature, to outlive their natural life cycle. Just a few more weeks. Just a few more ripe tomatoes and cucumbers because I can’t endure winter without you.
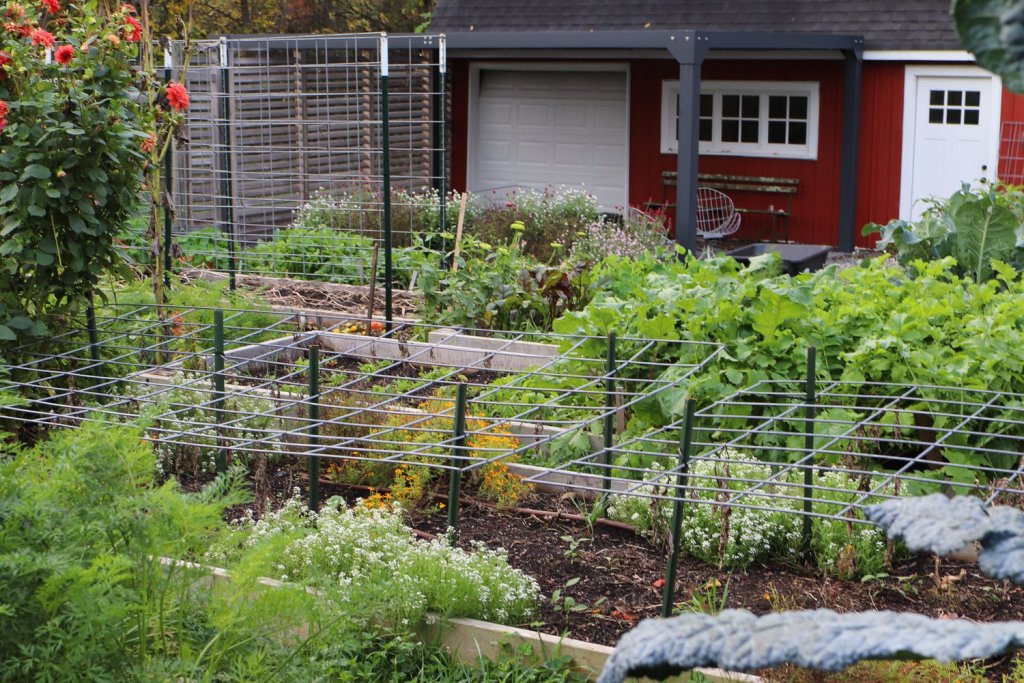
It always crystallizes when I start to take the tomatoes down. I can see again. Literally see across the space. It is the singular gift I give myself sometime in late summer or early fall, giving myself garden space to breathe and process. Some years I pull them out by the first weekend in September. Other weekends an early frost might get them before I do, though that’s pretty rare these days. This summer was long, and I was ready but also avoiding. Not only was I avoiding taking them down, it morphed into avoiding the garden. It was all I could see when I spent time in the garden, those nagging tomato vines I needed but didn’t want to deal with. Disease had rampaged the planting since late July and I had more or less walked away from them.
Smothering my ability to take in the beauty of the changing seasons, that’s when you know it’s time to pull out your overgrown summer garden. I painstakingly curate a fall garden for a reason. For this very reason. To be able to take out a cornerstone of the garden and be left with an entirely new garden season growing right before my eyes.
And because of this, there’s something so joyful about this goodbye. Because we are not meant to be in every season at once. I think gardeners appreciate life’s fleeting nature, and many of us use it to help heal us. Help teach us about the life and death cycle. I’m delighted that we are finally welcoming the new season and fully saying our grateful goodbyes to the summer crops.
I’m ready for the shift, the looser timelines for harvesting and processing, and the unobstructed garden views because the vining crops are absent. It is slowly returning to that familiar blank winter slate, which means I can start to mentally build next summer’s garden as we close this season out. I need this open space for my creativity, as much as I need the summer garden to fuel the ideas and dreams that are about to germinate in me to be realized in future years.
-
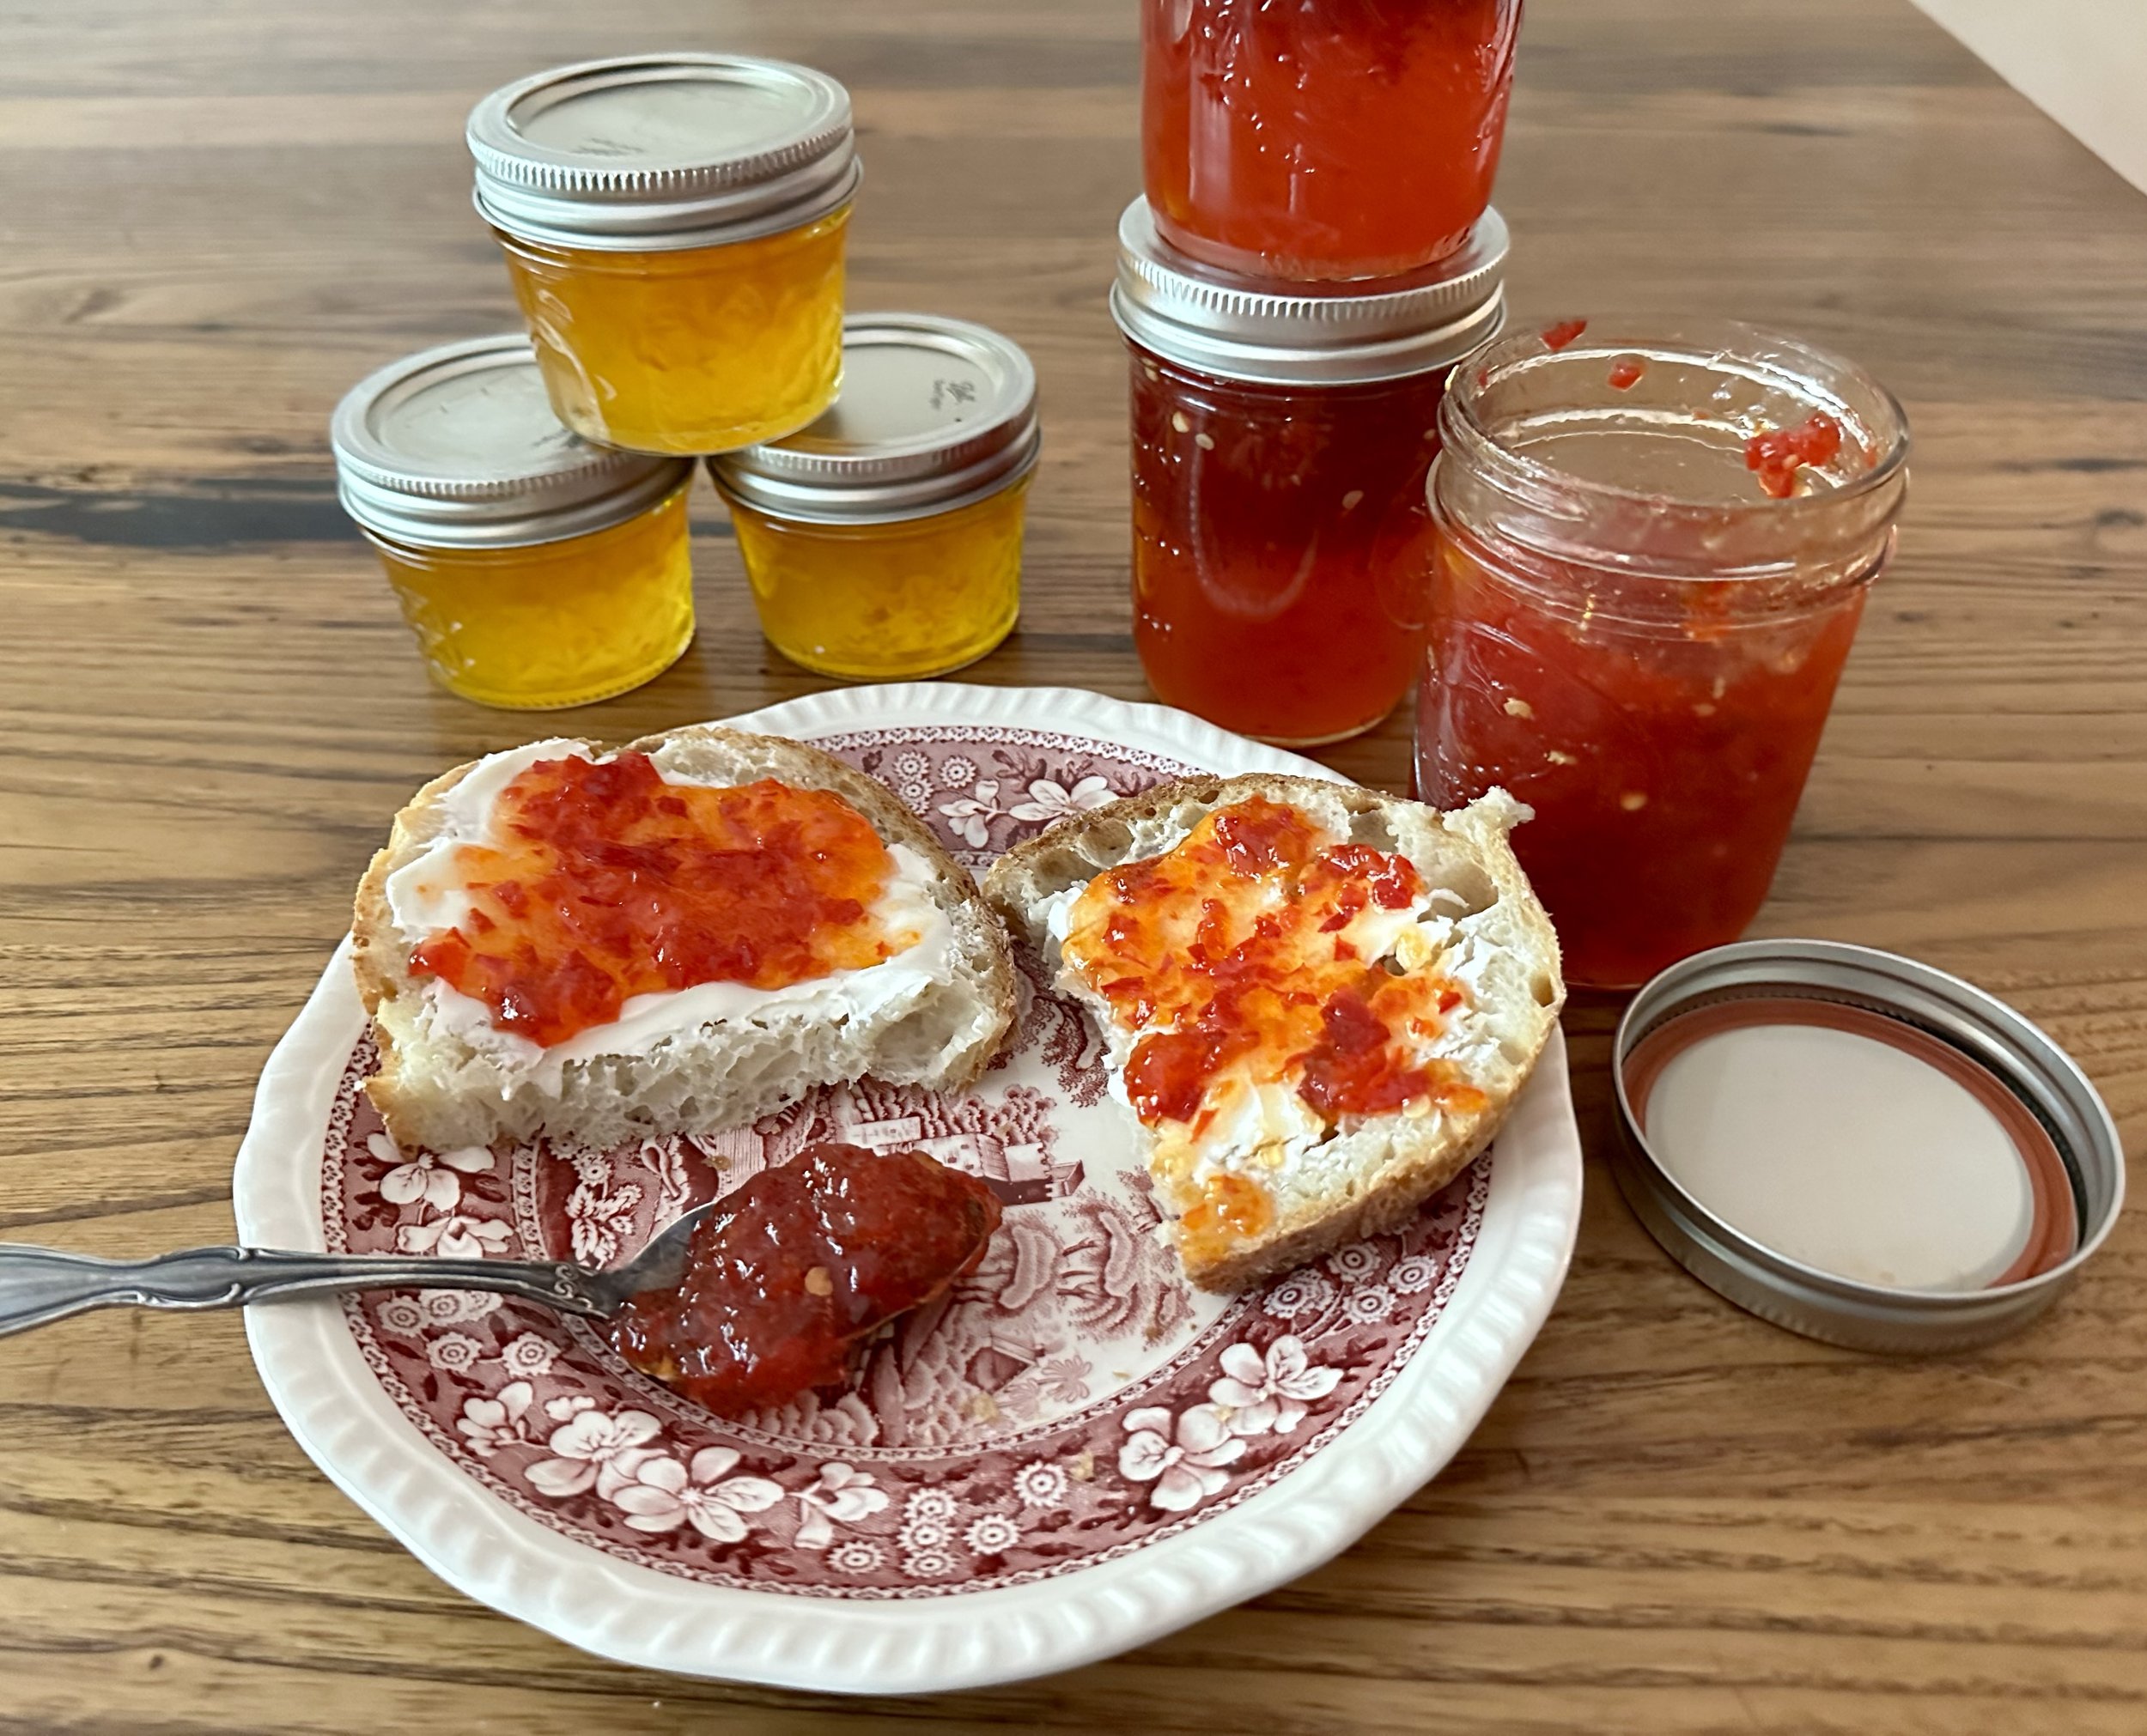
Hot Pepper Relish
This could be the only jelly one needs in their life. If you love a dash of spice in everything you nosh, that is.
These recipes have been adapted from the Sure Jell Hot Pepper Relish recipe. I have changed the proportions of sweet and hot peppers but have not altered the sugar or vinegar, the key ingredients to keeping this product safe.
I wanted to share all the ways we’ve split proportions for this jelly. Some years I’m pretty sure I’ve even just done all hot peppers and didn’t even add any bell peppers, but both of these recipes have the total cups of peppers the same, with a more even distribution between sweets and hots.
For those who’ve followed my lead with aji amarillos, this is a beautiful way to highlight their complex flavor. I had a bumper crop of sweet peppers this summer, so this was the perfect thing to do with all those red and orange bells.
Aji Amarillo Relish 2 cups orange bells + 2 cups aji amarillo Jalapeño Relish 2 cups ripe jalapeños + 2 cups red bell peppers Gochu Pepper Relish 2 cups red bell peppers + 2 cups ripe gochu peppers Hot Pepper Relish
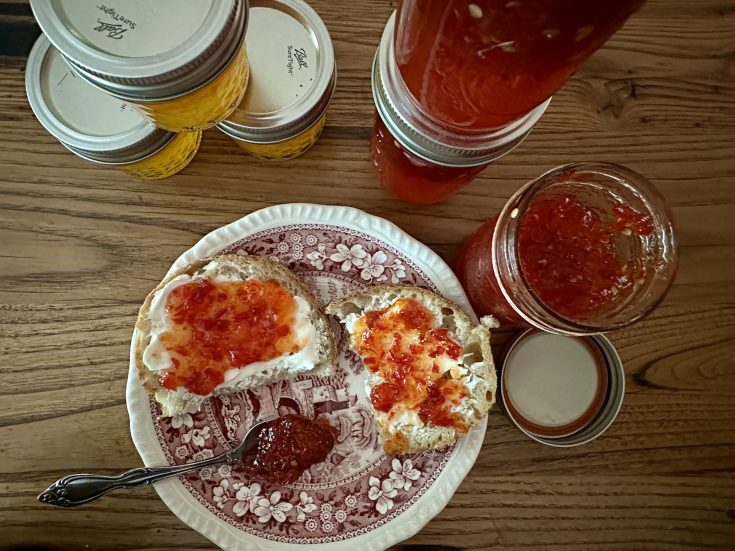
Ingredients
- 2 cups finely chopped bell peppers (match color with your hot pepper color for best results)
- 2 cups finely chopped hot pepper (of your choice)
- 1 Sure Jell Premium Pectin (yellow box!)
- 5 cups granulated sugar
- 1 cup apple cider vinegar
Instructions
- Prepare the peppers: de-rib and de-seed the bell peppers and chop finely. Add to your food processor.
- Repeat the same process with the hot peppers. For us, we have tried the jalapeño relish without seeds and ribs and found it could have a little more heat for our palates, so we now leave some of the ribs and seeds on the peppers.
- Honestly the amount of sugar in these recipes really balances out the heat. But if you’re averse to heat, definitely take the time to remove seeds and ribs — and always remember to wear gloves to protect yourself.
 This was our jalapeño and red pepper relish. You can see that I do dice them pretty finely before the added step of run them through the food processor. It really makes a difference on the texture of the final product, so don’t skip this step (or just keep chopping till you’ve got it super fine).
 - To process, I use the pulse setting, running it for a second or two and stopping and starting again. The finer you get it, the better.
- Meanwhile, get your hot water bath canner filled up and boiling. Wash and set your glass jars into the heating water and set up a second pot for your lids too.
- Now it’s time to start cooking this up.
- In a 3 quart pot, mix your 4 cups of finely chopped peppers, cider vinegar, and the sure jell pectin.
- Turn on high heat and bring to a rolling boil, one that keeps boiling even when you’re stirring constantly. This is extremely important as it helps activate the pectin.
- Next you will add those 5 cups of granulated sugar, stir to combine and work to bring this back up to a rolling boil. I like to keep it on medium high heat at this point. This should take about 5 minutes or so to return to a full raging boil.
 BEWARE: you do NOT want to keep this on super high heat as it can and WILL boil over. Trust me, I’ve been there and it’s a sticky mess.
 - Once you get back to that vigorous, rolling boil, set a 1 minute timer and stick to it. As soon as those 60 seconds expire, remove from heat and gently skim off any foam on top.
- Now you can hot pack your jars, leaving 1/2” headspace.
- Clean the tops of jars off with a damp paper towel to remove any jelly that may have dripped on it before placing the lid and securing it to a fingertip tightness with the ring.
- Boil in your hot water bath canner for 15 minutes (1,000-3,000 feet), adjusting for altitude. Keep the boil active and lid on or just burped.
- After the boil, turn off heat and let stand in canner for 5 minutes.
- Remove from heat and place on a tea towel and let stand overnight or for 24 hours before moving.
- Check to make sure all seals are secure, label, and store. Or just crack one open immediately and slather on a bagel or piece of sourdough with some cream cheese. You’re choice!