
Your cart is currently empty!
Welcome to Meg’s Blog
-

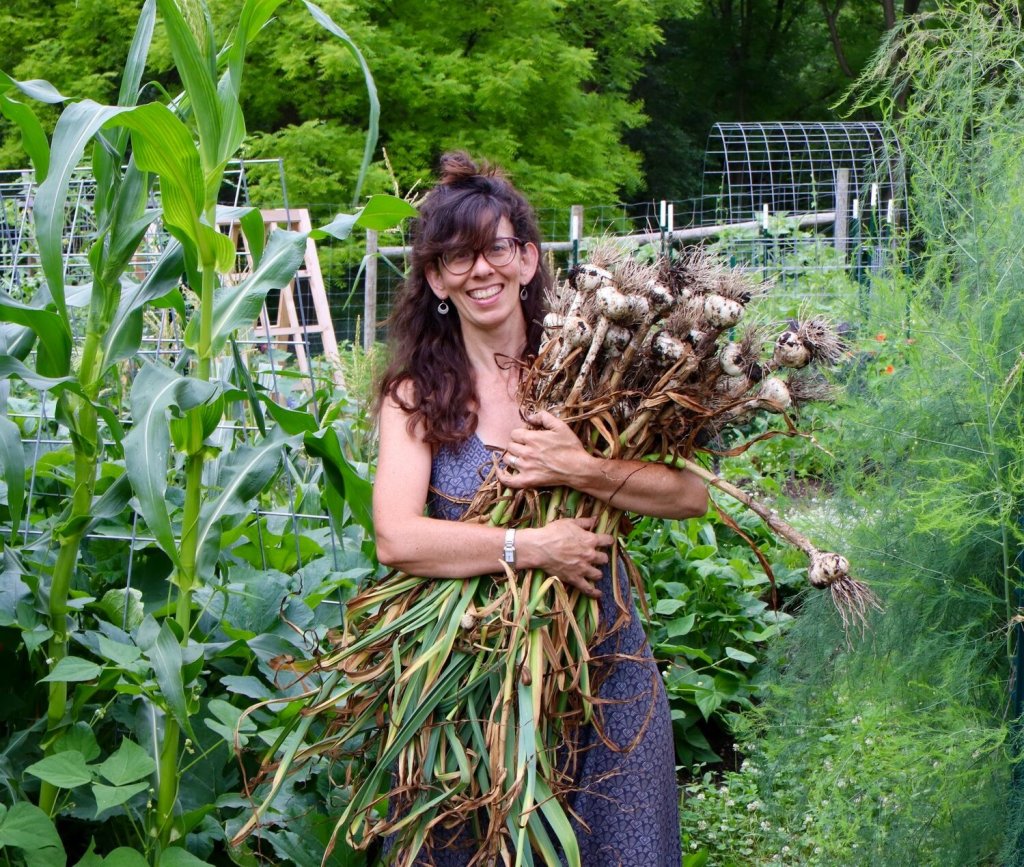
Garlic Grow Guide
Garlic may be a somewhat mundane vegetable, but it is, like virtually every other vegetable, completely transformed in the home garden. Homegrown garlic is full of pungency (what you might call heat); pungency is a mouthfeel rather than a true measure of spiciness and it is what gives garlic its perceived spiciness.
Garlic is also a great vegetable for the busy gardener. Planted in autumn, the same time so many spring bulbs are tucked into the earth, garlic rests for much of winter. Planted around or a few weeks after your first hard freeze, this gives the garlic cloves time to set roots — but not shoots — before winter sets in. Meanwhile, you carry on, knowing come spring those cloves will break dormancy as soon as favorable conditions ensue. In cold climates, garlic will sprout up in early spring, reaching maturity by the middle of summer.
For us, our garlic reliably sprouts by the middle of April. Lately, it seems to sprout right before a massive April blizzard. They emerge only toget blanketed with heavy, wet snow that quickly melts, drenching the thawing and warming soil with an early precipitation. At first, I fretted whether to cover them or not, but alas, my busy life and natural curiosity for cold hardy gardening inspired me to let them be. They have always victoriously emerged after late season snow events. I now confidently rejoice at their early spring pokes of green, confident of their phenological awareness that the seasons are shifting.
Hardneck vs Softneck
As the name suggests, the difference between hardneck and softneck garlic is in the main stem of the plant. Hardneck garlic produces a stiff central flower stalk while softneck grows absent a hard flower stalk, and is thus easier to braid. Softneck generally produces more reliably in warmer climates while hardneck is well-adapted to frigid winters. Softneck stores longer, but produces smaller cloves though in higher quantities per bulb; softneck can be a bit finicky here in our USDA Zone 4a. Flavors also vary quite a bit among garlic varieties.

The benefit of growing hardneck is that the stiff central stalk produces a flower, called a garlic scape. This bonus harvest must be removed to signal to the plant to fatten up those underground bulbs — otherwise the scape will flower and produce bulbils, another clone of the mother plant that can be planted though more commonly harvested before flowering. The scape can be used in the same way one would use garlic. Our favorite way to consume scapes is Garlic Scape Pesto.

While we continue to attempt to grow softneck varieties, hardneck performs more consistently in our very cold climate. While hardneck does not store as long, they produce markedly larger cloves that are easier to peel. We dehydrate aging hardneck garlic bulbs in February to use as garlic powder until fresh garlic is back in season come July or August.
Preparing the Soil
Like with every other vegetable, the quality of your soil is one of the most instrumental and influential factors in your gardening success. Garlic is considered a heavy feeder, so be sure to provide plenty of nitrogen to your garlic bed. We take a one size fits all approach to tending and feeding our plants, and it seems to work well for us.
We add our slow release organic fertilizer at planting time, along with a very generous layer of compost mulch. We broadcast fertilize with the slow release organic fertilizer again in spring when all the plants are about 6” tall, sometime in early May usually.
Mulching your garlic is recommended to keep the bulbs moist and protected from frost, prevent heaving, and to reduce weeds come spring. Our mulch is also a universal in our garden: we mulch with compost. For everything. It’s easy, economical, nutritious, effective, and I highly recommend it.

Garlic likes to grow in a neutral soil, much like all vegetables, with a pH between 6-7. As a heavy feeder, it is helpful to know where along the pH spectrum your soil falls as some micronutrients are more bioavailable at different pH levels. Too acidic (below 6) or too alkaline (above 7) would be good information to know as it may impact availability of micronutrients. Most extension agencies offer soil tests for a nominal fee if this is something you haven’t yet explored.
Plant Spacing
As a shallow rooted plant, I prefer to give my garlic its own planting space. I don’t interplant garlic with any other crop. This eliminates potential crowding or shading from nearby plants. I always plant my garlic in a block, 6” between cloves within a row with offset rows also 6” apart. When I do this, each plant is spaced 6” on center in all directions. I would not plant any closer, even though I’ve read 4” as a potential plant spacing. I could go farther apart between rows, but experience has taught me that this spacing delivers consistent and large bulbs.

Grown as a clone, a single garlic clove is planted and produces an entirely new bulb the following summer. I plant my garlic 6” deep. This depth includes my 3” of compost mulch already on top of the bed. If you are going to add mulch after planting, the recommended depth is 2-3”.
Weed Pressure
It is important to keep the bed as weed free as possible. Weeds can dramatically reduce bulb size so this is paramount to growing the strongest possible garlic crop. Because of our no till gardening, weed pressure is practically negligent in our garden, so maintaining a weed free garlic bed is mostly effortless.
I highly recommend considering compost as your mulch. This single method of mulching has been transformative to our gardens and made weeding our most despised invasive weed, creeping charlie, a cinch because it comes right out of the fluffy compost mulch. Leaf mulch, grass clippings, and clean straw are three other excellent options for mulching your garlic (and all your beds).
Mulching also helps to retain moisture, which is important as garlic likes consistent moisture.
Even Moisture
Garlic needs even moisture, especially during the bulbing period. Be sure to irrigate if you do not receive adequate weekly spring and summer rains. We aim to supplement with 1” of water weekly if we are experiencing dry conditions. On years that are wetter, with more than 1” of water weekly, we simply do not supplementally irrigate the garlic.
A few weeks before the garlic is mature is the best time to stop watering. Of course, we cannot turn off summer rains, but definitely consider summer rain storms and time your harvest to be a good distance between storms for the best quality bulbs for storage. This allows the bulbs to start to dry out. Each leaf you see above ground correlates to a paper wrapped around each clove.
Harvesting, Curing, & Storage
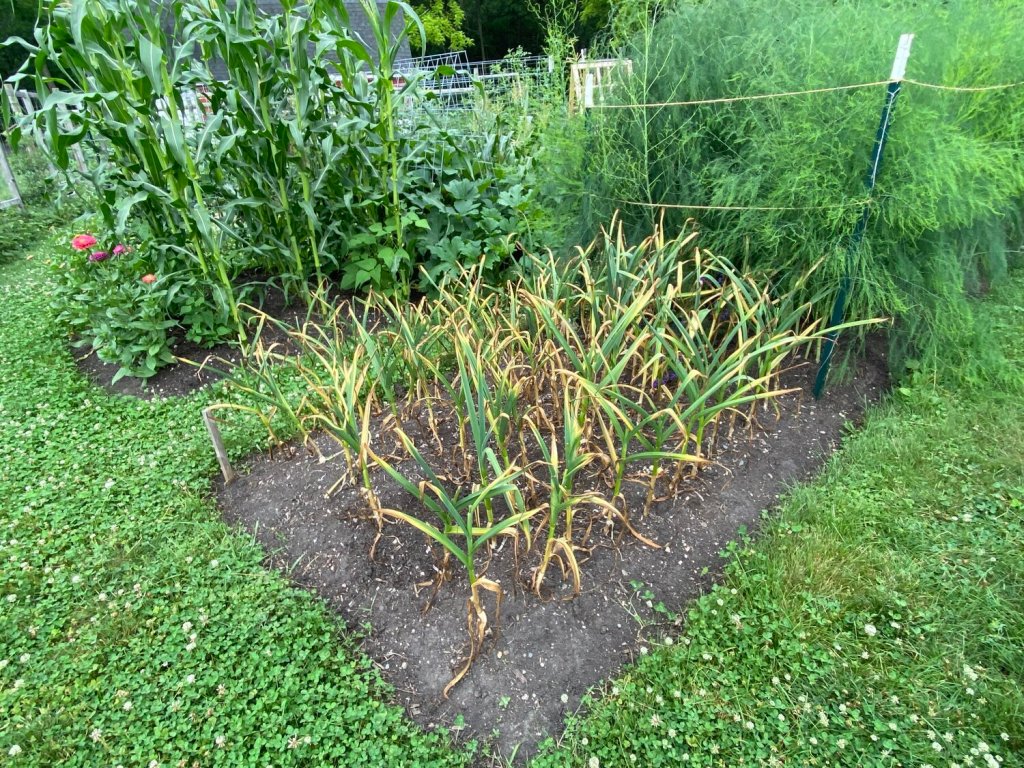
Garlic is harvested after at least 3-4 of the lowest leaves have turned yellow. I usually dig up a test bulb or two in mid-July to see how they are doing, and to gauge how mature and dry the paper skins are becoming. Depending on where you live and the environmental conditions of your current growing season, this could be anywhere from July to August. Knowing when to pull your garlic could be the difference between under mature bulbs with few papery wrappings for good storage quality all the way to too many paper wrappings if you wait too long.
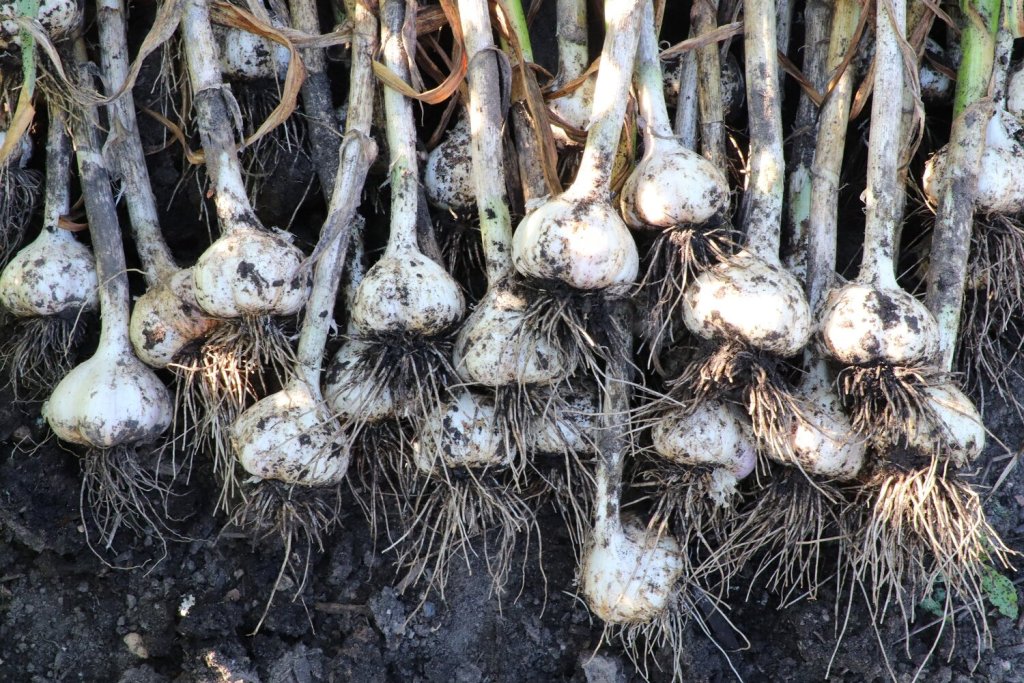
I try to harvest before more than the 5 lowest leaves have turned yellowish-brown. Once harvested, it’s recommended you gently brush off the dirt and lay flat or in small bundles to cure for 2 to 3 weeks in a dark well ventilated place that isn’t too hot. Once the entire plant has dried, snip the tops and trim the roots of the garlic off. For best quality, store in a cool location with moderate humidity. Do not store in a humid basement or your refrigerator.
We always set aside our biggest and best bulbs for planting in the fall to keep our garlic stash going. If you grow enough, you should have plenty for both fresh, year-round eating and to plant in the fall. For our family of four, we plant at least 75 cloves a year to maintain a healthy supply of garlic for consumption and planting.
Happy planting!
-

2020 Tomato Garden Review: How the Jewels of Summer Fared
Another year, another opportunity to share our tomato garden review with you. I enjoyed another year of tomato exploration and the theme from last year continued to deepen for me as the seasons went on.
Stick with what you love to eat. This is true for all vegetables, but especially for tomatoes. And often, what looks beautiful or grows well for someone in a different climate will behave differently in your garden. Even the same variety will perform different year over year. So sometimes the best thing to do is try it a few years in a row before deciding if it’s a permanent addition to your garden lineup. And grow enough diversity to ensure some of them will succeed no matter what Mother Nature throws at you.
Last August and our large heirlooms have mostly faded while the cherries and plum and saucing tomatoes are going strong.
It is all too easy to get swept up in beautiful photos of unusual fruit. One of the biggest aha moments for me has been tasting tomatoes that look pretty. And yes, my palate is bent toward the sungold, and prized cherry tomato in most home gardens because of its burst of sweetness. But I am happy to say that among the new and returning tomatoes I grew this year, I have a few new favorites and a few that I’ve tried a few times and am letting go with confidence.
We grew about 35 tomato plants across all types of tomatoes, from cherry to plum to slicer to determinate saucing tomatoes. Without further adieu, let’s get into the details.

The nearly complete tomato lineup of 2020, labeled for reference. Plum Perfect may be my favorite tomato of this year. I just loved it’s shape and smoothness.
Heirloom Slicers
Our family is somewhat split on the merits of large tomatoes. Someone who will remain anonymous considers them too wet, though often I notice them consuming them between slices of bread for lunch. I have grown to love several new slicing tomatoes this summer, largely due to their productivity and flavor.
Paul Robeson
These tomato seeds were gifted to me, and it was the single most named tomato whenever I query my instagram community for tomato recommendations. It is a stunning specimen and the flavor was superb, peppery and slightly floral too. However, it was not a very vigorous plant and only produce about 4 or 5 fruits for us. I will try growing it again next year to see if I can produce a more vigorous vine and enjoy more fruits.

The most anticipated heirloom slicer in my garden this summer was this beauty, Paul Robeson.
Berkeley and Pink Berkeley Tie Dye
These tomatoes are closely related. One is a green-fleshed tomato and the other a burgundy. I found these tomatoes a little temperamental in that as soon as I noticed color on the bottom of hte tomatoes they were very soft and overripe — but only partly. And often when I tried to harvest them at this stage they were so soft they didn’t hold well. So I have started to harvest them about 25% ripe, when color just starts. They ripen indoors within the next 24-48 hours. I enjoyed them both, and am not sure which one I’ll grow again, but it probably won’t be both. Space is a premium.
Brandywine
Well, this was the winner of my new tomatoes this year. And yes, while we’ve enjoyed these tomatoes from other people’s gardens, we had never taken the time to grow them ourselves until this year. And it was a coincidentally significant year to do that because these are my late mother-in-law’s favorite tomato. And because we truly loved them and will grow them again, her memory and love of Brandywine will be with us for the rest of our days.
Black Beauty
The second year growing this tomato, I gave it space because I enjoyed its flavor last summer despite the fungal challenges that is anthracnose. I also chose to grow it again in spite of this challenge, to see if it would repeat itself. And, it did. And I have heard from many growers in more humid climates that black-shouldered tomatoes like this one have been more susceptible to these sad, sunken spots on their tomatoes. It’s a soil-borne disease that persists for year.
I gave this one a good few years, and now I’m bidding it adieu.
Piroka
This was a star of the garden last summer. She performed well while her neighbors caved to anthracnose and I loved her old-timey simplicity. This year was another story. Like with the Paul Robeson, it produced very little, undoubtedly impacted by early onset of Septoria Leaf Spot, which was my disease of the year and will be discussing in an upcoming blog post.
Big Rainbow
Despite having survived a late frost, the plant has not yet produced any fruit. So, I have to say, I have not been impressed with this plant in my garden. And based on the tomatoes I know and love, I will probably not even try to grow this one again next year.
The Ones that Got Away
I had a handful of varieties I was growing for the second year in a row, but I lost them to a late frost. They include Costuloto Genovese, Afternoon Delight, and Solar Flare. All three of these were new for me last summer and I like them all well enough to grow again. Despite having lost them to the persnickety May freeze, I will definitely bring these three back to our garden in a future summer.
Keeping it Simple
I really pared down our cherry tomato grow list this year, and grew fewer total plants. We grew Sungold, Sweetie, Midnight Pear, and Blush, the latter of which is more of a plum but I swear in my mind it was more a cherry. I blame my winter daydreaming on that oversight.
Sungold
Tried and true. This one is my “if I only had space for a single tomato variety, it would be this”. You can roast and sauce them, pop them as candy, use them on toast, salads, and the like. They are a versatile tomato and I love their big burst of flavor in my mouth. We have 3 or 4 Sungold plants and they are still producing well for us.

The little garden queen herself, a bowl of Sungold tomatoes. If there’s one tomato you should try growing next summer, it’s this one.
Midnight Pear
I was so very excited about this tomato. It was going to take my garden bowl to the next level. It purported wonderful flavor too. And it splits. I’d say 80% of the fruit has split for me, and this is in a droughty year. I don’t know if it is perhaps better suited for greenhouse conditions, but this one is a no-grow for me. I wanted it to be a forever tomato. I won’t even try again next summer and will instead replace it with a different dark colored tomato or perhaps a green variety like Green Zebra.
Sweetie
This tomato clings to the vine, similar to the hang time on the Sweet Millions from last summer. I liked the productivity and vigor of this variety even though the flavor was mild — though honestly it’s impossible to compete with the Sungold. This tomato is simply a keeper for me and I’ll grow it again next summer for sure.
Blush
This was another tomato with lofty expectations. It took forever to ripen and only a few did fully ripen on the vine. The majority of them were consumed underripe, I’m convinced, because I just couldn’t wait that long. I waited longer for these tomatoes to ripen than my Brandywines. It was a test of my patience and I definitely lost. I really wanted to love this tomato because it’s a beauty, and it’s one of those examples of how beauty doesn’t always translate to functionality in each of our gardens. I don’t think I’ll grow this one again.
Juliet
Ironically, this is another very beloved workhorse in the garden and I just wasn’t feeling it this year. It was not nearly as productive as last year and that might be because we only grew two plants instead of four. However, this tomato tastes great, roasts well, and was disease resistant last year (though not this year). It’s a coin toss whether this will be given much square footage for next year or not. Your guess is as good as mine. Maybe best of 3 is the way to gauge this tomato and I should give it one more summer before I cut it permanently. You’ll see why I’m less committed to this one as you keep reading.

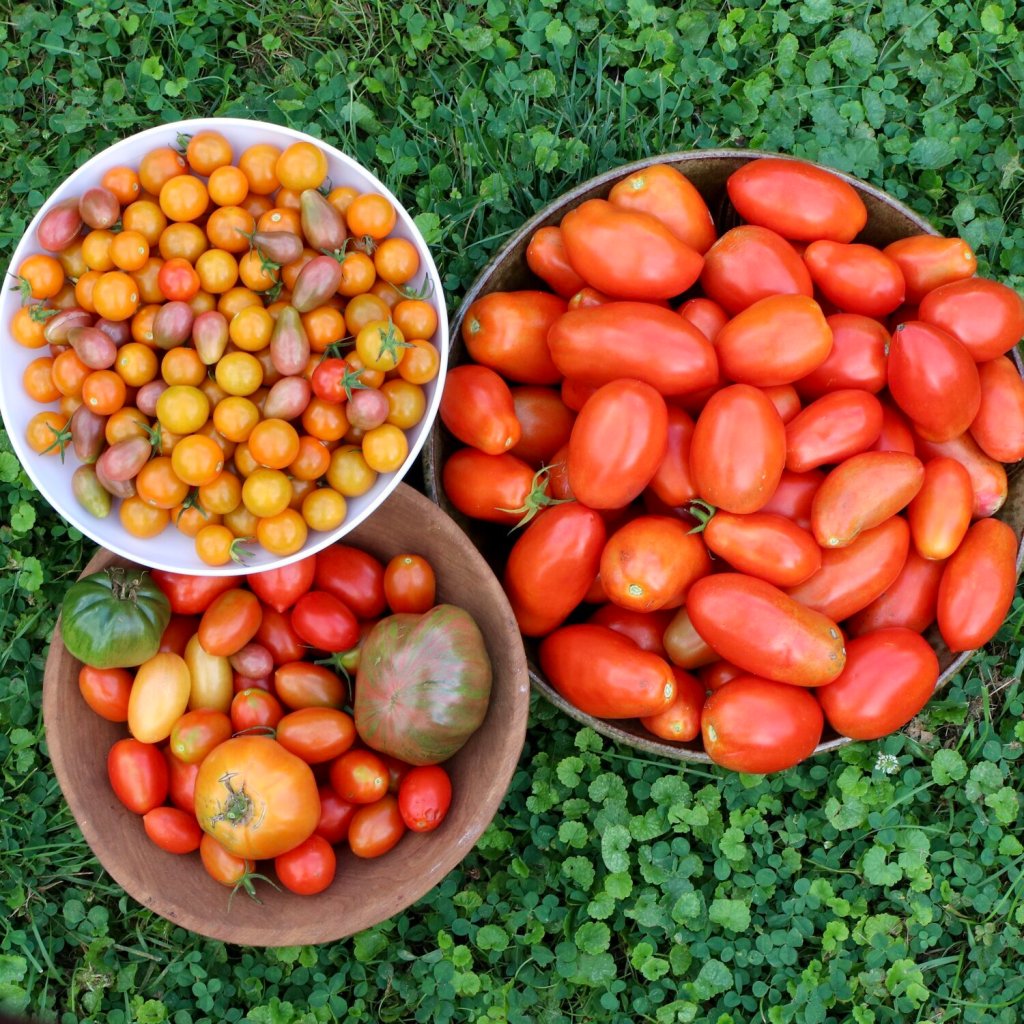
A bowl of cherry and plum tomatoes immersed in saucing tomatoes. I strategically turn over the Midnight Pear tomatoes so the splits aren’t as obvious. The Blush are the yellow tomatoes and the Sweetie are a red cherry.
Getting Saucy
Our focus this year has been on paste and saucing tomatoes. While last year we grew 26 tomatoes, I canned only about 14 jars of salsa and maybe 10 pints of tomatoes. While the salsa lasted most of the year, the canned tomatoes were hoarded between store-bought organic canned tomatoes because we simply didn’t have enough.
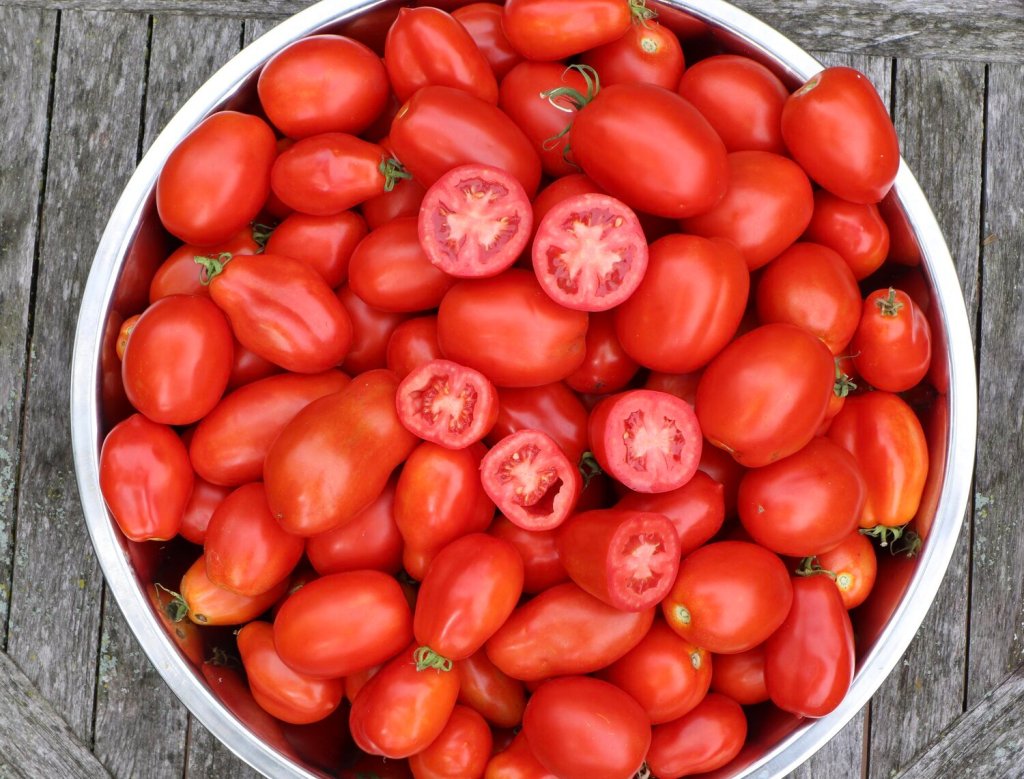
Our three saucing tomatoes cross-sectioned, clockwise from top: Plum Perfect, Paisano, and Italian Roma.
This was the year of tomato processing, so we allocated an entire large bed just to paste and saucing tomatoes. We grew three types of saucing tomatoes: Italian Roma, Paisano, and Plum Perfect. Each of these varieties are determinate tomatoes, meaning they grow to a determined height and life cycle and thus produce their fruit over a more concentrated window of time. They each crop within a few weeks of one another and we have harvested close to if not more than 150 pounds of tomatoes off the plants.
This was a major shift in our tomato growing mindset. Moving from indeterminate paste tomatoes the likes of San Marzano and Amish Paste to Roma and hybrid plum and paste tomatoes. It was definitely a one-way street. I am only looking ahead to more food security and productivity as we continue to focus on putting food by for the year.
The other remarkable thing this summer was that despite the heat and dry summer not a single roma or paste tomato suffered blossom end rot. Not a one! This is in stark contrast to my normal San Marzano drama and another reason I’m hooked on these determinate tomatoes as our new path forward to tomato independence all year round.
Go with Your Gut
The biggest lesson I’ve learned this summer is that year to year variability between even the same types of tomatoes is high. So even when planting our dependable producers from years past, there’s just no guarantee of continued success. Plant as much diversity as you can with your tomatoes, consider determinate paste and plum tomatoes for a saucing garden, and be sure to try a few new tomatoes annually because your next favorite tomato could be the one you haven’t grown yet.
-

Cucamelons: Debunking Garden Envy
I have some confessions to make. Last year when I was new to Instagram and its amazing community of open, communicative and helpful gardeners the world around, I quickly fell into a deep rabbit hole of what mankind has suffered from for eons only now has a nifty hashtag and acronym to accompany it.
FOMO. The fear of missing out.

What started out as meager bowls in mid-July matured into several pounds a picking by late August.
I had to google this a few weeks ago when a friend used it, even though somewhere deep down I knew what it was. The fear of missing out. Yes, I started to feel like I didn’t have the most unique, nifty veggies to photograph and that as a result my garden – and more importantly, my account itself, a virtual page of squares on a grid – was “less than”.
This of course is a ridiculous construct of the virtual world I choose to spend time in, fostering friendships with fellow gardeners from around the world and sharing inspiration through virtually visiting each other’s gardens on the regular. If you don’t know what I’m talking about, head on over to my instagram account here and see what I mean. It is a vastly beautiful and inspiring visual-based social media platform.
The vast majority of my time there is deeply positive, and I quite honestly relish the opportunity to share our knowledge, hopefully inspiring new gardeners to give gardening a go and encourage anyone to stretch their season, but especially in the North. This irrational need to not miss out is born out of the obvious and palpable beauty of this social media platform clashing with the well-documented downside of being so connected all the time.

The central arbor filled in with cucamelon vines running amok over this new trellis by mid-August.
And yet, I couldn’t rationalize my way out of this unmet desire. I resolved to grow beans that weren’t simply green, and I would not call it a successful growing season without climbing nasturtiums up a central archway and those prized cucamelons. I took the bait hook, line, and sinker.
And now that I’m on the other side of the cucamelon craze, I am here to say one word: meh.
To be brutally honest, I don’t love them. And worry not because in my opinion, you aren’t missing much.
Yes, they are unequivocally photogenic and that aspect has been a true joy for me. Additionally, they are truly prolific once summer’s heat kicks in. They also seem disease resistant, a welcome respite this year in what was a constant battle to understand and help our plants thrive under a myriad of beetle damage. Harvest, often, and they will continue to send more cucamelons your way than you may want. First we tried them fresh, straight off the vine, standing in the middle of the garden.
I will never forget my first bite of cucamelon.
So much was riding on this little vegetable. Seasons of waiting, followed by months of tending to seedlings, carefully setting transplants out when the soil was warm enough, my memory flooded with images of cucamelons and gushing captions about how wonderfully delicious they are, with a finish of citrus.
The pedestal on which they resided pretty much destined them to be a let down in hindsight.
They had a cucumber vibe for sure, the skins a bit tough, and sour on the back end. But I wasn’t getting ANY “finishing with citrus/lime”. In order to get that, I ended up having to slice them and squeeze fresh lime juice on them. Which, it turns out, is how I prefer to eat them.
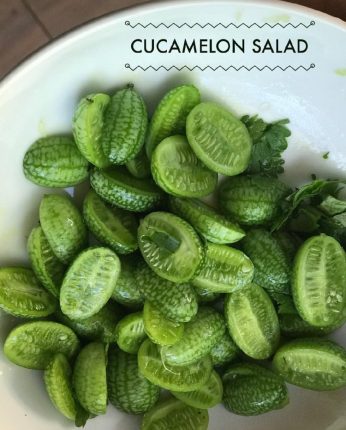
Cucamelons sliced in half, sprinkled with chopped cilantro, tossed with a little olive oil, sprinkled with sea salt, and finally splashed with the juice of a lime. This is my ideal cucamelon salad. Simple, fast, satisfying every time.
Here’s what I like to do. Slice them in half and drizzle with olive oil and sea salt. Squeeze half a lime over them, or more, to taste. Top with chopped cilantro. I use this as a topping for beans and rice, which is a staple meal in our home. So, they aren’t a total garden fail, but it takes a bit of magic for my palette to jump at them in a dish.
Another way we’ve made them super tasty is by pickling them. I did a pretty quick lacto-fermentation on several pounds of cucamelons with garlic, dill, peppercorns, and chili. They taste just like a dill pickle, only in this cute little package. Cucamelons redeemed!
My point in blabbering on and on about these little garden darlings is that if you happen to be suffering from any form of garden FOMO around this vegetable, they just aren’t worthy of it. Don’t sweat it a minute longer.

Pickled whole after nicking off the blossom end, these made my unimpressed palette jump for joy.
If nothing else, they are a fun, novel food that delights and intrigues garden visitors. But recall I felt left out, and so I grew them. Now I’ve grown them and I’m thinking they aren’t that big of a deal.
Will we be growing them again? I think so. Four plants again? I think not! I’ll probably grow two plants next year, and grow them from our tubers we will be lifting and saving.
I’ve been sitting with this for a while now and taken this cucamelon lesson to heart diving deep into my knee-jerk reactions of feeling “less than” with my garden adventures this summer. I am also able to see now what holds water with our palettes, what works well in my garden layout, and what will make the cut for next year, because we tried a lot of new things this summer, and a lot of it won’t be making an encore presentation. I’m especially focused on foods my boys will eat, because while photogenic food is fun, we are growing it to be eaten and there are some foods they just protest, cucamelons being top on the list.
If you’re a newbie or space is at a premium, I really encourage you to be as practical as possible with your growing space. Think long and hard about what you reach for at the farmers market or grocery store, what you enjoy cooking most, and find ways to grow those specific foods. Within those vegetables, explore to your heart’s (and catalog’s) content until you find your favorite varieties and ones that can extend your harvest season as long as possible.
For us, the culmination of our garden toiling is what graces our dinner plate; ideally, our entire family enjoys the produce we serve. Truth be told, I am moving more toward catering our garden space to foods our children will happily consume (less broccoli is their daily plea!). They are not loving any aspect of the cucamelon experience, so it’s my husband and I doing all the consuming.
And, at the end of the day, it turns out I can live a happy and fulfilled life without cucamelons, as cute and fun as they are – and a whole list of other flashy bean varieties, which I’ll dish on later this fall after I’ve done my fall cleanup and had more time to reflect.
-
The Best Asian-fusion Cole Slaw
This really is the very best cole slaw ever. And I don’t make that claim lightly. It’s part veggie combo and part dressing. We make it often and devour it every single time. We even use the dressing for kale salads if we want to mix it up.
As with all our recipes and advice in and out of the garden, take this as a fluid recipe. This is what we have come to enjoy as a dependable recipe. We frequently swap ingredients for what’s on hand, and that indelibly changes the flavor profile of the slaw.
Same dressing, different veggies. This is the slaw dressing with massaged kale in place of cabbage. It really is that versatile and delicious.
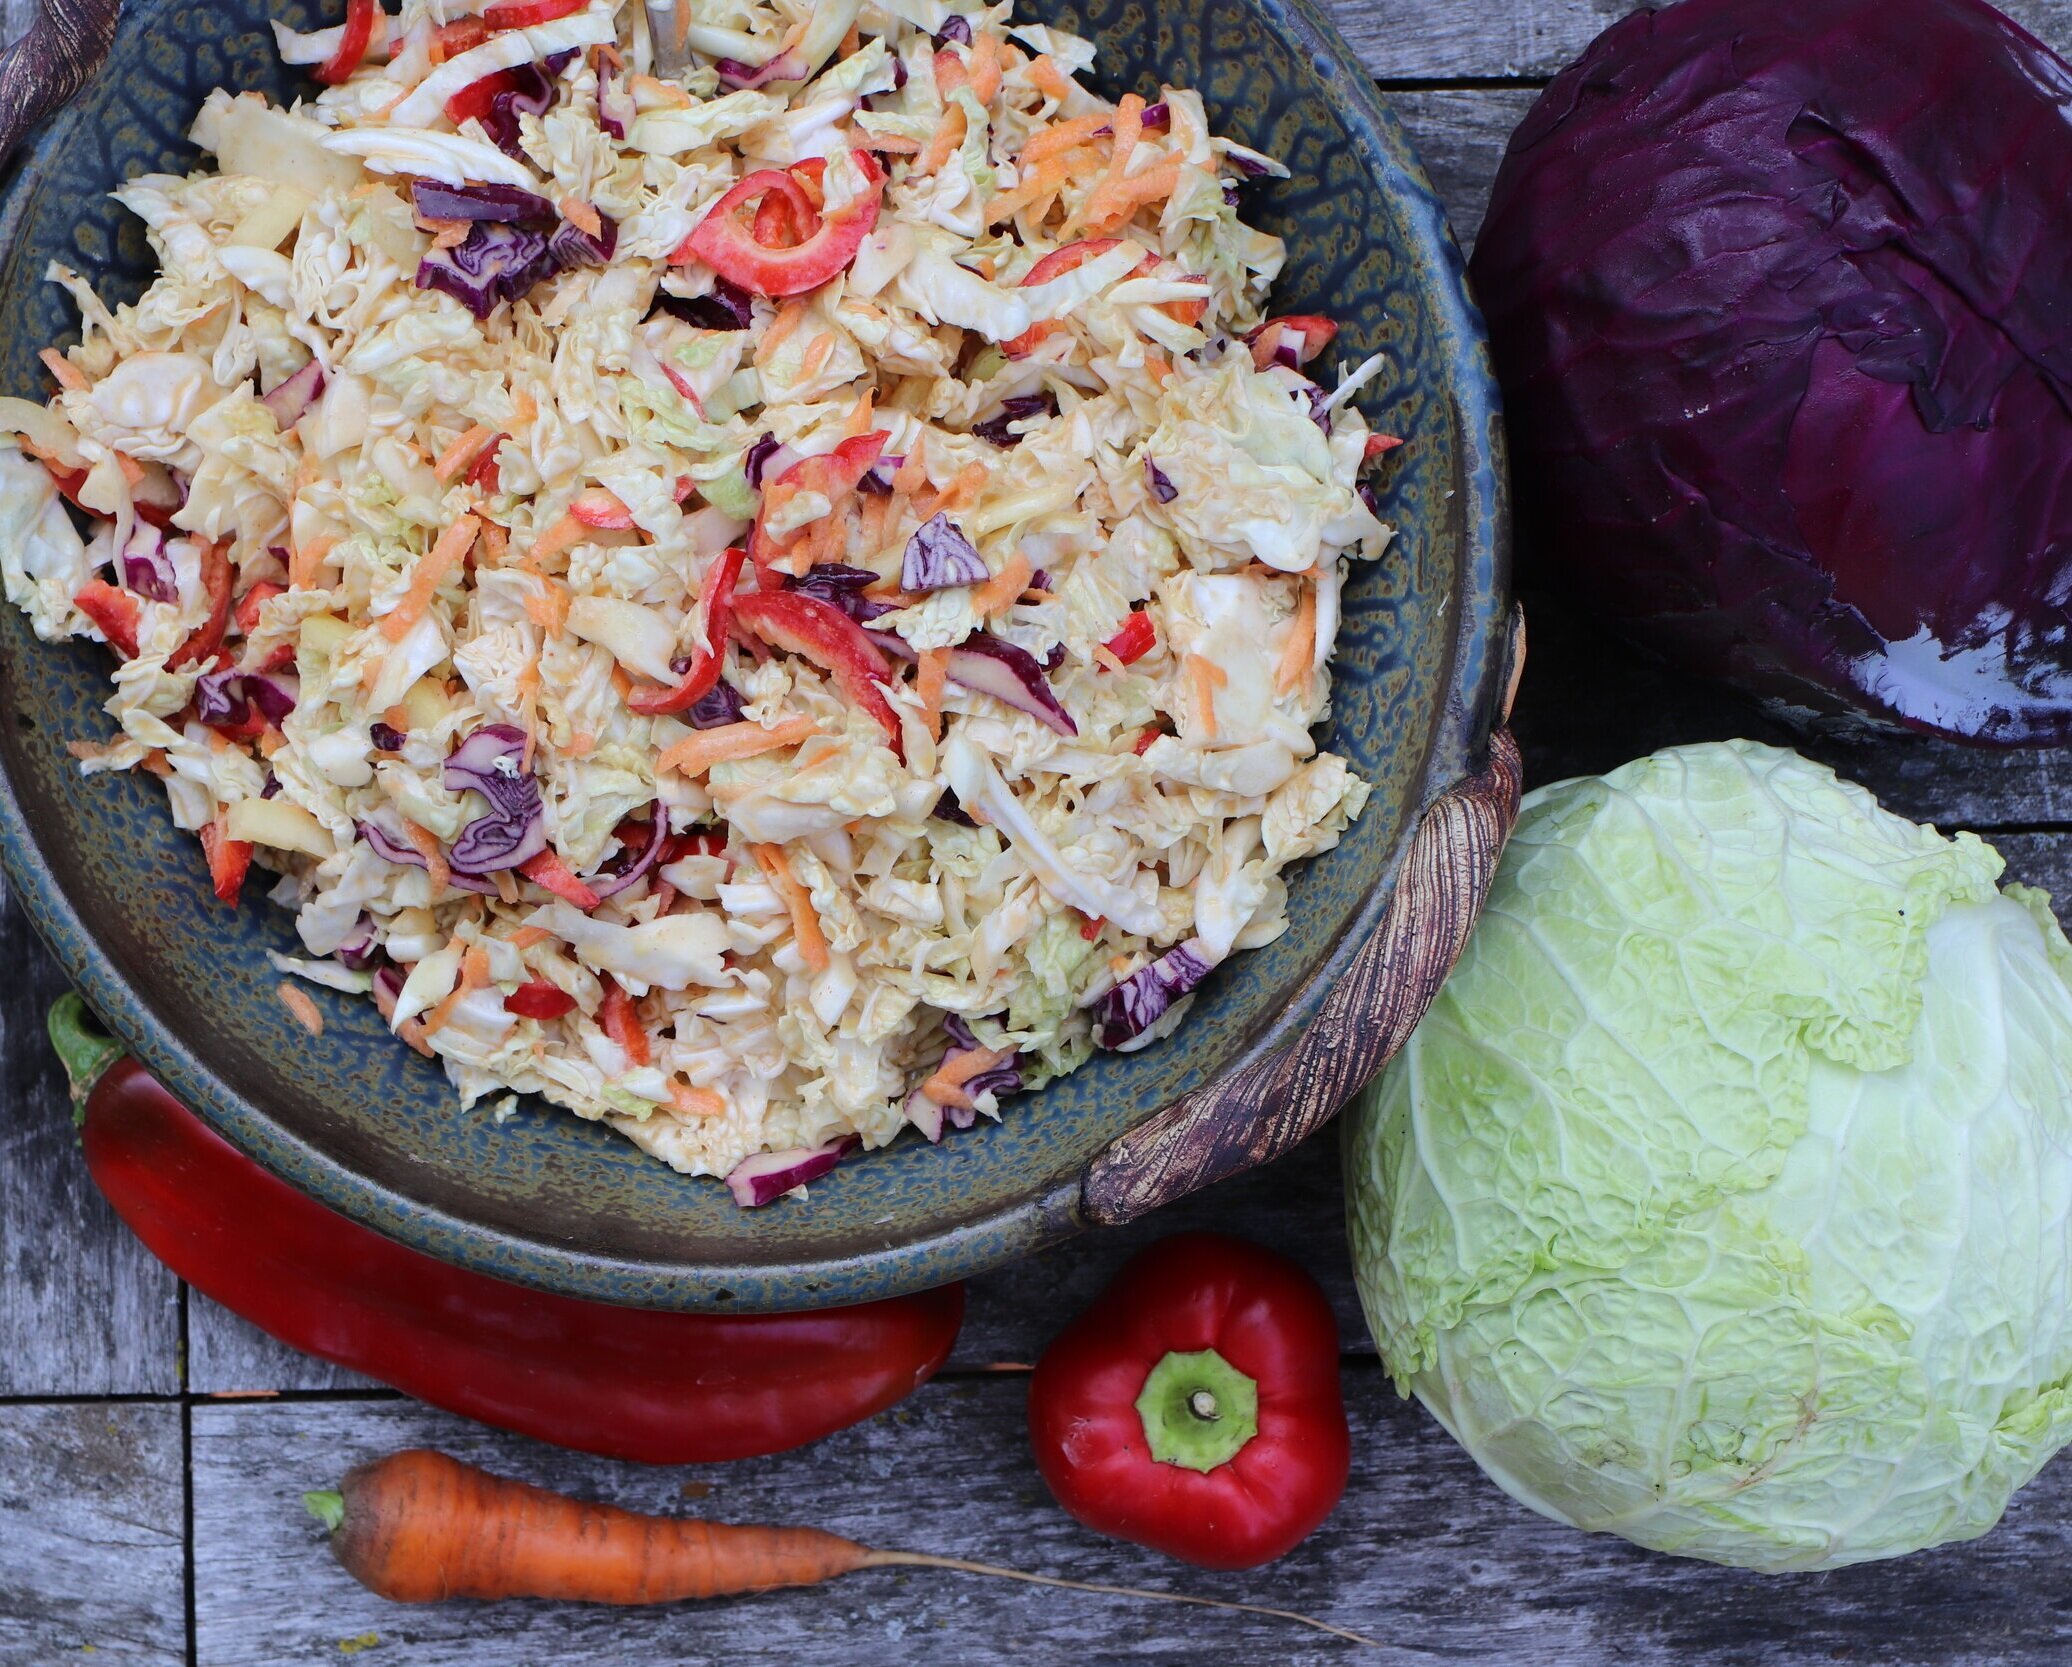
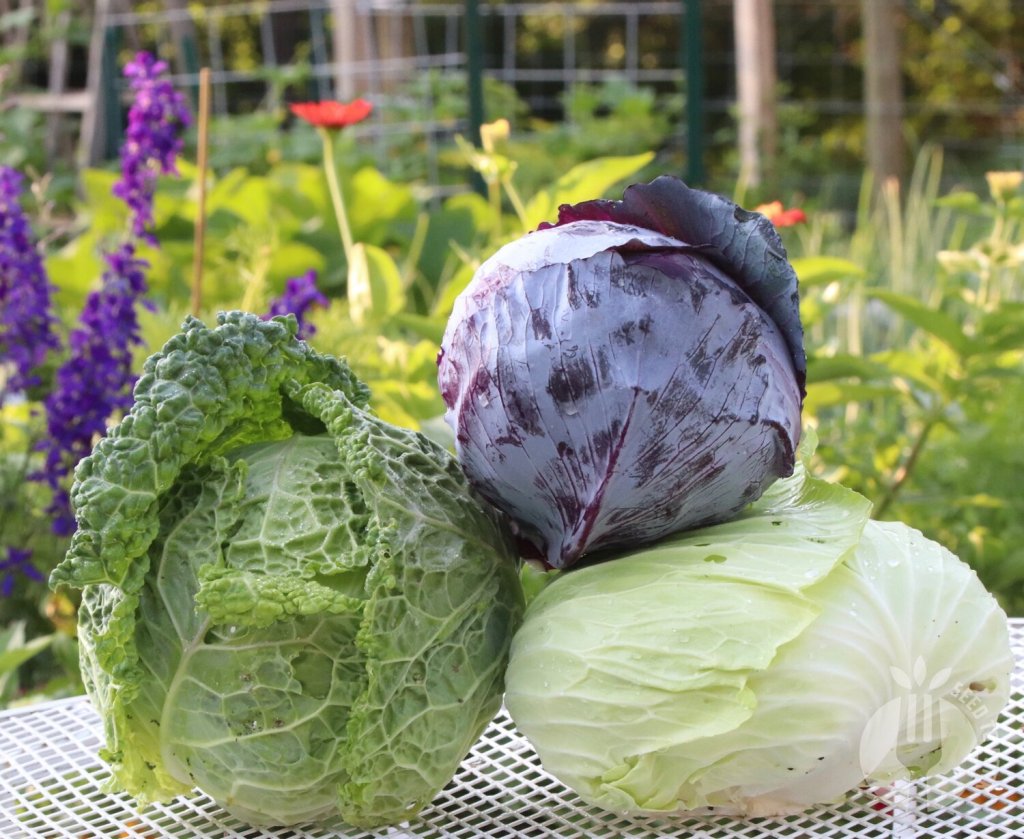
The essential vegetables for this dressing to shine are green cabbage, carrots, and a ripe bell peppers. All the other ingredients are bonuses, adding flavor, heat, and texture. I’ve made this with only green and red cabbage and it was not my favorite; the carrot and pepper balance it out in the best way.
 Yield: 8 servings
The Best Asian Fusion Cole Slaw

The essential vegetables for this dish to shine are green cabbage, carrots, and a ripe bell pepper. All the other ingredients are bonuses, adding flavor, heat, and texture. I’ve made this with only green and red cabbage and it was not my favorite; the carrot and pepper balance it out in the best way.
Ingredients
- 1 head savoy or green cabbage, shredded (about 3 lbs)
- 1/4- 1/2 head red cabbage, shredded
- 1 ripe bell pepper, julienned
- 1 hot pepper of your choice (optional)
- 3 or more carrots, shredded
- a bunch of cilantro, for garnish
Dressing
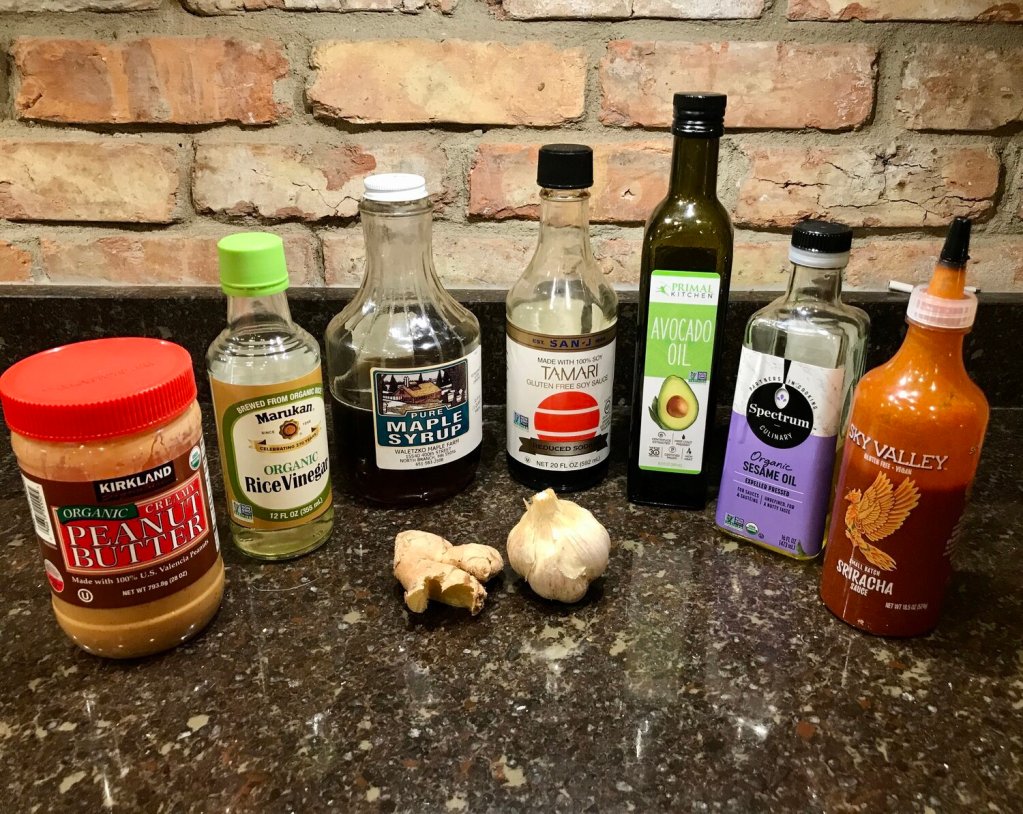
- 1/2 cup organic vegetable oil (a neutral oil like canola, safflower, or avocado)
- 1/2 cup rice vinegar
- 3-4 tablespoons peanut butter (or other nut or seed butter)
- 1 tablespoon sesame oil
- 3 tablespoons tamari
- 2 tablespoons honey
- 2 tablespoons maple syrup
- 1-2 teaspoons sriracha
- 2 cloves garlic, minced
- 2-3 T freshly minced ginger root
Instructions
- Prepare the dressing by placing all ingredients in a Vitamix or tall container for an immersion blender. Set aside dressing.
- Thinly chop cabbage into 1/2” strips. Alternatively, we use a food processor with the 4mm slicing blade to make preparing the cabbage a breeze. I chop the cabbage into quarters or smaller to fit into the processor and have a large bowl ready to transfer the shredded cabbage into as I work.
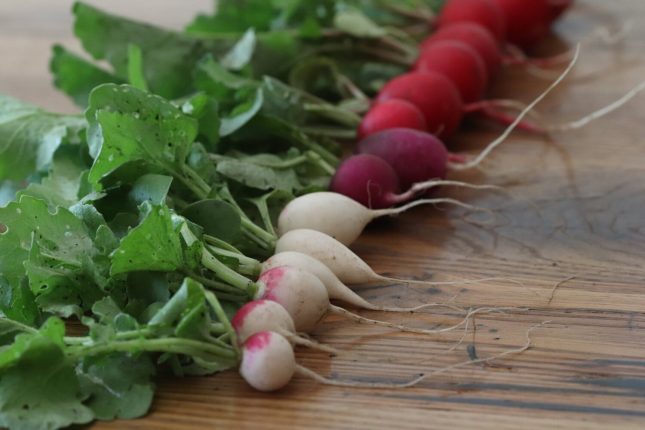
- After I add all the shredded cabbage, I shred the carrots by hand and julienne the bell pepper. If I have it on-hand, I will also shred a watermelon radish for a lovely pop of pink and hit of pungency. Cilantro is another nice-to-have but I will make this recipe often without cilantro.
- Dress the vegetables and toss well. Let marinate for an hour or two before serving. It’s best eaten within 24 hours of making. We make a large batch and eat it for supper and then for lunch for the following few days.
-

Fall Garden Plan: Part 2
In part 2 of my fall garden plan series, I share all the fall vegetables we grow that mature faster than Part 1, and thus need less time to be ready. This means more flexibility when sowing and planting these crops. These are sowed indoors or direct sowed starting about 8 weeks before last frost, so hopefully this reaches many of you in time for a magnificent quick fall garden this year.
It is especially helpful to lean into these quick vegetables if we miss the window for slower maturing vegetables like cabbage or the sluggish celery, both of which need to be started by mid-June in Minnesota for the most successful and robust fall harvest. Trust me, I’ve tried sowing them in late July and even mid-July with disappointing results, and finally, after years of tinkering, have resigned to sowing fall crops in late Spring as the only way to do it here.
It’s important to recognize that this group of plants if started too soon might bolt or complete their life cycle well before Autumn fully arrives, which is never our goal. Because, tomatoes, cucumbers, green beans, and squash. So I’ve learned to hold off on these plants until mid- to late-July, and in some cases August, too.
I continue to eye plantings that are on the decline, places where younger, healthier plants might produce faster and more than what’s currently dragging its heels. Maybe you have a few things that could be cleaned out to make room for some fresh fall crops. Trust me, your October self will be grinning from ear to ear.
Fast-Maturing Brassicas
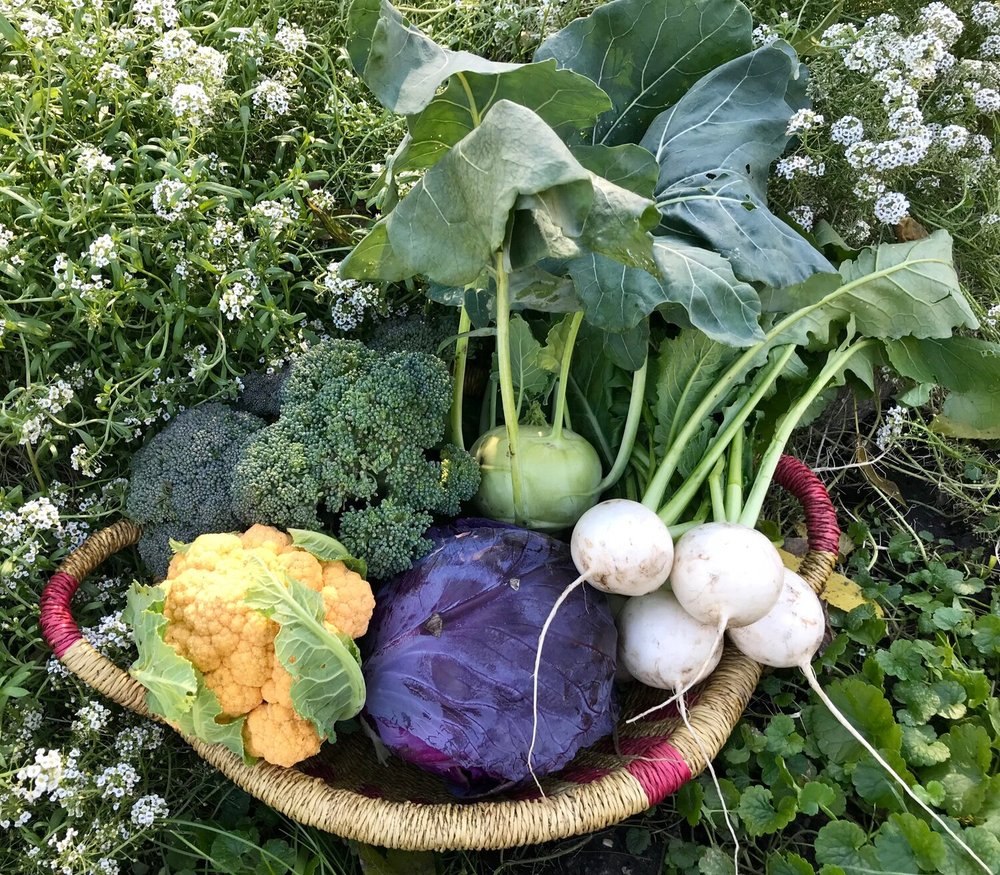
Cole crops are a broad group of vegetables that vary widely both in their form and what part of the plant we consume as well as their days to maturity. They are an indispensable part of our garden plan because we enjoy eating them so much and they grow so well in the early and late season which helps us make the most of our very short growing season, that come August never feels that short but then in October I am sad to see so many things gone. It’s a delicate balance, a frenzy all summer that is anything but balanced, though with each passing year I strive to find balance amid the demands of the harvests.
Kohlrabi, along with Asian greens and leafy greens like lettuce, arugula, and spinach are my go-to crops for those last-minute fall gardens that need to be planted — like now! Super speedy to mature, this should be ready to eat by early October in our garden. I’ve sowed more just this past week as well for hopefully an extended fall harvest.
The main crops I am sowing later in July and early August for a fall garden include:
- Kohlrabi
- Mizuna
- Broccoli Raab
- Bok Choy
- Mustard Greens
- Tiara cabbage (60 day variety)
These crops all mature within approximately 2 months time, especially when the soils are warm as they are in late summer, so I plan to sow my latest sowing of these about 8 weeks before our average first fall frost (which in my mind is Sept. 30, though it varies year to year) in our typical soil blocks and transplant them about 3 weeks later into the garden.
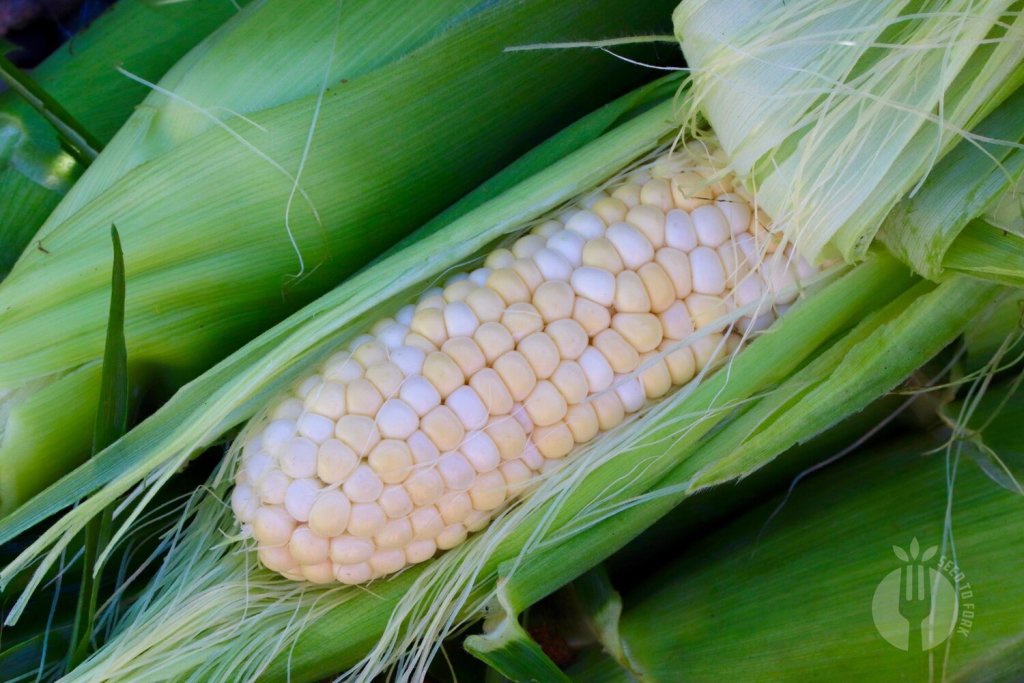
Itty bitty Asian greens replaced our sweet corn this past week. I sowed these plants on July 22. They are taking off in this moderate August weather and we look forward to their pungent addition to stir fries starting in a few weeks.
I am trying my latest fall cabbage sowing this year; I indoor sowed some Tiara cabbage the third week of July along with the rest of the crops listed above, which you may recall as my favorite mini cabbage that reliably matures in late May for me here. I’ll be curious to see how it grows alongside our Capture, Savoy Integro, and Kalibos cabbages that are all well on their way to heading.
Trusty Carrots
If you’re growing carrots that will mature in 70 days or less, then it’s perfectly fine in our chilly zone to keep sowing those through the end of July, even into the beginning of August if you would be satisfied with baby carrots. The faster you can germinate your carrots, the better because that hastens their maturity.
In full disclosure, I complete all my carrot sowing by the third week in July, earlier if space is open. Sometimes we interplant them before crops complete, and other times we wait and fully reset the beds. Because they can take more than 2 weeks to germinate, it’s best to prioritize carrots for your fall garden. Also, because I believe they are one of the most magical and delicious root crops for a home gardener to grow and enjoy.
Fall Roots: Watermelon Radish, Rutabaga, Turnip, Daikon
Oh the trusty roots. Excepting root maggots and voles who have each been known to decimate my fall plantings in years past, we always seem to have enough to tuck away for winter eating. It could be more robust, but there’s usually a taste of each for late fall and early Winter meals.
Viola daikon are a striking pale purple with streaked pale insides. My favorite way to consume them is fermenting in a salt-water brine and using them as condiments. They also make fabulous additions to cole slaws, sauerkrauts, and kimchi.
I direct sow all these crops simply after a little wiggle with the pitchfork. All these crops generally follow my onions or garlic or one of my earlier successions of brassicas. Like with all brassicas, in the late summer the plants germinate very quickly and establish quite fast, so I do try to time it until after the majority of our heat waves have ended for the season. I tend to give these larger roots as much or more room than carrots, their rows spaced out a good 18”. Because, leaf area. These roots are 50-day varieties so I don’t start to sow them until end of July or early August. I will sow my last row of Watermelon Radish and Daikon this week.
Fall radishes are a real delight fresh, lacto-fermented, or stored for winter consumption like our storage-friendly daikons, black radish, and beauty heart (red meats).
These roots have dense foliage. And it’s this very foliage’s density that directly impacts its happiness and thus the robustness of its ensuing root. So this is another place where I tend to err on more room than trying to cram everything in there and hope for the best. I cringe when I see friends’ leggy radish plants with modest roots, knowing those plants’ potential were diminished by either growing in the shade of their neighbors or by being planted too densely. For more on plant spacing, see my Minimum Plant Spacing Guidelines here.
Especially with my beloved Watermelon Radish I am careful to give them proper spacing. At first it seems silly, but eventually when the plants leaves touch adjacent rows, I know. I know this was the proper plant spacing. I don’t want the plants to be touching each other until they are pretty well developed, meaning they are on their way to producing roots. We had them well past the New Year last winter, and my hope is we can sow an extra row or two.
Leafy Greens
A fantastic fall crop includes all the leafy greens:
- spinach
- lettuce
- arugula
Since we prefer head lettuce, we have already sowed a few dozen heads of lettuce for late summer and early autumn salads. But more recently this week, I started to direct sow arugula, and will continue to squeeze some square footage out of the garden to add some delicious pungency to our fall garden salads. Leaf lettuce, lettuce mixes are a great late summer addition and can be interplanted where space allows; recently I added some head lettuce starts below my now very well pruned tomato plants as plenty of light is penetrating the ground at this time in the season.
Fast Radishes
Quick globe and breakfast radishes can start to be sown again. And again. Be warned, when growing in heat, radishes tend to accumulate heat — in the form of pungency, the mouthfeel that makes a radish taste “spicy”. I have sowed several rows of radishes, all popped up within the week and are due for thinning. I will continue to sow a few rows of radishes probably through the first weekend in September.
Radishes, anything in the 28-32 day maturing range, can be sowed throughout August in zone 4. If you want to push the season, sow a few rows in early September, too. If warm weather persists, your extra trials will be your reward. You won’t know unless you try, and every season bring new results so it’s always good to sow as often as space allows.
Fall gardens include some summery foods. And, as the seasons turn, the summery foods fade and those things we sowed in July and August trickle in and extend our seasons.
As with all things in the garden, find what works for you by trial and error. Give a few varieties a chance across a few different weeks to see how they respond to different times of the season. The real beauty of the fall garden is getting these crops established before the days dwindle, and after that, you have an outdoor refrigerator and grocery store at the ready, awaiting your harvest baskets. I love the slower pace of fall, and it’s made even more special when our garden is chock full of produce in September, October, and into November.
-
The Direct Seeded Garden
There are so many delicious and nutritious foods that anyone can easily grow in just about any space or container by simply plopping seeds into some rich, well-draining soil. At its core, it embraces the simplicity of nature, fueled on the hope of a seed and intrinsic resilience therein.
This article will highlight the many types of veggies that grow best direct seeded, without the hassle of getting a head start indoors including investing in plant stands and grow lights and seedling mats.
It’s the most economical way to grow food.
That being said, I do love to start many things indoors, and even some things that do well direct sown. In large part, that embodies my passion for pushing my growing season as far as possible, not an indication that the plant needs that start to succeed. Beets are a great example of this. A contentious one, too. Many farmers only believe direct sowing beets but I’ve learned by trial and error that my indoor sown beets that have that little bit of a head start produce earlier than my direct sown beets. And setting out a larger plant means it’s naturally more resistant to pest pressure.
The keys to a productive organic garden are well-draining and well-amended soil, ample sunlight, and the right amount of moisture. Sounds easy, but some areas have native soils that are heavy clay and while holding a lot of water and very rich, they make it difficult for fine roots to grow and plants can easily get waterlogged and become stunted. On the other end of the spectrum are wonderfully sandy soils, the wellest-draining (yes, I made that up!) of the well-draining soil types, places where nutrients and water simply leech down and out of the soil making it very hard to keep your plants well-fed during the growing season — although waterlogged plants are never an issue. An ideal soil has enough structure to hold moisture and plenty of compost to add nutrition and invite in the micro-organisms to work their magic for you.
Additionally, there are sweet spots for growing food. Early season vegetables can germinate and grow in soil as chilly as 40 degrees, although I’ve found 45 and above to be their happy place, while hot summer crops need really warm soil to thrive so it’s a fool’s errand to attempt otherwise. As I share these veggies with you, I will generally move across the garden seasonally, sharing what to sow earliest during the chilly late Winter/early Spring weeks through to late Spring/early Summer when the soils are properly warm and the days getting hot.
There’s a fine line between pushing your season and setting yourself up for failure because you’re trying to start things at the wrong time. Timing is everything in the garden, and particularly when sowing directly into the garden. I want you to be successful, and that means timing your sowings properly, and becoming proficient at challenging tasks such as waiting for Mother Nature to warm your soil in spring before you dive in and drop seeds in the ground.
On to the good stuff. Let’s grow a garden from the ground up.
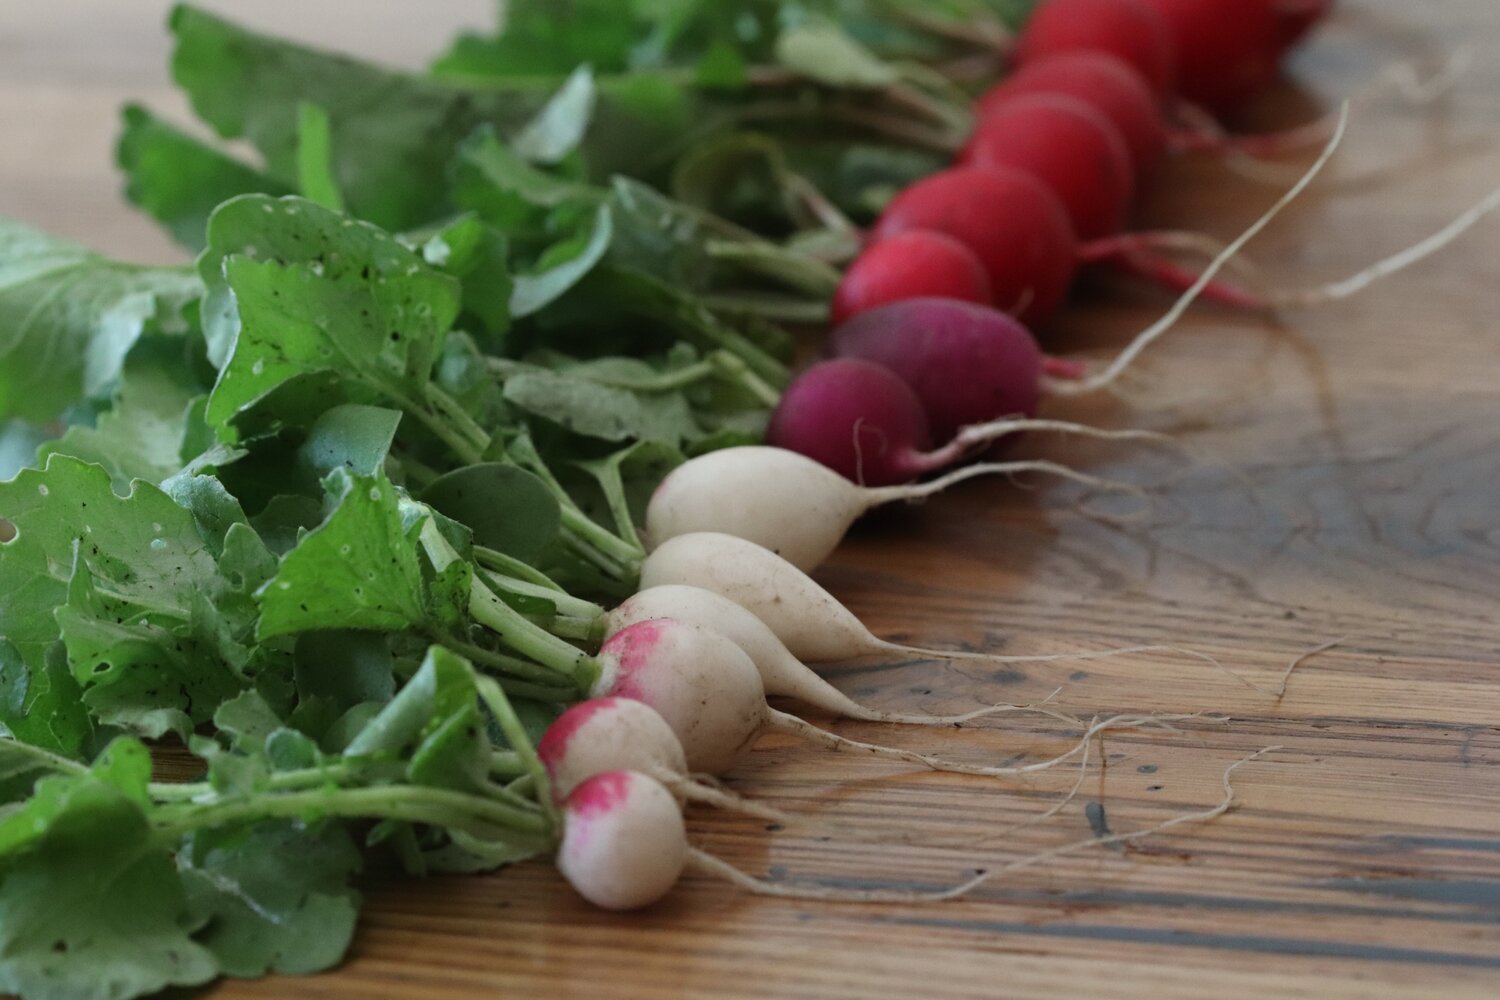
Radishes and Leafy Greens: What Early Season Salads are Made of
Want food fast? I can think of no other fast food than a radish. A radish is a fantastic addition to all gardens, a wonderful first seed to plant with children because of its rapid growth and maturity, and, the best part is, you can eat the entire plant around a month or so from seeding, even in early Spring. Always direct sown right into the garden and maturing in mere weeks, radish are a very easy food to grow. Some of my favorite radish varieties include Sora, Easter Egg II, Viola, and Red Head. I usually rinse my radish leaves off and quickly wilt them while my eggs are cooking in a hot skillet – a great way to add veggies to the start of your day.

Sowing Tips:
Radishes should be sown about ¼” deep and covered. Lightly loosen soil with a hand trowel, making a mini-furrow for the seeds. Sow about 1 seed every ½”-1”. Thin radishes to 1-2” apart after the first set of true leaves appear.
There are an endless variety of greens to choose from, but I’ll focus on what we like to grow from seed. Again, because I prefer to push my season, I do, in full disclosure, indoor sow most (alright, all) head lettuce to give it a jumpstart on the season.
However, arugula does equally well sown indoors compared to direct sown. In fact, in my current trials I’d say I prefer direct sown arugula over what’s been indoor sown and transplanted. We grow Rocket and Astro Arugula, and, like radishes, this is a near fast food in the garden when the growing is good in the early season, producing small harvests around a month to six weeks from sowing.
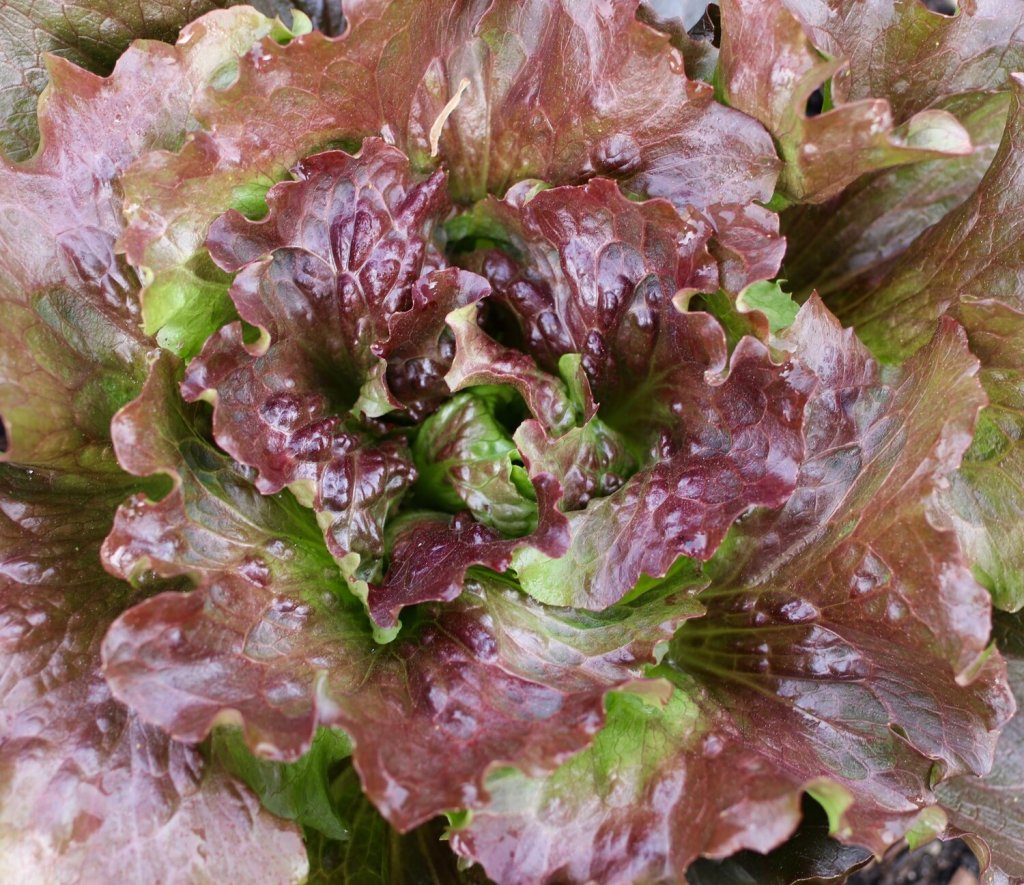
There are many baby leaf lettuce mixes, too, that can be harvested quite quickly and include a wide variety of greens that make a robust salad all on their own. Check the days to maturity on the back of the seed packet and select a variety that has the shortest number of days to maturity for the fastest harvest.
If head lettuce is what you’re after, you can absolutely grow that from seed as well. Sow it in early Spring for a late Spring harvest. Head lettuce is a bit more of a waiting game and so we always choose to sow it indoors to give it a leg up again slugs and other pest pressure.
Sowing Tips:
Lettuce is any easy seed to accidentally over sow because the seeds are so thin and slippery. Not to worry, you can just plan to snack on the babies as you thin them out to a wider spacing. Thinning is the process of removing some of the baby plants to give the strongest ones more room to fully mature. Be brave and poke around and thin your plants to the appropriate spacing. Leaf lettuce you can leave closer together while head lettuce needs a bit more space to fully develop their namesake heads.
Peas – Snow, Snap, & Shelling
Another crop we only direct sow, peas require a few months from sowing to harvest, depending on the variety, because the plants need time to fully mature and flower in order to enjoy their fruits (pea pods). But they are definitely worth the wait, a very satisfying food to grow from seed. It’s probably my favorite spring garden treat, and I’d like to think I’m the first to eat one each year, but realistically it could be any one of our family who snags the first mature pod, likely on the sly.

Last Spring’s snow and snap pea harvests were about as good as we’ve ever seen them. Peas produce from seed in 2-3 months, much sooner if you’re after the tender shoots. We wait for the pods, personally, and they are one of the sweetest treats from mid-to late-June through mid-July here.
We have been direct sowing our peas earlier and earlier in recent years, exploring sowing them under row cover as well as uncovered, and this Winter we sowed them April 1. The shelling peas that were sown under row cover germinated about a week before the uncovered peas, but they all sprouted within 3 weeks of sowing and right after an April cold snap and light snow storm. We enjoy growing Oregon Giant snow pea, Sugar Ann snap, Opal Creek snap, and are growing a new shelling pea this year called PLS 595.
Sowing Tips:
Soak peas in warm water the evening before planting them. This helps hydrate the large seed and thus expedite germination. This is a method often implemented for beans, too, but peas so far are the only vegetable whose seeds we soak prior to sowing. The seeds need to be buried a good ½-1” deep. We sow seeds 1” apart in two parallel rows and don’t thin the plants once germinated. Peas are one of the rare plants that seem to do well in tight growing conditions. Peas germinate fastest in soil 45 degrees or warmer, but can be sown at the same time you tuck your first radish seeds in the ground.

I add a popsicle stick label and plenty of water because these seeds are thirsty things, and tuck these on a warm seedling mat overnight before sowing to help hasten germination.
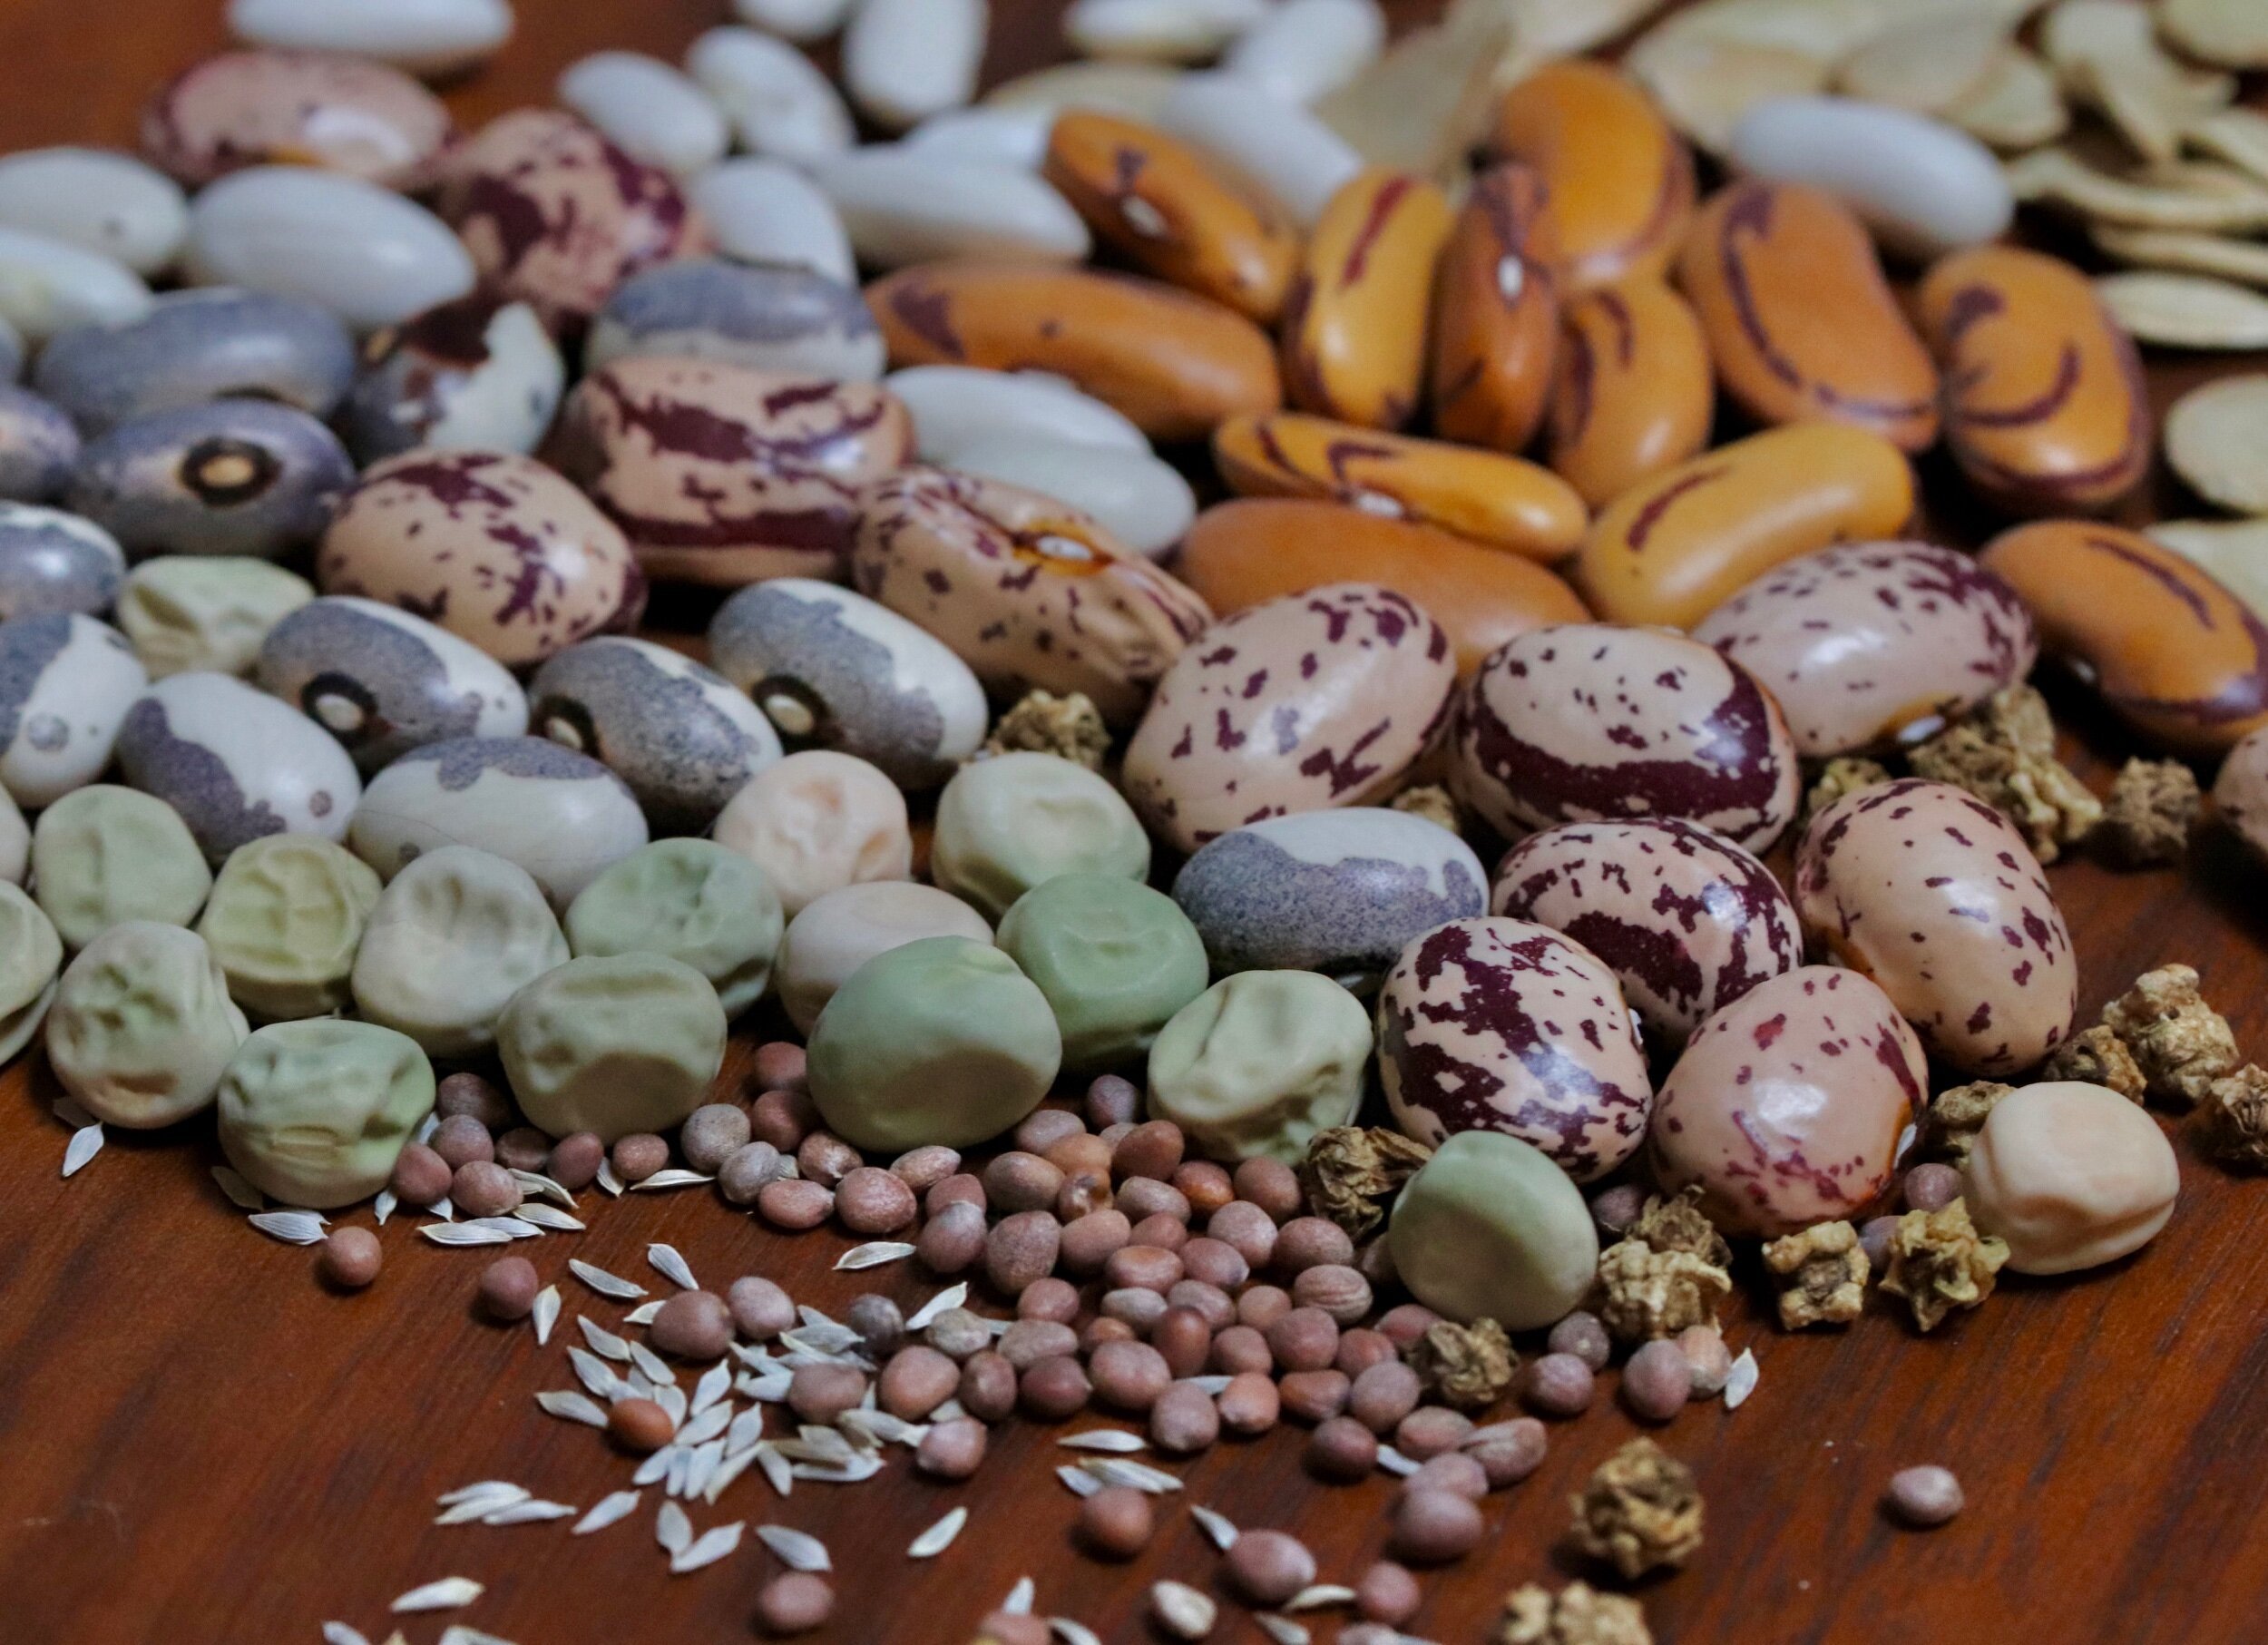
The Wonderful World of Beans: Shelling (dried), green (snap), & edamame
So many fabulous options abound in the world of beans, and we enjoy growing a little bit of everything. From bush to pole green (also called snap) beans, from edamame to heirloom shelling beans, we love growing a wide variety of beans. And beans are relatively fast to mature which makes them a must-grow in your direct-seeded garden.

From long beans to your standard green snap bean, green beans are one of my favorite foods to grow and eat during the height of summer. Seen here are Chinese Red Noodle beans (long beans), Purple Podded, Dragon’s Tongue (white speckled), Jade (the larger portion of green beans) and Fortex (lighter green).
Beans, like peas, take only a few months from seed to harvest. With such a wide variety to choose from – and with that comes a wide variety of days to maturity. On average, we yield beans in about 2 months after sowing, give or take a week or two. A hotter weather crop, they do well being sown about 6 to 8 weeks after you sow your peas, so think of this crop as coming in after your peas are all finished for the season (for us here in Minnesota, that’s usually in early- to mid-July).
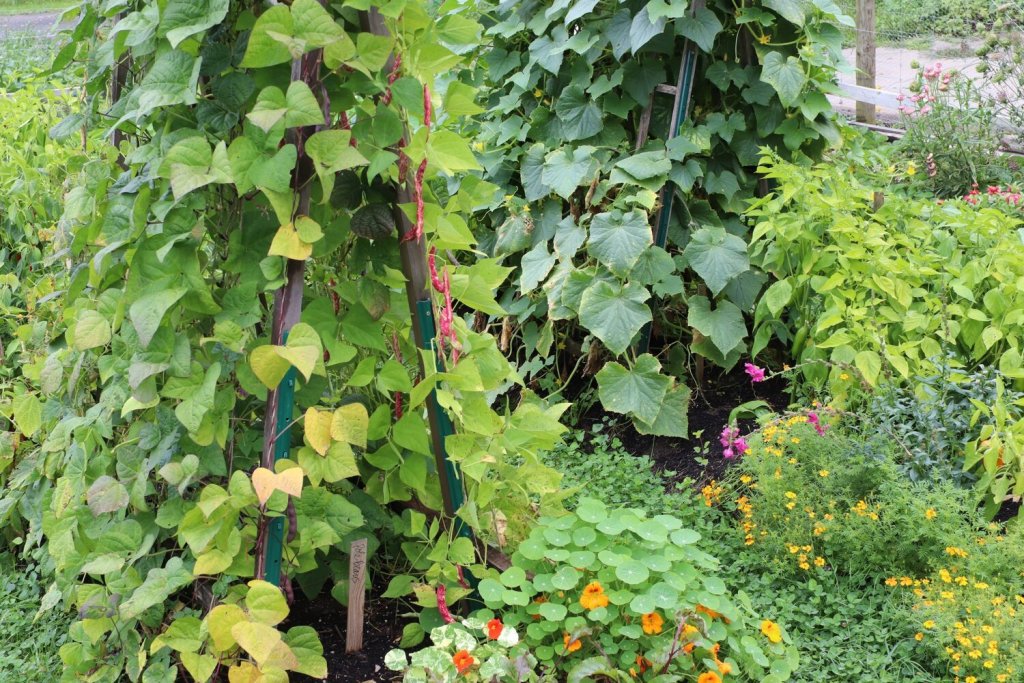
Pole beans, both shelling and eating, mixed together on one trellis, and cucumbers on another. Beans exhibit a few distinct growth habits: bush or pole. Short on space? Grow up, and go for pole varieties. Read my blog post on vertical gardening for more ideas on trellising. Pole beans are an indeterminate vine and will just keep growing until first frost. I always sow some pole beans, and appreciate their longevity once mature. However, I have anecdotally found them more susceptible to Japanese beetle damage than bush beans, our green varieties in particular. We had been growing Fortex for many years; we also grow Purple podded and are adding Carminat (purple pods) and Seychelles this summer to test my hypothesis about beetle damage.

These Dapple Grey beans were my favorite to harvest and to consume. They were the only bean that kept its mottling even after many hours cooking away in a cassoulet. And so delicious. A bush bean, these took much longer to mature than our other varieties but so worth it. Have a little extra space? Grow some of each and enjoy the benefits of both. Bush beans tend to produce over a shorter window of time. Although they grow low, they do appreciate some support. I like to add stakes and wrap twine around the plants as they grow up to their full 24” height. It prevents them from flopping over in high winds or heavy rains while ensuring the food remains up off ground level where lazy foragers like slugs might otherwise stumble upon – and devour – your crunchy snacks.
Our favorite bush varieties are Velour, Jade, Dragon Tongue, and Maxibel Haricot Vert. We’ve added a yellow wax this year called Gold Rush. Dried beans are new to us and we are enjoying Dapply Gray, Borlotti (Speckled Cranberry), and Tiger’s Eye as our favorite to both grow and for their superior culinary texture and flavor.
Sowing Tips:
No soaking needed. Because the seeds are so big, planting the just right amount is quite easy to do. Sow bean seeds 3” apart. For pole beans, be sure to have your trellis installed prior to sowing seeds so you don’t disturb your bean seedlings while installing the support structure. In the right conditions, beans germinate and establish very quickly and make a very fun and delicious crop to grow from seed. Don’t plant your seeds too close together because proper spacing and thus air flow will reduce disease pressure. We sow our beans starting in late May through mid-June here, when soil temperatures are 60F or warmer.
The Epitome of Summer: Sweet Corn
Sweet corn, cornmeal, popping corn. You can easily grow it all at home! It’s a bizarre agricultural crop, having been loved so much its grains now grow many times larger than its ancestor’s, packed with so much sugar we’ve all gone crazy for it. Well, not all of us. But a lot of us.
I have seen many gardeners start both corn and beans indoors, and I’ve never considered it necessary here. I am assuming they do this to prevent bird or other pest damage and to give their plants a leg up against predation. So, it might be useful in your area, but I generally go by the rule of thumb, the larger the seed, the more likely I am to direct sow it. And corn is no exception to this rule: I always direct sow this vegetable.
Corn can quickly get confusing with problems of cross-pollinating between types of corn. My recommendation is to choose one seed type (a super sweet hybrid, perhaps) and plant that out in a small block. This will avoid cross-pollination issues that may result in less starchier, less sweet corn. You can also stagger plantings if you have the space, sowing our corn 10-14 days apart so they pollinate at different times. Again, if you are growing only one variety this is a non-issue.
Corn is wind pollinated and it’s recommended to have a minimum of 4 rows for corn. We have grown as few as 3 rows of corn in a 3×4 area in our garden and had great pollination rates. We do shake the stalks when the corn is tasseling to encourage the pollen to drop down to the silks. It’s truly a fascinating plant, and I should write in more detail about it in a future blog post, but the takeaway, is drop those seeds in the ground and give enough space for proper pollination — otherwise you’ll have the dreaded cobs that are half filled with kernels, and no one wants that.

Even though we are trying a taller hybrid popping corn, I have a suspicion this Tom Thumb variety will reign supreme. It’s diminutive stature and cob size is simply charming and it pops really well! Our favorite corn varieties to date are American Dream super sweet (sh2), Tom Thumb popping corn, Northstine Dent (for cornmeal and flour) and Robust (a hybrid popping corn).
Sowing Tips:
Sow corn seeds 6-9” apart in rows 24-30” apart. There is a proper spacing to growing corn and overplanting can be a hindrance to success. These guidelines are the closest you can plant corn. Corn is sown when soils are warm, 60-70 degrees, so before your summer squash and around the same time as your beans. Sow the seeds 3/4 to 1” deep. If germination is high, I go through the rows and try to thin to 8” apart. I have successfully transplanted corn seedlings within my planting to get the proper spacing.
Meet the Cucurbits: Squash, Cucumber, Pumpkins, Winter Squash, and Melons
A true sign of summer is a basket of zucchini and cucumber. A vine-ripened cantaloupe. You cannot achieve this glory in the shoulder season. These are true seasonal delicacies that herald the warmest months of the year. We love growing all of these plants, and they all have relatively similar growing conditions. Basically, bring on the heat.

Growing our cantaloupes vertically is always a joys and a space saver. The biggest caution I share with this group of vegetables is be sure it’s good and warm before you sow. To drop the seeds directly into the soil you need soils to be even warmer than our previously discussed vegetables. These plants do not thrive cool soils. In fact, I’ve lost starts due to prolonged damp and cool June weather in the 60s. You need really warm soil, a minimum of 70F but warmer is better, for these seeds to sprout happily and thrive.
Cucurbits are a true summer crop and trying to push the season may result in disappointment and crop loss. Take it from the grower who’s lost entire plantings twice in one season due to a prolonged spring that went deep into June!
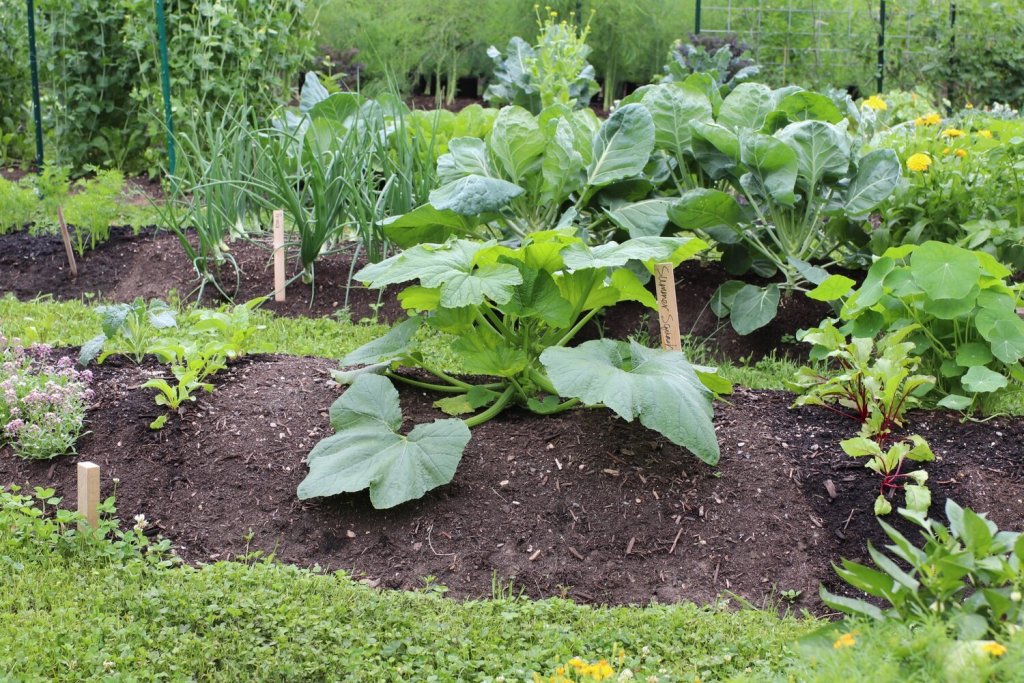
Summer squash are the only cucurbits we don’t trellis. And I’m beginning to wonder why not. This was the end of June last summer while it was still just a well-behaved young thing. The other main commonality with most of these vegetables is that they are vining. While some are short vines, I provide support for all of my cucumbers, winter squash, and melons. I let my zucchini ramble on the ground, but this summer I may take them vertical, too, and see how I – and they – like it.
We grow 4 slicing cucumber plants annually on a single trellis, two on each side, spaced 24” apart. We also grow about 5 pickling type cucumbers which yield us enough to give away generously, pickle, and eat whole like apples in the middle of the garden. It’s easy to overdo these crops, and sometimes less is more.
Anything over 2 squash plants and we are drowning in them by mid-August, so less is ideal with summer squash, though I admit it’s hard to narrow it down to just one per year. They are space hogs so I never grow more than 2 summer squash.
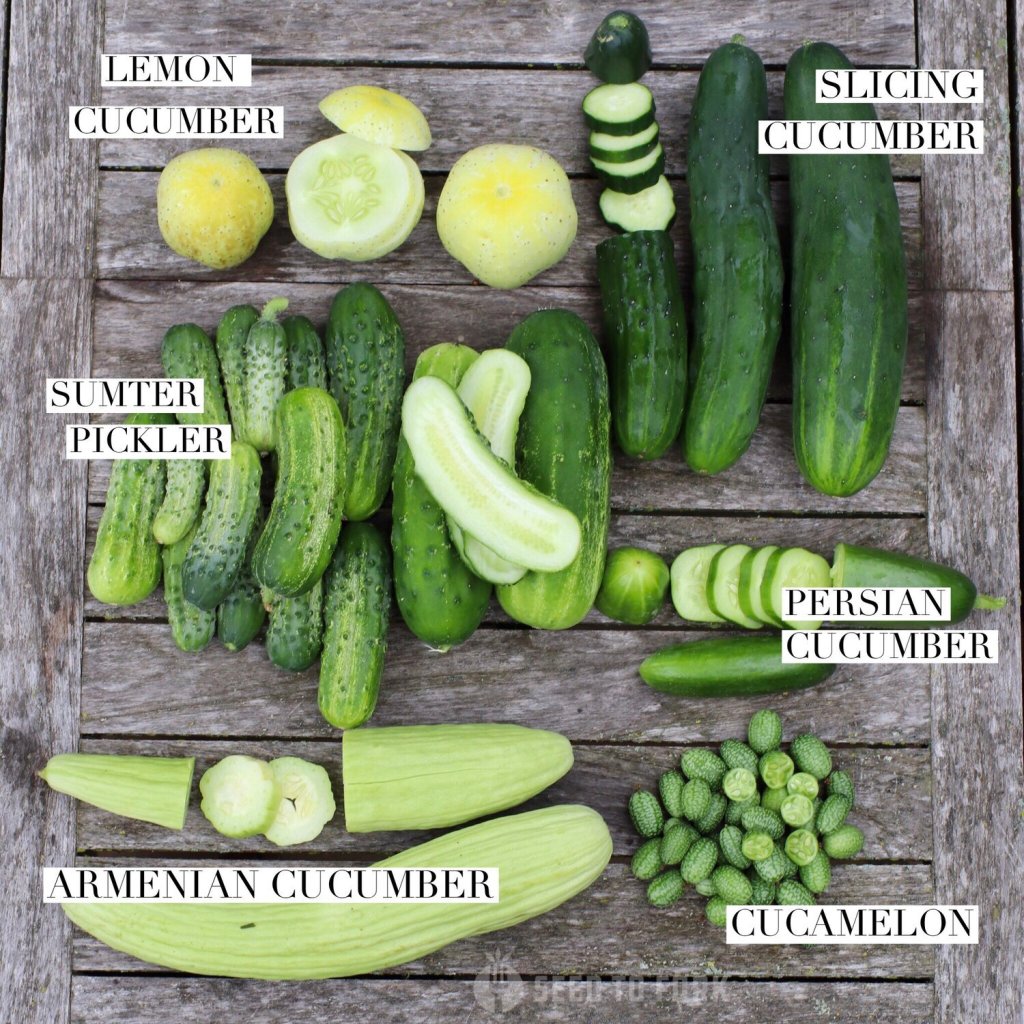
We enjoy growing many varieties of cucumbers, and continue to explore the possibilities, including many new varieties this year. Some standby producers for us are Sumter (pickling type) and Marketmore76 and Poinsett (slicing varieties). For summer squash I enjoy costata Romanesco and yellow crookneck. For winter squash, delicata and Waltham butternut are our favorites.
All of this variety, grown from seed to harvest in 2 months’ time. Incredible! Sowing Tips:
Wait to sow these seeds until several weeks after your last frost. On an average year here, I wait to sow them until the end of May or early June, but choose a stretch of warm weather to follow sowing them in the ground. Like with the pole beans, I install my trellises before I sow the seeds. Sow a few seeds per hole and thin to one. Generally, I space my melons, cucumbers, and winter squash 18”-24” apart on a trellis. Summer squash is one plant per 4×4’ area.
Full Disclosure: I give these plants a minor head start indoors. I use my 3.25” newspaper pots and sow the seeds approximately 3 weeks before transplanting. This does two things: allows me to plant strong starts and gives the soil those extra weeks of warming before planting. I still plant them around the same time I’d have dropped seeds in the ground, it just gives my season a little extra bump in productivity. In warmer climates, this is a completely unnecessary step.
The Trusty Roots: Carrots, Beets, Daikon, Turnips, and more
There are so many wonderful root crops you can easily grow from seed, with a simple but important caveat. Similar to those earliest radishes mentioned earlier, they need some really good soil in which to expand and mature. If you are trying to grow in your native soil and it’s heavy clay, you will have a hard time growing great roots. Try using containers if your soil is really heavy or consider growing the atlas carrot, a rounded carrot that grows well in all soil types.
The wonderful world of root vegetables includes many delicious varieties of radish, some of which are seen here. From top left clockwise: beauty heart, alpine daikon, black radish, viola daikon, viola radish and center sora radish.
The beauty of these crops is there is no indoor sowing. Like, ever. It’s plop seeds in the ground for all of us, from the big agricultural farms to little old you and me. Although you and I don’t have machinery, we just use our hand trowel and hands.
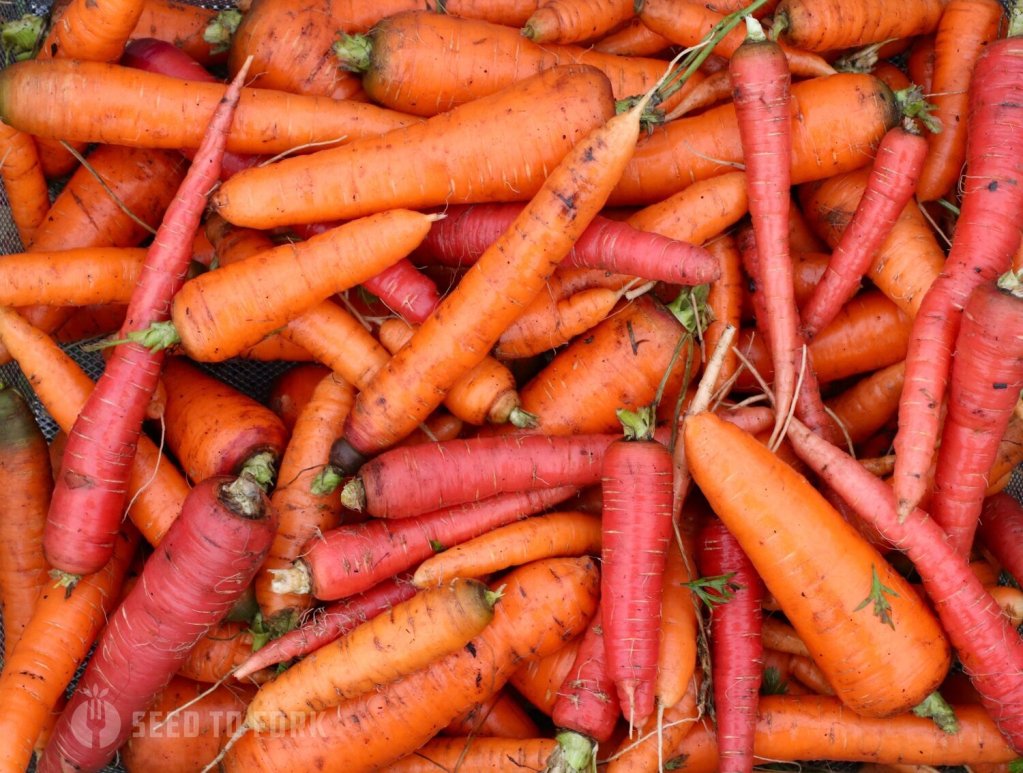
Fall carrots are simply the tastiest. We select varieties known to store well so we can keep eating our homegrown carrots all throughout the Winter. Stored well, they keep for upwards of 5 months for us.
Most of these make fantastic fall crops, so sowing them starting after the Summer Solstice and into the middle of July for a northern garden works well. You can also sow many of these types of crops early and get a spring harvest, but I find things like watermelon radish to just grow better for me in the fall. Carrots, though, we grow them all season long and store them well into the following year.
Sowing Tips:
Sow carrots as soon as the soil can be worked in spring, although they germinate faster as the soil warms up, like most things. We have tried a lot of different germination aids but the current favorite is using a burlap sack to hold moisture in and keep the soil evenly moist.
Consistent moisture is completely critical for good germination. Carrots are sown shallow like radishes, ¼ to ½” deep. We often use our pitchfork and loosen the soil as deep as we can work it before sowing carrots to ensure the soil is ideal for those lengthening tap roots. Again, this is just for carrots. The rest of the root crops we grow form round bulbs and don’t need pitchforking prior to sowing.
Key Takeaways
- You can grow a tasty garden directly from seed right in a container or into your ground.
- The better drained and amended the soil and the more sunlight, the happier and more productive the plants.
- The bigger the seed, the deeper it goes into the ground. And vice versa: small seeds are sown right near the soil surface.
- Soil temperatures are a key factor in germination. If you plant seeds too soon, they will take longer to germinate. Don’t lose hope!
- You can plant hot weather crops too soon. Resist the urge!
- Some direct seeded vegetables like radish and leafy greens grow best in cooler weather. Embrace the seasonality of growing food.
Happy Growing!
-
Garlic Scape Pesto
Garlic scapes are the early gift of a garlic bed, the flower head from hard neck garlic that must be removed for the garlic to bulb as large as possible. They emerge after a few months of growth in spring and about a month before the garlic will be mature. It’s imperative to harvest them so that the plant can continue to focus on bulb formation, developing the largest, most productive heads of garlic as possible. If you’re curious to learn how to grow garlic, read my garlic grow guide.
We’ve tried grilling them, dehydrating, them, and even making garlic scape pesto. It was very pungent — the mouthfeel that makes food taste spicy which is actually a sensation and not true heat like from capsicum (peppers).
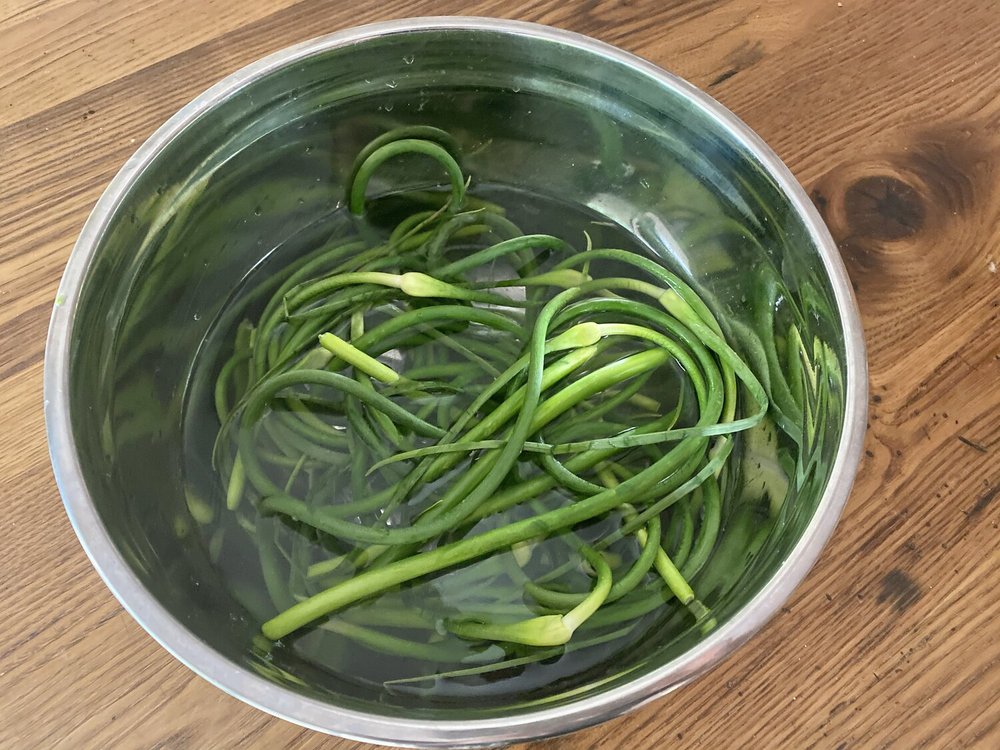
Blanching the garlic scapes knocks back the pungency to the just-right amount for me. I think you’ll agree.
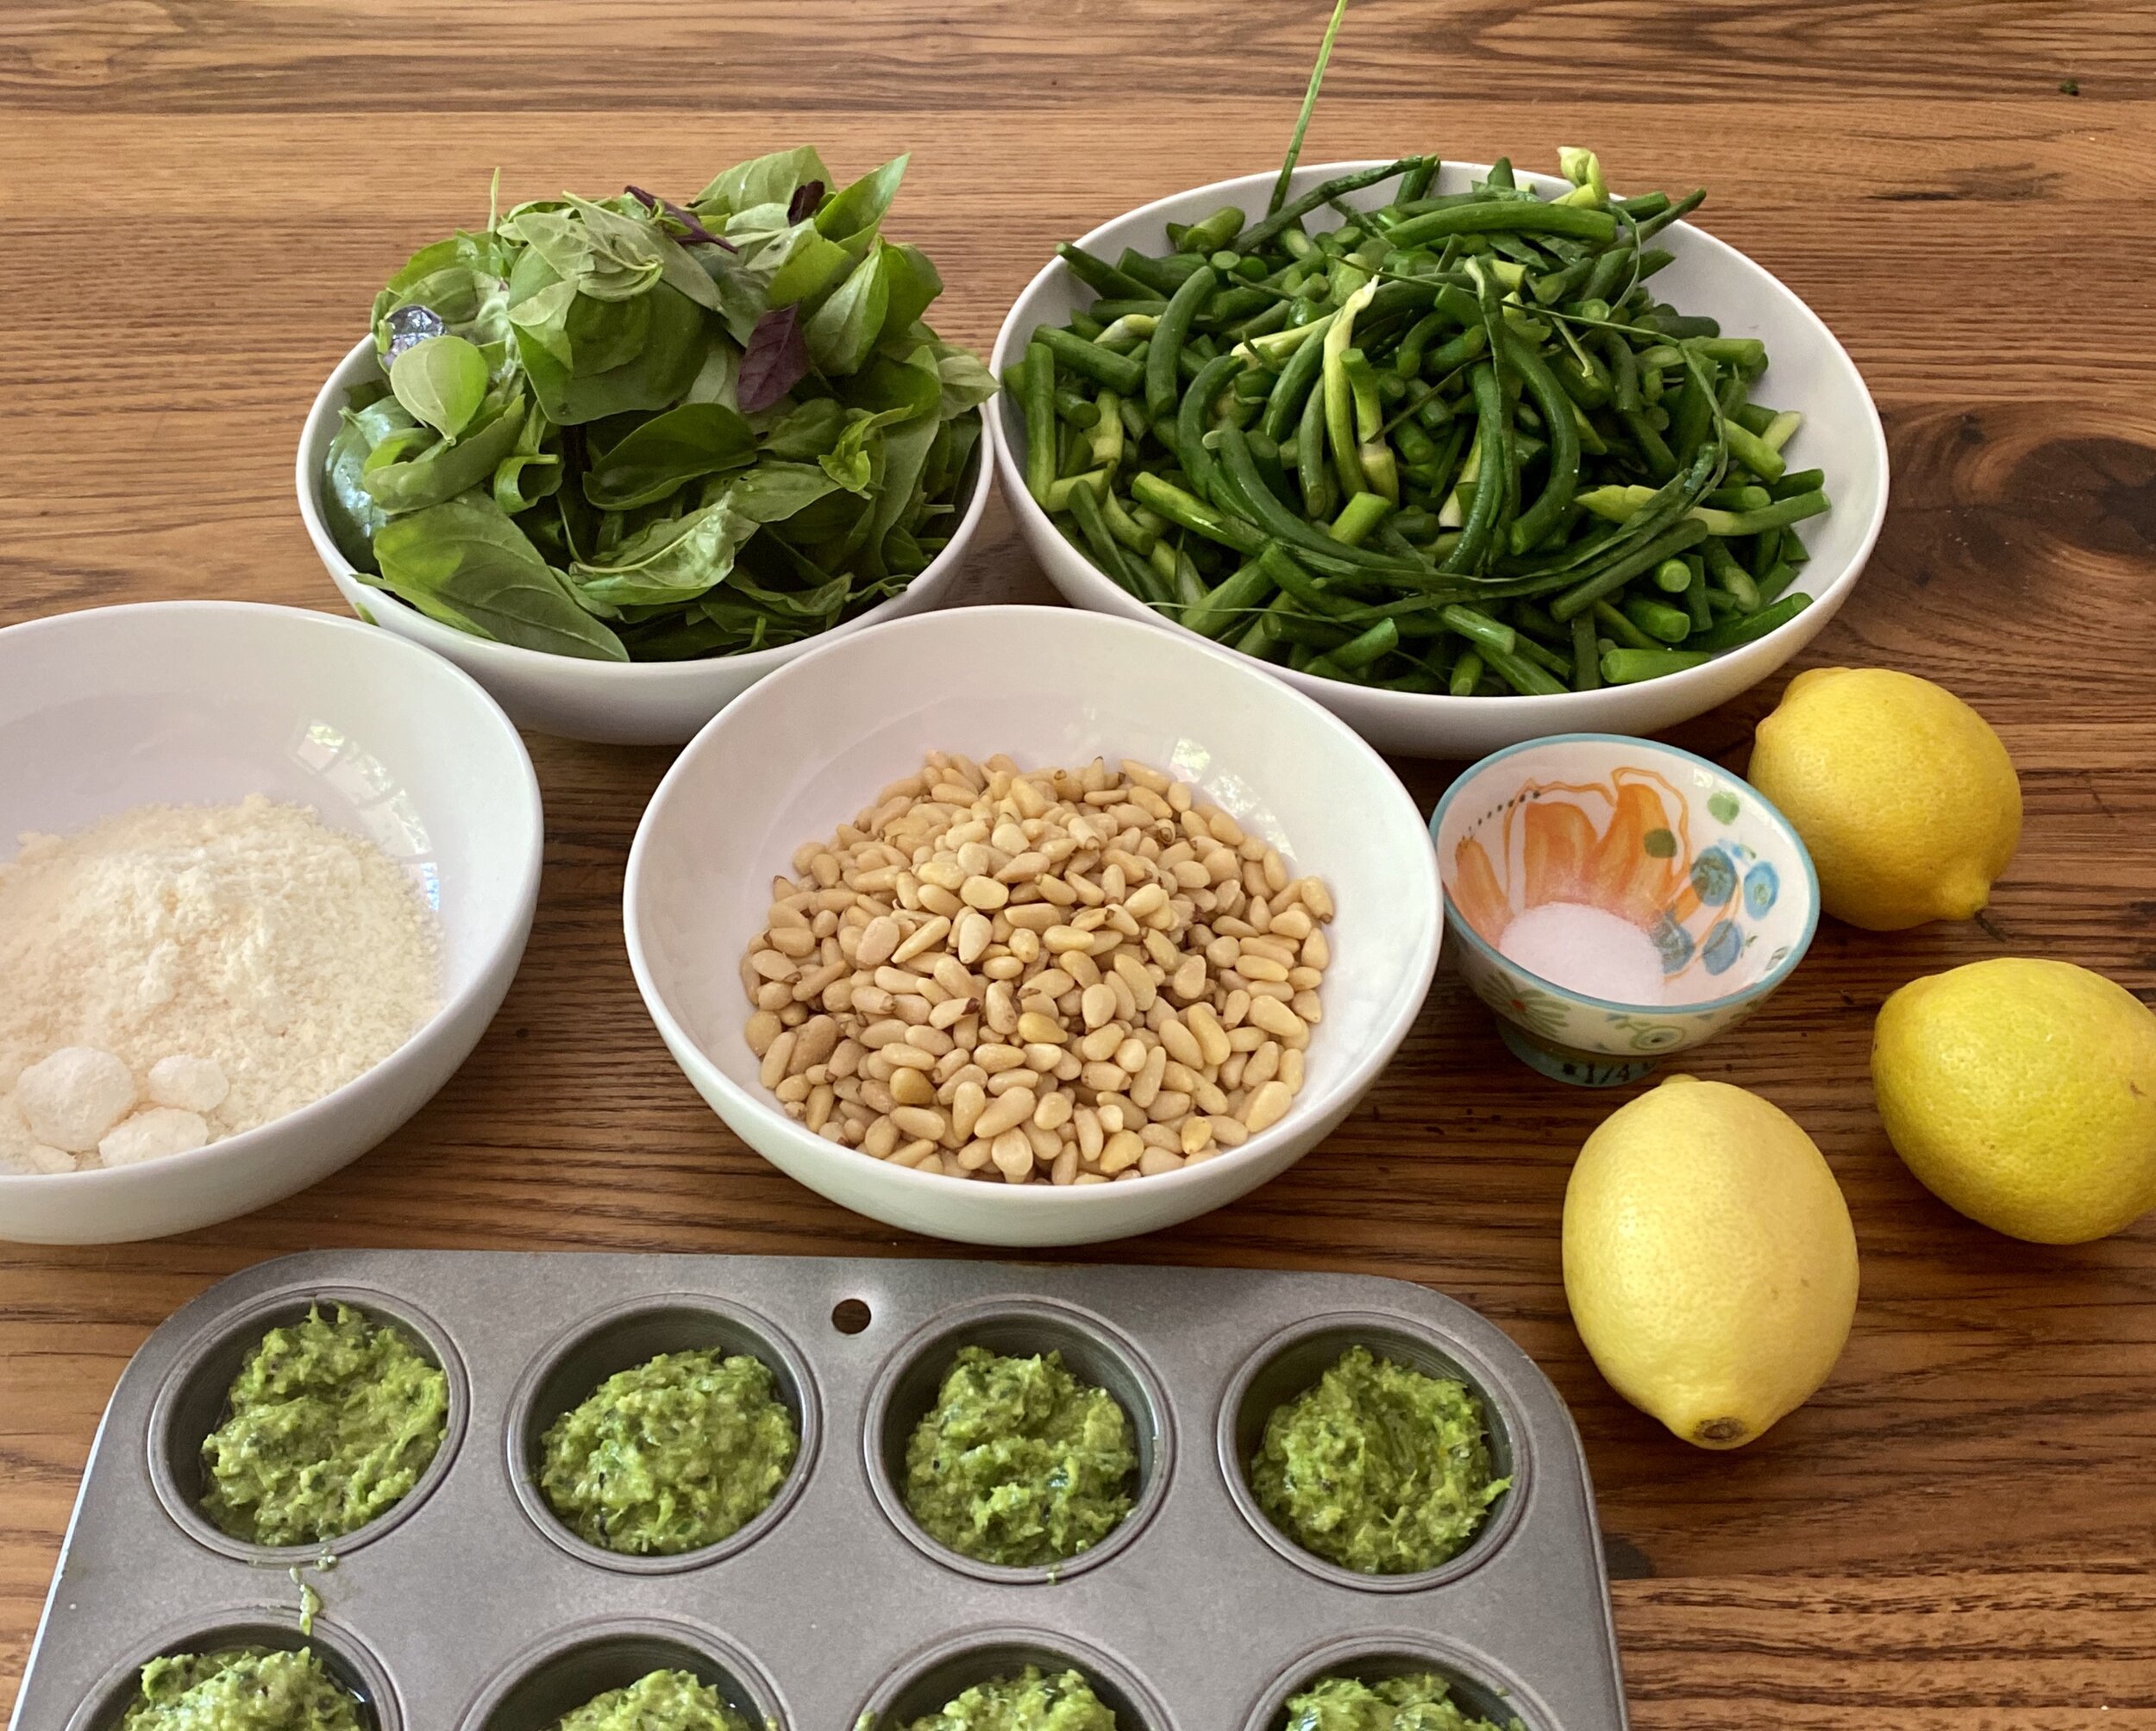
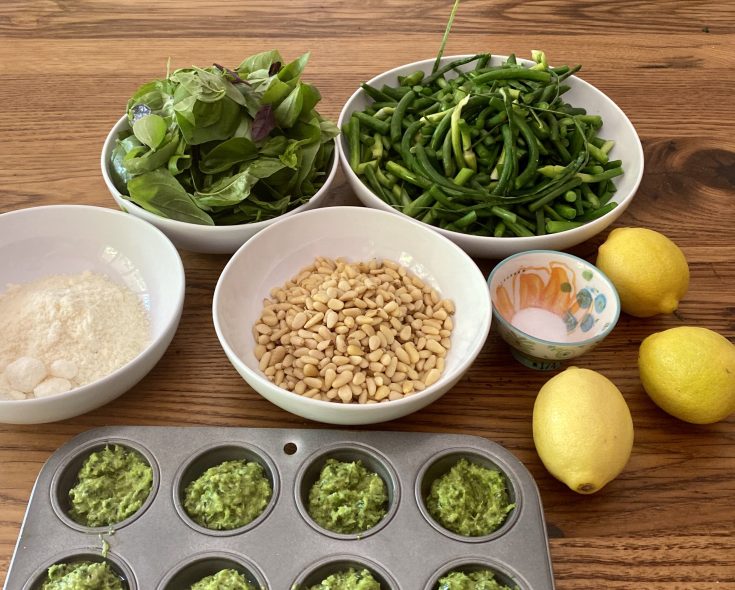
The beauty of this recipe is that we have enough basil for this recipe but not enough for a basil pesto, and meanwhile have garlic scapes sitting in the fridge singing tick-tock to me every time I open it. This allows us to utilize abundance of one and modest offerings of the other and is a fabulous alternative to our traditional basil pesto.
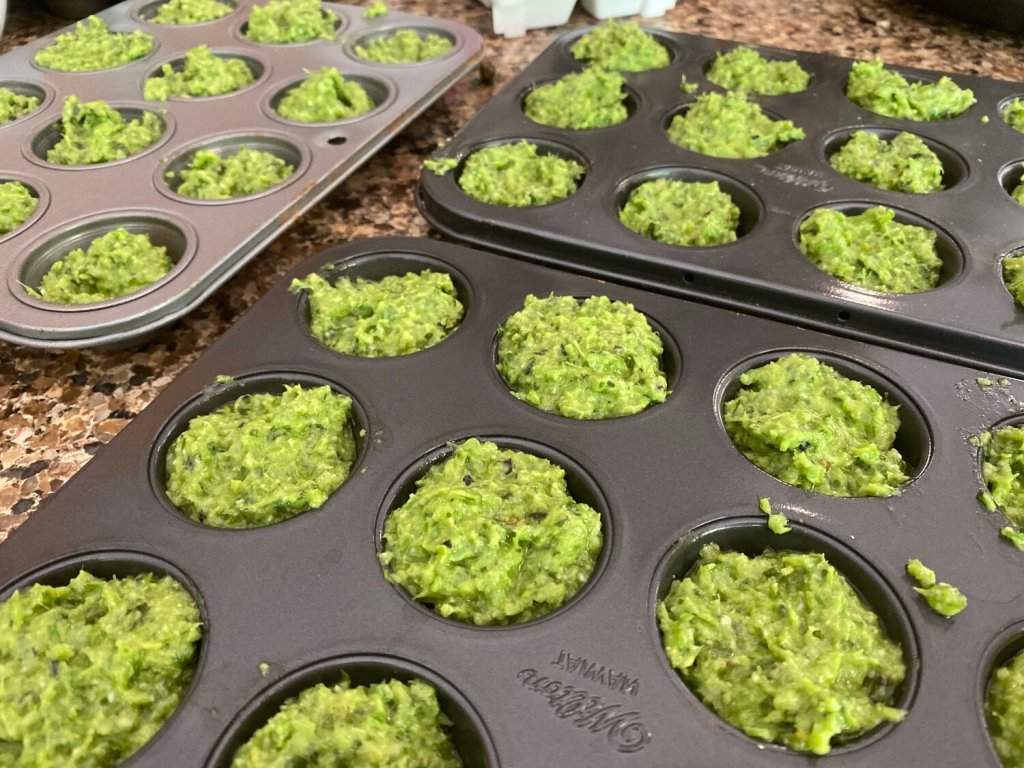
Portion-ready pesto cubes in the making.
We freeze all of it in small batches — ice cube trays, mini muffin tins, and 4-ounce, 8-ounce, and 12-ounce jars. It will last us all year, being used in pastas, pizzas, gnocchi and rice dishes.
Yield: 1 quartGarlic Scape Pesto
Garlic scape pesto uses the flowering head from hard neck garlic and a modest handful (a cup) of basil leaves, a perfect seasonal harvest and processing recipe for any home gardener. Freezes like a dream.
Ingredients
- 4 cups garlic scapes, blanched and diced (about 25 scapes)
- 1 cup packed basil leaves
- 1 cup organic pine nuts
- 1 3/4 cup olive oil
- 2/3 cup parmesan cheese
- 1/3 cup lemon juice, fresh squeezed (about 3 lemons)
- 1/2 tsp salt, or to taste
Instructions
- Blanch the garlic scapes. This cuts the pungency down just a little while retaining the beautiful garlic flavor. Dip in boiling water for a few minutes, remove and dunk in an ice water bath. When cooled, chop down to make the food processing faster.
- Place blanched scapes in your food processor and pulse until very well pulverized, about 30 seconds of pulsing.
- Add the pine nuts and pulse again until the mixture is fully mashed up. Scrape it down part way through to be sure you catch any rogue pieces that didn’t get mixed in.
- Add the olive oil and blend until almost smooth. Texture is ultimately your call, so you decide.
- Add the parmesan cheese and pulse to combine.
- Finally, add the basil, lemon juice and salt and process until you reach your desired texture.
Notes
The New York Times blog turned me onto the order of operations, which I don’t usually consider while making basil pesto (though maybe I should). It makes a very smooth texture.
-
The Fall Garden Plan: Part 1
It’s that time in (technically) Spring when I already have my garden planning focused on fall crops. Not just the quick crops, I am pondering my root cellar veggies, the ones that will be feeding us in December, January, February, March, and hopefully into April. Now is the best time to create this garden plan, and some fall plants will benefit from being started from seed before the middle of June to have time to fully mature in our short growing season.
I partition my fall garden into the following categories:
- Veggies that take all season to produce and are largely harvested all at once in late summer or early fall.
- Veggies that take a solid half season to produce and thus need to be started in early Summer.
- Veggies that mature quickly and are largely enjoyed fresh, those that are sown directly in the garden in late summer. (A subject for a future blog post.)
Sown in late February, these cabbages are just now starting to really head toward maturity in early June. This blog post will focus on the middle group, what I am currently preparing to sow this week to ensure a successful fall garden in our growing zone. I will include how many weeks before last frost I aim to sow the veggies I discuss here so that if you live in a warmer zone, you can estimate when to sow for your growing zone. My best guess is 2-3 weeks later for each zone warmer, but that’s just an educated guess.
From my personal experience, there’s nothing worse than confidently sowing cabbages in the heat of mid-July, transplanting the stout seedlings out when it’s still warm and summery a month later in mid-August, only to have them not even form a full head by mid-October. With each passing year as I sow them a little earlier, I’ve realized that for some fall crops, an early June sowing is necessary for these foods to be given the opportunity to fully mature.
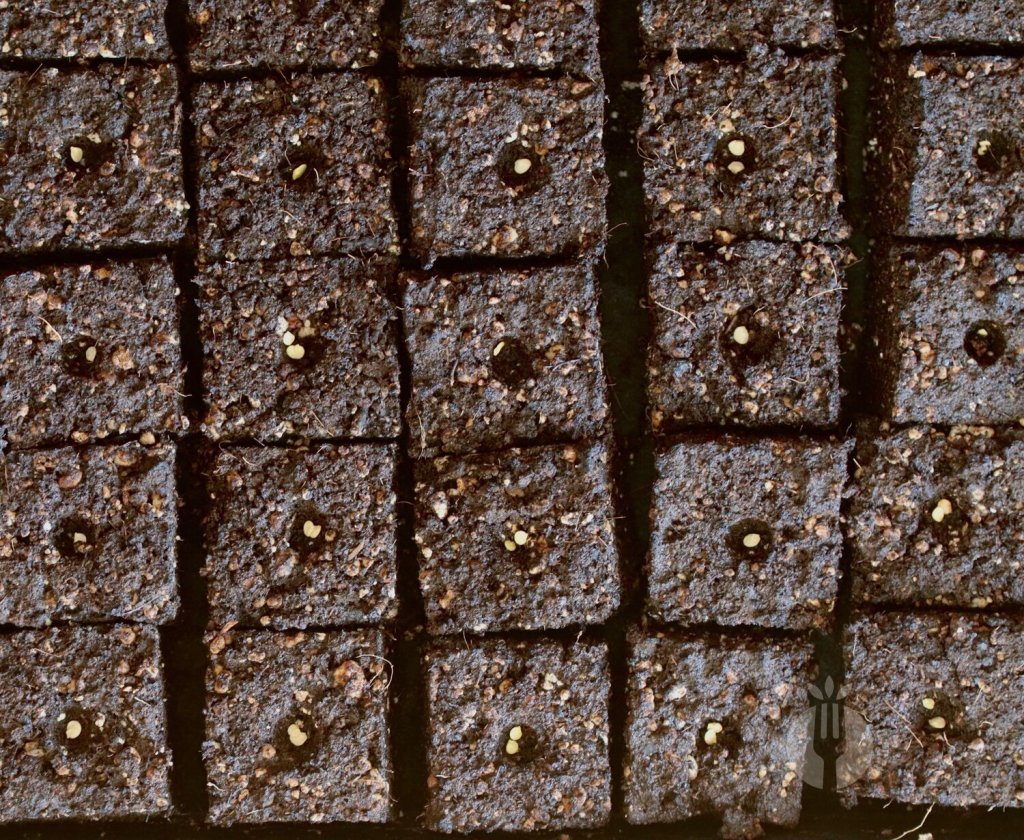
Soil blocks are our preferred seed starting method. They reduce the amount of plastic and provide a faster transition into the garden because they don’t get pot bound. Once we hit late September, if the brassicas haven’t matured enough to start forming a head or curd (cauliflower), there’s little chance they will fully mature before the end of the season. Conversely, if they are more than halfway to maturity, they will continue to mature even as the day length shortens. It’s a fine line between starting too early and too late, so I encourage you to try a few different sowing dates with the same seed and see how they do for you.
Year to year weather fluctuations will also directly affect the speed with which the crops will mature. It’s always best to dig in and use your own experiential knowledge to fine tune your sowing schedule. I’ve started my fall broccoli too early and they’ve all been harvested by middle of September, which I considered a garden fail because they matured too quickly and a time in the garden when we were still flush with the late summer glut.
Long Season Crops
These foods are already in our garden, and include potatoes, onions, garlic, and brussels sprouts. They will be harvested at various times throughout the growing season, though largely later in summer with only enough time for a short crop to follow them as in the case of garlic and onions. All of this food will be tucked away, more or less as-is straight from the garden into our storage areas, for longterm consumption. I love these shelf-stable foods; they are the backbone of our winter diets. And we didn’t really start growing these in earnest until we had our current space. Before that time, we dabbled in onions and carrots, and occasionally grew brussels sprouts, but they were all for immediate consumption.
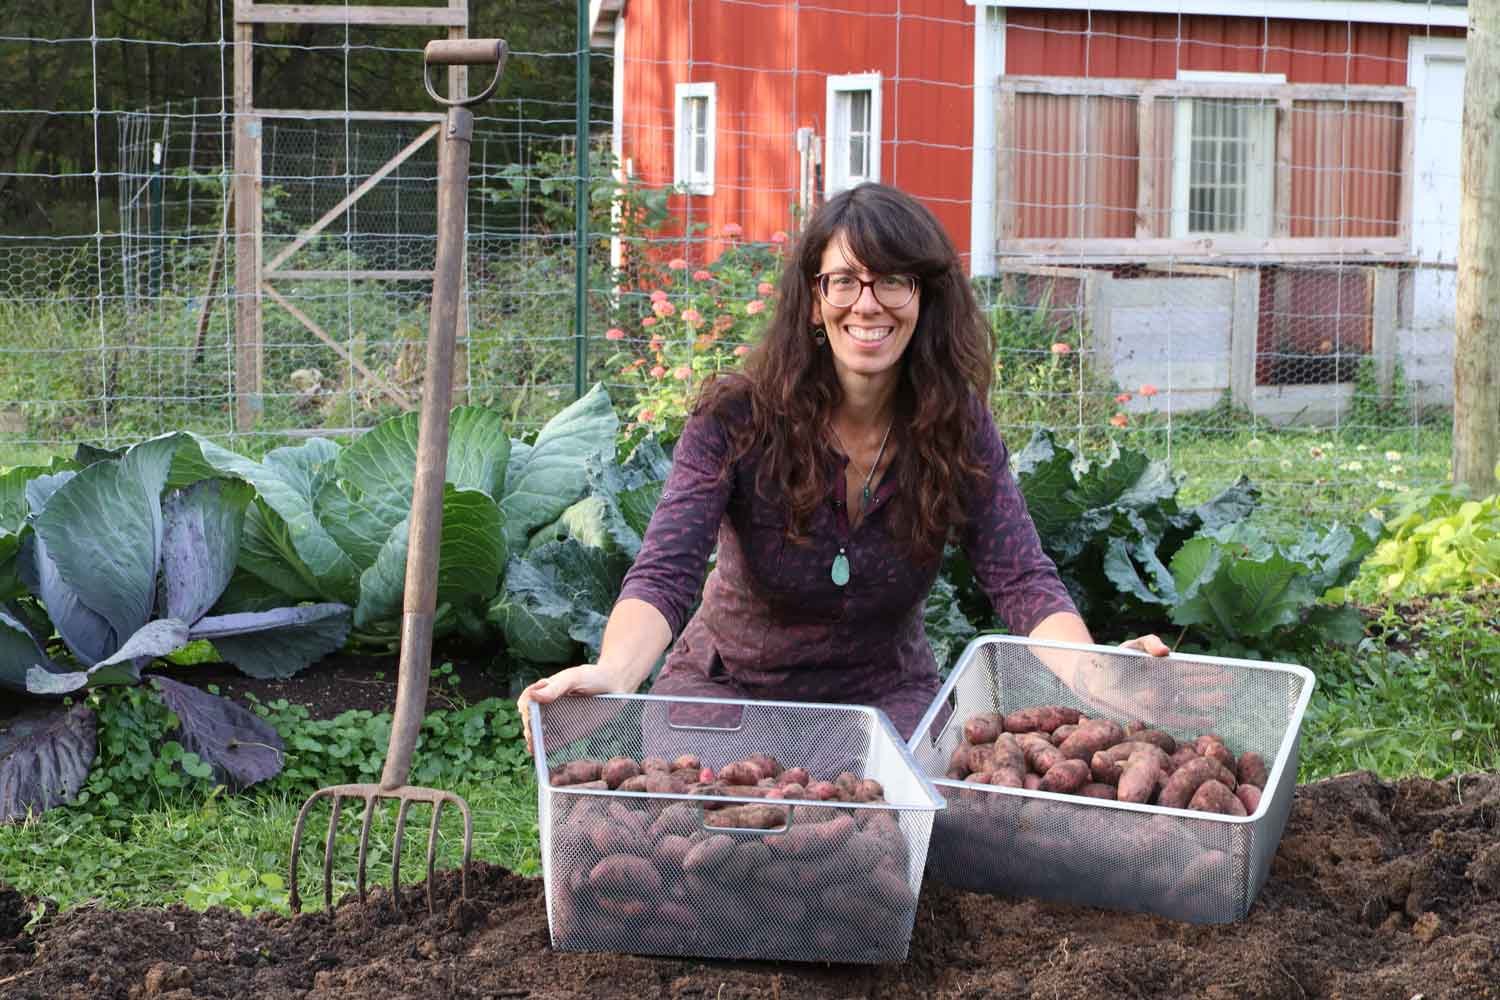
Potatoes go into the ground here right around the last frost and we leave them in the ground, patiently waiting in the ground for us to get around to harvesting them, which is usually around end of September.
Hopefully, you have some of these already planted in your garden if you’re living in short-season growing zones and have the space to grow these. If you have any extra long growing season, brussels sprouts and potatoes can probably still be added to your garden. Brussels sprouts can probably even still be sowed here in Minnesota for a fall harvest if they are under 100 days to maturity.
Half Season Crops
This is really what I want to focus on today. These are foods that take more time than you think to mature, cool season vegetables that don’t seem like they need to be started until maybe August, but trust me when I tell you now is the time to start some of these. If you live in a slightly warmer zone, you can probably wait until the end of June or beginning of July to sow many of these.
Past experience has taught me that in order for cabbage and celery to develop fully in the fall, I must sow them in early June. It’s before my first ripe tomato and when my cucumbers are mere seedlings. And it is quite frankly the hardest thing to do in June: think about my first fall frost and work backwards to give these plants the best start possible.
I am not sowing them directly in the garden, but rather am using my soil blocker, indoor lights, and all the same resources we relied on so heavily to get a jumpstart on the growing season a few months ago. In case you missed it, you can read my Seed Starting post here.
I find sowing starts indoors during summer gives them a gentler welcome into the world, is easier to monitor moisture levels, and produces strong starts that are more resilient against pest and disease pressure, producing what will hopefully be a smooth transition to the garden in mid-July.
That being said, these plants still need to have the same, gentle hardening off process, slowly acclimating them to natural sunlight which is much stronger than our compact fluorescent shop lights. So a few weeks after germination I will start bringing them outside on our deck which gets partial shade for most of the day. Given our close-to-home mantra this year, our garden tasks are feeling much easier to accomplish as I am home most of the time and can tend to these plants between gardening and parenting tasks.
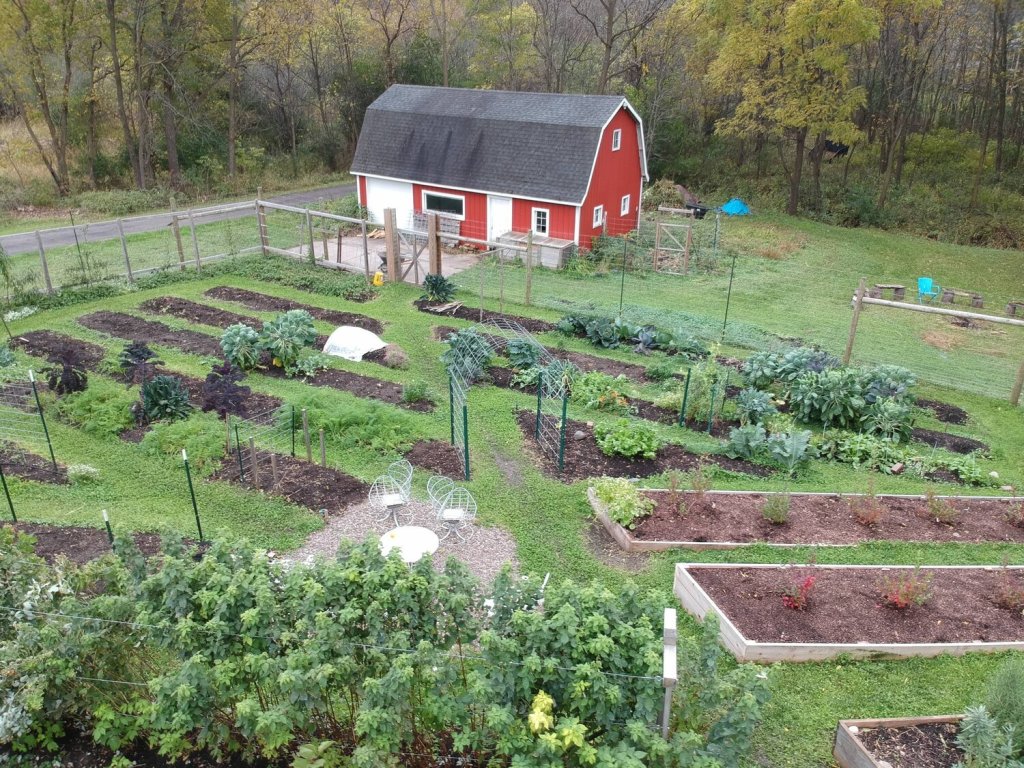
The fall garden is always here and there, tucked in and made possible by constant openings created as crops mature throughout the growing season. Another imperative factor as you plan for this fall garden is where will you fit these seedlings into your garden? Do you have room right now, or will you have room soon? I keep a 4×20 foot long bed just for fall cabbages, and plan to tuck the rest of my fall garden in after my peas and then the faster maturing fall garden follows things like onions and garlic. So, think about your dynamic patchwork and how this garden will come to life amid your summer jungle.
Cabbage, Celery, & Cauliflower
The three slowest to mature fall garden friends are these wonderful vegetables. And along with some more heat tolerant lettuce, herbs, and beets, these will all be sown imminently indoors in my 2” soil blocks. To be honest, I am a little behind as I’d intended to sow these the first weekend of June this year based on my garden notes from 2019.
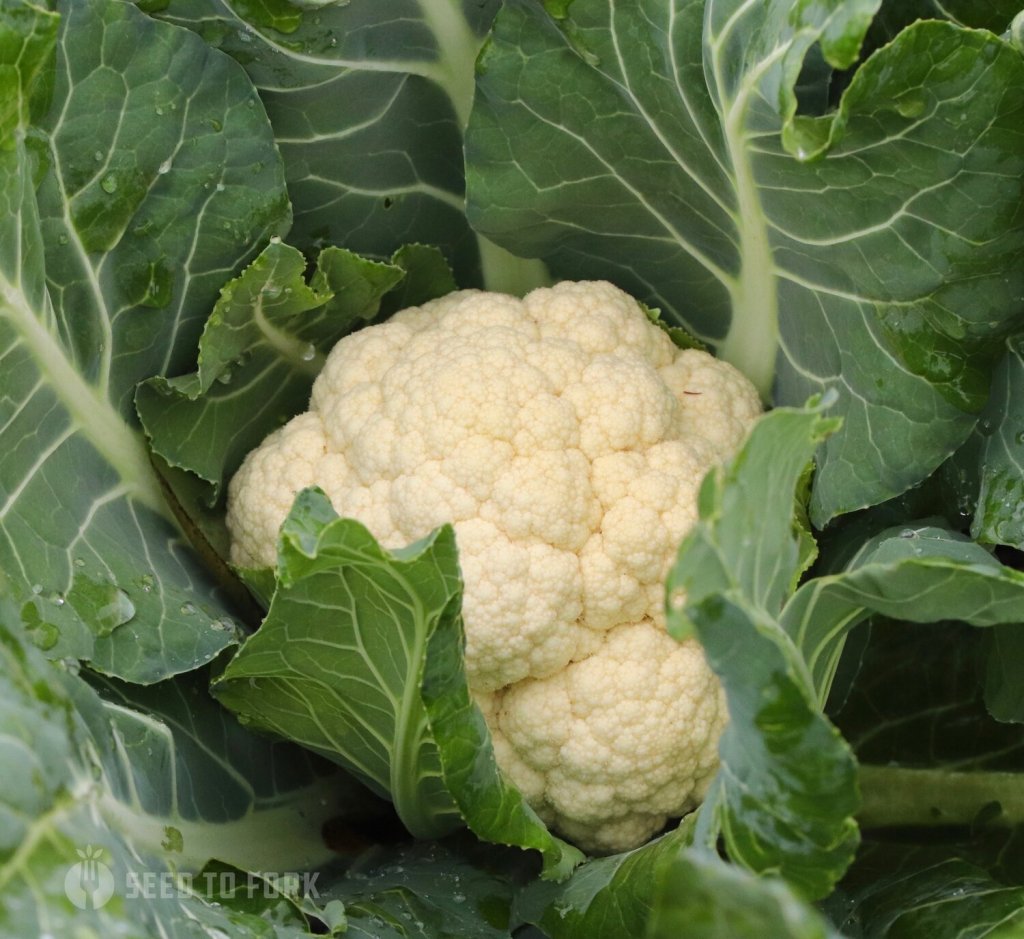
Sown in mid and late June, this Mardi cauliflower had just enough time to fully mature, and was remarkably cold hardy, surviving several chilly nights before harvest. It does seem early, but most of the varieties recommended for fall harvest and storage and main season or storage varieties are recommended to sow in late Spring. Incidentally, all of these varieties need a lot of time in the garden to mature. And that does mean setting them out in the heat of summer, because as you know if you live in a cool zone, the heat can turn off as quickly as it turns on, and your fall garden must be well on its way before we start the rapid descent toward Autumn.
Sowed in mid-June and harvested November 13, 2019, this is a Passat green cabbage. All the most delicious, root cellar-friendly cabbages we love growing need a good 3 months in the ground (as 4 week old transplants) to fully mature. That’s about 100 days. Think of all the cabbages I sowed at the same time as those super early Tiara cabbages, who I harvested in late May, all going into the ground on the same day in the end of March under row cover. Most of them won’t be ready until end of June or early July. That’s a full 3 months of growing, and the last 6 weeks were during some really ideal conditions and even some good heat.
I think of the fall garden as the reverse of that time frame. We start them during the height of summer and day length, and for their first six weeks outdoors (as four week old seedlings) they soak up the final heat of summer, and then the weather moderates to more similar conditions to our spring weather.
Savoy, Integro, and Tendersweet as an early summer harvest. We grow these twice a year for a near-constant supply of cabbage for slaws and krauts and stir fries. My favorite fall garden varieties are:
- Cabbage:
- Red cabbage: Integro (85 days) and Kalibos (74 days)
- Savoy: Famosa (75 days)
- Green cabbage: Capture (75 days), Tendersweet (71 days), and Passat (90 days)
- Cauliflower:
- Mardi (62 days)
- Vitaverde (71 days)
- Romanesco (73 days)
- Celery:
- Tango (80 days)
Can you see the theme here? Most of these things need almost a full 3 months in the garden to fully mature. Days to maturity typically means the time from when you transplant a seedling into the field to when it matures. These are merely guidelines, as you and I know that rarely do plants mature at the exact days to maturity.
I will sow a mixed tray of cauliflower, cabbage, celery, and head lettuce – plus herbs (cilantro, dill, and basil) – for ease of management. I will keep these under lights for the first few weeks until true leaves emerge on all seedlings, and then will start to harden them off in late June or early July. They will be sown indoors about 14-16 weeks before our first fall frost and transplanted into the garden in mid-July, which is approximately 10 weeks before my last frost.
This is not the only fall planting I will sow indoors this month.

Belstar broccoli sowed June 22, 2019 endured a little early November dusting of snow and ice. It was a near-perfect planting all maturing around the same time and sweetened by a few light frosts. I will sow another tray of brassicas in another week or two during the second half of June. This will include things like my Tiara cabbage, which are faster to mature at 63 days – and, in complete disclosure, an experiment this year, as well as Belstar broccoli (66 days), which, as mentioned above, has been known to fully mature too quickly here if I sow it too soon, though I know this is one of the hardest ones to time right.
An October 2018 fall harvest included some quick maturing salad turnips seen here that were direct sown in early August. Additionally, at that time, I will probably also sow my last heat tolerant head lettuce succession and even more herbs to ensure we have a steady stream of cilantro and basil all summer and well into fall. Beets will also be sown again in late June for a fall harvest, though I seem to have better luck with spring and summer beets than fall beets. And I am sure I won’t be able to resist a few more cauliflower, just to keep pushing my season and keep experimenting and learning. Some lessons take several failures to learn completely.
Taking Cover
The other thing we do in fall, as needed, is add row cover to our fall plantings if multiple hard frosts are predicted. Similar to how we approach our spring garden, you can read more about our methods in my succession planting post called Take Cover
The Direct-Sown Fall Garden
Another fantastic fall garden crop is the carrot. Carrots can be sown any week from now through the middle of July here in Minnesota, maturing in the fall, at which time after a few fall frosts they will be ready for harvest whenever you need them in the kitchen. There are varieties specifically for storage so enjoy perusing seed catalogs and choose your varieties carefully. We currently enjoy growing Bolero, Danvers, and Nelson for our storage carrots, though I find availability of certain hybrid carrot varieties changes every few years.
We grow dozens of pounds of carrots each fall, tucking them carefully into our root cellar for winter consumption, and I just sowed my first main season carrot bed and will sow carrots a few more times in the coming month to ensure we have as full as basket of fall carrots as possible.

exc-6487a36d5de4ef79cfd13c90 Carrots for months! We grew enough carrots to feed us well from November through about mid-April in addition to all the carrots we enjoyed fresh from July until November.
It’s one of those foods I don’t think we will ever grow enough of, but I guarantee we will keep trying until we do.
The Quick Fall Garden
There are other fall garden veggies that mature much faster and thus don’t need to be sown until July such as bok choy, kohlrabi, broccoli raab, mustard greens, and such. Additionally, there are many other direct-sown fall garden suspects like arugula, spinach, radishes, and others which will be the subject of a future blog post as their timing and succession planting is not for another month or more, so the good news is we have a little time before we have to find space in the garden for these goodies.
I hope if you’ve made it this far, you now have a pretty good understanding of how we make the most of the fall season in our garden, and can see that it involves most of the summer months to successfully come to fruition. The garden has a way of keeping us humble and perennial students, and I hope this article helped you formulate a plan for your own fall garden.
-

Coconut Coir Soil Blocks (peat-free)
We are embarking on our third growing season using soil blocks to start most of our veggies and many of our flowers. And after two successful growing seasons we continue to enjoy the process of creating these blocks, appreciating how well the seedlings grow and how easily they transplant and adapt once set out into the garden.
Soil blocks are known to have numerous advantages over pots in large part due to the natural air pruning that occurs when roots reach the end of the soil block, which also helps minimize transplant shock. The thing I love most about them is that I am using less plastic, and that we don’t have any potbound plants anymore. Are they more vigorous and do they exhibit less transplant shock? I want to say yes, but I didn’t really pay close enough attention to determine this for myself. Logic would say of course, so I’ll just roll with it. You can also read my original soil block post from last winter here.

This was a stellar hodge podge of cotton seedlings (far left), thyme, and my super early peppers including Hatch and Aji Amarillo. You can see our bottom watering setup in this photo and can read more in my original post here. The traditional soil block recipe including any pre-mixes you purchase from well-respected seed companies all use a somewhat controversial, non-renewable resource, peat moss. Actually, most if not all commercial seed starting mixes contain peat moss. So what’s the big deal?
Peat moss is a seemingly abundant resources of seed starting mixes that has come under intense scrutiny—and for good reason—over the past decade. Peat bogs, depending on whose side you land on, are considered a non-renewable resource and sensitive Canadian ecosystem, and the harvesting practices of this resource permanently alters the landscape and takes centuries to recover. If the landscape is in someone else’s backyard, does that mean it doesn’t impact us?
Personally, in this age of globalism, it’s impossible for me to not think about the impact my purchases have on the broader environment. For me, every single purchase accumulates. It’s an additive effect on the environment. As an aside, I am currently working on significantly reducing my family’s single use plastic, which takes a shift in our consumer mindset and is a very active work in progress. There are alternatives to peat, and they aren’t without their tradeoffs, because everything has consequences.
I hope you already know a little—or a lot—about this peat alternative. It’s coconut coir. And I’ll be the first to admit that I was a bit skeptical a few years ago. I was concerned about the transportation costs of shipping this agricultural by-product across the Pacific Ocean to my midwestern home, a real tradeoff cost of the global lives we now live. Additionally, I’ve read it can contain high salinity content if it is processed using salt water instead of filtered water, which would not be a good thing for tender seedlings. That being said, I did not observe any major differences in growth of seedlings grown with coir vs peat moss last year, so I’m diving deeper into this peat alternative this year.
Coir is a by-product, a waste product, of an existing industry, something that has been piling up for decades (it does not decompose quickly) and accumulates year round in tropical regions around the globe. This fiber accumulates in large proportions, and has been studied, compared to peat moss, with very promising results.
Note: I now use Coco Loco, a coconut coir potting soil in my peat free soil block recipe.

These kohlrabi seedlings were among my first with coconut coir, before I made adjustments to the soil block recipe, substituting 1:1 peat to coir. I currently use 2/3 coir to 1 part peat and add extra compost instead. New recipe detailed below. Coir, unlike peat’s acidity, is pH neutral, exhibits a slightly lower but still very functional water-holding capacity to peat, and can absorb water and re-wet itself much more readily than peat. It would make a great accompaniment to peat if you’re not ready to completely switch off peat moss. I love that it is a by-product of an industry rather than an industry in and of itself. I think of it like recycling or upcycling.
Because I only use a small proportion of coir in my soil blocks, and lesser quantity than that of peat, I am happy to share my new recipe with you. As this is my second season and first full season using coir, if I see adjustments are needed I will update this post.
Coir Soil Block Recipe
- 2 parts coconut coir
- 2 parts perlite
- 3 parts compost
- 1 part garden soil

A part is a part is a part. What do I mean? Use whatever container you’d like and that is your “part”. I use either a quart or half gallon yogurt container when making this recipe; a half gallon will yield several trays of soil blocks.
I mix all the dry ingredients together and then add the water. It usually takes about 4-6 parts water to achieve adequate moisture. You want water to drip profusely out of the mixture when you squeeze it. Learn more by watching my You Tube Tutorial.
Watch my You Tube tutorial on the basics of soil blocks, including my new recipe.
This is not an exact science. You may want to play with your proportions and moisture, and your compost may have more or less moisture than mine. I prefer to have ample leftover in my bin so I can easily stuff my soil blocker, so I always make more than I need for any given day. And any leftover mixture I simply leave in my bin and re-wet a good 30 minutes prior to needing it the next time. But most often, I add an entire new batch to the mixture and moisten the entire new batch with the leftovers mixed in the next time I make soil blocks.
We spent many seasons considering soil blocking before investing in the tool and trays. We use a 2” soil block with the standard pin. You can see all of the soil block equipment we use by visiting my Amazon storefront (full disclosure, I am an Amazon affiliate and may receive small commission on purchases made without any additional cost to you).
-
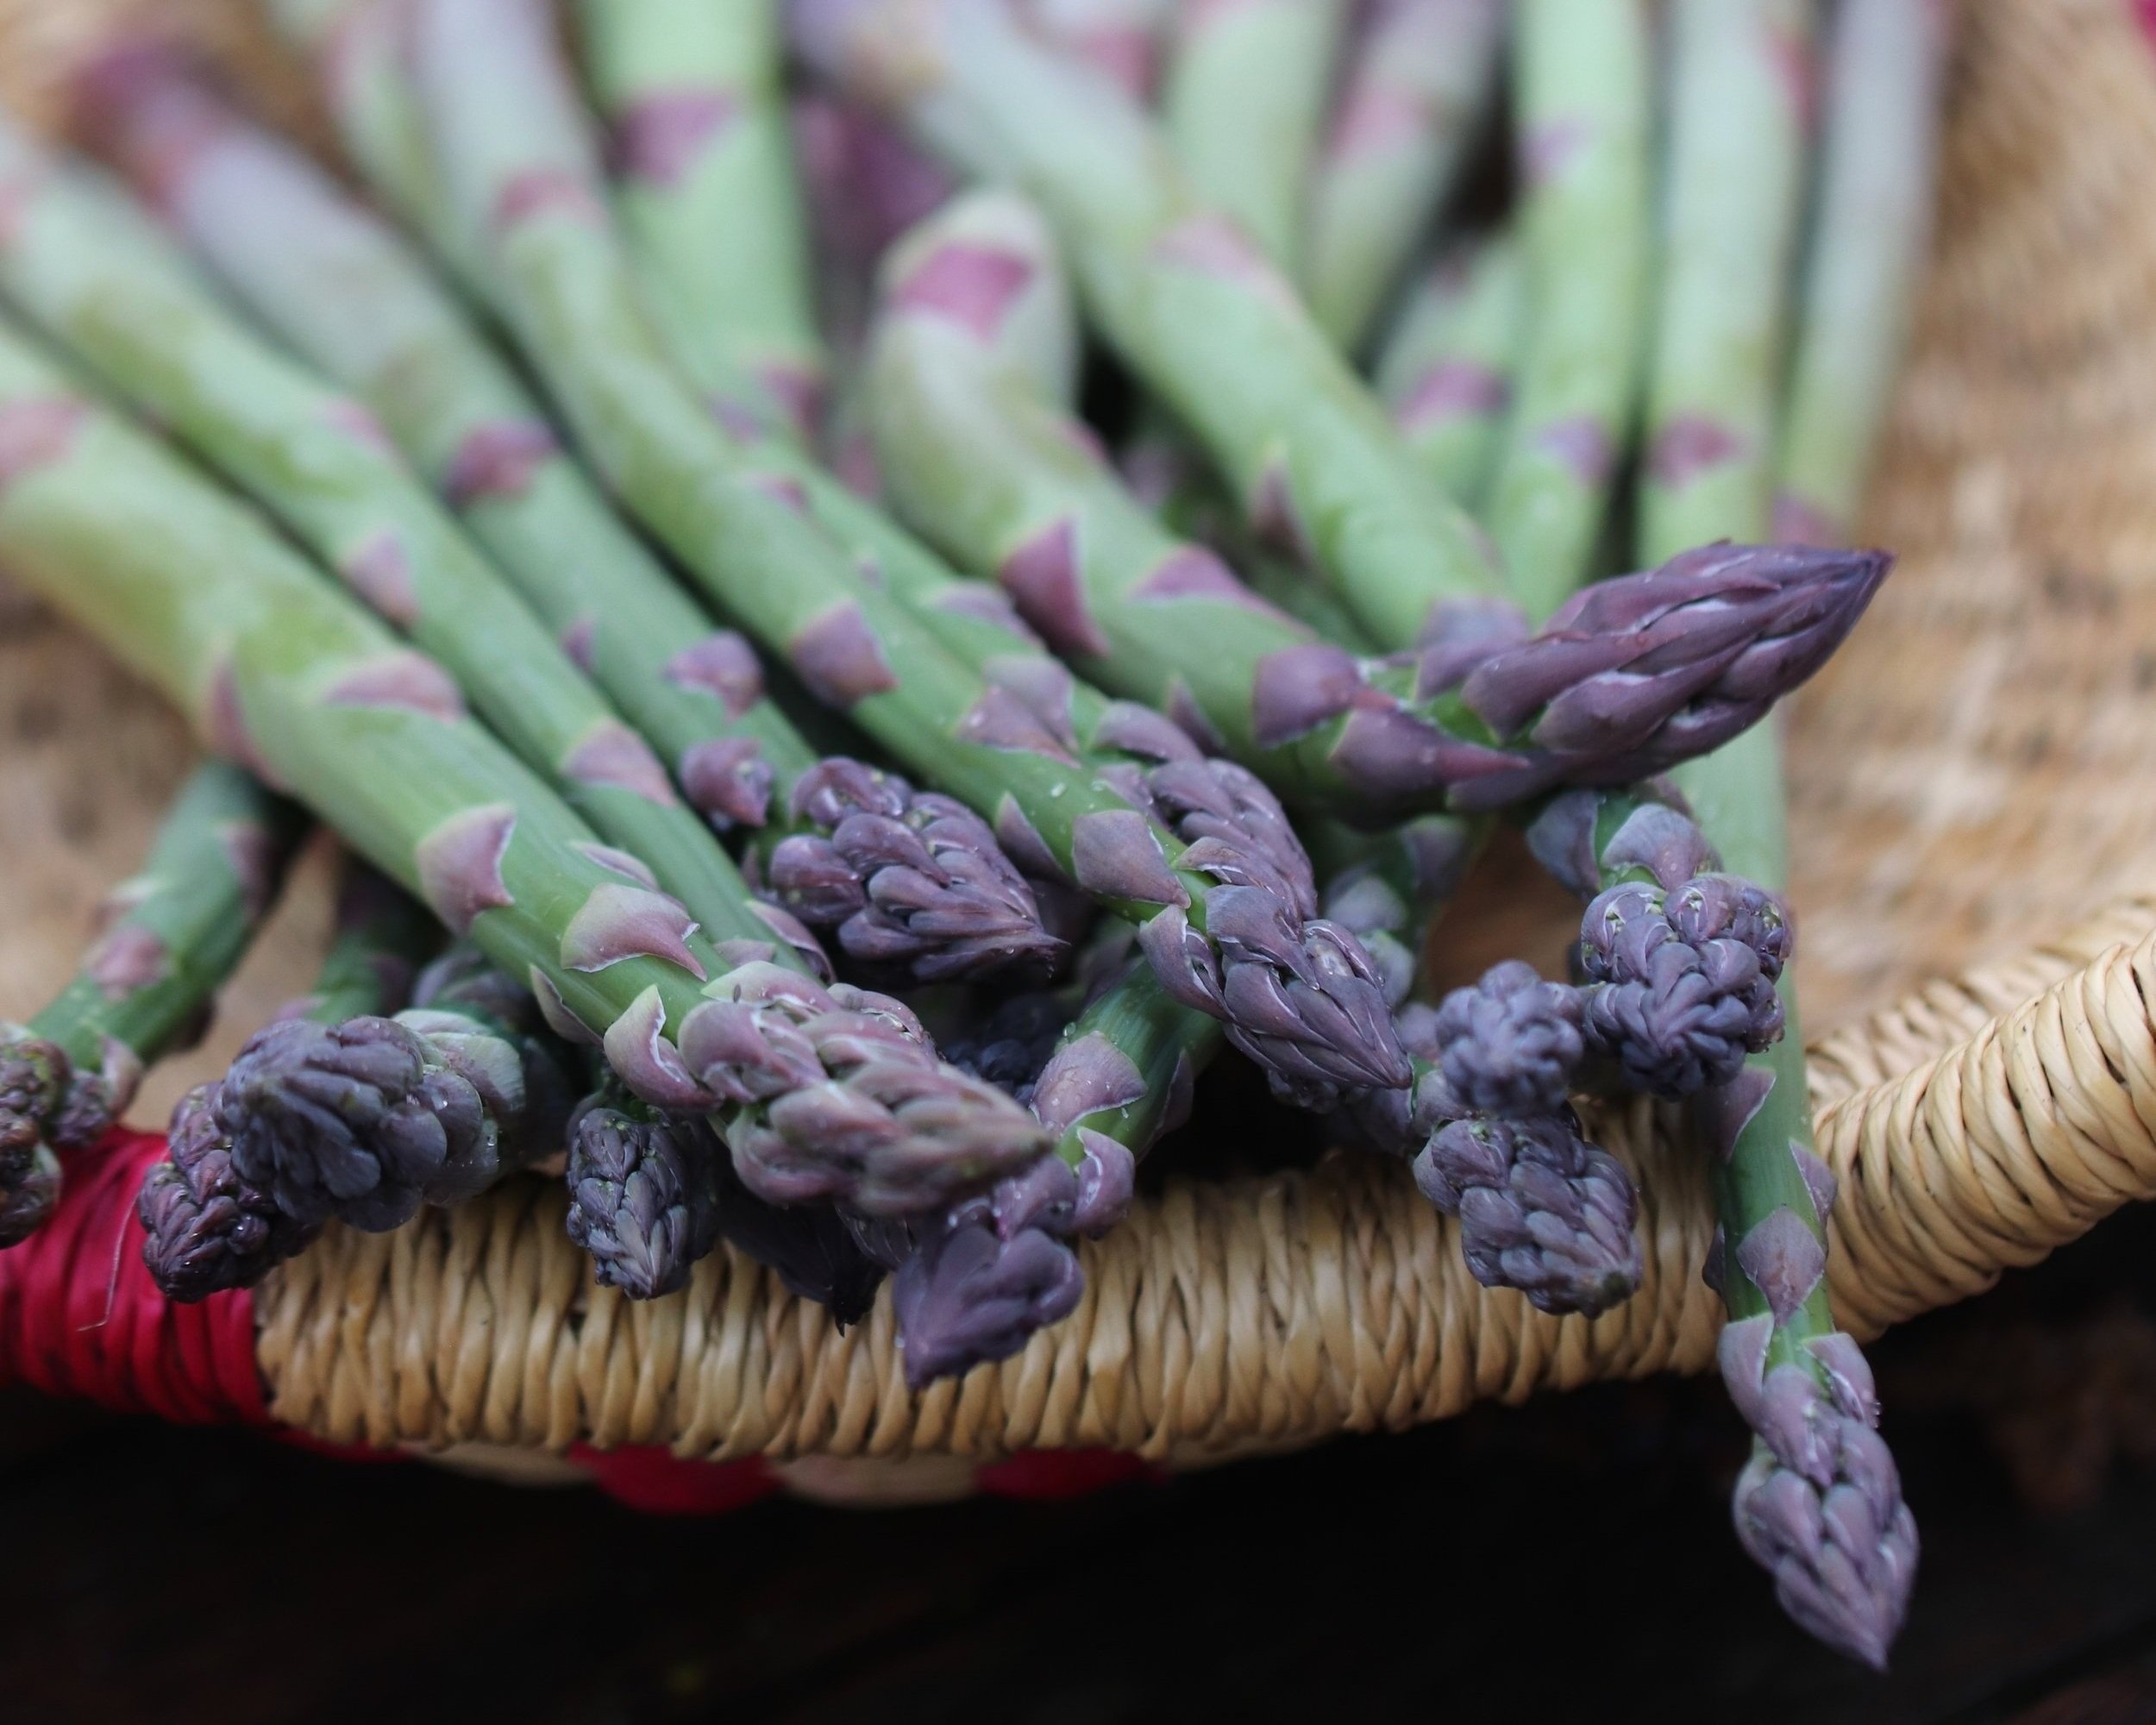
Growing Asparagus From Seed
Asparagus and its unique texture and flavor evokes strong feelings from people. Do you love it or hate it? We are asparagus lovers, devouring it when in season from early May through mid-June, abstaining when it’s not in season. It does not freeze or can well, so it’s a true feast or famine crop for our family.
The biggest secret about asparagus is how easy and affordable it is to grow from seed, not only saving you money but also producing harvestable food faster than if purchasing crowns. Growing from these one year old dormant plants, called crowns, is the industry standard and what we used to think was the only way to grow them. It wasn’t until several years ago that we learned starting asparagus from seed was possible — and this was an eye-opening experience for us.

Our one year old plants pushing up thick, happy spears from their new home in Spring 2018. We harvested only the largest – and only a few – spears from the strongest plants last spring, yielding about 2 healthy bunches of asparagus. If established early and transplanted well, asparagus can produce a harvestable crop of spears in year two. Year two is the same age as a crown, whose establishment takes another 1-3 years until harvest. While we only harvested a few of the largest spears off the strongest plants, let’s just reflect on how incredible this is relative to conventional knowledge: that’s the same age of the crowns sold commercially which then take another few years before you can begin to harvest. By starting our seed super early, we saved at least 2 years in the establishment of our asparagus patch.
When we planned our dream garden in the fall of 2016, we allocated a very large space for asparagus and it is too soon to tell if it’s too much or just right. We know it’s not too little, that’s for sure. I have my theories, but I’ll let it unfold over the next few years before say I was right.
Following the advice we read from various sources, we established a 40 plant bed, 10 plants per person in our household. The only glitch to this logic is that half our household doesn’t love asparagus, so in reality we are growing more like 20 plants per human, twice the recommended amount for your homestead. Luckily we have many good friends and neighbors who love it as much as we do!
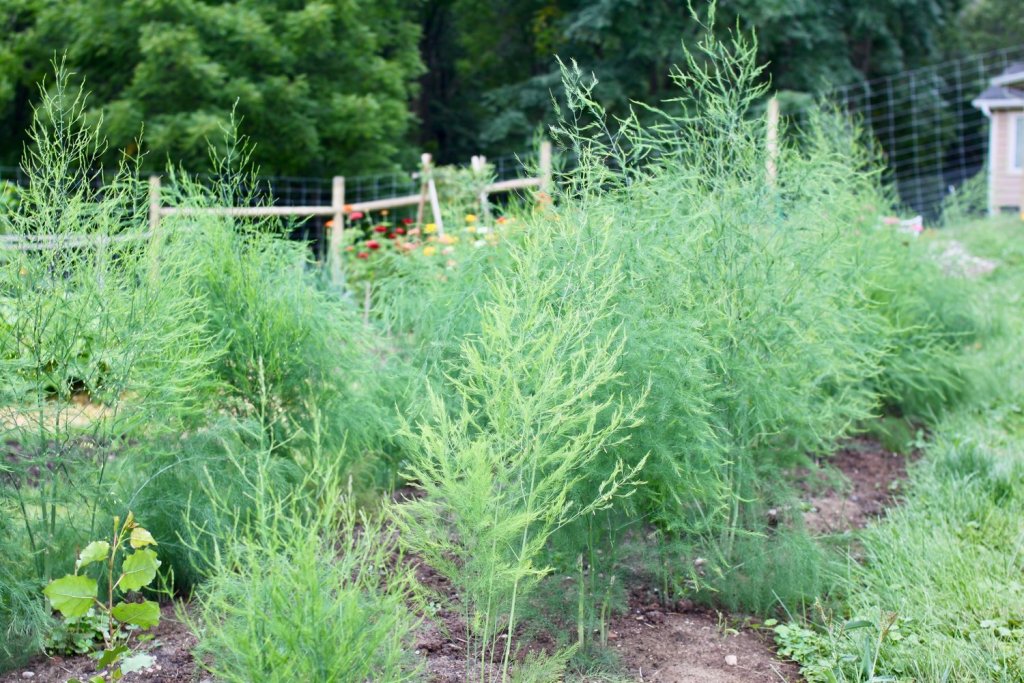
By the end of the first summer and less than a year old, this is what our asparagus patch looked like. All summer long new and thicker spears continued to erupt from the plants, which meant really good things were happening underground with the developing root system. This unique veggie, unlike almost all the other annual vegetables we eat excepting rhubarb, is a perennial: it’s roots go dormant in Winter along with perennial flowers like peonies and coneflowers, just like deciduous trees and shrubs. Like those plants, they take a little extra care to get established but are an easy and affordable food to grow from seed — and with a little annual maintenance of weeding and fertilizing will yield for several decades in a home garden.
While I oversee all our annuals (fruits, veggies, and flowers), my husband is the perennial fruit and veggie grower, so I let him select the variety and was just along for the ride. We purchased 70 asparagus seed for $10, which equated to $0.25/transplant because we cultivated the strongest 40 plants for our garden. When compared to $1.50-$2.00/crown, it is a bargain and one to consider when establishing your asparagus patch. He chose Jersey Knight, a male-dominant hybrid variety, meaning the seed would be almost entirely male.
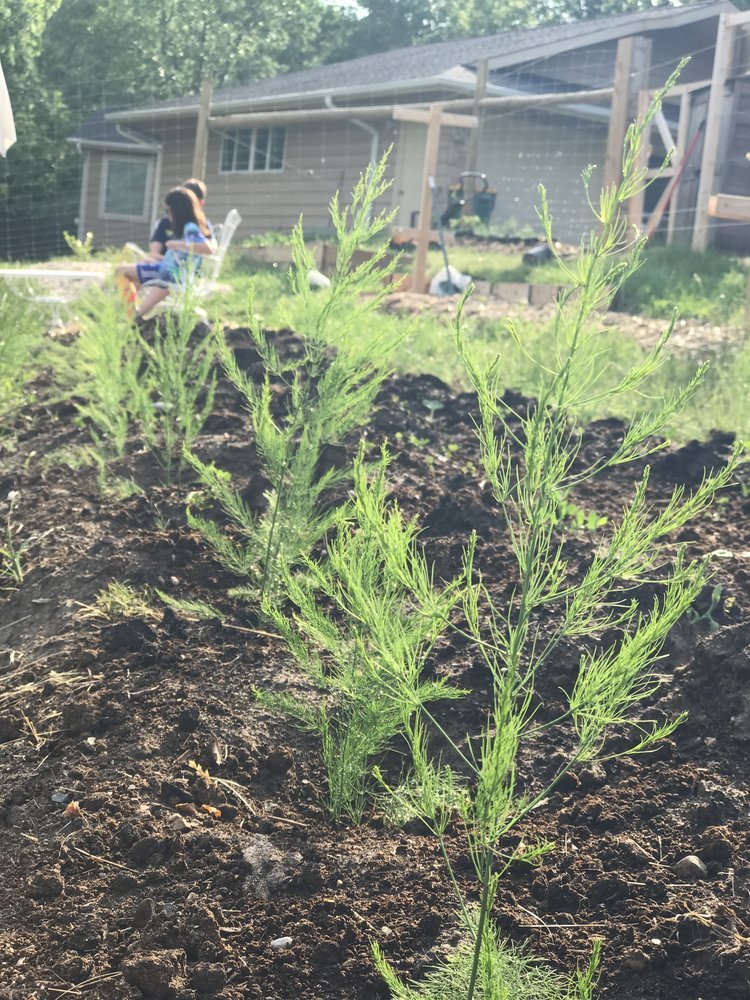
Here are the tender young new plants a month after transplanting – this photo was taken in June 2017. We left the transplant hole open and buried them in little by little as they grew up taller and taller. Why this matters is because asparagus is a dioecious plant, meaning plants are either male or female, producing only stamens or pistils and never both. One female plant inside a patch of males will produce dozens and dozens of viable seed annually. The plants are indistinguishable until after the bees have had their fill and the fruit develops; the plants with the red berries in late summer are the females. In year two, our plants flowered for the first time and the bees came; the asparagus pollen was a beloved garden snack for the pollinators. Out of our 40 transplants, 7 are female, which means our seed is 83% male. Some seed companies claim their seed is 100% male which is what we are working toward for ideal productivity, hence, we saved seed last summer to work toward replacing the females. And here’s why.
While we love self-seeders in some areas of our garden and especially in our native planted prairies where I invite the plants to move around until they are completely content with their location, female asparagus plants will disrupt the intentional ecology of our asparagus bed which we amended with extra sand and silt and compost to develop a rich loam. Self-seeding asparagus will compete with our established plant spacing, vying for precious resources such as compost, sunlight, and water, and will reduce overall production long-term. Additionally, female plants are not as prolific of a producer of spears as male plants, perhaps because they are saving precious energy for their seed production later in summer. We only want the strongest 40 male plants in our patch, and so are in the process of ‘weeding out’ the female plants.
We grew asparagus from crowns in our first home, but they didn’t come back the following year; it could have been poor quality crowns or it could have been too wet for them as asparagus does not live happily in wet conditions. This was in 2004, and we waited and waited until we lived in the right home to establish an asparagus patch. And after much research and deliberation, we decided to grow it from seed instead of crowns in part for economics but also because it was a fun experiment.
Start them Early
Growing asparagus from seed is totally feasible and fun and I highly recommend it. Despite what you may have read or the fact that we’ve all been taught that crowns are the way to go because starting with seed can be finicky, I’m here to give you the confidence boost to give it a go if asparagus is in your garden plans and you’re up for a truly rewarding adventure.
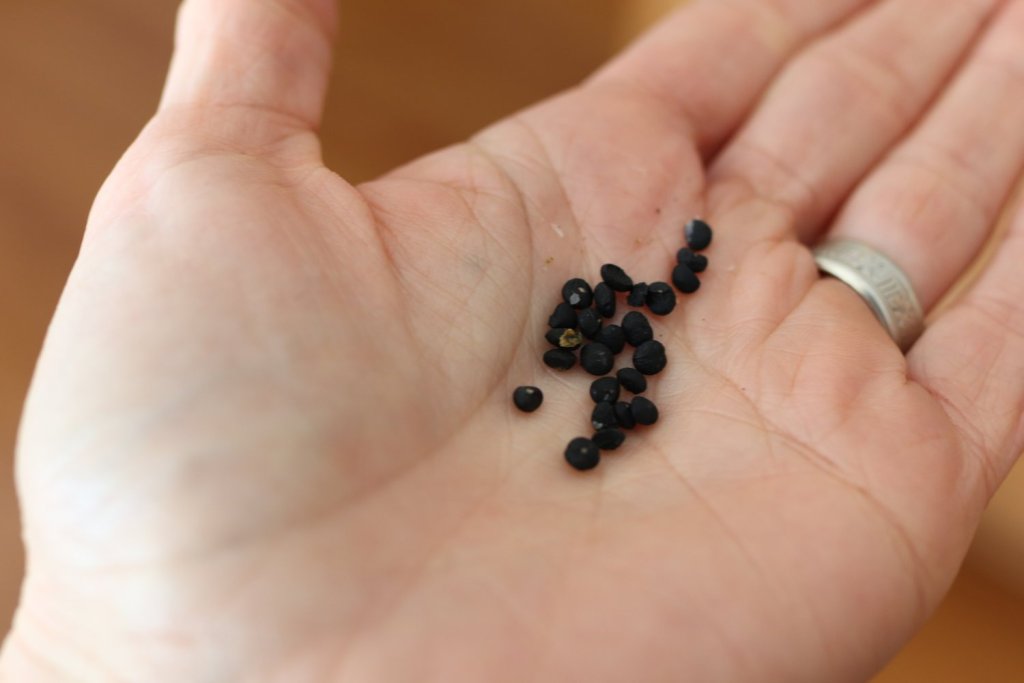
Here they are in their simply glory: asparagus seeds! Amazing that a single seed matures into those healthy crowns in the first growing season and then returns annually to produce nutritious spears again and again. We started them February 1, 2017 and more or less followed the advice of Eliot Coleman in The New Organic Grower. Sow them extra early and bump up as needed until early you can transplant into their final home. This method required two dedicated indoor shop lights once they were in their 3” pots, so it did take additional resources than just the cost of seed.
We already owned a lot of shop lights for seed starting, so this was a sunken cost for us. We started ours in a 72-plug tray, transplanted to 3” pots about a month later – labeling the root strength as strong-medium-light – and then transplanted them into the garden by early May. We had about a dozen extra plants which we potted up into gallon pots and heeled into a bed of wood chips and irrigated all summer as our backup plants in case we lost some.
Transplanting is Key
Asparagus is a deeply rooted perennial; the roots can penetrate several feet deep, yet don’t like wet feet. So in heavier soils, it’s best to plant them only to a depth of 4” whereas in well-drained soil you can plant the tip of the crown at a depth of 8” or more. Because we amended our heavy clay soil tremendously to make it lighter and loamy and the bed drains well, we transplanted our seedlings about a foot deep.
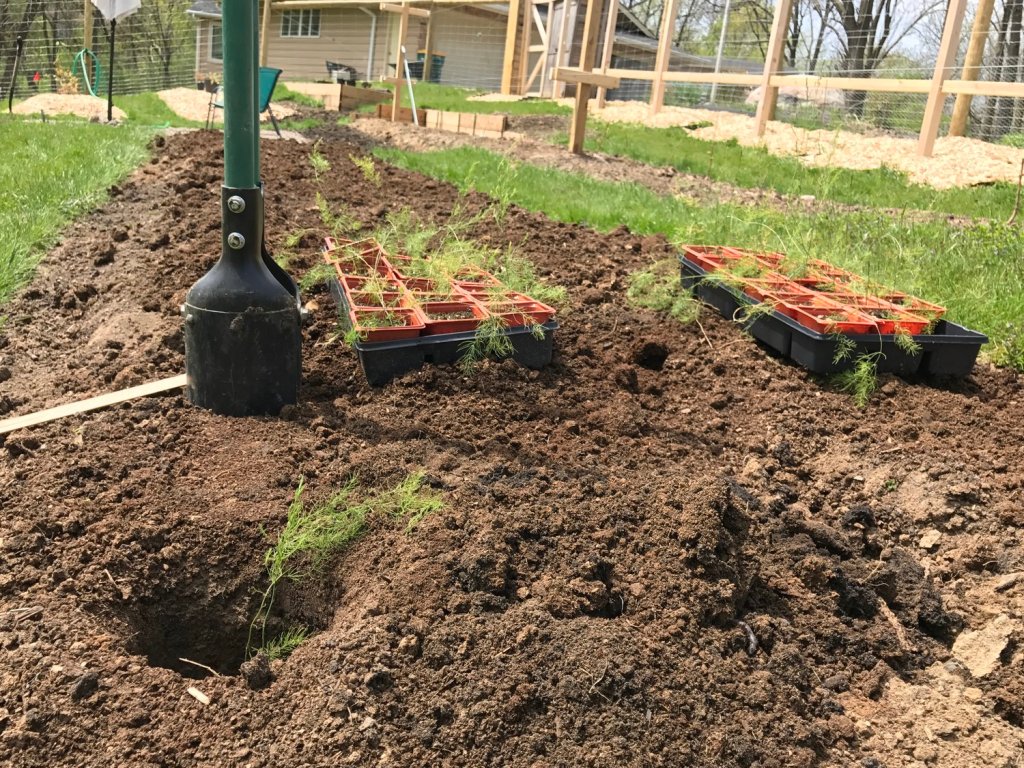
Such a simple method and much less digging than a trench. Transplanting asparagus seedlings is easy, made easier by this post hole digger method we followed after reading about it in The New Organic Grower.
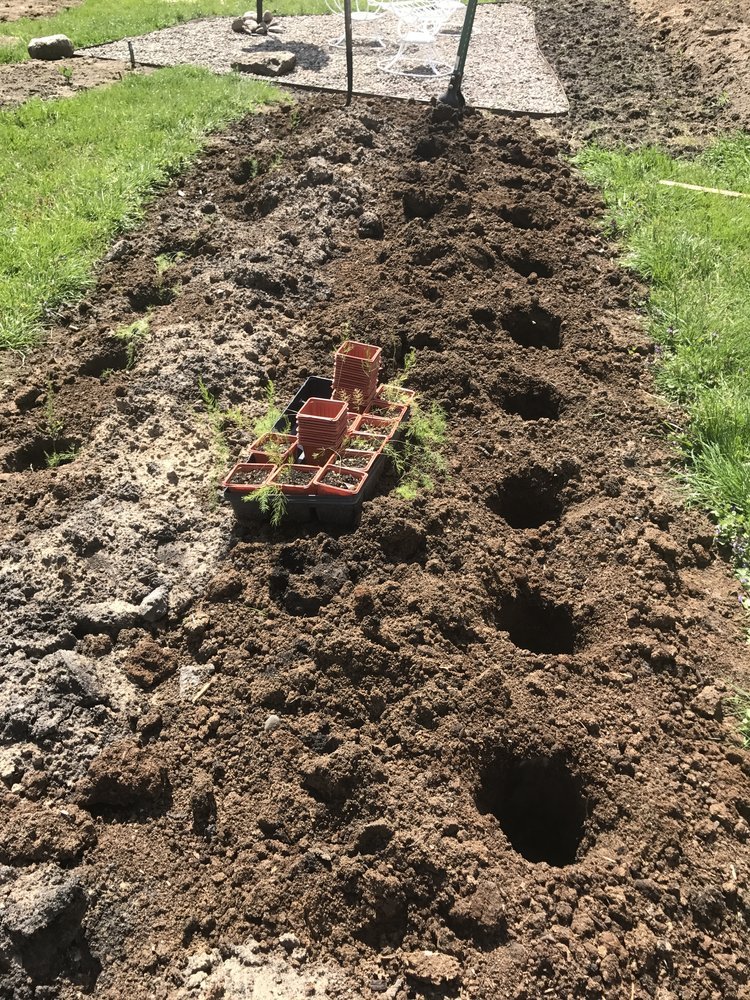
Instead of the trench method which is the industry standard for transplanting crowns, we used a post hole digger which created a perfect space for our transplants. Our asparagus bed is 6 feet wide and we planted them 18” apart in rows spaced 4 feet apart. The entire bed was amended with compost and slow release fertilizer before transplanting. Once transplanted, simply fill the hole in as the fronds grow taller. The first year they didn’t grow taller than 3 to 4 feet if memory serves me. But last year, up they came, thick spears and all, and before the dog days of Summer they were over 6 feet tall. Mature asparagus is a beautiful thing in the garden, blowing this way and that in the breeze like a whimsical sea of ferns.
Since we now know we have over a half dozen female plants, we will harvest them aggressively this Spring, cutting every last spear before digging them up and replacing with (hopefully) male plants from the new cohort of seedlings we started this Winter.

“Thicker than a pencil width” is the standard for your first asparagus harvests after you plant them. This applies to crowns or seedlings. These are our one year old seedlings and they definitely passed that test. While we continued to harvest off some of the strongest plants for up to two weeks, we stopped harvesting well before the width of the spears were less than a pencil to ensure there was ample shoot growth to support further root development last year.
The key to quick establishment of your new asparagus patch is a two-pronged approach: early establishment from seed in January or February followed by deeply transplanting the starts in Spring. By implementing this method, we were able to have a meager harvest of the largest, first spears off a handful of our 40 plants in year 1. Yes, year 1 crowns are what you purchase from commercial nurseries, who instruct you to let them establish for 2-3 years before harvesting. The process of lifting and transplanting dormant roots delays the homeowner’s ability to harvest the food, so why not leap frog your asparagus patch to its full potential a few years earlier by growing from seed?
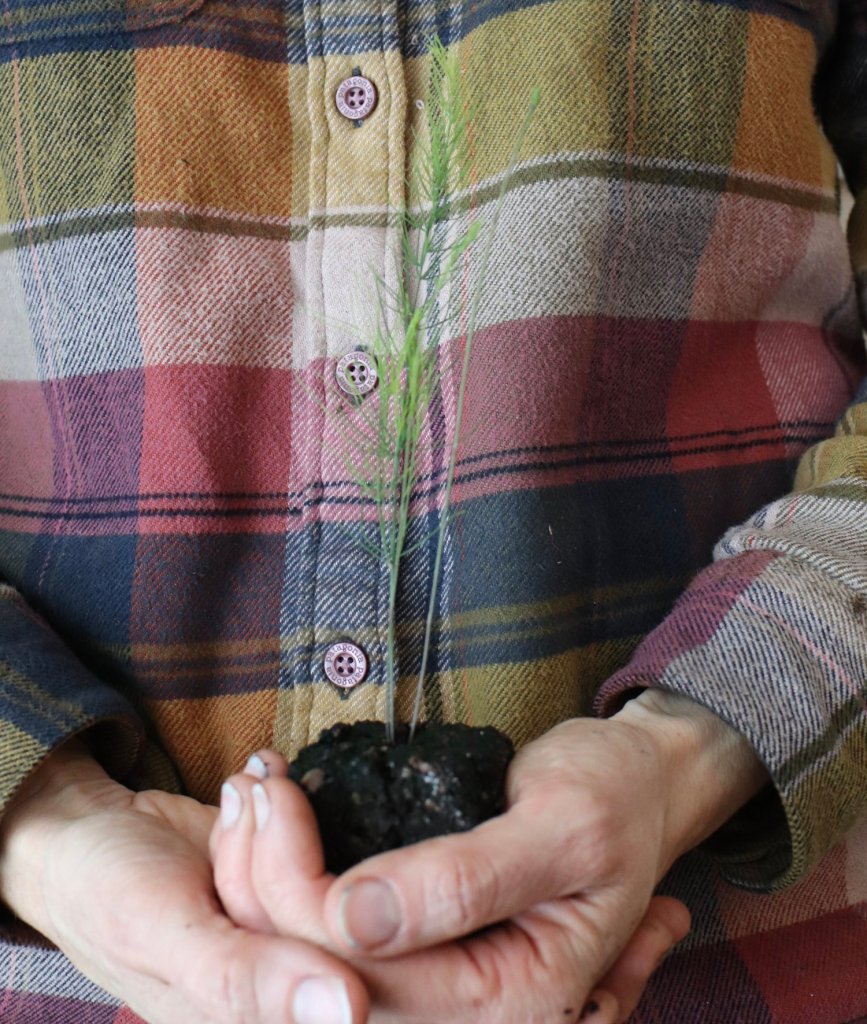
Four week old asparagus seedling ready to be potted up in February 2019 from saved seed. We are hoping some of these new plants are male and will eventually replace the female seed producers in our asparagus patch. Our goal with starting our asparagus plants in January this year is that maybe, just maybe, they will decide to flower this year, although it is likely they will not. So we are basically rolling the dice with our starts, banking on the fact that they should also be 83% male and chances are 5 of the 7 transplants will be male. And if we still have females, we will comically start this process all over again in two years until we have the bed under control
-

How to Fold a 3.25” Newspaper Pot
I recently shared a video (linked at the bottom of this post) of how to fold a mid-sized newspaper pot on my You Tube channel and I’m following that up with step by step photo instructions here. I hope you find a use for these very fun, kid- and environmentally friendly DIY compostable pots.
We will continue to use these pots for many years to come. Actually, I don’t think we will ever purchase pots again for seed starting. These are sturdy, make use of materials on hand, compostable and this is a really versatile size pot. I hope you find this photo tutorial useful.
Leave a comment below to let me know how they fold up for you.

The base for this pot is a full sheet of newspaper, ideally it would be 24” wide. Ours isn’t, so we had to make a template that was 12” wide to get the pot to be this size. This way, we can fit 18 pots into a standard 1020 tray.

Fold the paper in half lengthwise and crease on the template. Remove template and crease again along the fold. We are establishing the right width for the pot in this step.
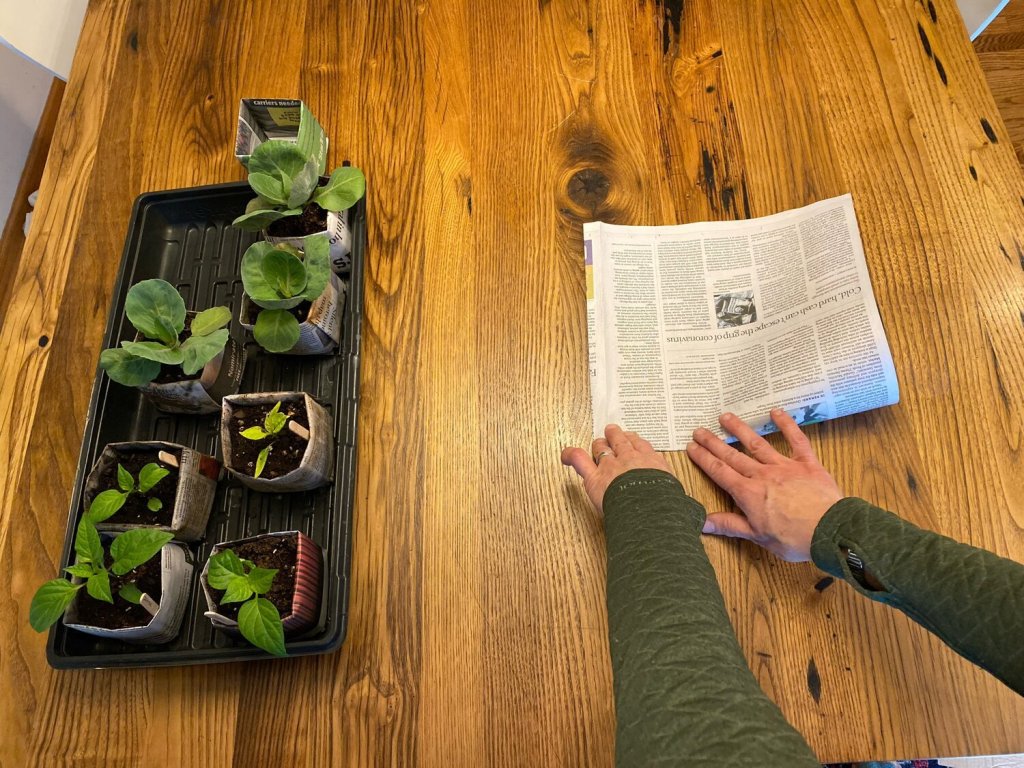
Fold the paper in half again and crease well at this new seam. We will be working from this seam over the next many steps.

Fold paper in half one more time lengthwise, with crease edge on your right. When done creasing open back up. We will use this new middle crease in the next step.
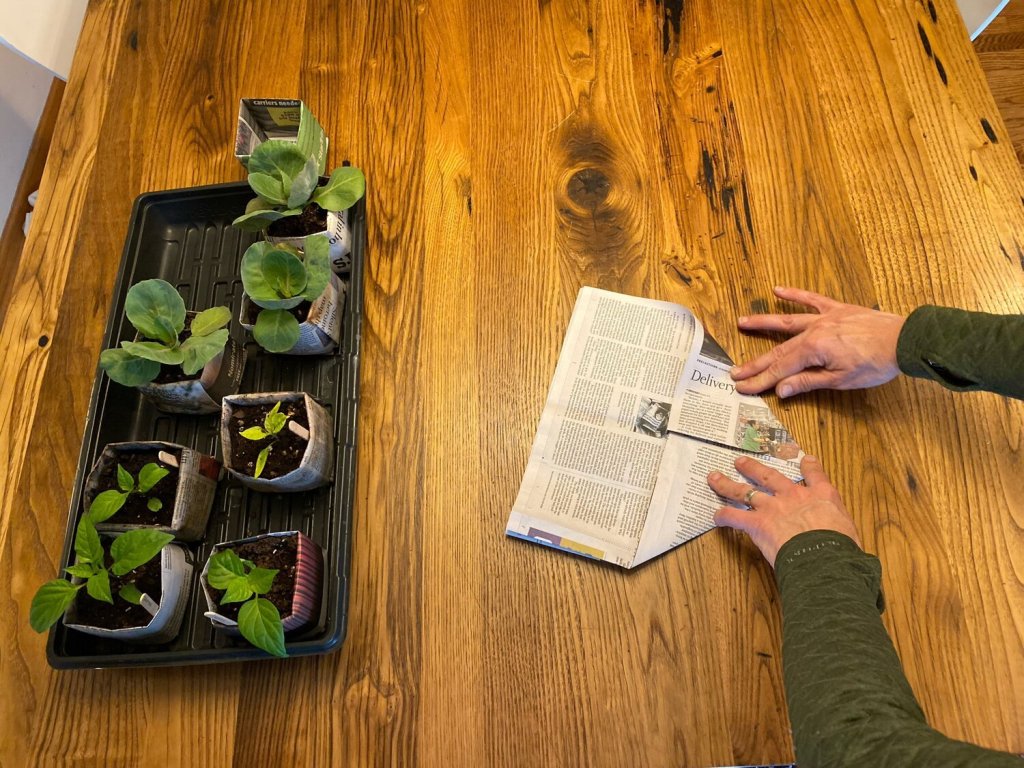
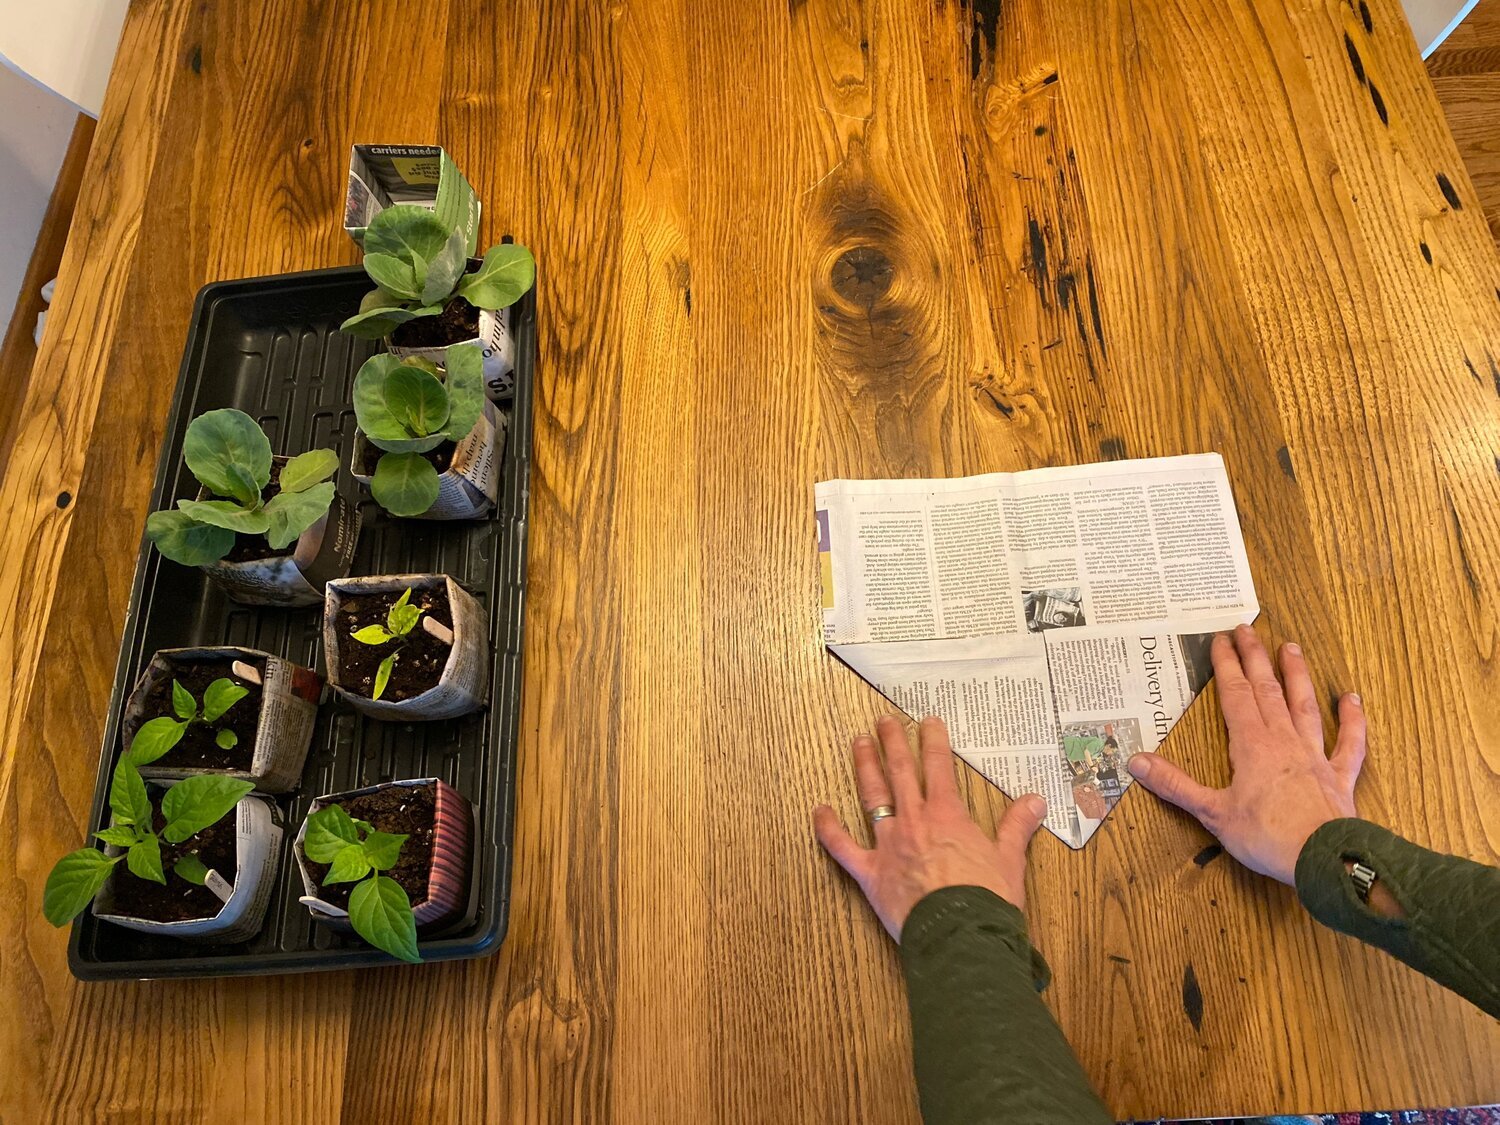
Those folds we just did will eventually become the bottom of the pot! Now we are ready to start shaping the sides.
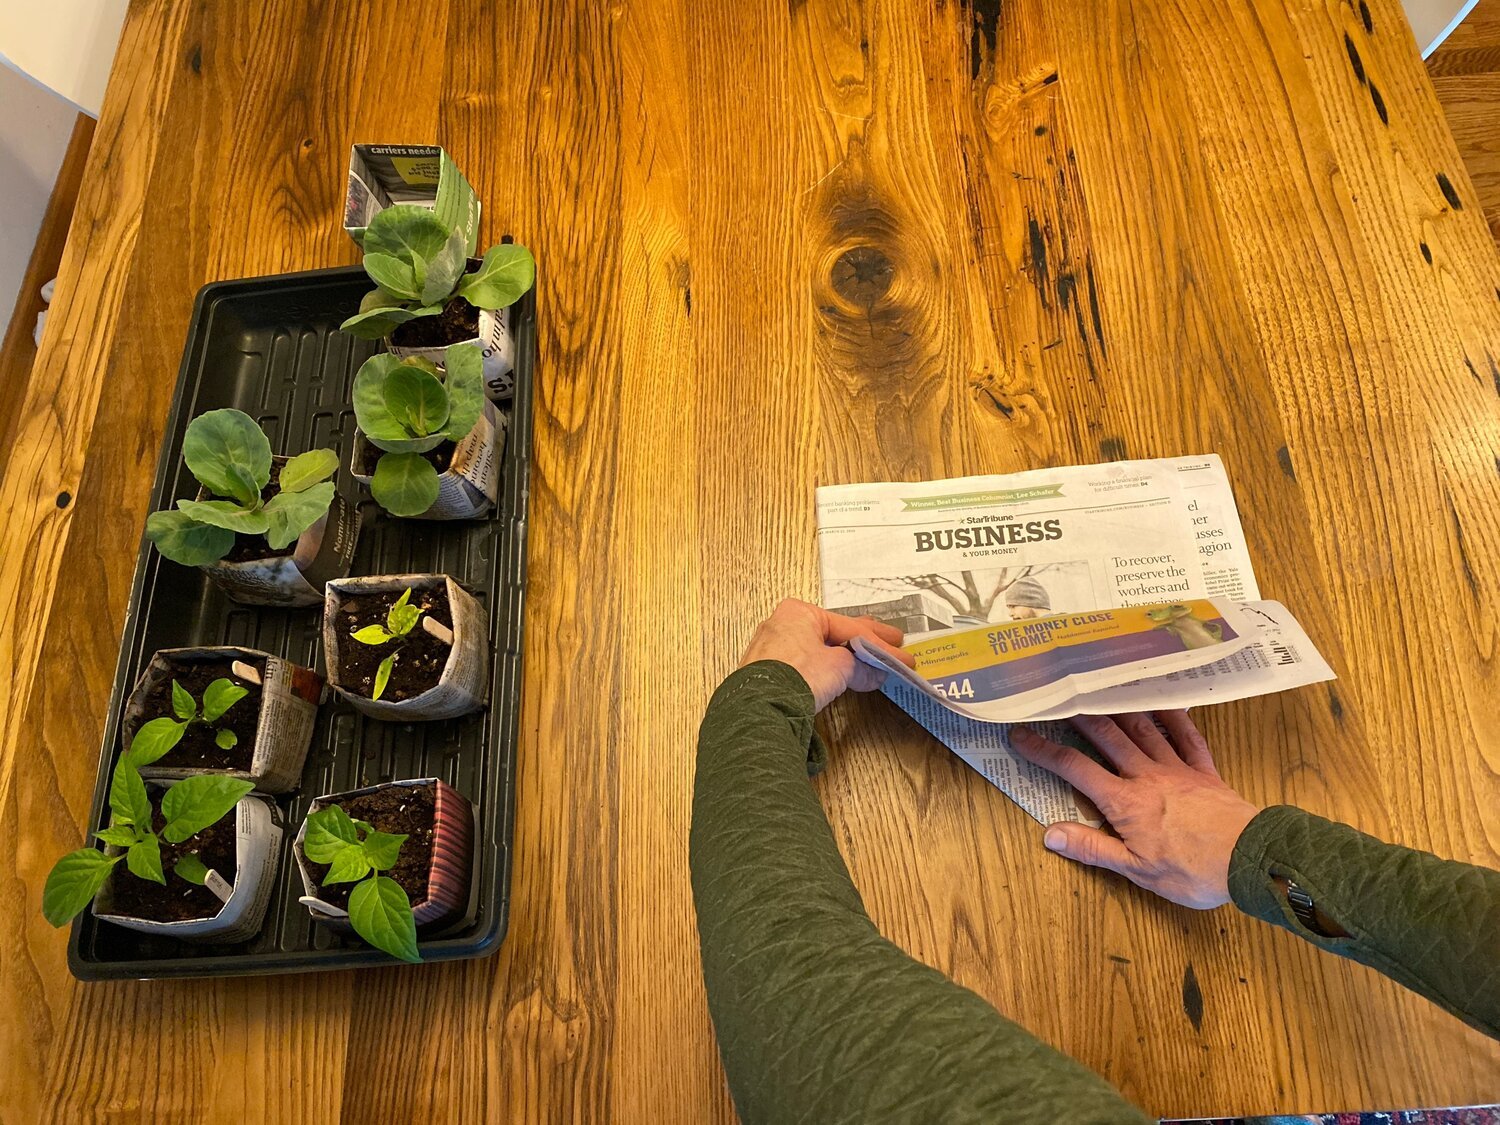
Take one of the two halves of loose paper (it’s two sheets) and fold them up to the triangles. We will make a nice, strong crease here and open it back up.
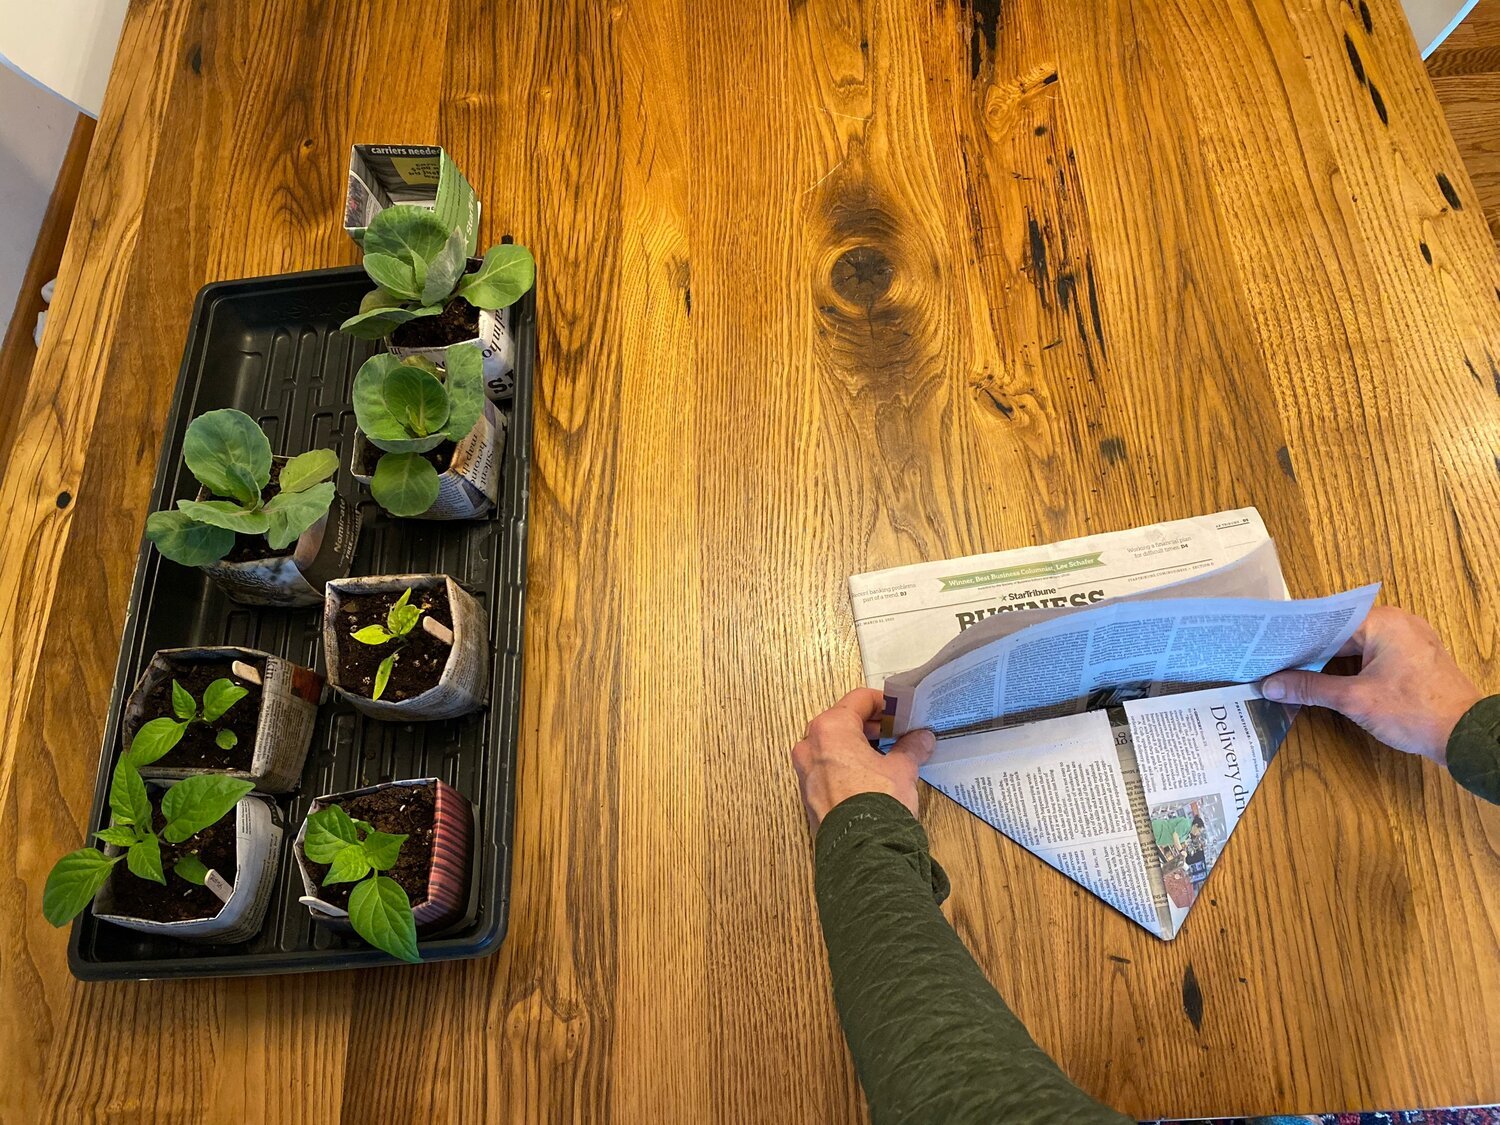
Now we need to make this half as wide by folding it in half again, which will become two of our sidewalls of the pot.

Fold it in half, lining the loose ends of the paper up to the triangle folds. It’s okay if the triangles flap open – they probably will. We will fix that in a few more steps.

More creasing! I cannot underestimate the value of a good crease for these paper pots. Once you have this creased well, you can fold it down over the seam and partly covering the triangles.
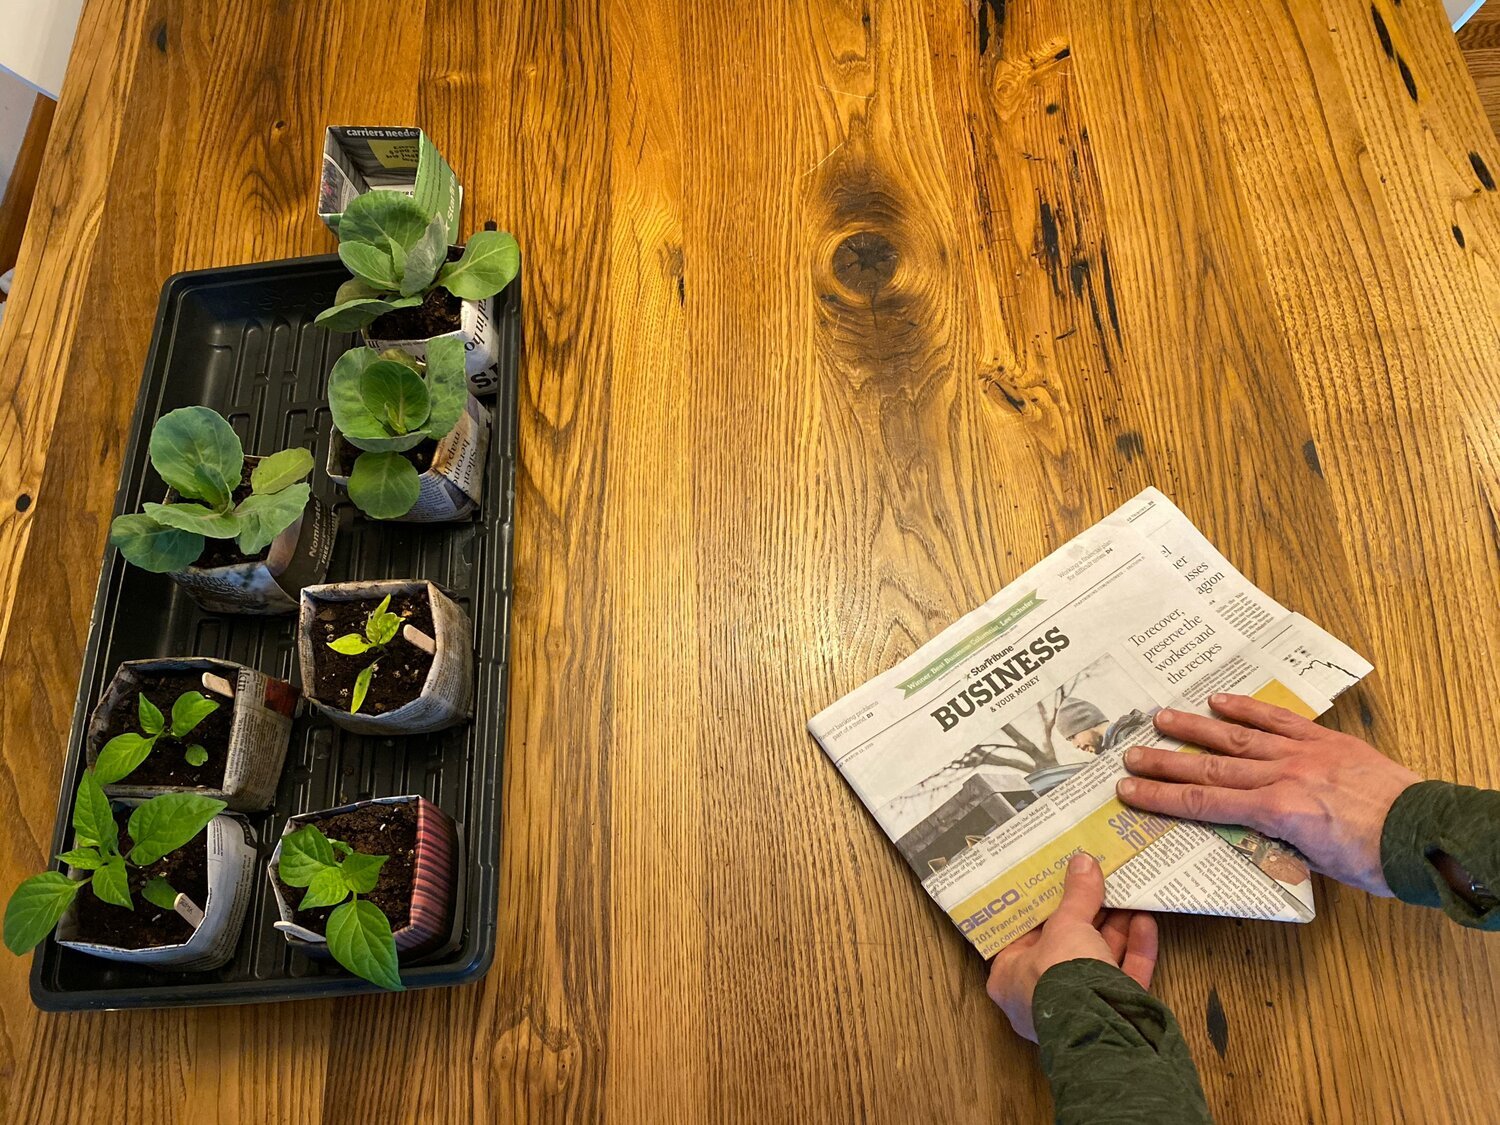
Here’s what mine looks like all bundled together and ready to be flipped over. We are getting close now!

Now we are back to folding into the middle crease, but this time we are folding more paper, including what we just folded and part of the triangle. Fold half of the paper lengthwise toward the middle seam. And yes, crease it well!
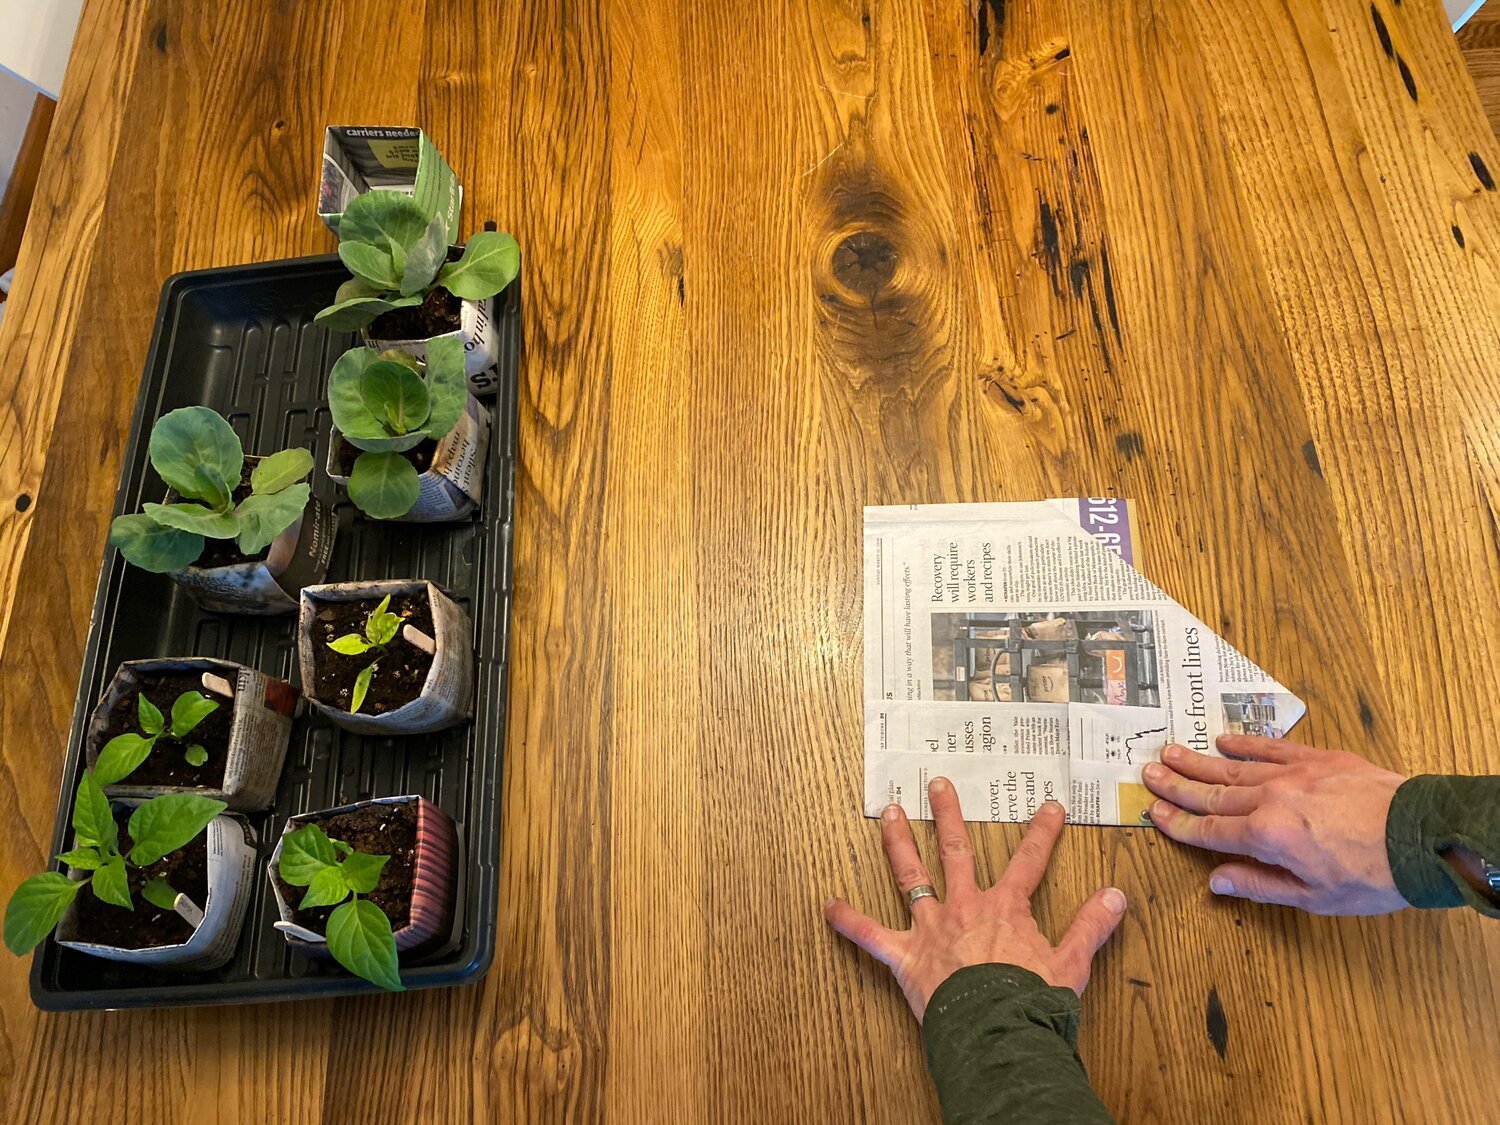
Well-creased and ready for me to fold down the other half.
Folding the other half down and I will crease that new fold down really well before proceeding to the next step.

Now I rotate the paper so the tip is pointing toward me. We now have to fold the other sidewalls, just like we did before, but these ones are already folded in half lengthwise. The other tricky bit is we need to tuck these ones in to make the pot sturdy.
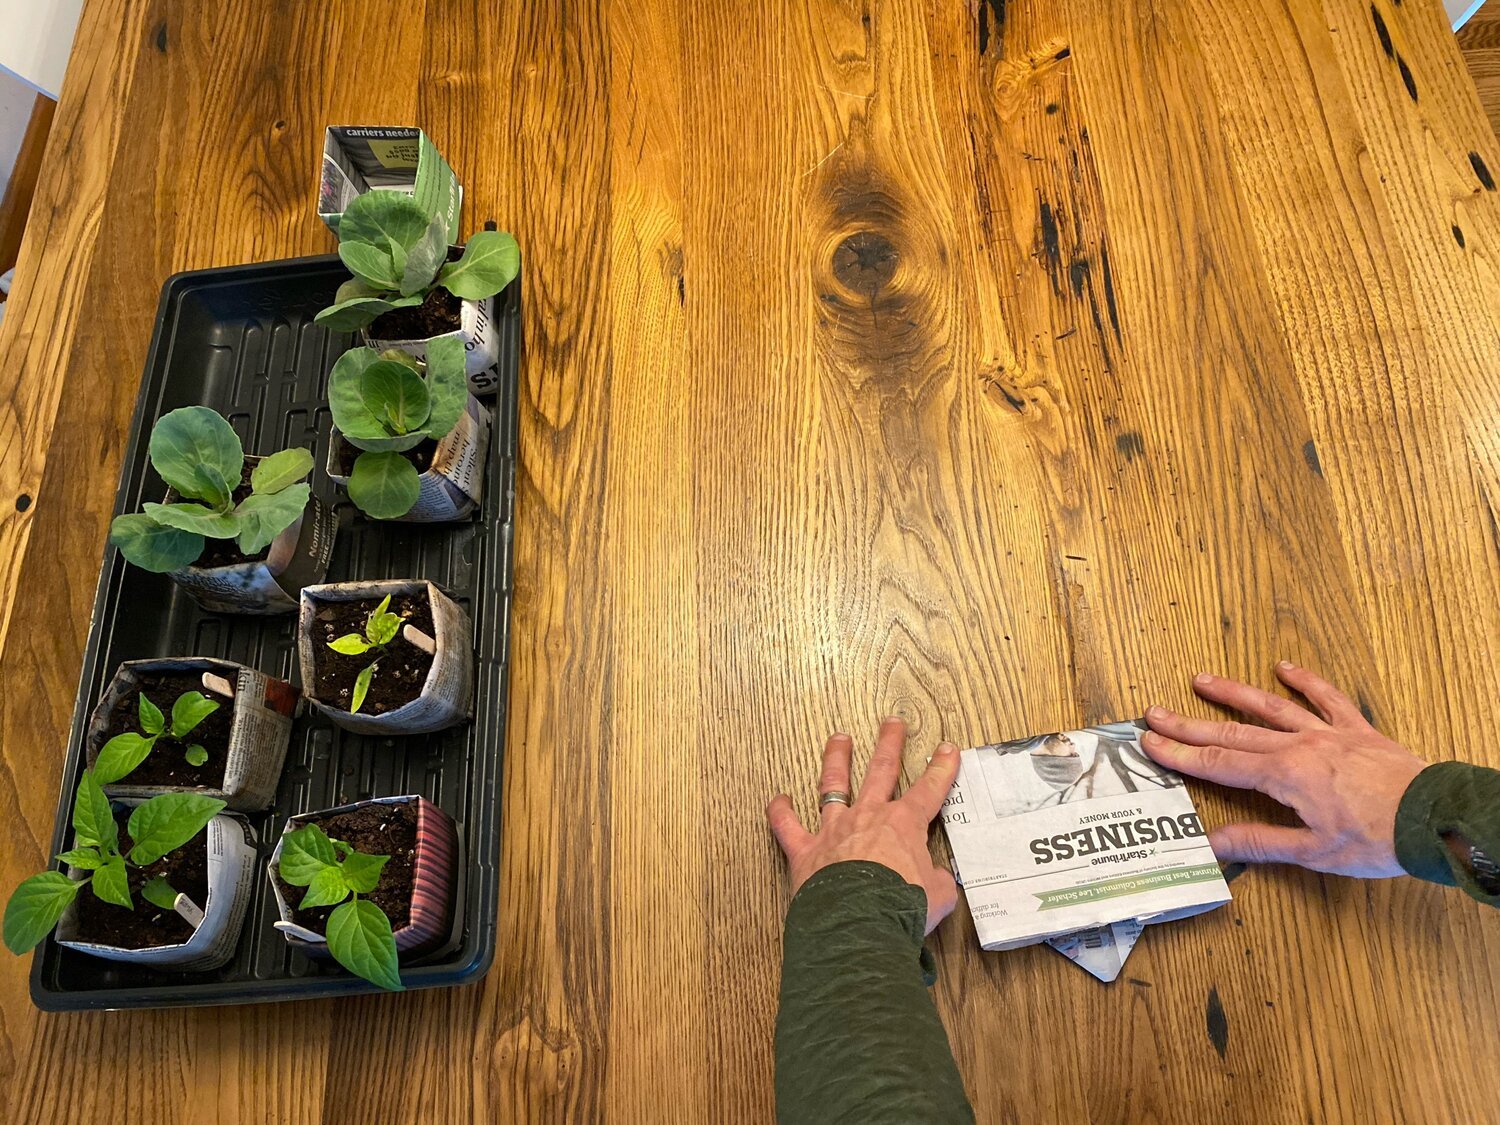
So I fold what is left in half, making a new crease as close to the triangles as possible, just like we did on the other side.
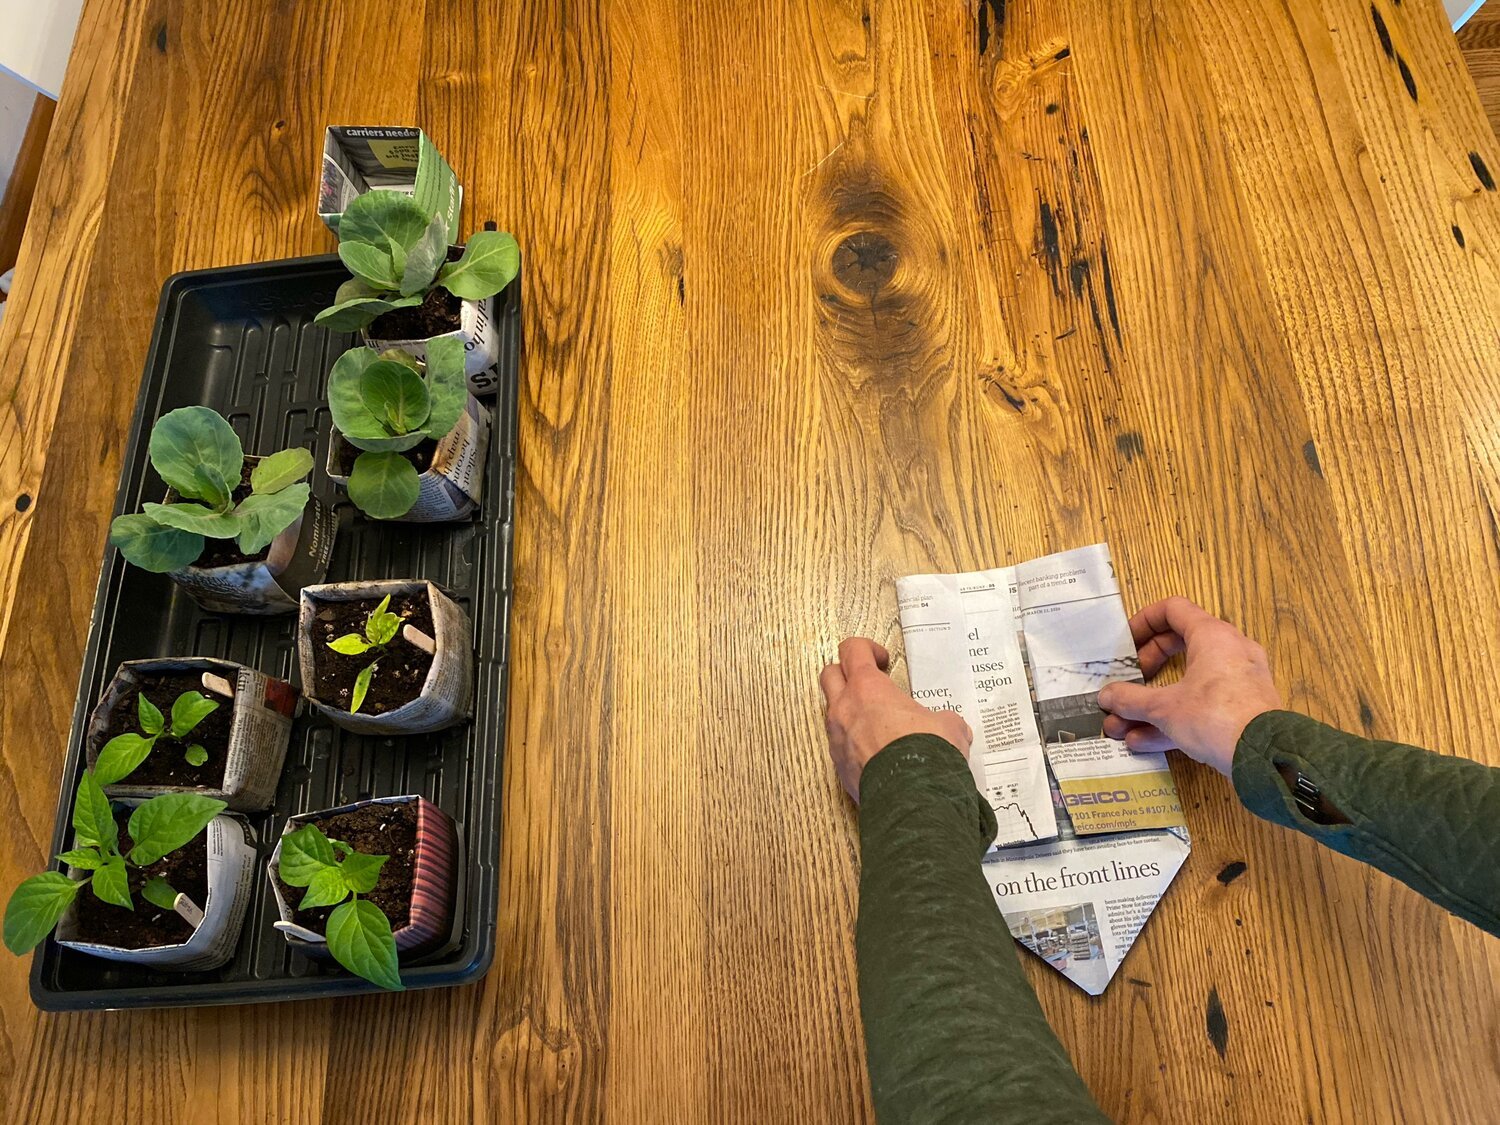
Now I open it back up and prepare to fold in half again down to the same seam, just like we did on the other side.

Here it is folded down again. Now comes the trickiest part: that part I just folded down needs to be tucked into the folded down bits from the other side that are right below them in order for this to become a self-standing, 3D functional thing.

I rotate it around so it’s right side up, and now I will bring this newly folded last piece up toward the tip of the triangle (aka, bottom of pot).

Now I am using my index and middle fingers to pull back the bits of paper so I can tuck this right against the triangle side, folding it right against that ‘wall’.

It takes a bit of practice to hold it all together while folding this down, but thankfully the pots are quite sturdy regardless. Especially because you were so good at making creases all along the way, giving the pot its shape.
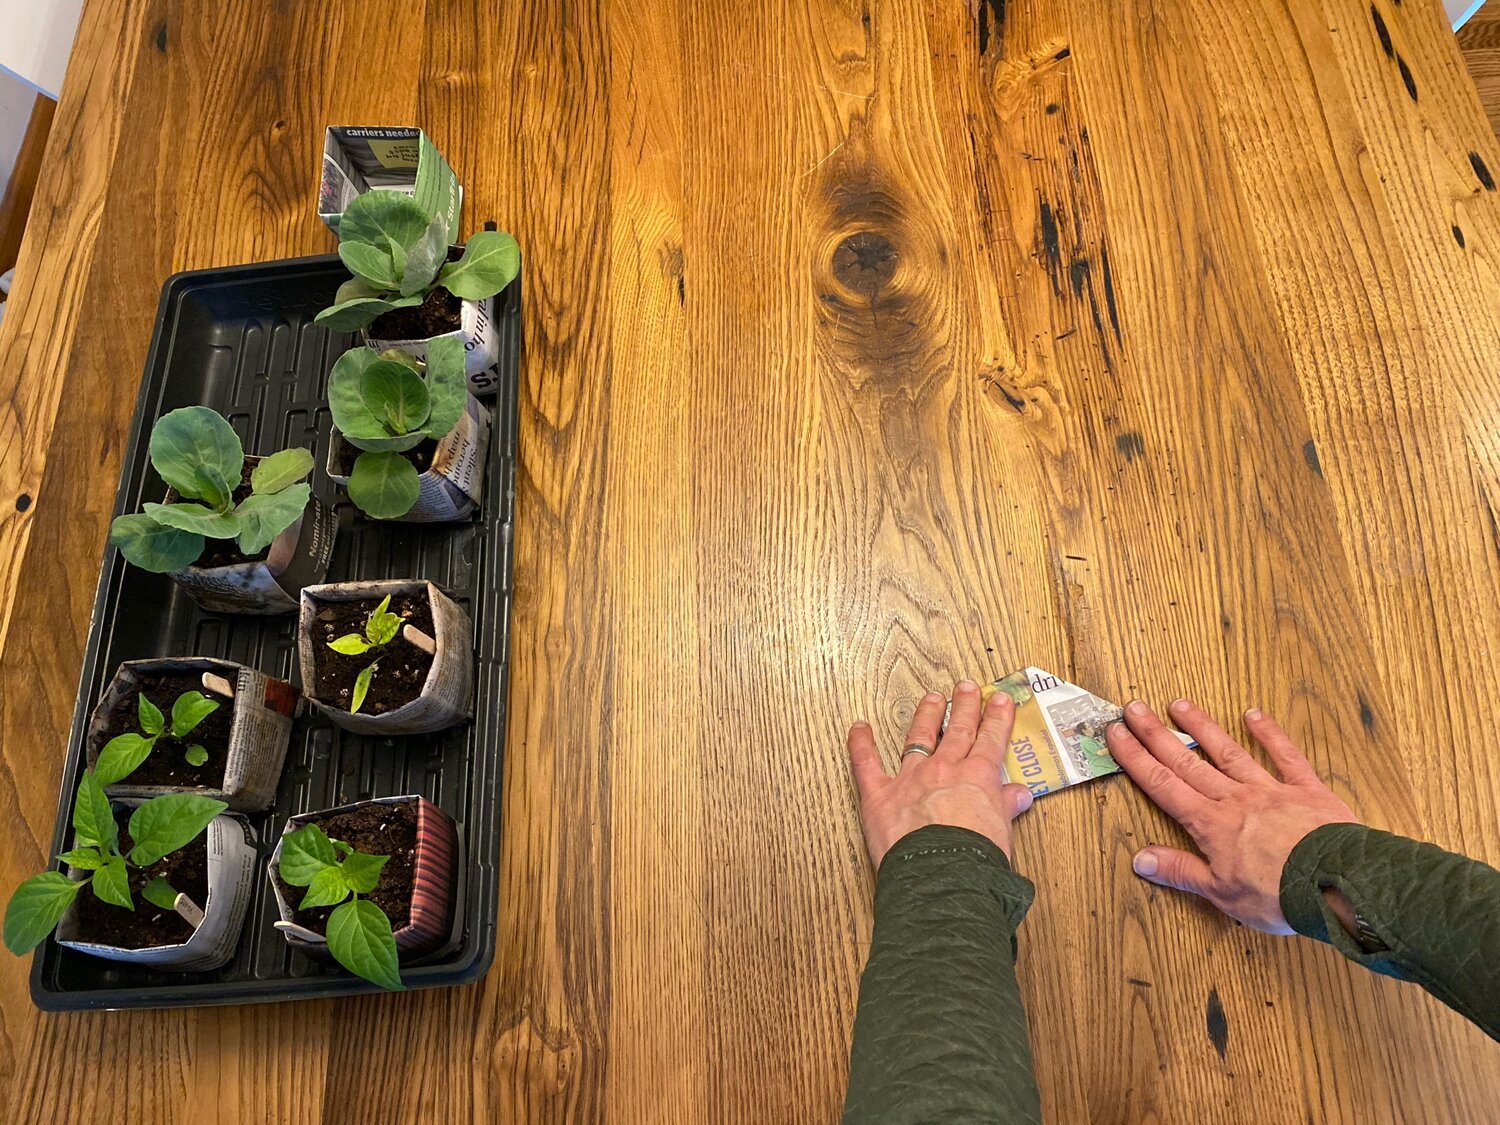
It’s getting pretty thick at this point, but it’s still important to reinforce those creases. Push down firmly on the straight sides, which are the walls of the pot. We are almost there!

The final fold in half happens next. You will fold it in half again, creasing it as well as you can.
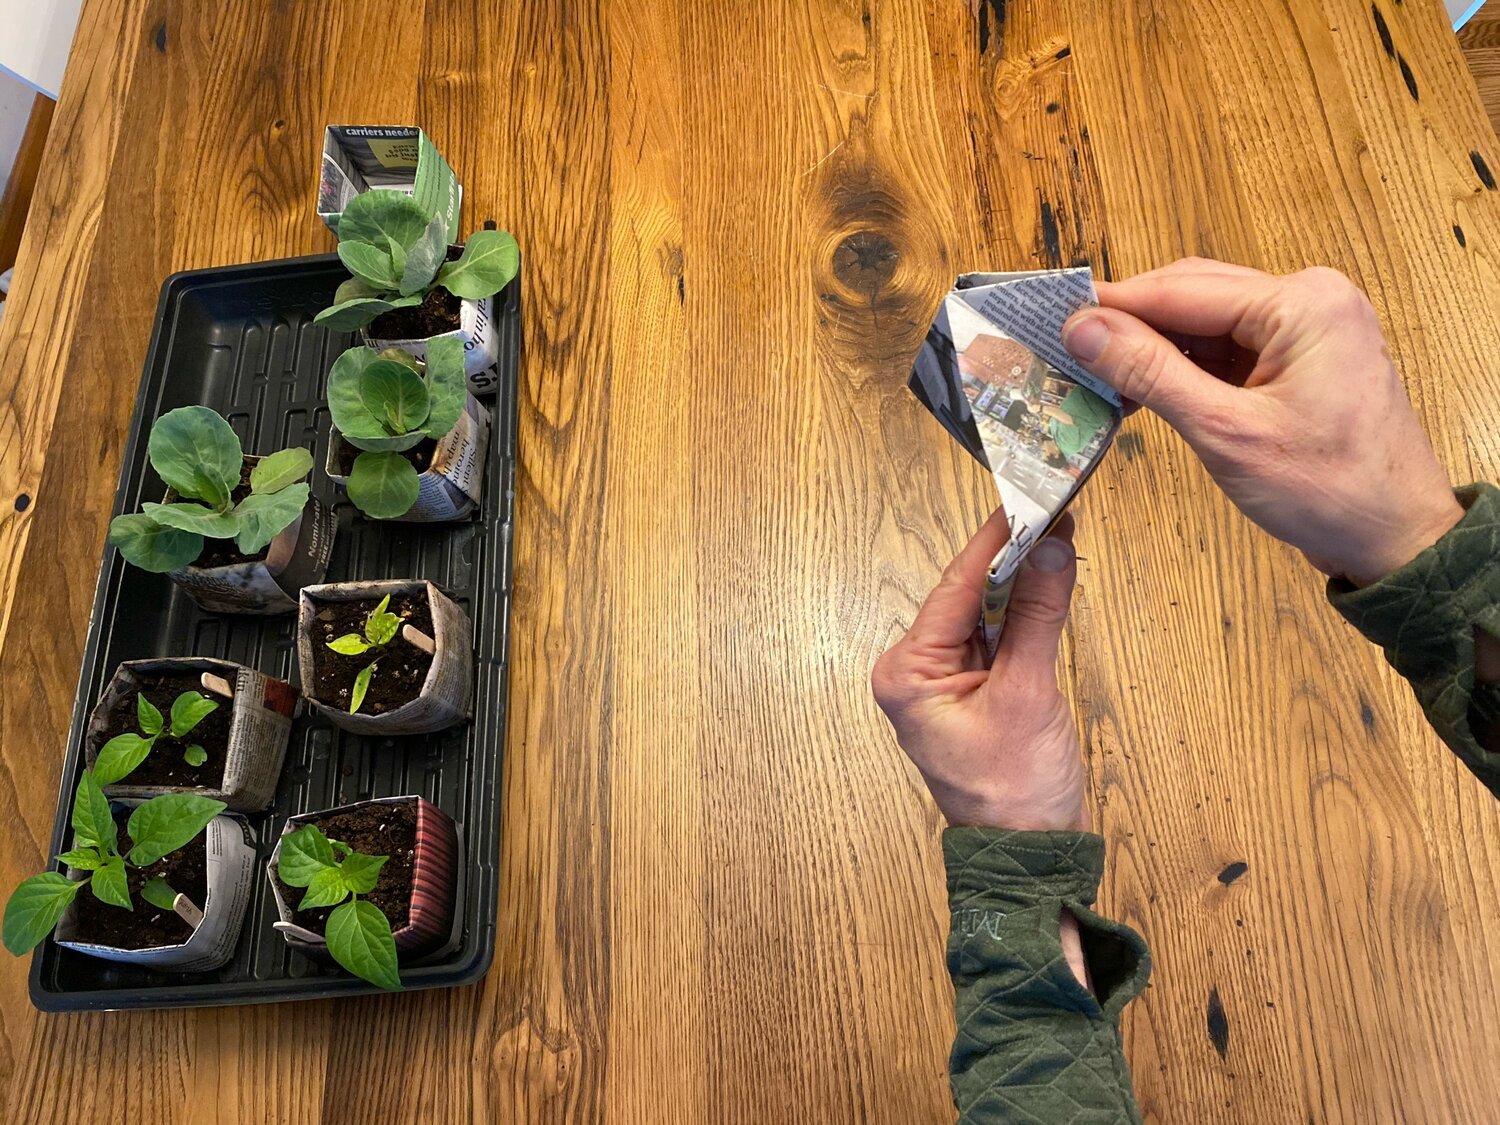
This is the final creasing, I promise! You take the tip of the triangle and bend it up toward the top, sort of like moving it from 3 o’clock to 12 o’clock. And crease the bottom down. While you’re doing this, the bottom side will want to pull up off the table and that’s ok.
Now you should have a littler triangle. And the fold that makes the right angle coming up off the table also needs to be crease, which is what I’m getting ready to do here.
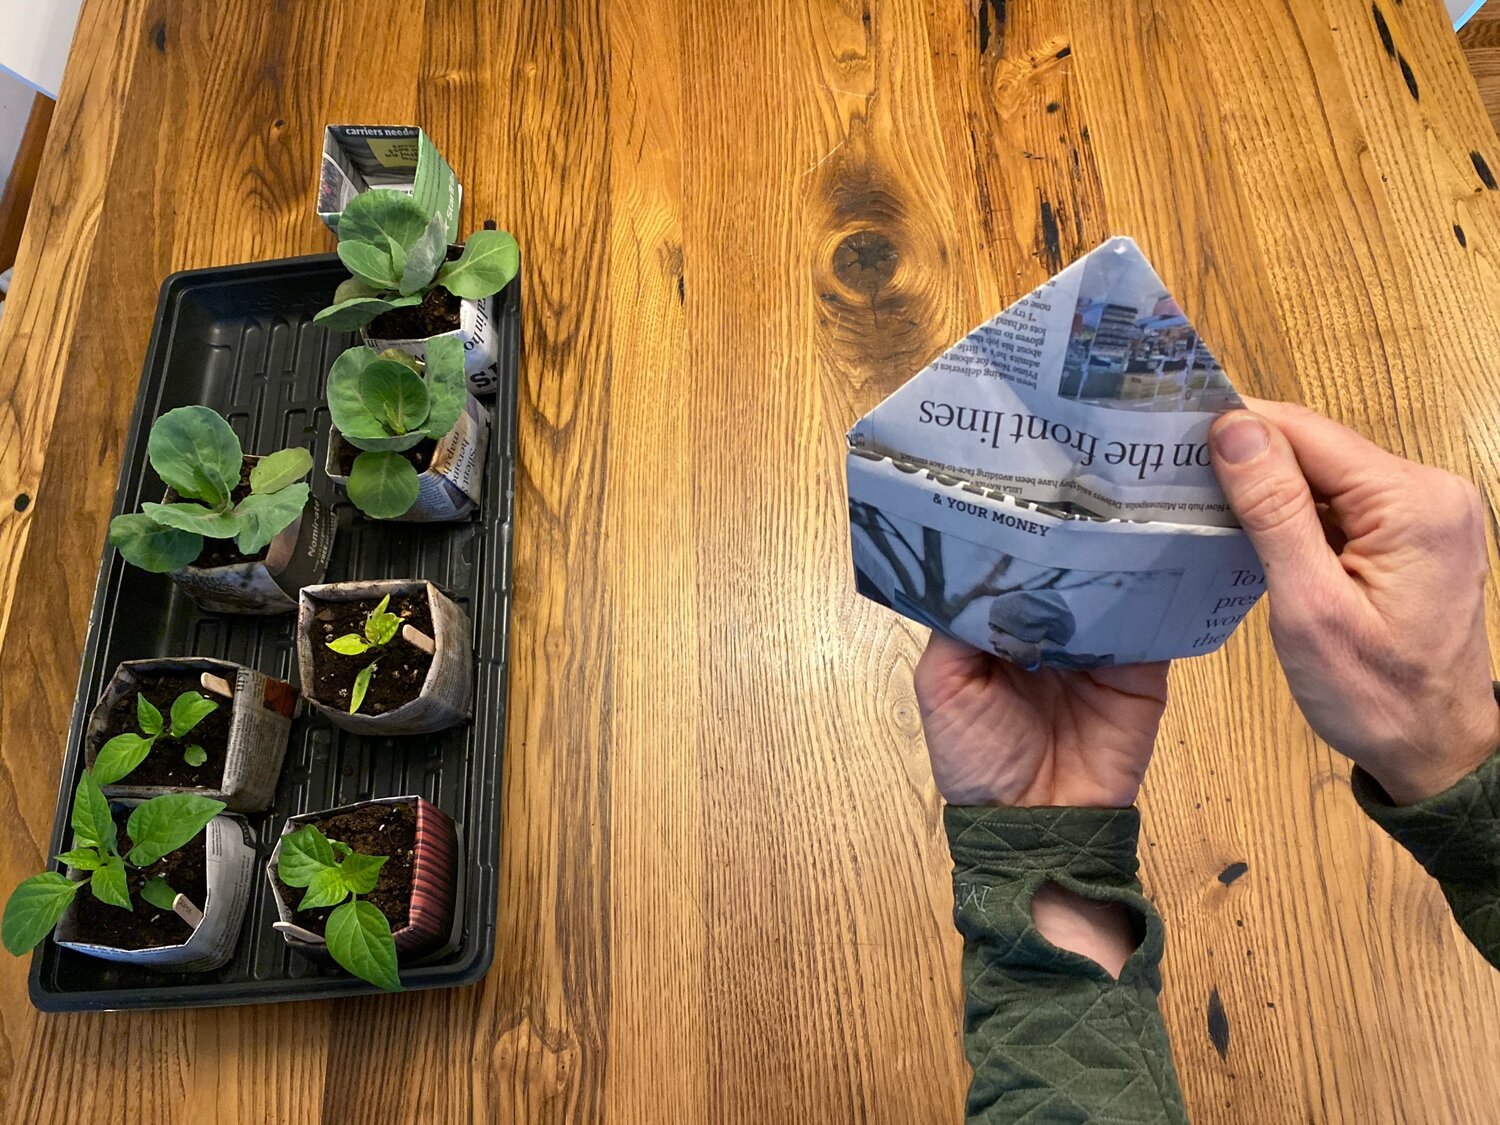
This is what the bottom should look like when you finish creasing all these new folds. As you can see, we have half a pot, so now it’s time to open up the middle and help shape the bottom to be flat.

I open the folds back up and insert my hand to spread apart the middle/inside of the pot. I work carefully to open it as square as possible. By doing this, now the triangle on top will want to bend. We just gave it shape with the creases and will help flatten it next.

Next, carefully find the diagonal crease where the triangle was made a few steps back and start to bend down this triangle to the corner to make the base square. This is the hardest part. Saved it for the end!
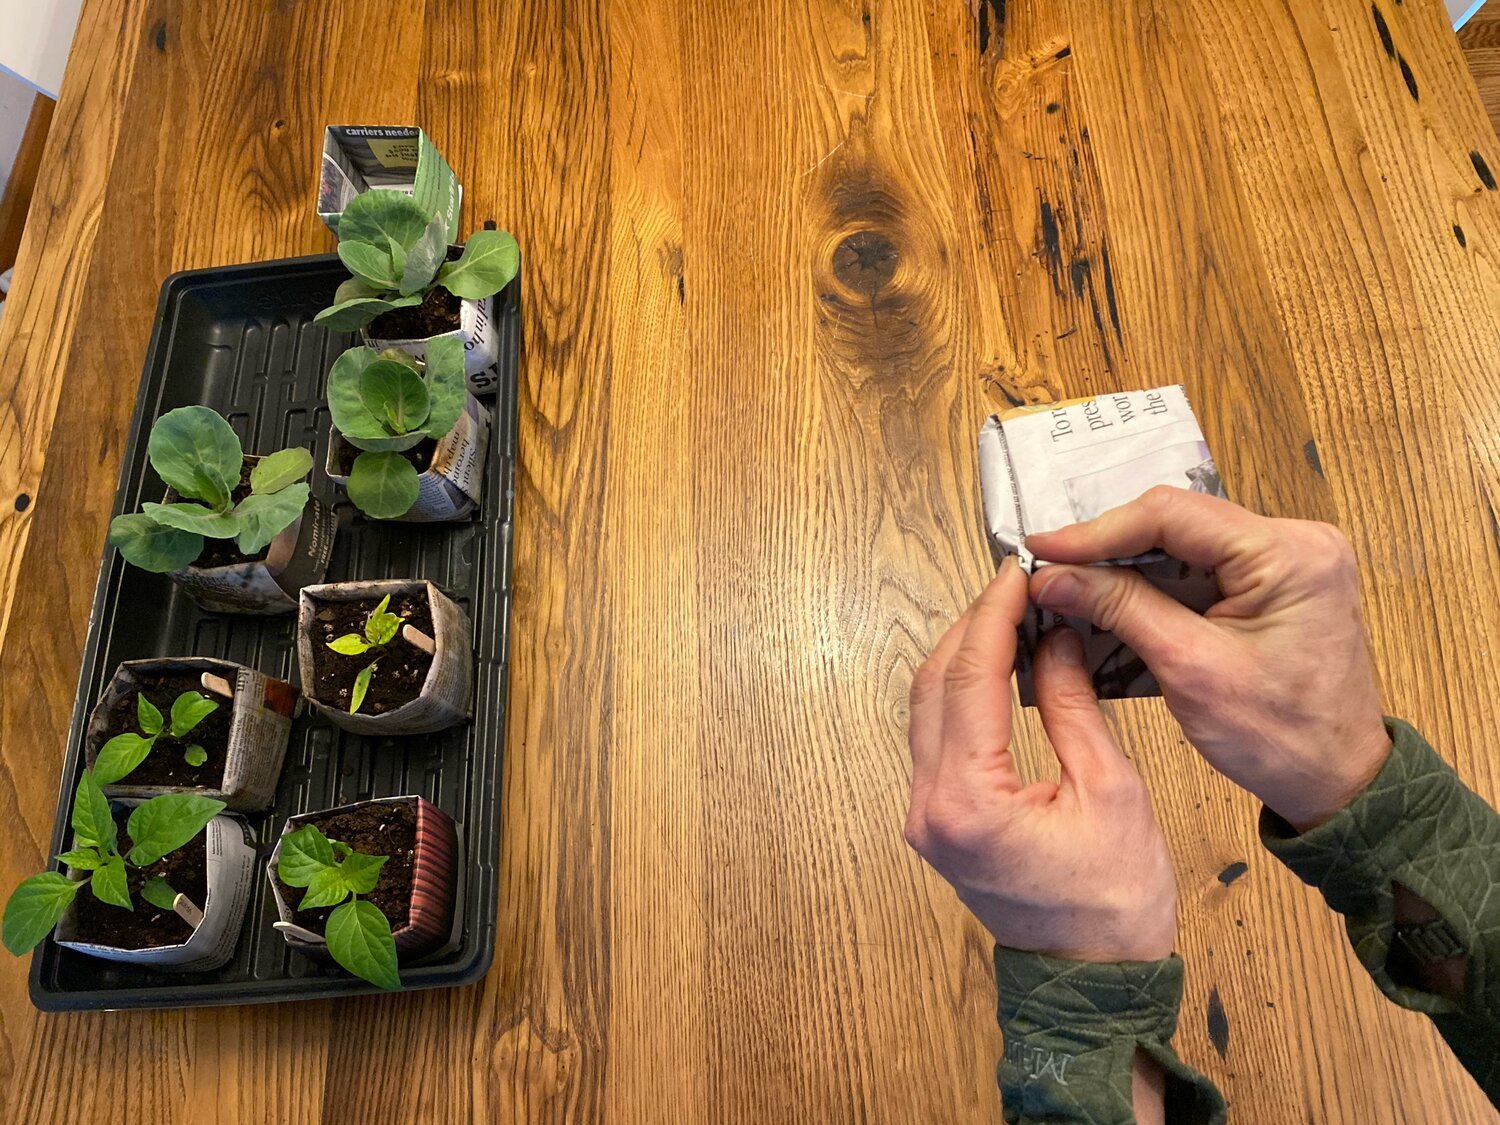
Got it down, now just a little more creasing at the corners and it will be done! The base will sit flat once you get soil in there. Just a few pinches at each corner and that’s it.

-
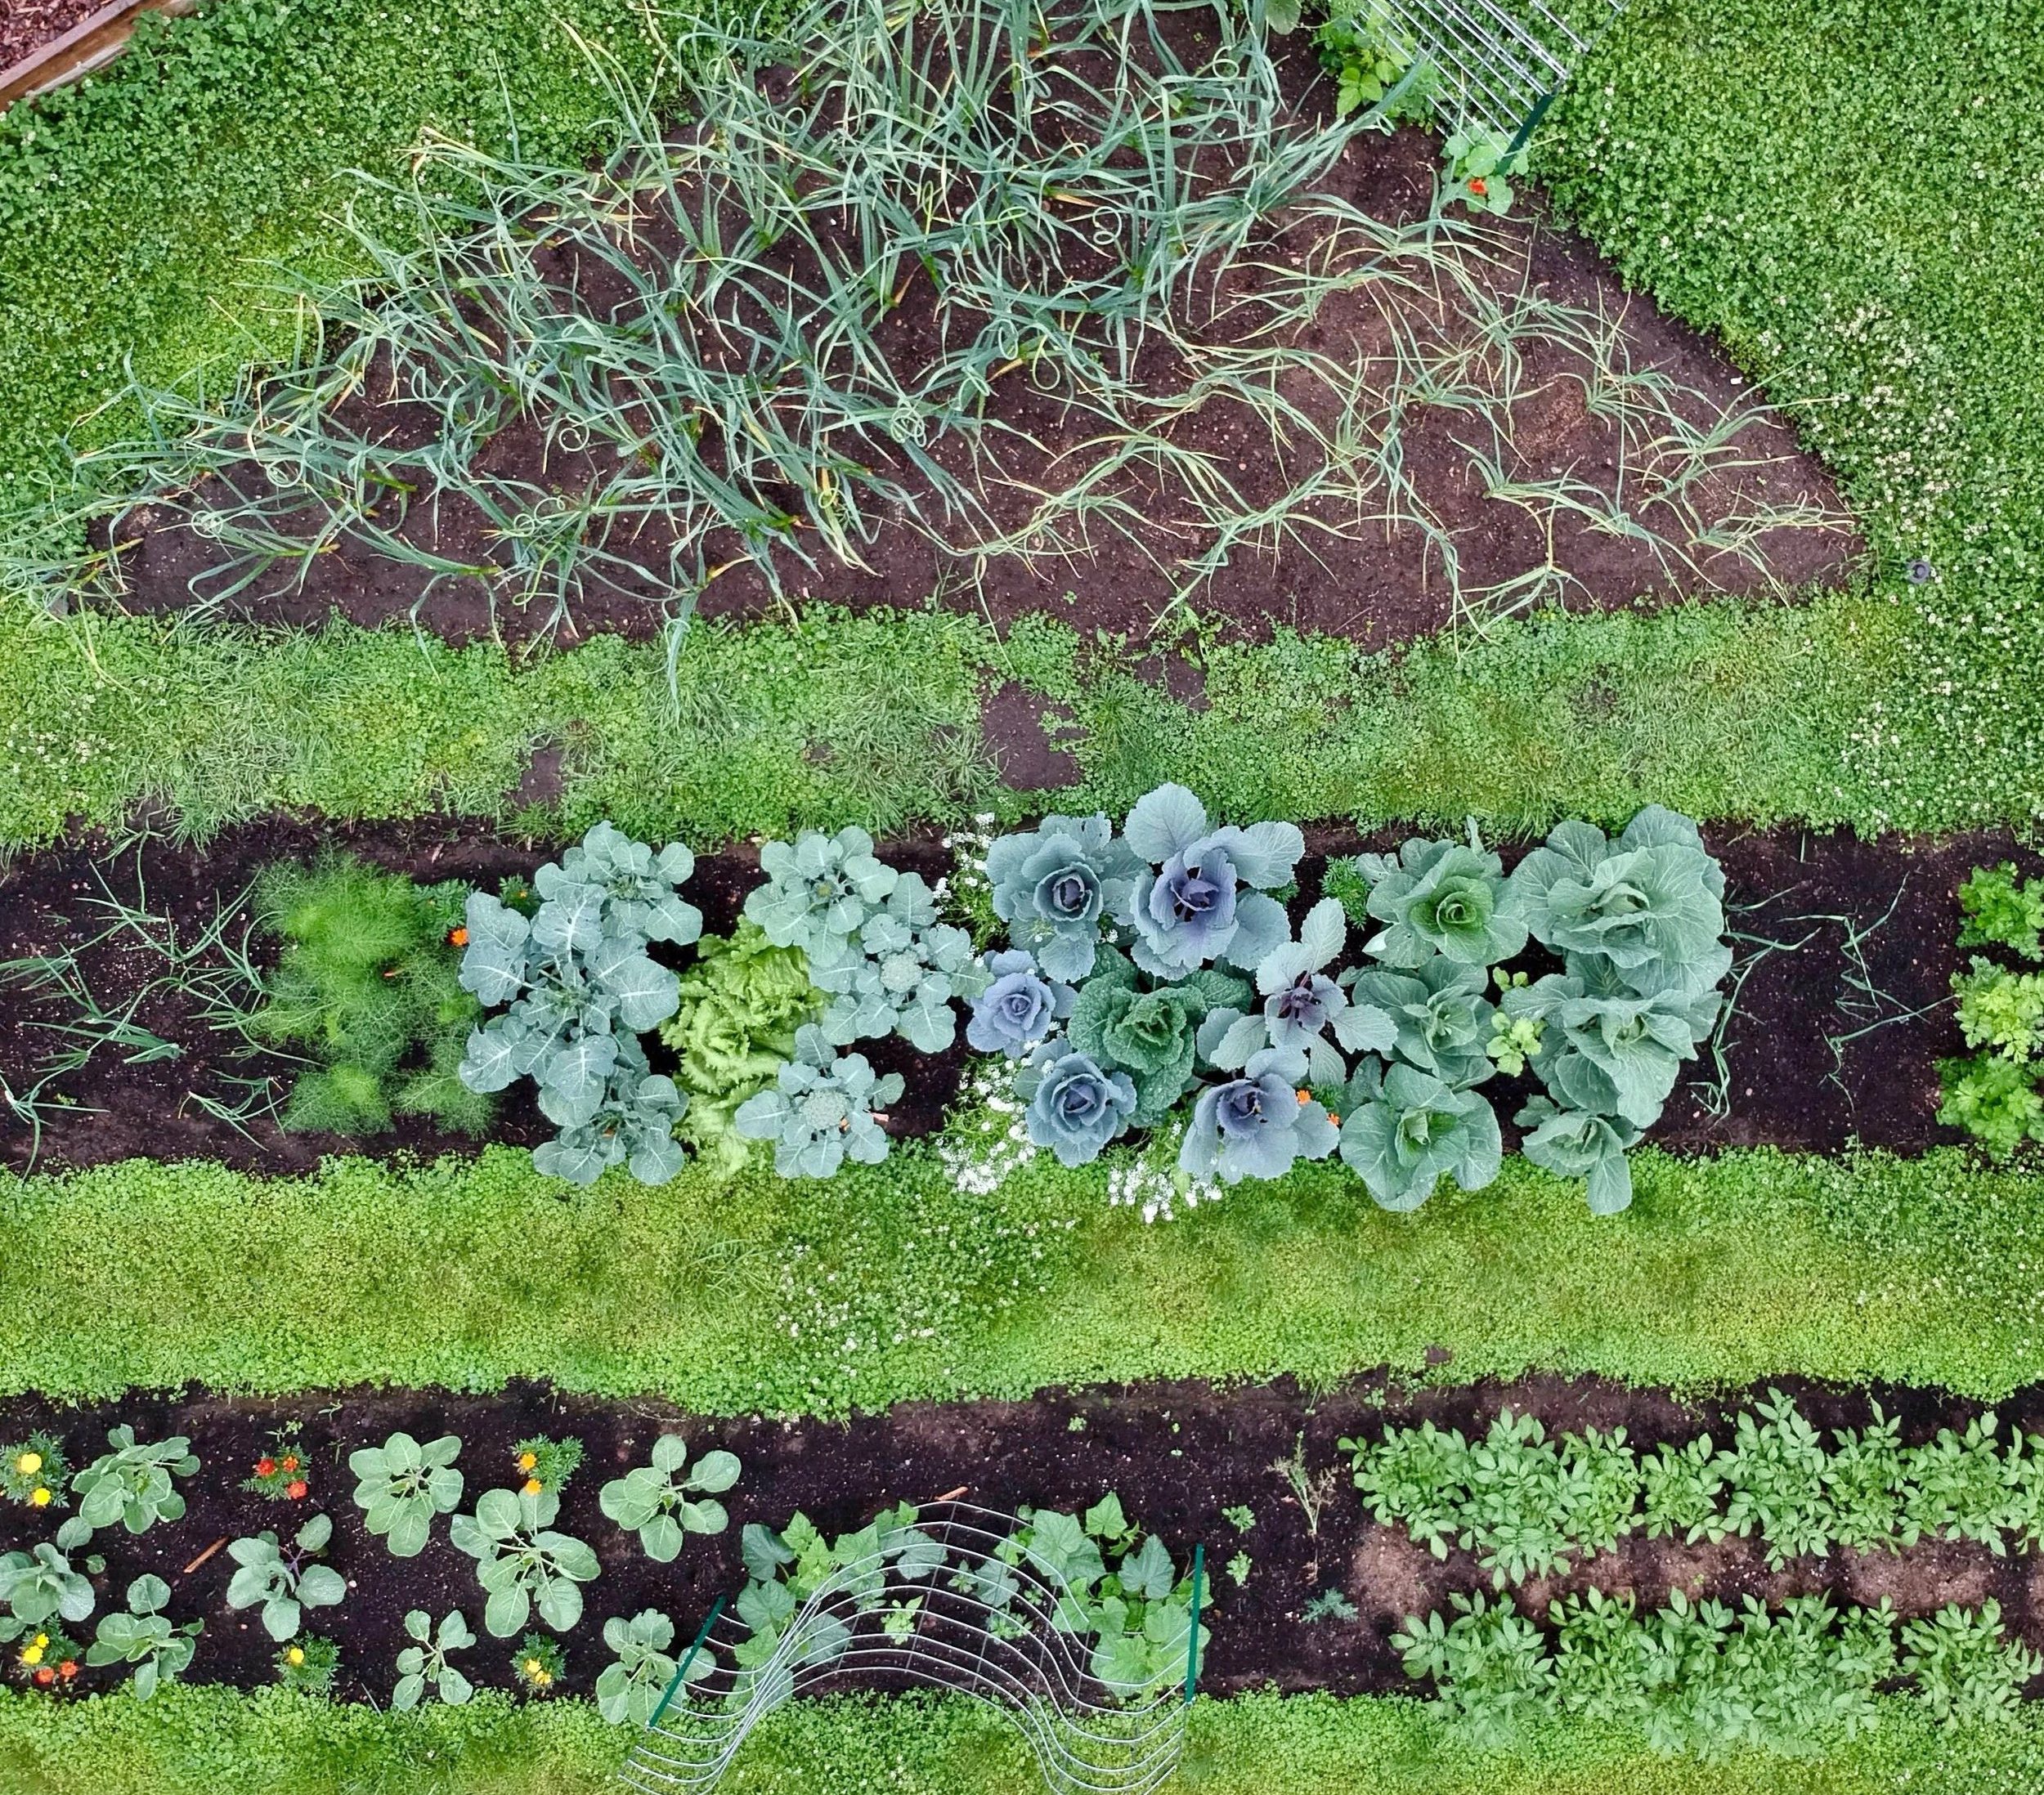
2019 Garden in Review
I am eternally amazed at how each growing season offers subtle lessons and blatant reminders of how we missed our target in often equal proportions. I remain humbled reflecting on what we achieved and where we lost our way growing our own food this year, with some of the planning and execution always slipping away from me come mid- to late-August, a time when we are inundated with produce, preparing for back to school, and honestly looking forward to our first frost, quietly relishing the imminent slow down.
Never Enough Salads
You’d think that after decades of growing food, I’d have gotten growing greens down to a refined science like I have my beloved brassicas. The truth is, I tend to plant too much all at once, and then there’s so much I don’t succession plant as much as I should or could.
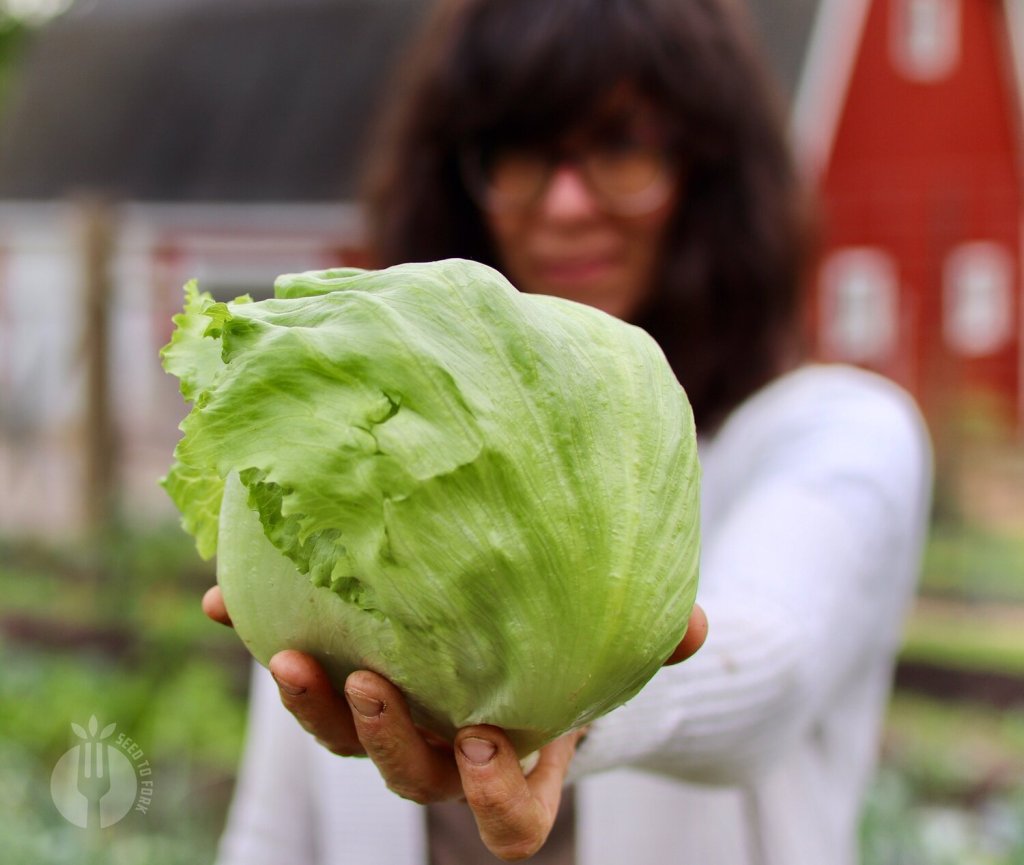
Because I prefer to sow lettuce indoors and transplant, my goal for next year is to start lettuce over a longer period of time, less than half a dozen soil blocks per planting — and sow our iceberg and romaine lettuce indoors two weeks earlier (early March) for an early to mid-April transplanting under row cover.
In spring we tend to have our lettuce fix just right; I sow a few indoor successions of about 25 different heads, and with varying strength of seedlings they become more than one succession out in the field, the strongest starts maturing faster than the smaller ones. It sort of works itself out as the season warms up, with plenty to eat and more than enough to share.
Come Summer, though, that’s when growing greens becomes a challenge for me mentally. And it also becomes challenging because lettuce goes to seed (bolts) very quickly in the heat. To ameliorate this issue, last Summer I invested in a few heat tolerant lettuce varieties, which I sowed indoors in late June and transplanted out in late July. They did so well, and it was a wonderful reminder at just how much faster things grow when the soil is warm and the days long; we had harvestable lettuce in less than two months time.
In 2020 I will do much smaller sowings weekly starting in mid-June through mid-August. Yes, weekly sowings for about 8 weeks sounds, well, a bit onerous to me, too, but we love our spring, summer, and fall salads, so here’s to planting stamina.
Fall Brassicas
This is an area where I have spent several years exploring and experimenting, in large part because growing cabbage takes several months, and more practically because we consume a lot of cabbage, and by a lot I mean daily. And a food like cabbage is not something you can remember in late Summer and grow successfully from seed before Winter blows in; you have to think and act several months in advance.
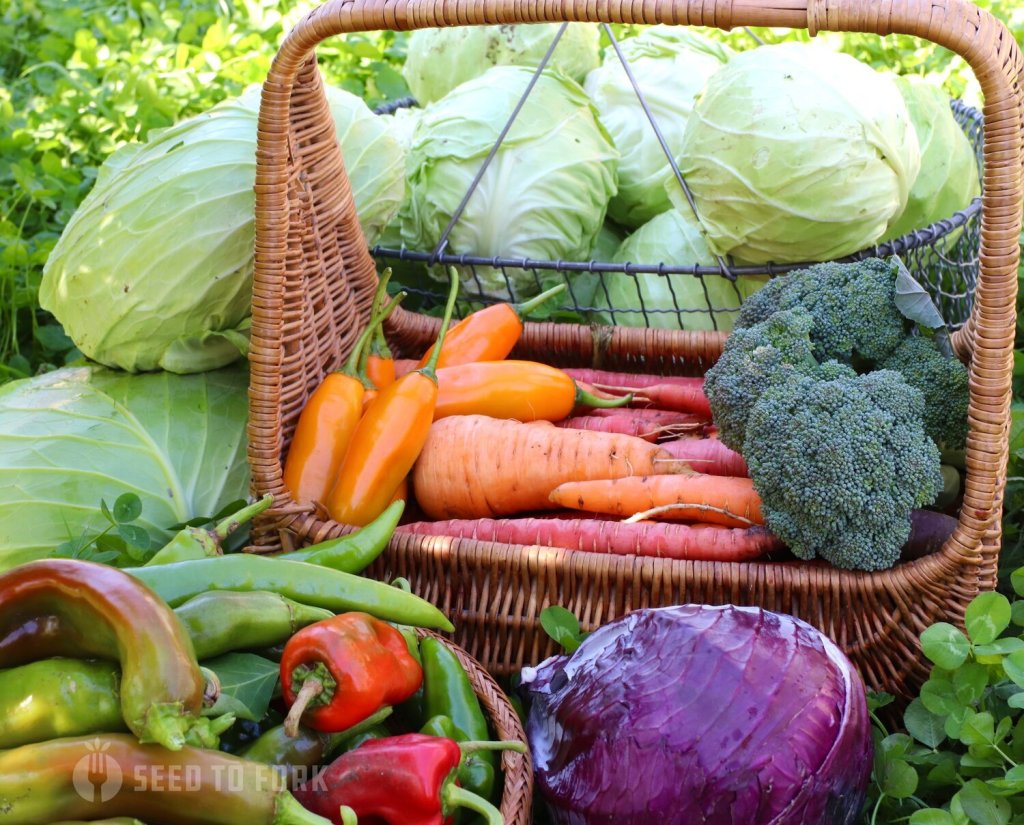
I have been tweaking our fall brassica sowing schedule for three years now, and am inching closer to understanding how our array of brassica varieties mature across late summer and into fall. I added two late season cabbages to the lineup this year, and they did really well for us, maturing later than the rest of the fall cabbages that became kimchi sauerkraut.
Besides having gallons of fermented cabbage in our basement refrigerator presently, we also have well over 15 pounds of fall cabbage in our root cellar. Largely a success, our latest maturing cabbage, which are also the most cold hardy, could have been sowed a few weeks earlier. So next June I will so the slowest producers on June 1, looking to fall before the first ripe strawberries or tomatoes are picked. Truly one of the hardest things for my heart to get behind, but it’s necessary to stretch our short growing season.
Pepper Garden
We grew so many new pepper varieties this year and it was a lot of fun exploring the world of paprikas and hatch red and gochus, taking a year off almost all hot peppers. In years past we ended up giving away or freezing almost all of our hot peppers – and admittedly some ended up in the compost heap – so we decided to use that garden space for culinary peppers this year.

Yet as we started to enter salsa season, a particular pepper was sorely missing from our lives. The jalapeño. Last year I grew jalapeños, habaneros, serranos, Chinese five spice, and candlelight peppers. So this year our course correction went a little, umm, extreme, eradicating all but the ornamental candlelight, which we used as our hot pepper. It was definitely not the same.
I used my hot paprika peppers in my salsa recipes in lieu of jalapeños, but lesson learned the hard way: we won’t have a garden anymore without at least one jalapeño pepper plant.
The Tomato Garden
One thing is certain: we need to adjust our ratios of cherry to paste to beefsteak. We grew about 25 tomato plants, and more than one third were cherry tomatoes. Actually, I think 11 were cherry tomatoes! That ratio is going to change next year. We will grow 6 or fewer cherry tomatoes, and at least a dozen paste or saucing tomatoes – half of which will be determinate – with the remainder rounding out the basket with big, beautiful beefsteaks.

As beautiful as giant bowls of cherry tomatoes are, we were both unimpressed by several of our new friends’ flavor and feeling like our paste tomatoes didn’t deliver the pounds we needed to get us through winter. There’s always next year to refine our lineup to try to achieve our homesteading goals.
We haven’t been too serious about tomatoes though they’ve always been a part of our garden, but it’s time to focus on the right mix for our family’s needs so we can hopefully enjoy homegrown tomatoes all year round in another year or two of experimenting because our canned roasted tomatoes have been so delicious I am hoarding them, and know all too soon we will be purchasing canned tomatoes because our stash will be all used up.
The Garden Shallot
Mediocre germination rates were the tip of the iceberg for my shallots this year. Compounding our woes, I planted my shallots in their own block but between a few sprawling cucurbits and, if you know what cucumbers and summer squash do best, were a bit shaded out. Shaded out veggies in a very full sun garden seems odd, but it happens on this micro-scale and can deeply impact the productivity of a low-growing veggie such as a shallot.
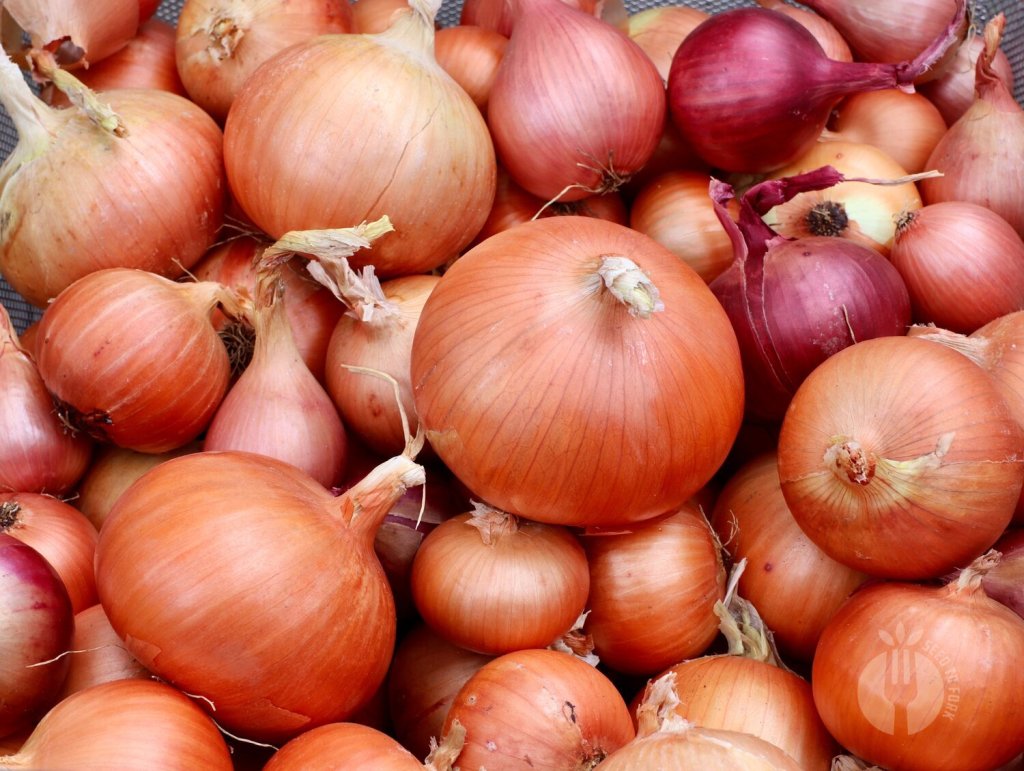
Too few shallots this year, but that will be course-corrected next year, hopefully, with equal plantings of shallots as yellow onions. I’ll be purchasing more of my favorite shallot variety, Conservor, and plan to give them a good sunny end of a garden bed in 2020. Because our shallots surpassed all our other storage onions last year, lasting well into very late spring, they are high on my priority list of food for the root cellar. They were drier, yes, and on par with store bought shallots locally. And mine were homegrown.
Rethinking Beans
I have had good intentions and poor execution with our bean successions, and this year was downright mediocre. In part it was because I didn’t dedicate as much space to pole beans, instead sharing the same space with two new shelling bean varieties I absolutely love. However, we did not have the late summer glut I am used to, and because of that I did not lacto-ferment any dilly beans, nor was I able to can any dilly beans, either. So, I need to adjust my sowing schedule for beans to say the least.

These speckled cranberry shelling beans, also known as Borlotti beans, were part of the reason our reliable Fortex pole beans weren’t as abundant. I hope to build one or two new cedar trellises over winter for beans so we can allocate sufficient space for both snap and shelling beans.
Our goal has always been start our bush beans earlier, which come into season faster and don’t last as long as pole beans. I am aiming for middle of May to sow my earliest bush beans next spring. When they germinate, we will then sow the pole beans, which will begin producing at the tail end of the bush bean’s productivity, thus providing two successions back-to-back. I’ll keep honing this succession until we have the just right amount of beans for as long as possible. And will be sure to share our learnings along the way.
The Super Early Radish
I was so happy I decided to ceremoniously sow Spring Equinox radishes, under row cover, who germinated by the end of March and matured by early May. Along with our earliest pansies and asparagus, it was a delight to be harvesting food the first week in May from the garden. This is a tradition I will continue indefinitely.
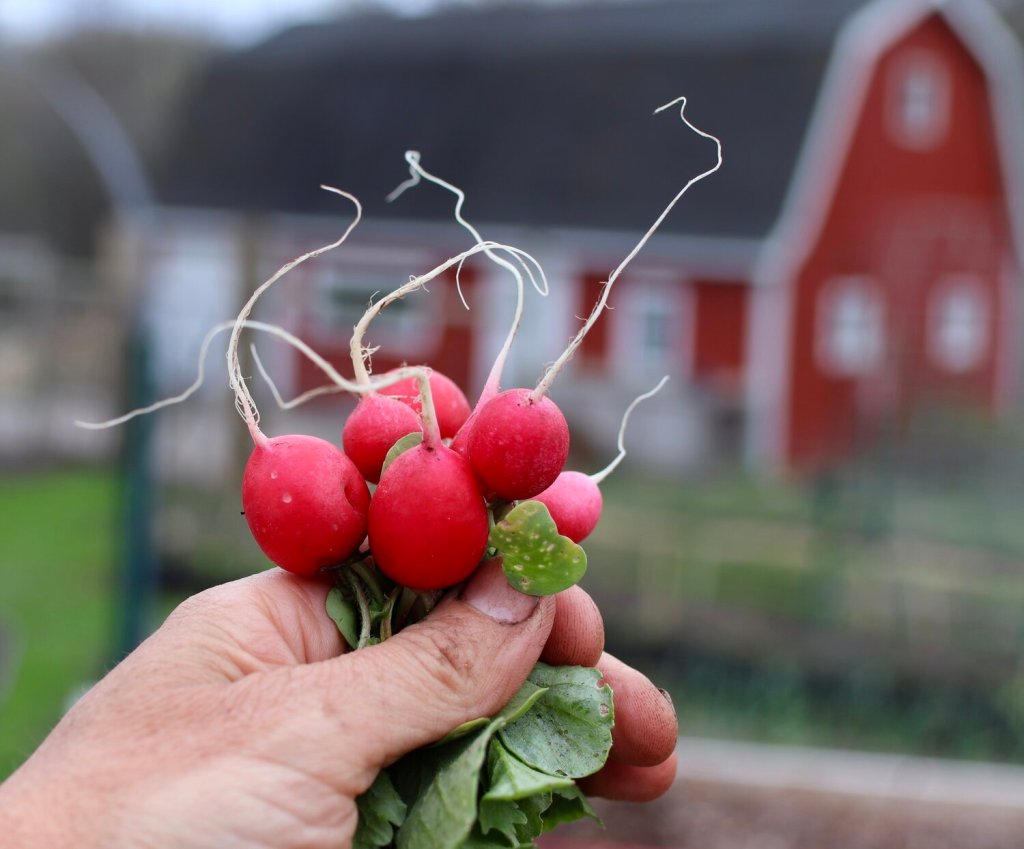
May 4 and the radishes were ready. That is the earliest I’ve harvested radishes in this garden. Here’s to radishes in April next year.
Late Corn
I wasn’t going to sow any sweet corn this year, because we grew a little too much last summer, but I got cold feet, afraid I’d miss it terribly, and planted it right after some kohlrabi matured in late June. It was the latest I’d ever planted corn, and I was warned by a local corn farmer I’d face pest challenges with a late planting. That turned out to not be the case for us, perhaps because of the very small amount of corn we grew. It was just right, about 12 square feet of corn, enough for several meals over the course of a few weeks.
I might do a super early (sow late April) and a late succession next year, because homegrown sweet corn for Fourth of July is pretty delicious.
Tomatillo Fail
This was one of my biggest fails of the season: I didn’t cut back a trailing nasturtium and it ran amok among the tomatillo plants, thriving and outcompeting the future salsa verde patch for sunlight. The result was embarrassingly small tomatillo harvests.
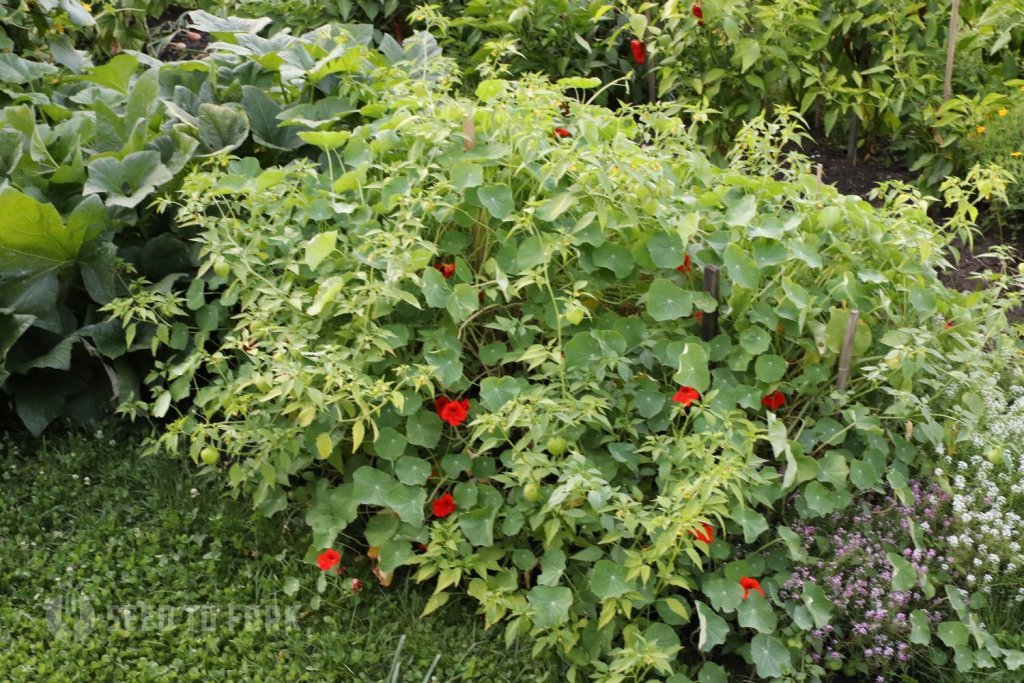
Ah yes, growing nasturtiums like my life depends on it. Meanwhile, the salsa verde has been postponed until August 2020. Better luck next year. I know this plant can and should be a shoe in, known as a rambling, productive mess in any garden. We’ve only grown them twice. First time was in our very first big garden as newlyweds, and we canned at least a dozen pint jars of salsa verde from two plants. And they self-sowed like mad the following year.
The second time was this summer. And it went terribly wrong. It was a great reminder of how important plant spacing is. It is something I highly value, but because tomatillos were known to be insanely productive, I figured they would persevere. Boy was I wrong. Lesson: give your tomatillos, like your shallots, and everything else, their rightful square footage in the garden. Let the ramblers ramble on.
The Perfect Melons
I love growing muskmelons, namely cantaloupe. We ditched watermelon this year, and have to say, I didn’t miss them. A plant I once pined to grow from seed, I’ve now grown and decided I’d rather use the space for other food. That’s the beauty of the annual vegetable garden: you can create it differently (or the same) each season. We may choose to grow watermelon again in the future, but for the foreseeable, I’ll stick with one or two melon plants a year to supply us with the most delicious, aromatic late summer fruit I know.

Flowers
I very badly overplanted one of my flower beds this year, and ended up cutting them back heavily. Cosmos were the heaviest leaners of the plants I grew, and they were the ones I took out by the end of July. I definitely need to adopt proper plant spacing to my flower beds, too, because they were not happy crammed together. Lesson learned. More space, less flowers will equate to stronger flowers and happier plants. And it will look tidier and more beautiful as well. This will simplify my April seed starting as well, requiring less space for flower starts – unless I decide to add more annual beds somewhere, which is always possible.

These were our AmaRosa fingerling potatoes, a beautiful red-skinned potato with gorgeous purple and white flesh. We’ve been enjoying these oven roasted at least once a week. Where’s the Beets?
Admittedly a memorable highlight of my fourth grade school year, and perhaps a misplaced reference for those not old enough to remember those Wendy’s commercials, but really, where are my beets? I did not grow enough fall beets this year, having fallen to a similar fate as my shallots, being largely defeated by the interplanting game. The more I interplant, the less I am willing to interplant – I don’t mean not to do it, it’s just my list of what works together grows narrower and narrower, and has become mostly a game of flower and veggie pairings more than anything else. And you saw that tomatillos and climbing nasturtiums are a no-go, hence my dwindling list of suspects.

While last year my beautiful summer and fall beets were largely consumed by voles, this year I didn’t even give them the opportunity, having pulled my best beets by the end of July. Definitely one of my favorite root crops, I resolve to dramatically improve on my track record next summer. In full disclosure it won’t be difficult to achieve this goal, but I’m putting it out there nonetheless.
This post might feel like a list of what fell short, but implicit in all of this is also what went well — anything I didn’t mention like my cucumbers, winter squash, summer squash, potatoes, and so many other terrific vegetables. All in all, our harvests were often overwhelming and abundant, and while penning this in early November we are still very much eating out of the garden, which is fantastic. I did purchase some lettuce last week for my son’s birthday – because salads are one of his very favorite foods – and citrus and fruit we need to purchase, but in terms of vegetables, we continue to eat seasonally, filling up on brassicas, winter squash, carrots, potatoes and onions. It’s a lovely rhythm, and feels just right for the current mood which is below average temperatures.
-

Kale + Grapefruit Salad with Roasted Pine Nuts + Lime Juice
Kale is one of those garden companions I don’t know how we ever lived without, but we did for a very, very long time. Longer than I’d like to admit.
Since embracing the architectural and culinary beauty of kale in its many forms, we have since needed to play with it often in the kitchen. Because, abundance.
Super simple and fresh is the best way to eat. While only the kale is from the garden, this remains one of our favorite ways to prepare kale any time of year.

One of our fastest and favorite ways to use kale is in a massaged kale salad. We play with citrus and various nuts, but this is one of our stand-by combinations. There is something simply delicious about how the lime and grapefruit meld together, creating this sweet and tangy very simple dressing.
Yield: 4 servingsKale + Grapefruit Salad with Lime and Roasted Pine Nuts
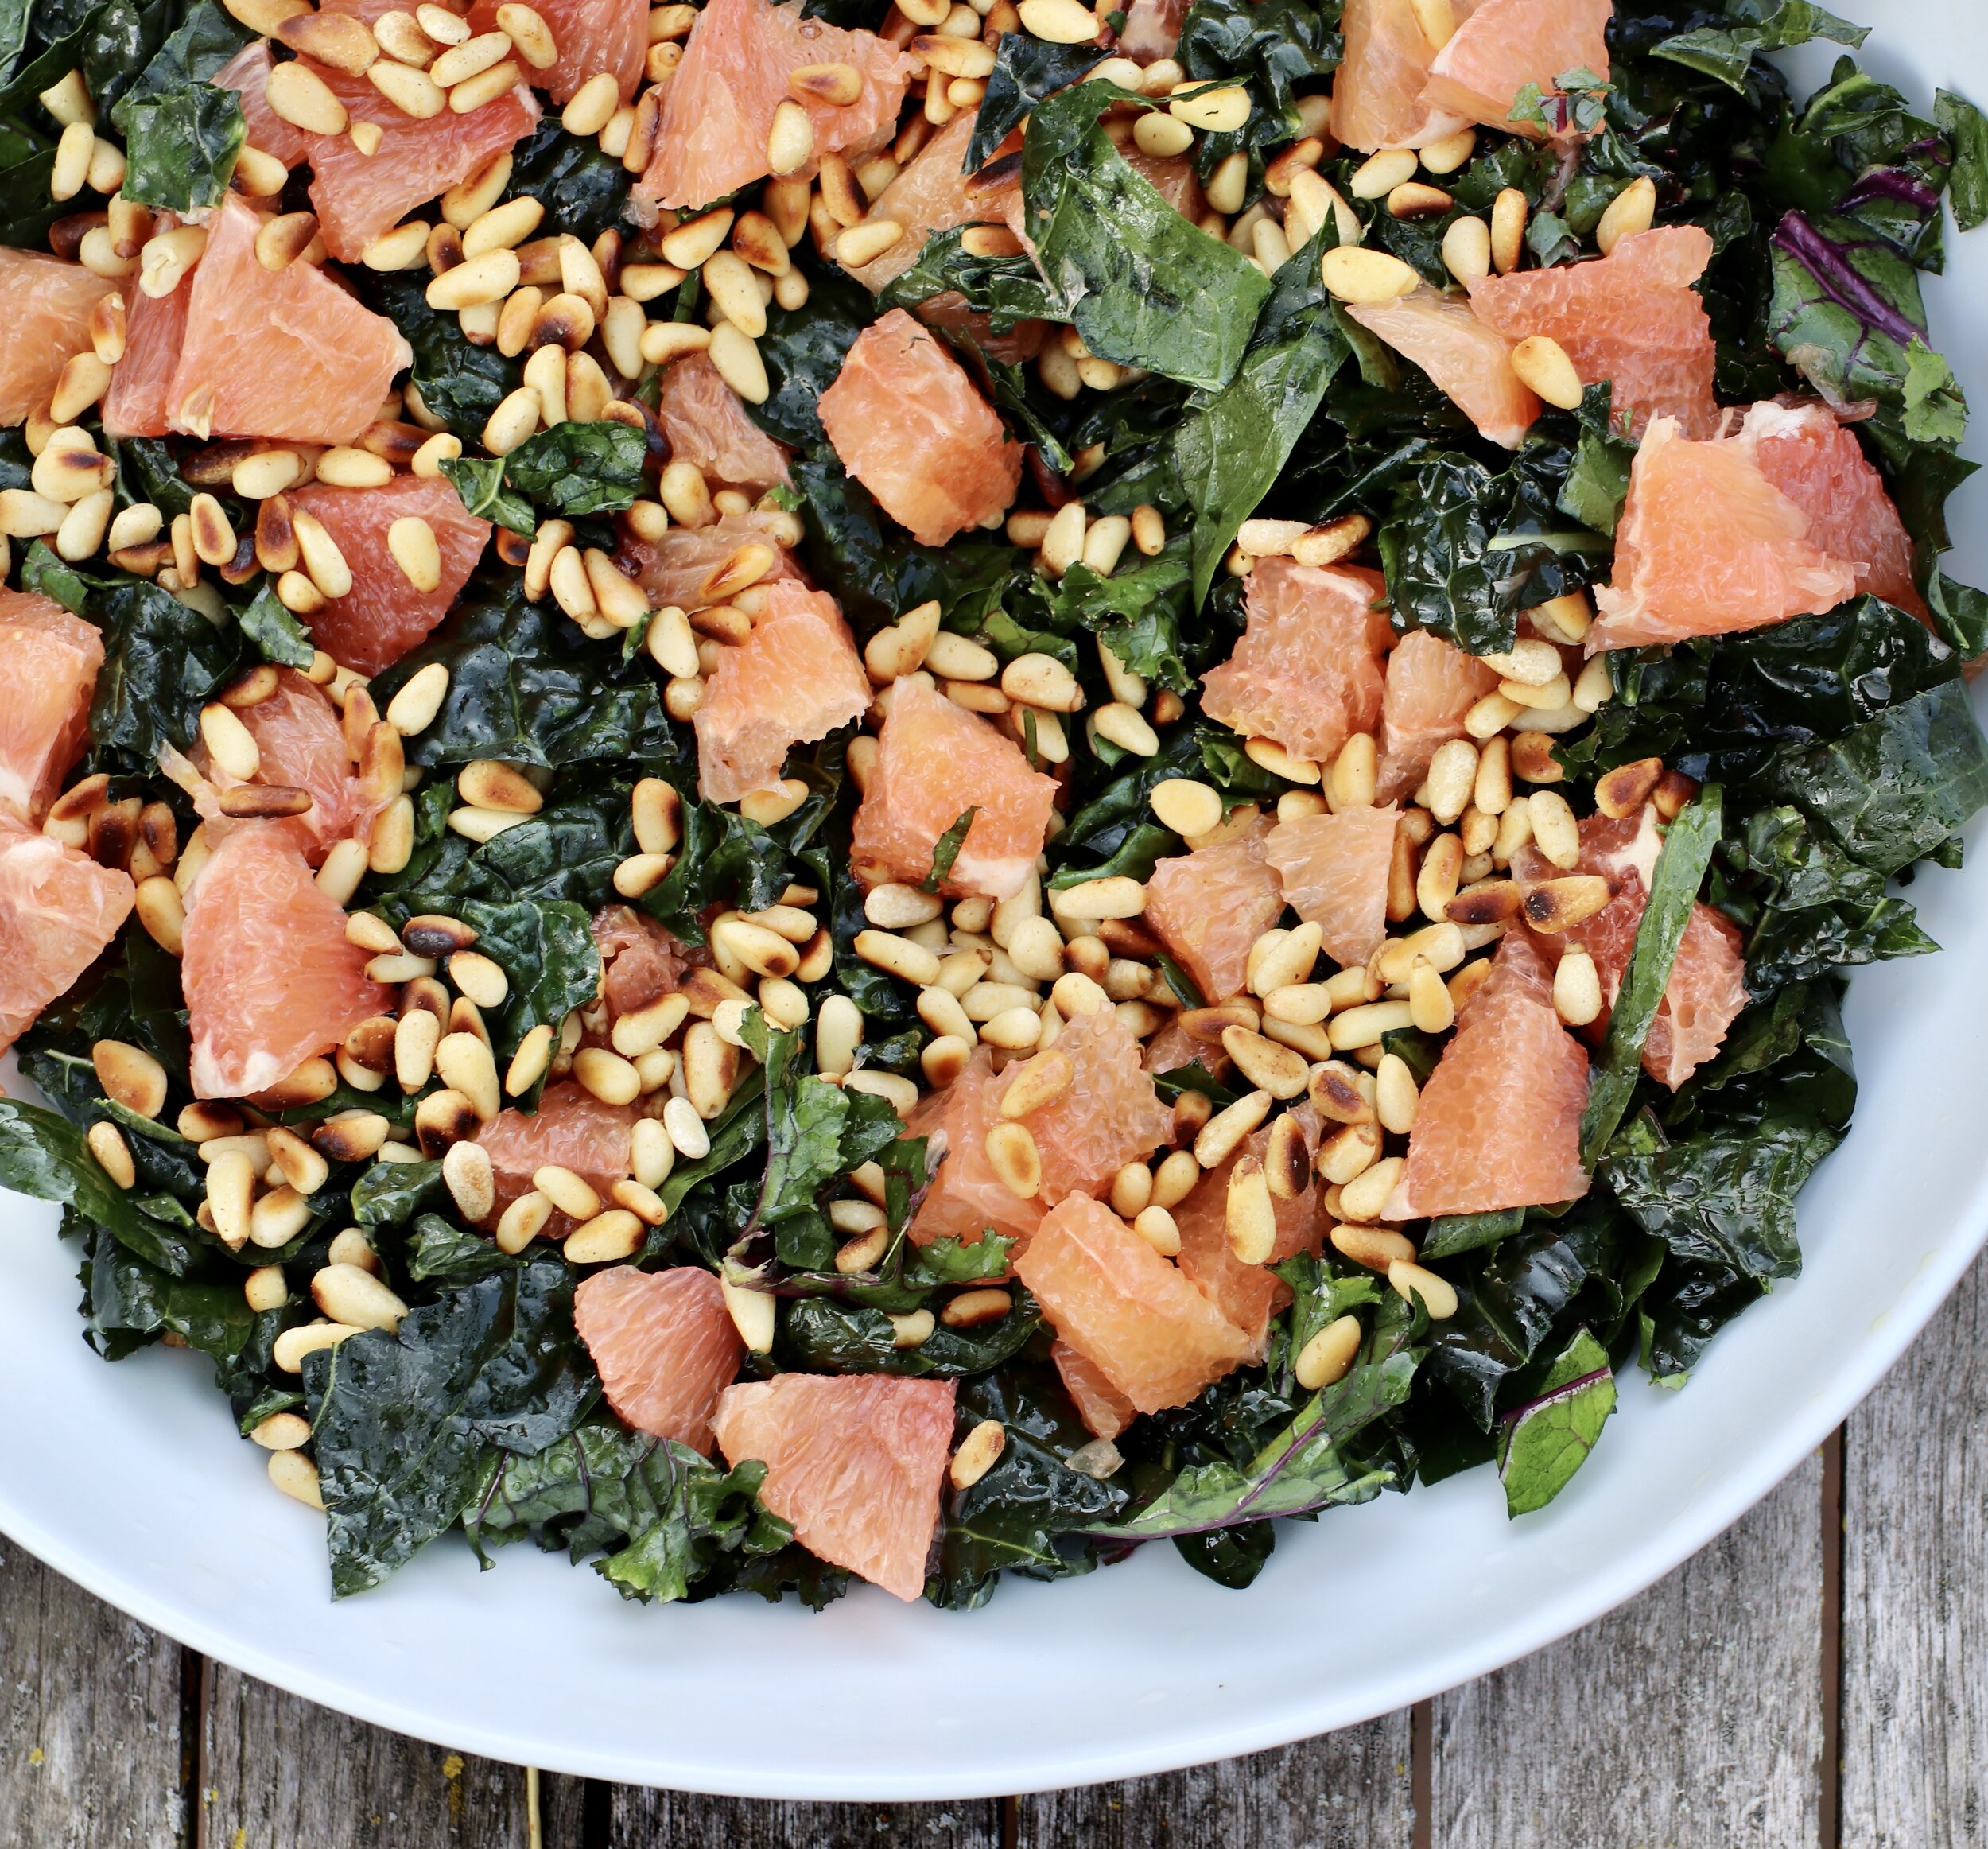
Delicious sweet and citrus-y kale salad to brighten your meals. This one won't last long.
Ingredients
- Large bunch of kale, massaged
- 2 grapefruit
- 1-2 limes, to taste
- 1/2 cup pine nuts, toasted
- olive oil
- sea salt
Instructions
- Prepare your kale by de-ribbing it and chopping into about 1” pieces. We use a little bit of what we have, and I often enjoy mixing a few different kale varieties together in this salad, providing extra color and depth of flavor. Our standard kale varieties include Lacinato, Scarlet, Ragged Jack, and Olympic Red
- Once the kale re-ribbed, chop it into bite-sized piecs and set into a large mixing or serving bowl. I tend to use the same bowl I’ll serve in to save time and dishes. Massage the kale by drizzling olive oil on the kale and gently squeezing handfuls of chopped kale, continuing to grab handfuls until it is all slightly wilted looking and glistening from the oil, fully coated.
- Once massaged, grab the grapefruit and carefully cut off all the rind. Then chop the grapefruit into bite-sized pieces, removing the central core of the grapefruit as you cut it up. Set aside the grapefruit and the juices created by cutting it up.
- Next up are the pine nuts. We preheat our cast iron skillet to medium high heat. Then add the pine nuts and turn the temperature down to medium-low. Watch carefully as this process happens really fast! I tend to over-roast them, which is a polite way of admitting I more often than naught burn my pine nuts.
- Assemble all these ingredients together in a serving bowl, being sure to add the juice accumulated from the chopped grapefruit.
- Zest the lime into the salad, and finally squeeze the juice of 1 or 2 limes into the salad. The amount of lime you use is fluid, not only to taste, but also depends on how juicy they are.
- Toss. Taste. And adjust for salt if needed.
Notes
You can de-rib kale with a knife by slicing it off right along the rib. Alternatively, you can use your thumb and index finger and pull from the base of the stem all the way up as far as you can. I prefer the latter method, because I like to get my hands dirty even in the kitchen.
-

Oven Roasted Tomatoes: The Precursor to Every Great Tomato Dish
Before there is salsa, there are oven roasted tomatoes. I have found this to be a fabulous way to start the preservation process this summer, buying me a few extra days between roasting and processing. Plus, the process of slow roasting tomatoes brings out the flavor and sweetness and adds so much depth to whatever tomato dish you’re making.
These are the base ingredient for my salsa, as well as for canning tomatoes. I oven roast them first. My canned salsa has a marked sweetness to it, and we have concluded it’s from this roasting process.

While I do freeze whole tomatoes in a pinch, taking the time to oven roast and skin them has become the norm and that is how I have prepared almost all of our tomatoes this year.

A serrated knife is a must-have in our kitchen, especially for slicing tomatoes. Click here to pick up the same one we’ve used for over 20 years and going. It’s a Henckel 5” utility serrated knife. Our handle happened to melt in the oven a few years ago, so my crafty husband made a new handle for it.
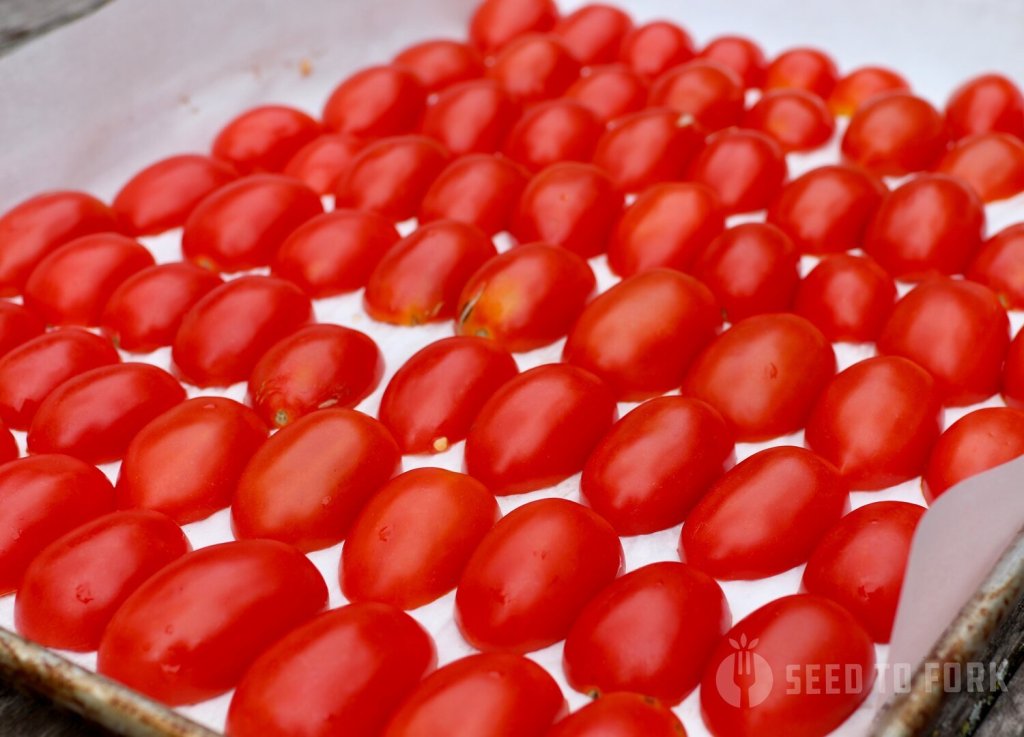
I like to maximize productivity and energy usage and try to fill at least two trays at a time when oven roasting, three if we are in height of the season and I’m ready to make salsa or can some tomatoes.
Instructions
- Adjust your oven so you can fit 2-3 baking sheets evenly inside.
- Preheat oven to 375 convection roast. If your oven doesn’t have convection roast or a roast setting, set it to 325 bake.
- Using ripe roma, plum, or paste tomatoes, cut off the top of the tomato and then cut in half lengthwise. You could even use this method for cherry tomatoes, too. Use what you have!
- Place tomatoes cut side down on a parchment-lined baking sheet.
- Fill the tray with tomatoes, repeat as needed, and put all the trays into a hot oven.
- Time in oven will vary — the type of tomatoes, whether you’re roasting, convection roasting, or baking, and how many trays you place in the oven. You want the skins to be wrinkled as noted in the above photos, and even slightly browned. The sheet should have juices in it. Generally this will take between 40-60 minutes, but as short as 30 minutes if you convection roast at 375 (longer for baking at lower temps).
- Note: You can roast them at a lower temp, but it’s takes more time. I’ve switched from low and slow to hotter and faster.
- Let them cool to the touch and then lift off the skin if using for salsa.
- Store in an airtight glass container in your refrigerator for up to 7 days, process into a canned good, or for later consumption consider freezing in glass jars or freezer bags. Note: If using your roasted tomatoes for a simple oven roasted pasta or pizza sauce (which I highly recommend doing with just a dash of salt and perhaps a little garlic), don’t bother with skinning them. Instead, use the entire tomato and simply puree in a Vitamix or blender. The skins will get pureed and there is zero food to compost. Good food made easy, literally.
From our kitchen to yours,
Buen provecho!
-
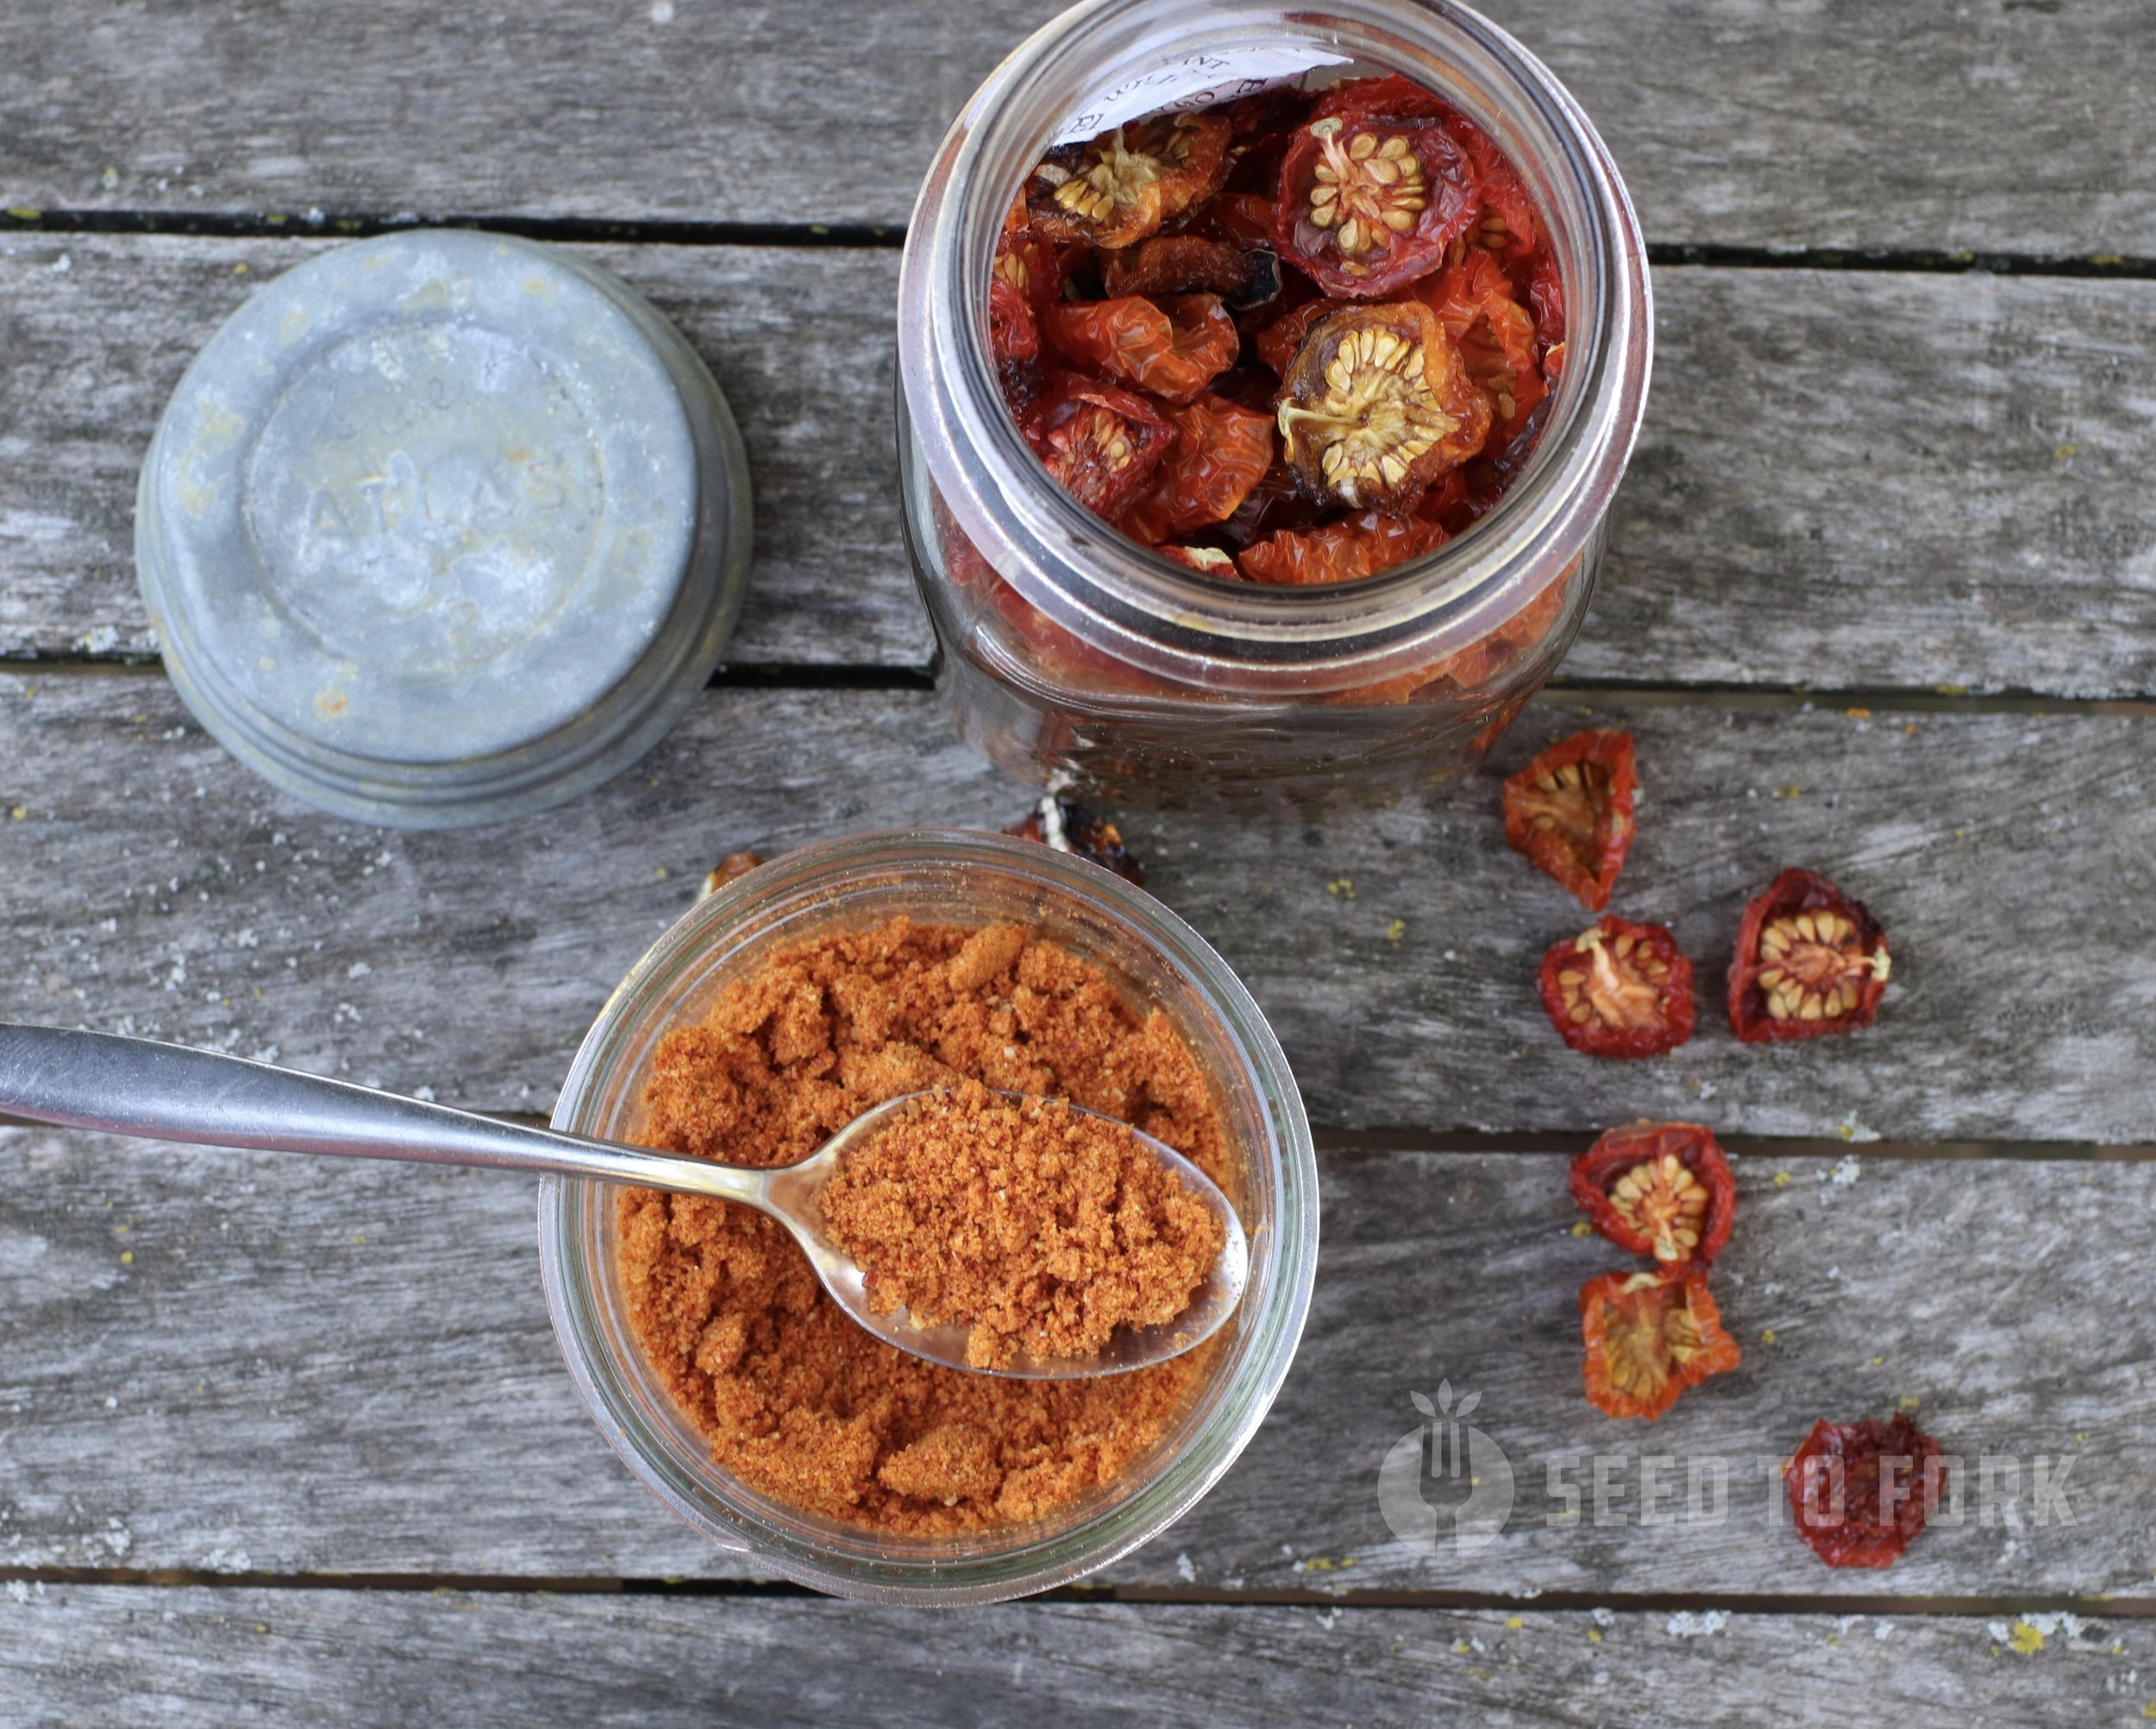
Tomato Powder: How to Make Your Own Tomato Paste from Garden Tomatoes
One of my favorite new ways to process tomatoes I learned last summer from my friend, Kristina, in California, tomato powder continues to be a simple, effective way to “put up” tomatoes in a jiffy. Taking a few days to dehydrate in a food dehydrator, you yield little chewy to crunchy garden snacks. Leave them chewy and you have a snack, let them go another 12 hours or so, and you have the makings of a dehydrated tomato paste.
The result is a versatile pantry item that bolsters sauces, soups, and other tomato-based dishes. Depending on the variety, it adds a rounded tomato sweetness that can only be found in homegrown tomatoes. To add even more flavor to these dehydrated tomatoes, consider oven roasting them first, though it is not necessary.
This super simple preservation method is also a favorite of mine because it allows you to store a lot of tomatoes in very little space, and frees me from buying cans of tomato paste anymore. And I really love that freedom.
Instructions
- Gather a few pounds of cherry tomatoes.
- Halve the tomatoes and lay on on a dehydrator tray.
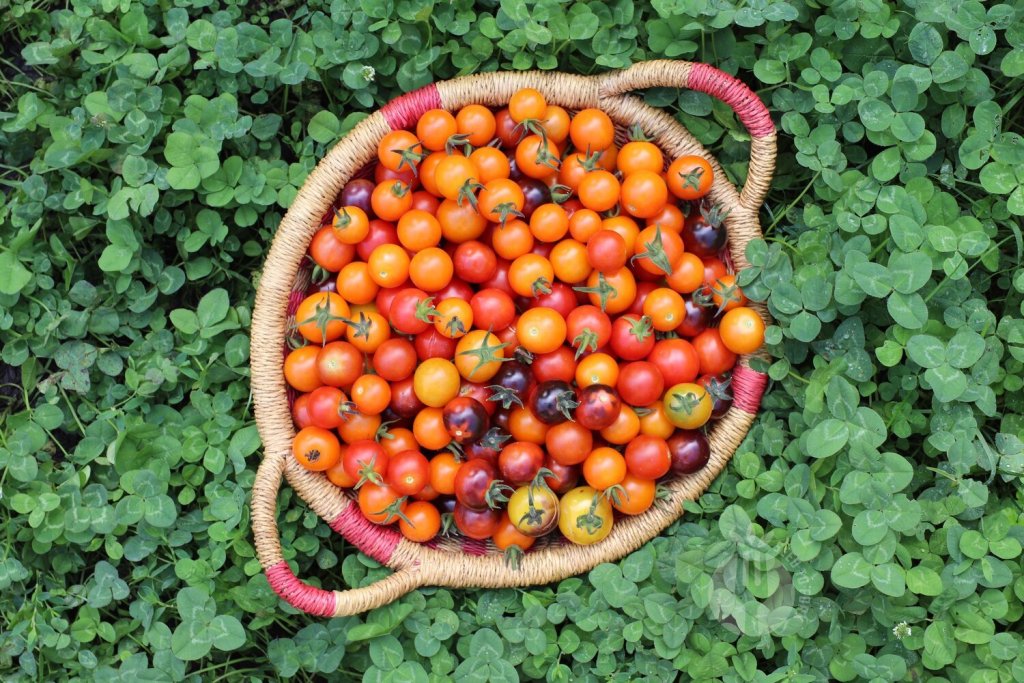
In the height of summer a basket like this was harvested a few times a week, hence my relief in putting these by in the form of dehydrated tomatoes for tomato powder. 
- Set your dehydrator to 135 degrees (fruits and veggies).
- Set a calendar reminder to check on them in 48 hours. Depending on moisture, it may take a little longer.
Personally, these little summer bites are like candy. I enjoy snacking on them as much as I use them in the kitchen in place of tomato paste.
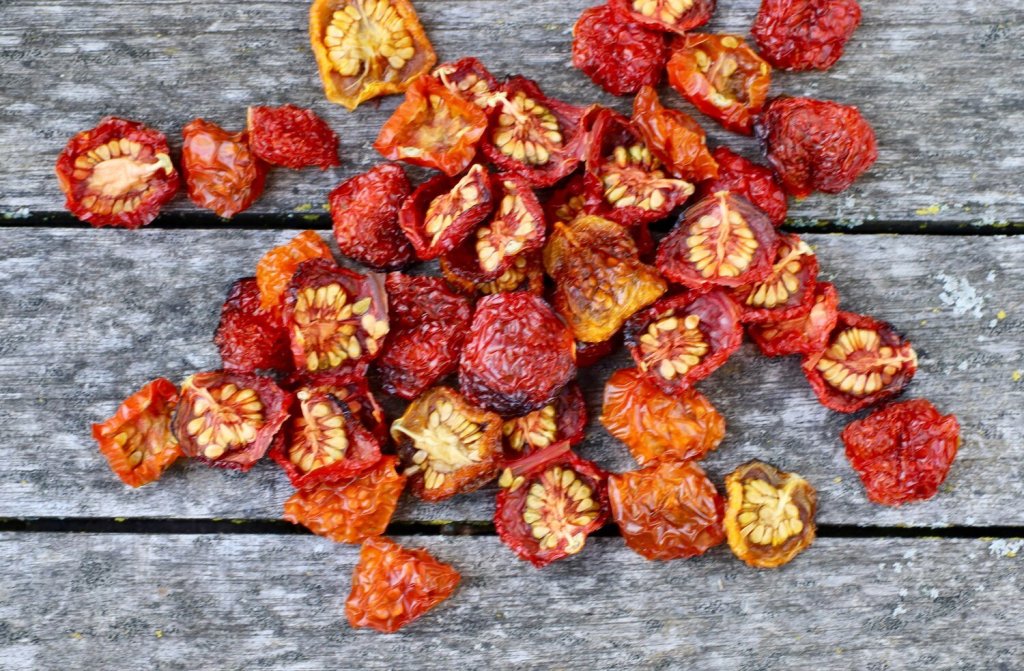
They should be crispy when done. If they are chewy as I mentioned, they will make a great snack but there will be a bit too much moisture for them to grind easily. They will get clogged up in the blades. Trust me, I speak from experience. So when in doubt, give them an extra day on the dehydrator. I set some up before leaving town for 3 nights. I set it on about 115 degrees. When we arrived home, they were done but not completely overdone.

ou need enough dehydrated tomatoes to use something large like a Vitamix for processing, but you could do it in smaller batches in a coffee grinder. We have a very old Krups coffee grinder whose sole purpose now is to grind spices.
Once fully dried, the key to safe, longterm is to keep the moisture out. I use these tomatoes up within about 9 months, or until fresh tomatoes are available again next summer.
Airtight containers, a freezer bag in the freezer: use what you have, but be sure they are stored in a low-moisture environment. If you have high moisture in your home, I’d strongly recommend storing them in your freezer. The main concern with dehydrated tomatoes is the possibility of mold forming, which would spoil your food.
I encourage you to take the time to visit some of the USDA’s recommended websites on drying vegetables, including this one: https://nchfp.uga.edu/how/dry/csu_dry_vegetables.pdf.
How I Store Them
I store my tomato powder in an airtight glass container in my pantry. It definitely clumps a little, but nothing a splash of water won’t remedy as I use it in my cooking.
I don’t grind all my tomatoes at once. Instead, I grind about 1/2 cup at a time, use that up, and then grind a new batch. I find leaving the tomatoes in whole form is best, though perhaps that is just because I think it’s a beautiful sight to behold on my countertop all winter.
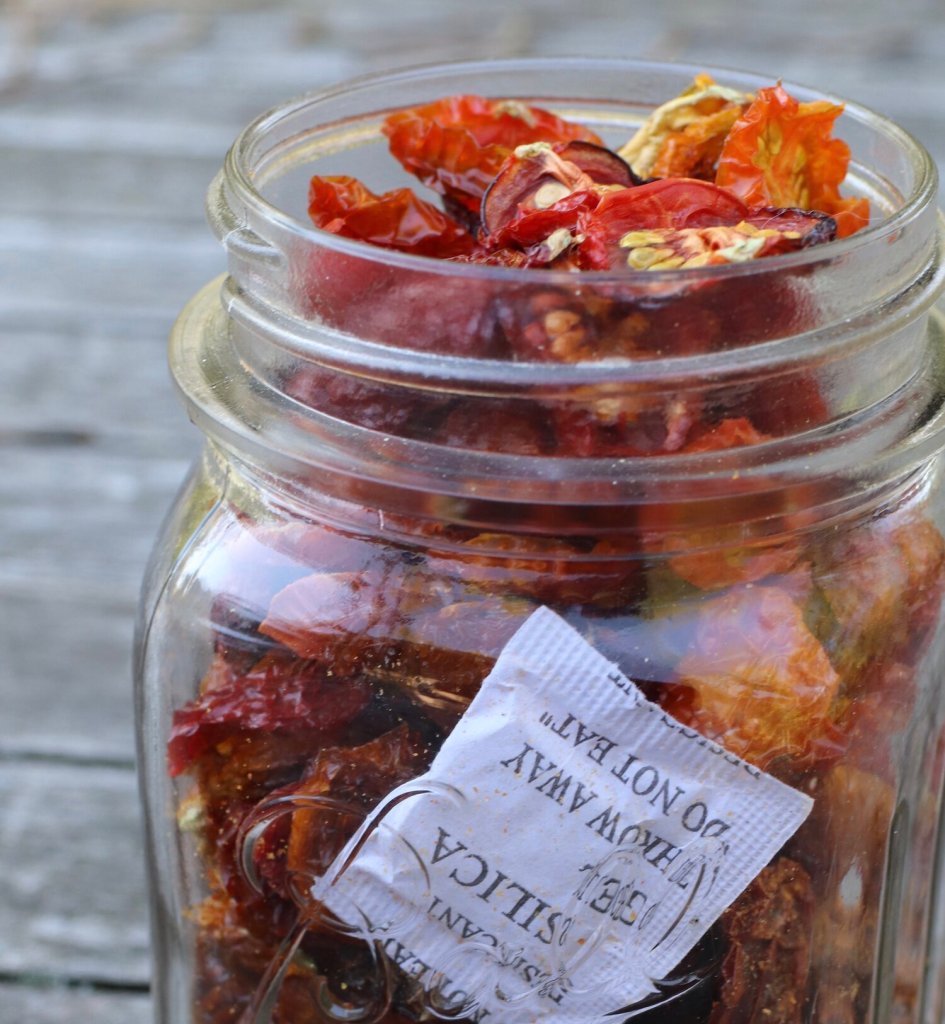
I always add a desiccant to my dehydrated tomatoes to ensure moisture remains low inside the container. I reuse these from packaged foods such as sushi roll packages and other prepared foods or shipped goods we purchase from time to time.
Sometimes preserving the beauty of the season is half the fun of preservation.
-

Anthracnose: The Tomato Disease You Hope To Never Meet
It took me twenty years of blissful summer gardens to bump into this disease. And truly, I hope you never meet this stubborn, soil-borne fungal pathogen. I can honestly say my life would be no less rich and a little more tomato-y had my ignorance continued indefinitely. And I’d have been perfectly content with that.
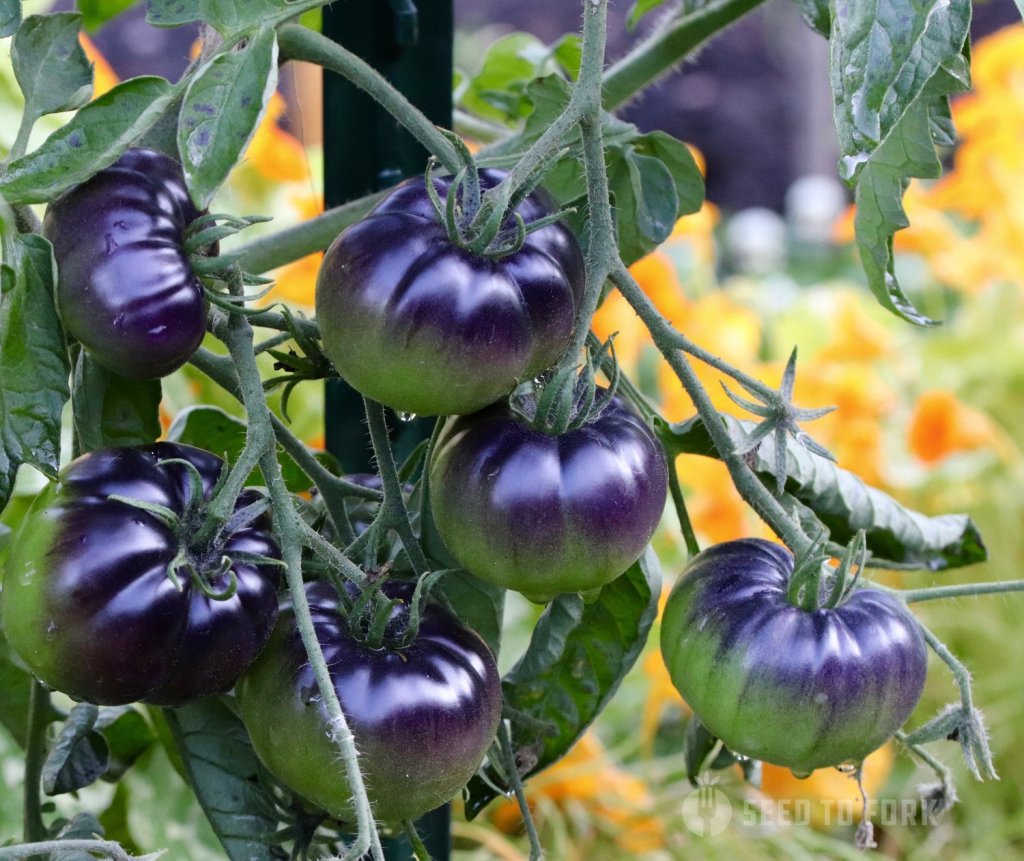
The honeymoon phase of tomato growing, that long season between fruit set and ripeness. I had no idea what was lurking in my soil, and studied these beautiful tomatoes I waited so long to taste. I have only been able to taste a few of them because they have been the worst hit by this fungal disease.
But that wasn’t my path.
Clearly, we were meant to meet. I’ve more than come to peace with that. If I have had this issue, surely this is a common garden disease that perhaps you have also seen over the year. I’ve worked to learn as much as a I can about this disease I never gave any thought to until last month.
And that’s often how gardening unfolds, a somewhat reactionary process, learning only that which is needed to understand what is unfolding right before you eyes. You may think going into a growing season you know what you need to know for a successful year, then something like this comes along and enlightens you, offering much learning and a deeper respect for growing food.
What It Is
Anthracnose is a fungus, its spores patiently wait in infected soil for up to four years even in our frigid climate until the right medium is nearby. Instead of being an edible mushroom like the fungi you may enjoy eating, these utilize primarily tomato skin as it’s nutrition to form a sunken fruiting body called an acervuli on the surface of your prized summer fruit, causing the tomatoes to rot, the spores to form and explode all over your soil and thus the cycle continues. It can also infect other crops in the Solanaceae family including your peppers, potatoes, and to a lesser degree eggplants. We’ve only observed damage to our peppers and tomatoes this year.
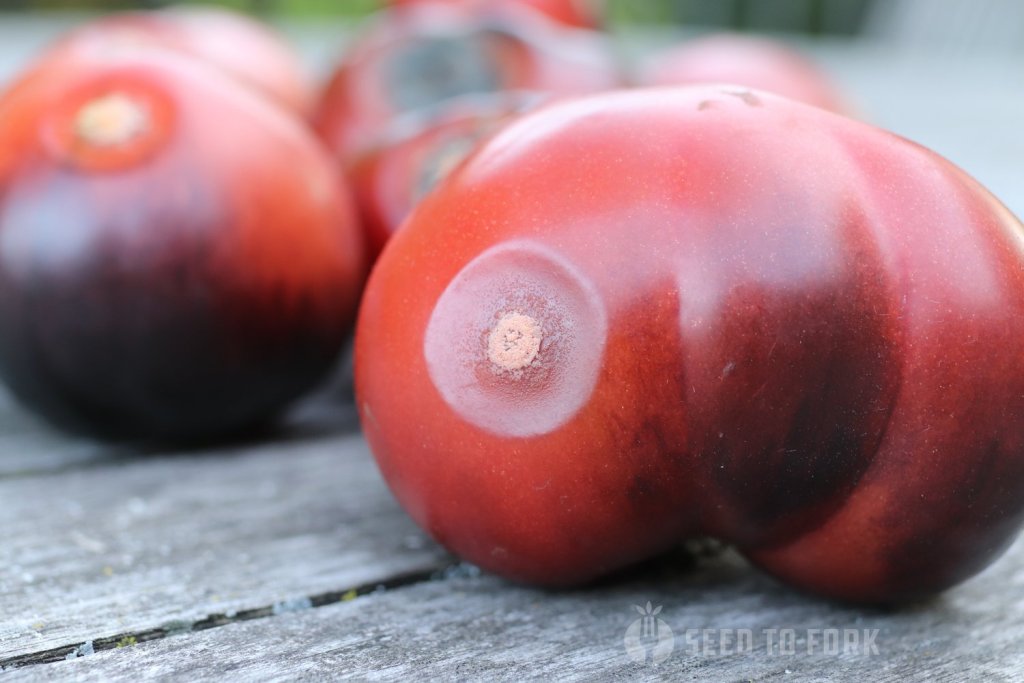
I’d be lying if I didn’t find this fruiting body a little bit fascinating. Infected fruits and plants should not be composted on your property. Instead, bag it up and dispose in your municipal trash, reducing the spore count in your own garden. Sadly, that was the fate of this mostly beautiful tomato.
There are many types of Anthracnose, and the name refers to a group of fungi that infect things from oak trees to agricultural crops. Tomato anthracnose is a terrible disease because you don’t know your plants have been infected until the fruit starts to ripen, the exact time when your heart starts to skip a beat or two as your daydreams of a caprese salad are nearly a reality.
How to Identify It
Keep a keen eye on your maturing tomatoes, the large slicing varieties seem to be more prone in my experience to developing this fruit rot. I’ll go a step further and share my observation that my heirloom and open-pollinated varieties were definitely harder hit than my cherries, plum, and paste tomatoes. It has taken all summer for my open-pollinated cherry tomatoes to show signs of it, and my Juliet plum and Sungold cherries remain as healthy as ever. To say it’s a complicated disease is a good start.
The upside is the gained knowledge that smaller tomatoes that ripen faster on the vine don’t seem as susceptible to anthracnose as larger tomatoes. And the fact that it hasn’t been a total loss of tomatoes despite having this disease this year. It might be confused for blossom end rot, which is a physiological condition not a disease. They may look similar in their later stages, but the fruiting bodies and spores of anthracnose are more brightly colored than the sunken black spots of blossom end rot. Both can occur anywhere on a pepper or tomato, yet blossom end rot is not a fungal disease and as such does not live in your soil. Instead, it is a function of calcium availability in your plant during ripening and is most often seen early in the season when demand for calcium is high for all parts of the plant, and early fruit tends to get the short end of the stick.
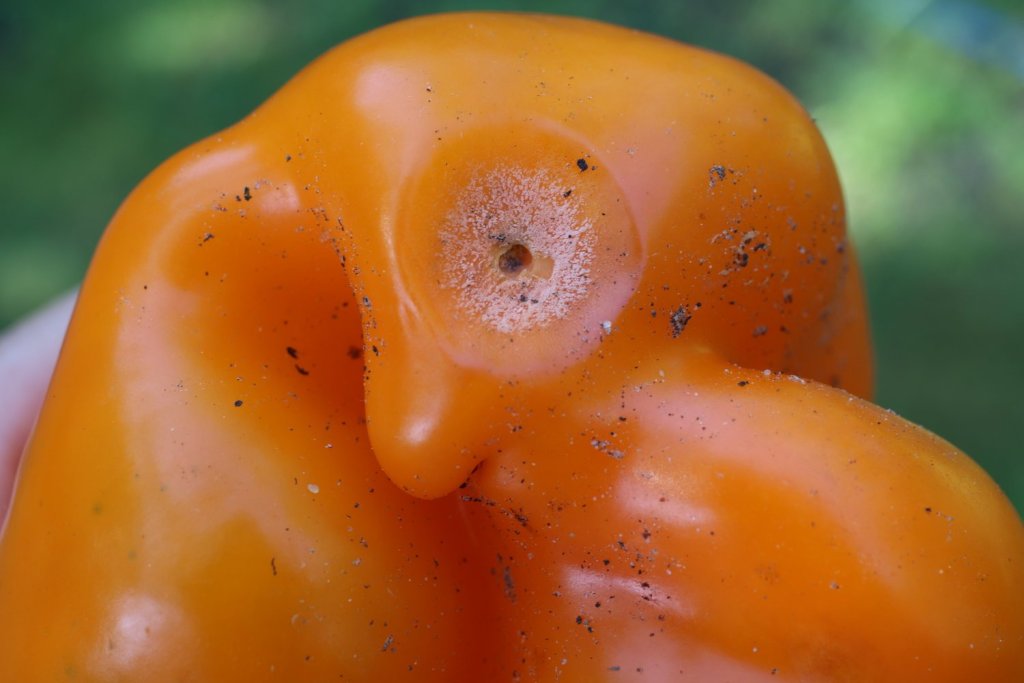
The saddest sight of the summer has definitely been the sunken, spore-producing acervuli on my bell peppers, those beloved, six-months in the growing only to be eaten by a fungi before we had a chance to enjoy them. What you may see at the earliest stages are sunken spots. Just little sunken spots. I can now recall seeing these but didn’t think too much of them. At first, they are just little divets. But those divets are already working toward producing spores, and are a sign that tomato anthracnose, one of several Colletotrichum species are hard at work reproducing themselves asexually.
How to Manage It
As I said, this is a disease of reaction, not proaction. You won’t know you have it until it is actively producing the fruiting bodies on your precious tomatoes or peppers. However, there are a few things you can do to minimize any chance it could splash up from your soil onto low-hanging fruit. No tomato variety is resistant. This one can attack them all.
Crop rotation is key. You don’t want to plant in the same beds where the infection occurred for at least the following three growing seasons. We have noticed it in multiple beds across our garden, so it is very likely our industrial compost is the cause of infection. I won’t ever know for sure, but in addition to crop rotation, we need to take further measures to minimize a repeat next year.
if you know your garden is infected like we do, mulch is probably the best defense. Mulch provides a barrier between your soil and splashing rainwater, preventing the spores which rely on water as its vector to travel onto your tomatoes or peppers. And it should already be a part of your gardening philosophy, as it is ours. We use compost as mulch, a thick 2” of industrial compost atop our beds each spring.
And that is probably our culprit.
Splashing water from our compost up onto the lowest lying fruit due to now regular torrential rains throughout the growing season provided an easy commute for the spores to infect our largest tomatoes. We have no control over our regular flash floods, and we love our compost mulch, but we will be adding another layer of mulch on top of our compost in our tomato and pepper beds next year.

We made such a fuss over our trellis system this year that has worked fabulously. We even added soaker hose irrigation so we didn’t splash onto the plants. Next year, we will be adding another layer of mulch besides the compost, and during the off-season we will be cleaning all these panels and t posts with a bleach solution to remove any residual spores that may be trying to hold on until next year.
It may be straw or landscape fabric or leaf mulch, but we will be minimizing any chance that rain could splash soil back up onto our tomato plants. This is our best defense for the foreseeable.
Another really, really important factor is that diseases can also be seed-borne. I know, this sounds crazy weird, but it’s true. So you don’t want to save seeds from any infected plants because the seeds can go on to infect a different bed where you worked hard to rotate your crops. There are home gardening methods for sterilizing seed before sowing, so if you’re a seed saver or swapper, this should probably be part of your best practices before sowing them each winter. It’s a time and temperature thing, exposing the seed to warm enough water for long enough to kill pathogens but not the seed itself.
I have appreciated the learning opportunity this disease provided us. I would not have learned as much about the disease without our outdoor classroom where I was able to continue to monitor and observe how the disease progresses. This is one of those wonders of gardening. As advanced as you become, you remain an avid student and there is always a new lesson or two awaiting you in each new season of growth.
-

The Five Keys to Creating Our Dream Garden
Establishing a large garden can be thrilling. And onerous. If you are like us, you can clearly see the vision, parse it out into discrete buckets, and from there prioritize and then further develop task lists and dig in.
If you’re not like us, it may be a dream that feels overwhelming and insurmountable. In this post, I share the factors we contemplated not only before purchasing our property – with our dream garden goal clear in our mind – but the key steps we took prior to ever planting a seed in our garden. I believe strongly that the pre-work is 80% – or more – of what is visible today. Taking the time and investing the resources to set up a solid framework on which to build your garden is paramount to finding ease through this process.
Finding the Right Spot
How do you find the right spot for a garden? The first and most important step is to seek out a tree-free, sunny area. Yes, I love trees. Heck, I have a bachelor’s degree in Forest Management. I’m pretty much a tree hugger. But gardening in shade is not a way to feed your family or grow beautiful cut flowers. Very few things we enjoy eating thrive in shade. In my experience, a full day of sun grows an abundance of food. We have always had at least 8 hours of sunshine in our vegetable gardens. Currently, our garden receives somewhere over 10 hours of sunlight depending on where in the growing season we are.
In addition to sunlight, it is important to take into consideration the surrounding trees, if there are any to consider. Some trees play well with food, and others not so much. Another challenge of our property is the presence of black walnut trees. They grow in groves due to a toxic chemical the trees produce called juglone that essentially makes the soil inhabitable to many other shrubs and trees. Many vegetables cannot tolerate juglone and so you it is not recommended to grow food under the drip line of a walnut tree.

Hello garden? I can see you is what I said to this little sunny spot the first time I was shown this house for sale. The barn was definitely a draw, and you can see just how overgrown it was and how we’ve released her from the grips of years of overgrowth. She breathes much better now.
We had to remove several black walnut trees located down by the red barn during our pre-work phase of the garden. We also removed a blue spruce that was located smack in the middle of the garden space, its stump a daily reminder of a miscommunication between my landscaping contractor and me who had planned to dig the stump out with an excavator while installing the fence.

There’s that stump, my daily reminder of a miscommunication. It’s pretty comical how a communication breakdown has been incorporated into the garden design out of necessity. Just had to roll with it.
If tree removal is part of the process you will undertake to establish your gardens, early day sun helps dry any morning dew, and I would favor morning sun over afternoon sun for the health of your plants. Ideally, you have an open area with ample sun already, because carving a garden out of a gap in the forest is a fleeting but noble approach to gardening. I prefer to bathe my garden in sunlight, and thus did not consider heavily wooded lots when we were making the move to this town.
Assessing Your Site
It is important to understand your water source, your soil type, and how these factors will impact your garden. We don’t all inherit the farmer’s dream soil, a loam, and here in Minnesota there is a lot of heavy clay, and that’s what we have here. I will discuss how we amended our soils in a forthcoming post, so stay tuned for more on that topic.

You can see that I divided the garden up irregularly. This was dictated by the location of the gates. I wanted to be close to the garage and land on the concrete pad down by the barn, so that was the first line that was determined in the planning of the fence, even before we had finalized the shape and size. It gives a lovely sort of whimsy to the garden, don’t you think?
We chose to garden on a slight hill because the price of the property was right, in the desired school district, with a bonus red barn – and the rest of the yard was either too wooded or without a large enough sunny spot for the size garden we sought. And we didn’t want a cluster of small gardens as we knew we’d need to fence our food in for safe keeping, so a slight hill felt like a sweet spot. Alright, it was the only spot, given the housing market and our needs. And I knew I could make it work.

It is difficult to see just how much of a slope this is unless you walk it, but we had a very steep spot where the raspberries are, and amended those beds generously to mound them. The terraced blueberry raised beds on the left side demonstrate the steepness of that area of the garden.
We also chose a garden site that does not directly talk to our home. Our garden is on the side of our home, just outside our garage. Visible from our master bedroom and that’s it, this was a very large compromise for our dream garden. But the red barn and large, mostly tree-free space made up for those downsides. And, the water was close by, and we were able to run a line into the garden with a spigot so we have water inside the garden for hand-watering. Some future year we will invest in drip irrigation, but that won’t be for many years.

You can see here how the entrance to the garden is closest to the garage, the closest access point to our home. While not ideal because it’s not in our cozy backyard and is less private than we had dreamed, it is a highly productive garden and has delighted neighbors as we have worked to create an oasis. Gardens build community just by their presence, and I love that about them.
Compromise is inevitable, so prepare to prioritize your wants and needs so you can make the best decision for your food garden. For us, gardening on a slope and hand-watering was a much better concept than trying to garden in between the deep pockets of shade of our black walnut grove.
Protecting Your Investment
Once you have your site determined, make a plan for protecting your food. Who are the primary fauna that roam your property? If you don’t know, ask your neighbors. Observe. We knew we were moving to deer country. We don’t have a dog to chase animals all day long, so we knew we needed a physical barrier to protect our food garden.
There are several different types of deer fences, from 3D to electric to what we used which is a traditional agricultural fencing called fixed knot wire. Standing 8’ tall, which is the mutually agreed upon height to prevent deer from jumping, anything lower could be jumped. Heck, I’ve heard stories of deer jumping 8’ fences, but they seem content with our compost pile and buckthorn seedlings in our woods.

Look carefully and you will see a 4’ high section of chicken wire. A little excessive, but it was all they had in stock the week of this project. I secured it to the ground with landscape staples and added a generous 4” of wood chips on top to bury the wire underground.
While our fence was installed, we made sure to also rabbit-proof it at the same time. We learned this the hard way in our previous home garden, where we created mounded in-ground raised beds for the first time, and the rabbits sauntered into our backyard and just mowed stuff down. So, I added 12” chicken wire that I stapled to the fence and then buried below ground and secured with landscape pins to “rabbit-proof” our backyard. Crazy? Yeah, I’m crazy about growing food. And happy to report it worked.
Within your fence, you want to think about how you will access the space, where you will situate your doors, where your water will come in and out, and how you will divide the space up once you’re all fenced in. Are there any materials or things you’d want to get done on the inside before the fence gets installed? Do you want to pour a concrete patio or have a brick patio installed? Might be easier to get material in and out of the garden if it’s not fenced or if the doors are built extra wide to accommodate larger small tractors. We built ours with 5’ wide doors to accommodate our large riding lawn mower, though we’ve never driven it into the garden.
Establishing Main Paths & Features
A large, empty space can be divided countless ways, so having a sense of your main anchoring features is really helpful when designing and implementing your dream garden – or a garden of any size, to be honest. Hand in hand with our espalier trellis installation was the laying out and preparing of every single bed where we planned to grow food.

I used tape measures, stakes, and spray paint to layout the garden three years ago when we were puzzling how to make the most of the protected space. Now we wish we had made it a little larger, and are experimenting with deer resistant food gardening outside the fence such as onions, garlic, and zucchini, all so far deer resistant two years in a row.
I knew long before I had this garden that I wanted an outdoor room in my dream garden. It was in the center of my dream garden, with four quadrants fanning out from the central pergola. But, alas, our real life garden is on a hill and oddly shaped and we didn’t divide the garden up into equal parts, so our garden patio is where it is. And somewhat accidentally, it worked out really well as the raspberries and asparagus frame the room in by the middle of July in all the right ways.

The garden patio, my outdoor room, is irregularly shaped just like every other bed and is close to its dream come true state. We would love to add a pergola for dappled shade in the heat of summer. But it’s pretty special just as it is today.
As we worked on the layout, we used stakes to mark possible paths to get a feel for the space. We played with different path widths to see what felt right. We wanted to maximize the growing space while keeping the paths usable. We knew we wanted 4’ wide beds, so that was a fixed width. I used spray paint and a tape measure for the final layout before we prepared the soil. We ended up with 24” paths between beds, though the widths vary and some paths are narrower.
Perennials First
Once we had the fence up, the first permanent structures we installed were our two espalier orchard trellises. These were installed roughly at the same time as our fence, the fall before we planted anything.
Apples, peaches, plums, apricots, pears, and nectacot trees all needed a home inside our deer fence. And fruit takes time. Time in years, time. Not throw a seed in the ground and you have a tomato in four months time — possibly half a decade or more for some of these trees to bear fruit.

The espalier orchard fence was set 30” from the deer fence to allow access behind it and to prevent the foliage from growing through the fence and thus be prey to curious mouths,. We are able to get a wheelbarrow behind the espalier trellis for compost loads, which is really useful.
So, fruit first is the way to go. Always plant your perennials first. Your future self will thank you!
The other fruit we prioritized were our 9 blueberry plants, 50 bare root strawberry crowns, 12 raspberry canes (3 each of four different varieties), and our asparagus seedlings.
Vegetables to Follow
Because most vegetables, excepting rhubarb and asparagus, mature well within a growing season, we knew this was the final frontier for the garden. That being said, we still made sure every single growing bed was prepared and fully amended the Fall before we intended to actually plant seeds and transplant starts.
I highly recommend preparing your garden the fall before you intend to plant. It made for a much easier spring transition, allowing us to focus on what vegetables to start, what fruit varieties to order, knowing our space was ready to welcome the bare root plants and veggie starts as soon as the snow melted.
Taking the time to set yourself up for low weed pressure thus a more manageable garden is well worth the time and resources, even if it means delaying the start of the garden. We have tried to hastily garden in an old field where we just tilled and planted, and what ensued was a weedy mess that I eventually just turned my back on because it was so overwhelming.

A harvest from earlier this week in our garden. Our short growing season doesn’t deter me from making the most of the growing season, and I truly relish the challenge of growing as much food as we can in our short growing climate. Waiting to plant the garden until our second summer here was so worth the wait.
So as hard as it might be to delay planting, I highly recommend taking the extra few months to set yourself up for as successful an experience as possible. We moved here in July, installed the fence in late October, and amended the soil and mounded the beds on an unseasonably warm November weekend — months of planning and execution. We didn’t expect to grow anything until the following year. It will be easier and more encouraging to garden in a well-prepared space.
-
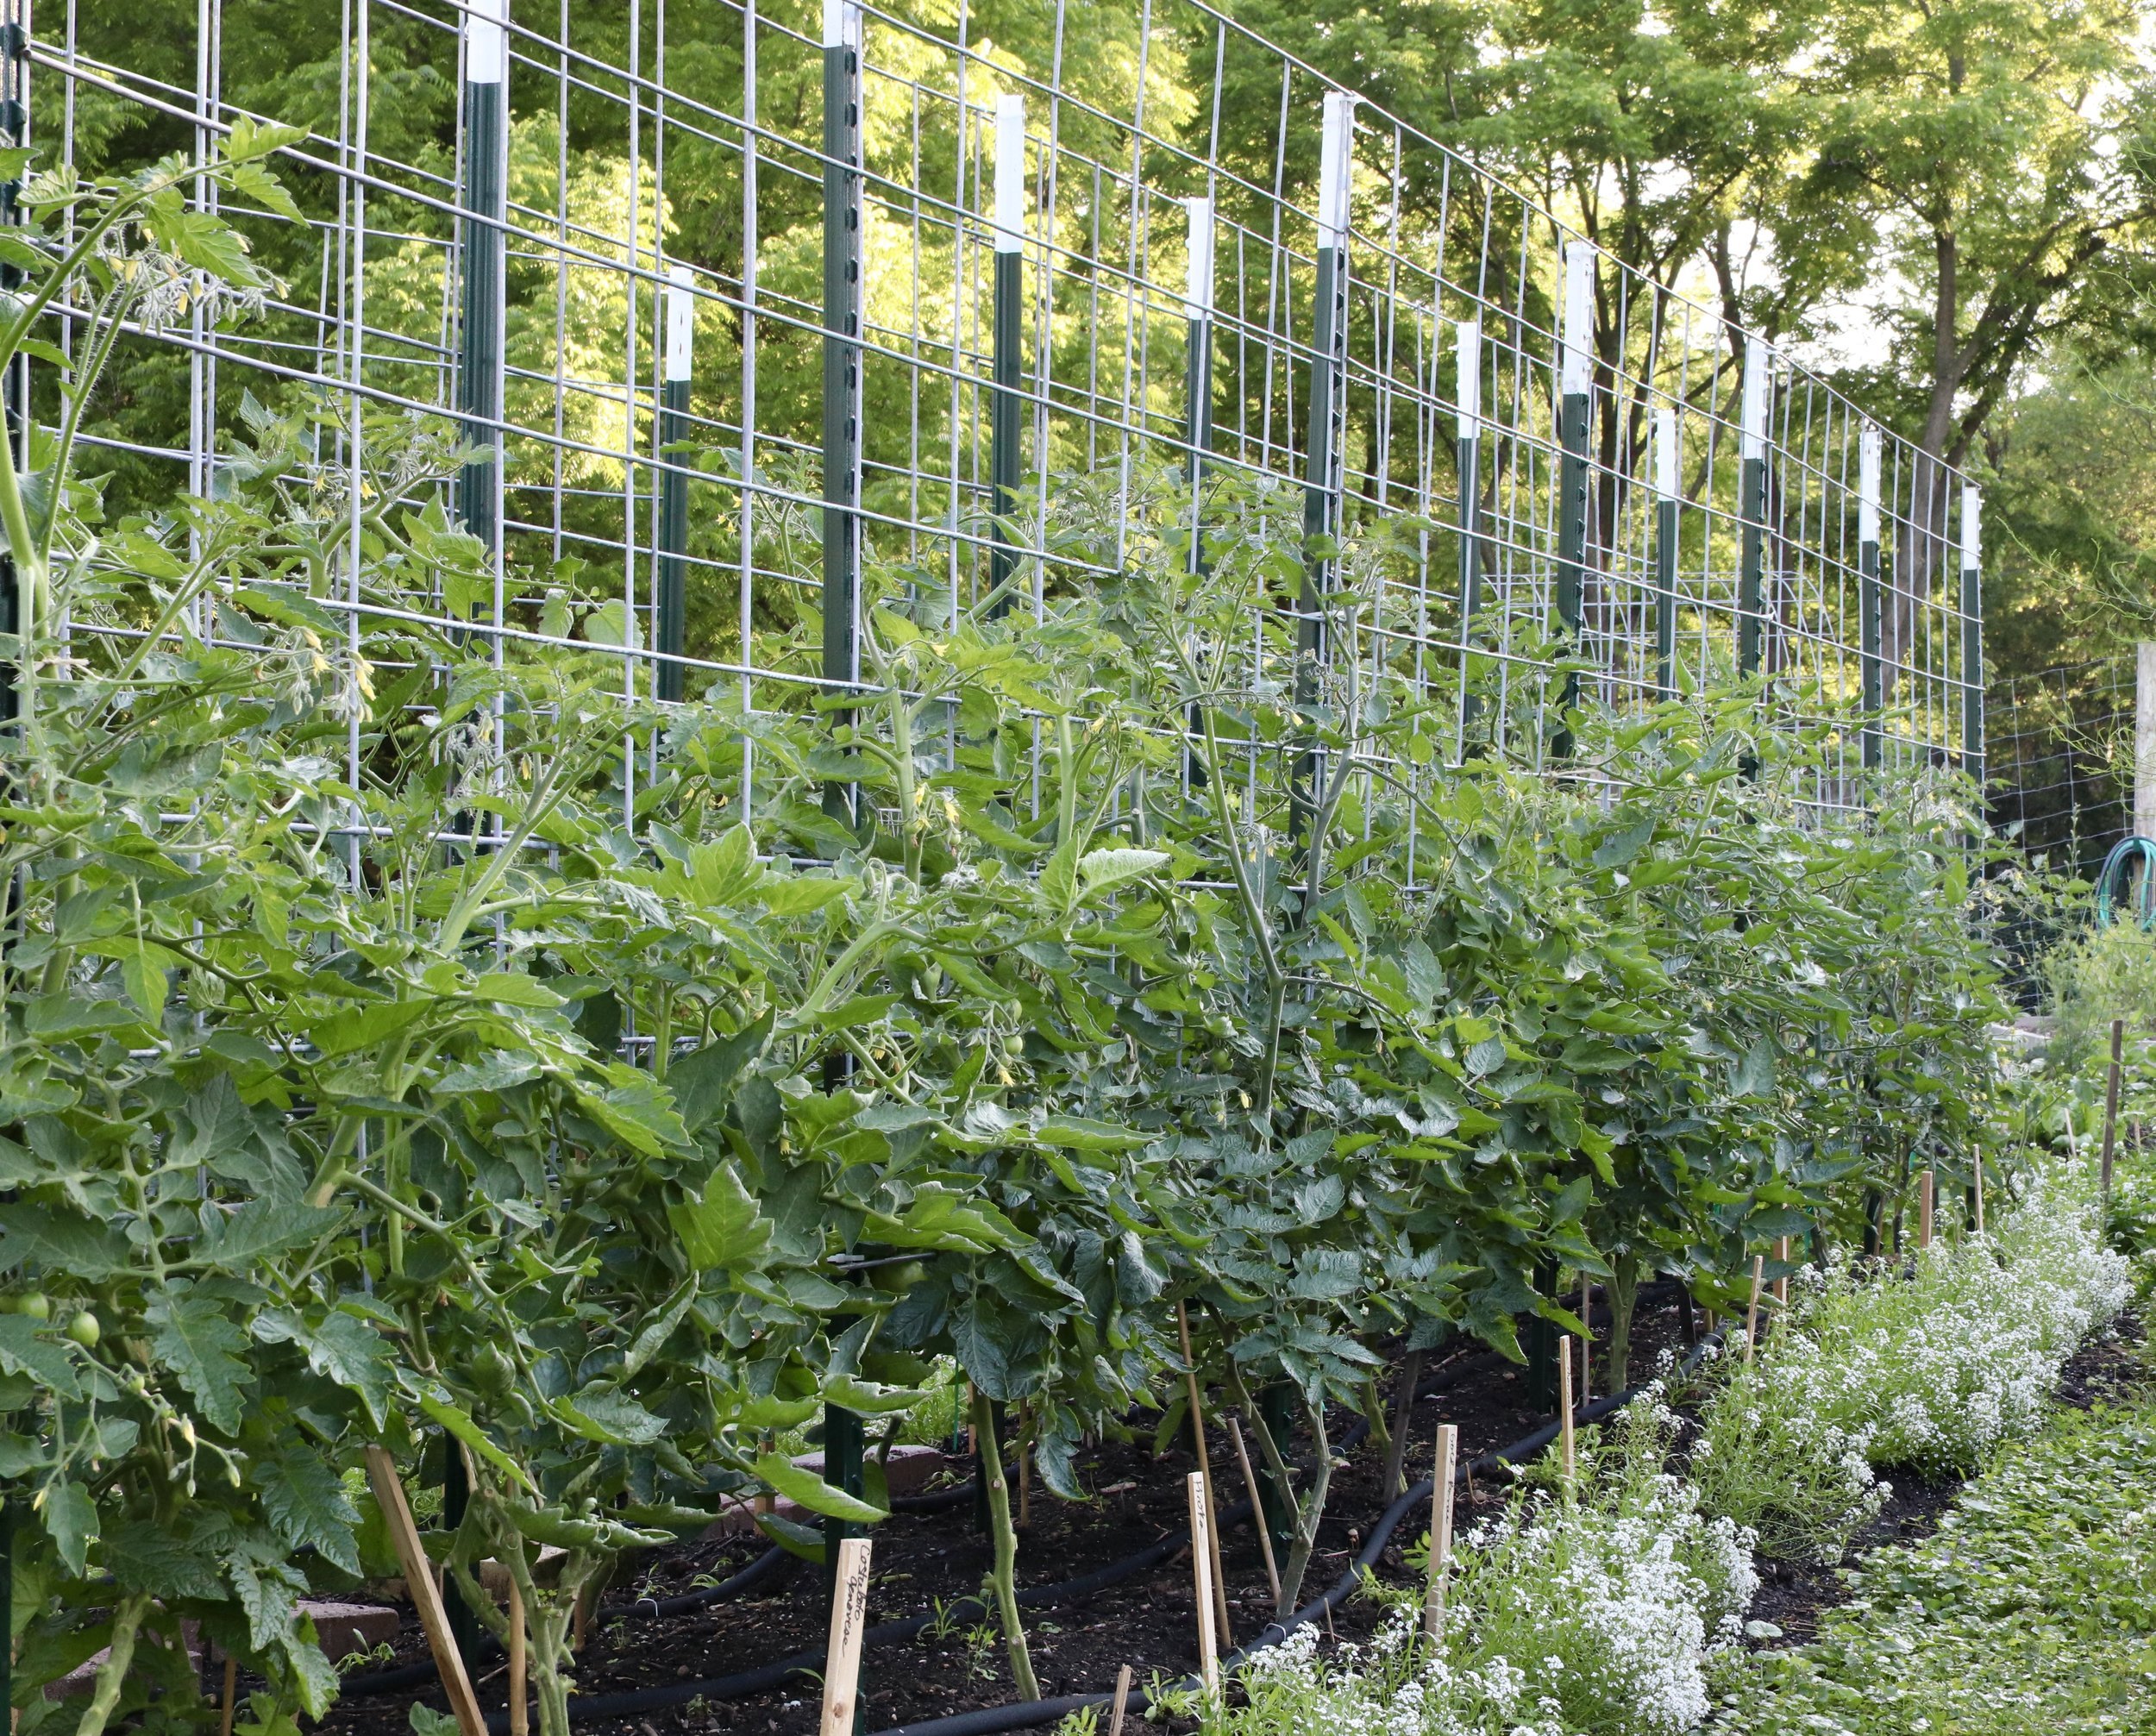
Cattle Panel Tomato Trellis: A Summer to Experiment
Another summer garden and a new approach to growing tomatoes. Each garden season invites tweaks and changes not only to the varieties of vegetables we grow, but also to how we approach growing food.
With the explosion of tomatoes in our garden this year, it really forced our hand on how we will manage over 25 indeterminate varieties. Vertical gardening has always been a large part of our growing adventures. And there are endless ways to grow up. Just use your imagination, and your resources. And that’s what we did: we pivoted this year from our single leader twine setup to a new method.

I had this notion that training the tomatoes this new way would be tidy, but it’s not even the end of June and some are already going wild. We knew our single leader technique worked, but it had its challenges, most notably the twine would give way at the height of summer when the plants were dripping with ripe fruit. We’d awake to one or more tomato plants having ripped themselves off the trellis in the middle of the night, snapping the twine in two.
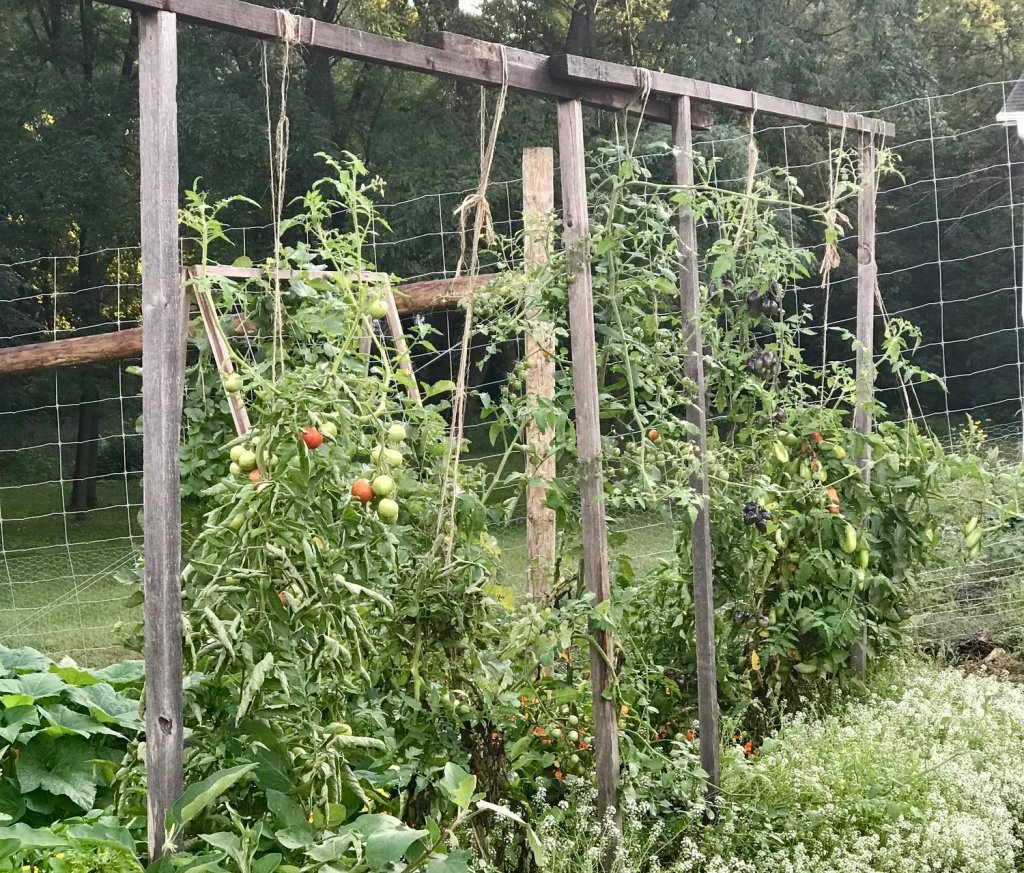
This was our ENTIRE 2018 tomato garden. You can see some of the tomatoes have double twine. That’s because they had already fallen one or more times. This has been our method of tomato trellising for about 15 years now, that is, until this year. These were trained as a single leader and twisted up the twine as they matured. A few suckers always got away in the heat of summer, and we were okay with that.
I used to tell myself this twine breaking happened slowly, though I doubt that was really the case. We’d consistently respond by doubling the twine up, and that would hold for a week or more and then, often, the changed landscape in the morning was an indication of yet another fallen tomato plant.
Tired of the failing vines and not wanting to build 30 tomato cages – though the notion sounded completely plausible while the snowstorms were burying us every other day in February – we decided to give two dimensional growing a try, like how we espalier our fruit trees. I had considered weaving twine horizontally with t-posts like I’ve seen large farms do, but then we thought why not train them up a cattle panel which is certainly sturdier.
We might have some trauma from the twine incidents, too, though you didn’t hear it from me.
We had a few extra lengths of cattle panel seeking purpose in the summer garden, so it was not too much more of an added expense to invest in the t-posts and one extra panel.
High Hopes for the New System
The benefit of the new trellis system we designed is that it’s neither open grown nor a single leader. Instead, I can train more than one leader, like with an open grown (caged) tomato, yet because I am training it to only 3 or fewer leaders we will potentially be producing more fruit per plant in a single season. Ideally, the productivity will be higher than in past years yet I can attempt to tame it, perhaps in vein, by tying it to the panel.
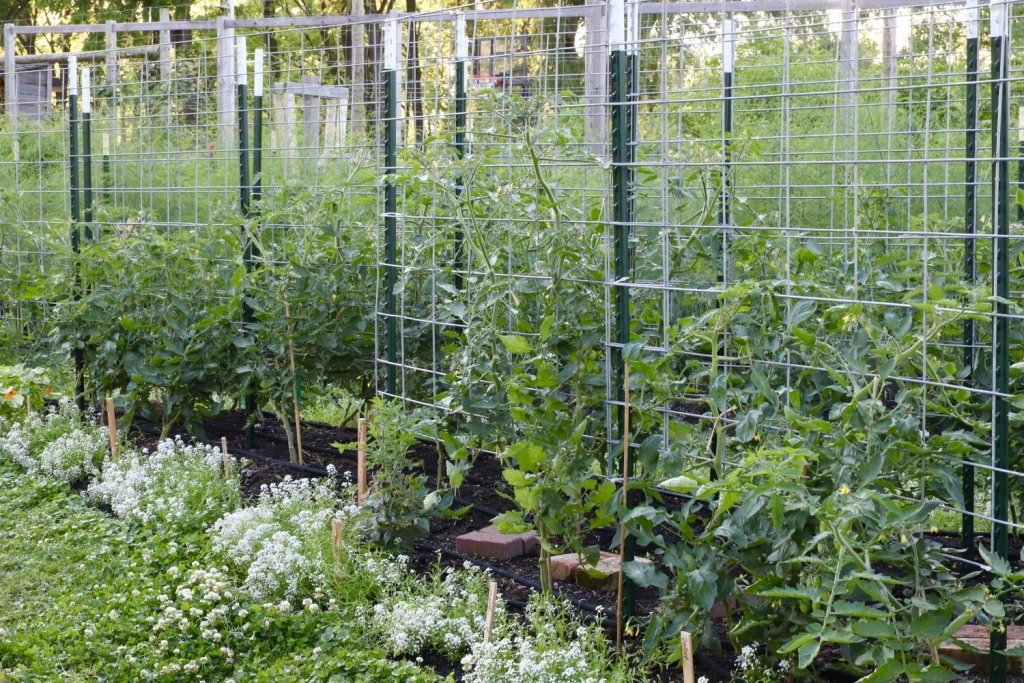
Taken yesterday, this is the south side of the tomato bed. You can see multiple rows of support, and a path between the south and middle rows of tomatoes. It’s been a cool spring but the tomatoes are finally starting to really take off.
The potential downside is that it’s not tall enough. We know this. And we have a plan. We will top the plants when they reach the top of the cattle panel, and allow new suckers to grow up from the main stem at that point. One of our sungolds is already almost at the top of the trellis. And yeah, it’s still squarely June.

What is most exciting about this new system is that is is a play off our espalier orchard. As with our fruit tree trellis method, you grow your plants out in a single plane, two-dimensionally. While these are certainly growing out and up, the effect on the garden design is, so far, really pleasing to the eye.
Materials & Installation
We had extras cattle panels which was the impetus for growing tomatoes a new way this year, so our investment was largely in the T-posts, a one-time investment that already feels worth it. In a matter of an hour, we had 23 tomatoes trellised in a very orderly and beautiful layout.
- 7’ t-posts
- 50” wide cattle panel, cut into 8’ lengths
- zip ties
- tape measure, and
- a level and string if you need to take the install precision to the next level
- Set the two outer posts first and run a string line so you can ensure the posts are all in a line. This helps when you go to set the panels in place.
- Using a pile driver, pound the posts in to just under 6’ and space them no more than 4’ apart, keeping the heights even all along the bed.
- (This takes two people): Carefully set the panel up from the top down.
- Zip tie one of the top corners in place, and then carefully zip tie the other top corner, being careful if the plants are tall to not damage any of the leaders.
- Use zip ties to secure the bottom of the panel to the t-posts, and repeat as necessary if you are building a trellis for a bed longer than 8’ (like we did).
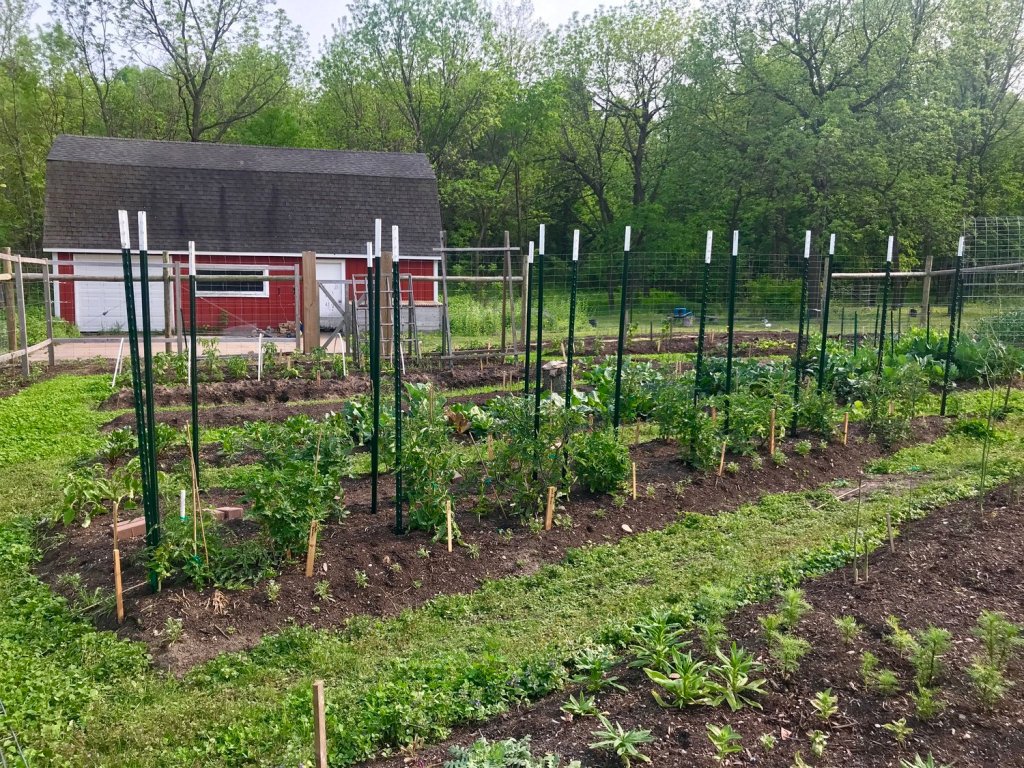
Here you can see just the posts set, by and large, at the same height – and plumb. Well, they were as plumb as I could get them. We didn’t actually put a level to the t-posts while we were pounding them into the ground.
Since our plants were so tall from the uncanny vigor exhibited indoors earlier this year, we set the panels horizontally and positioned them at the top of the t-posts, leaving the bottom 18” or so open to the ground. The 8’ length was then secured with zip ties on all the posts: at each end and one in the middle. We repeated this, adding smaller length panels as need be.
While not all the tomatoes were tall enough to reach the panel just yet, we used bamboo stakes to help get the plants up to the panels. By dong this, we used the minimal amount of cattle panel for the trellis.
Plant Spacing, Training, & Maintenance
Our tomato plants are spaced 30” on center, planted in a modified checkerboard pattern due to the irregular shape of the tomato bed – it’s triangular. I was pushing the limits of spacing a bit, but since we are growing them vertically rather than letting them bush out, we are anticipating this spacing will work well. Of course, I’ll keep you posted if we learn otherwise.

Because this is a long, irregularly shaped triangle bed (over 20’ in length), we decided to grow two rows back to back and then set the third and shortest row parallel with the south side of the bed. The northern row is accessible from the mowed path, as is the southern row. The middle row is accessible by this cobbled together brick path.
We are training two rows back to back, one row to the north while the other row will, theoretically, be harvested easily from the south. The third and shortest row is accessible from both the north and south.
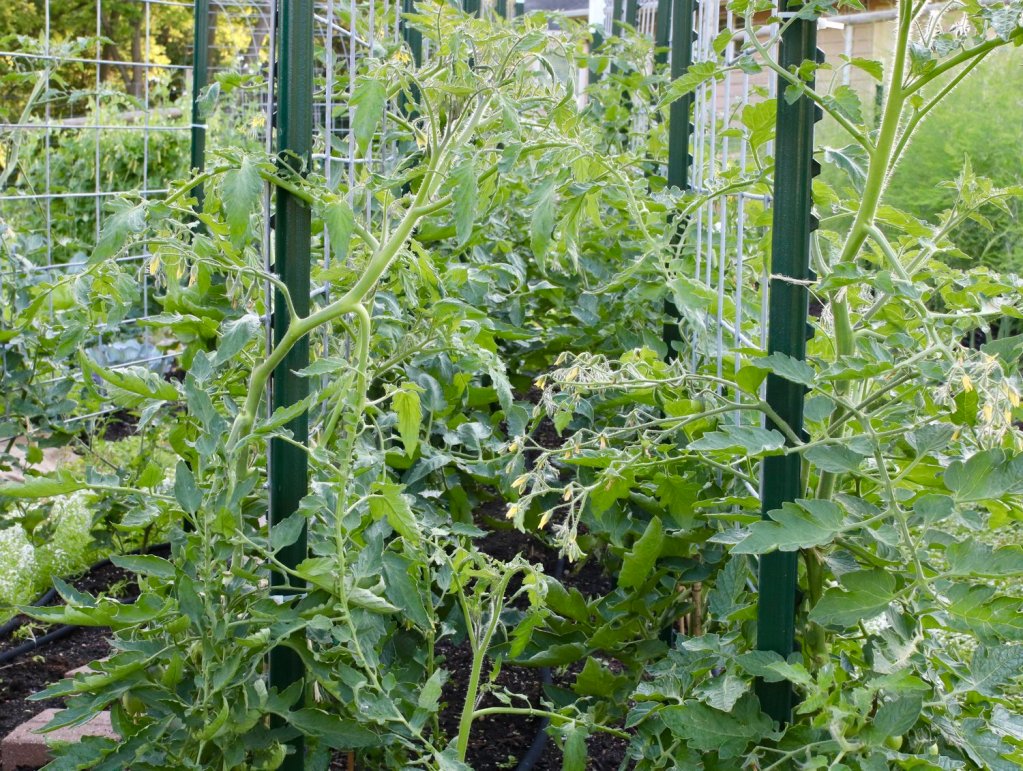
Yeah, so maybe not so tamed, huh? This is a recent photograph between the two back to back rows. I am working to minimize any tomatoes that may set fruit in this now inaccessible tomato alley.
Once a week after the morning dew has evaporated and ideally when a nice warm, dry breeze is blowing, I hang out in the tomato garden to do my training. The drier the conditions, the less risk of any possible disease spread in your tomato garden. I bring my pruning shears, a paper towel, rubbing alcohol, and dozens of twine lengths cut to about 6-8” long for tying the leaders to the cattle panel.
I always clean my pruning shears before starting. Always. And I clean them between each plant, regardless of whether it’s the same variety or not. Too hygiene is a non-negotiable for me, and this is an extra step this year, but it helps me slow down and really see what the plant is up to before cutting anything back. It hasn’t prevented me from accidentally whacking off a leader, but it largely helps me make the best decision for the plant.
We have been bit by disease in our tomato garden, and as we become more serious tomato gardeners, so our precautions have equally ratcheted up to protect our investment. I do not ever just meander through the tomato bed breaking suckers off anymore. I only do this with my pruning shears.

Oh yes, the irony is not lost on me. We are in fact still using twine! In smaller amounts but hopefully with much less dramatic results, I am training the tomatoes up on side of the trellis as best I can. Some tomatoes have grown on both sides, and where we have access on both sides, I am in support of this mess.
The beauty of the returning to the garden year after year is that accumulation of knowledge. And this tomato garden is informing us in ways yet to be fully discovered. We always enjoy this aspect of gardening so much, forever a student in our own playground, and here to share our trials and triumphs as they reveal themselves to us.
-
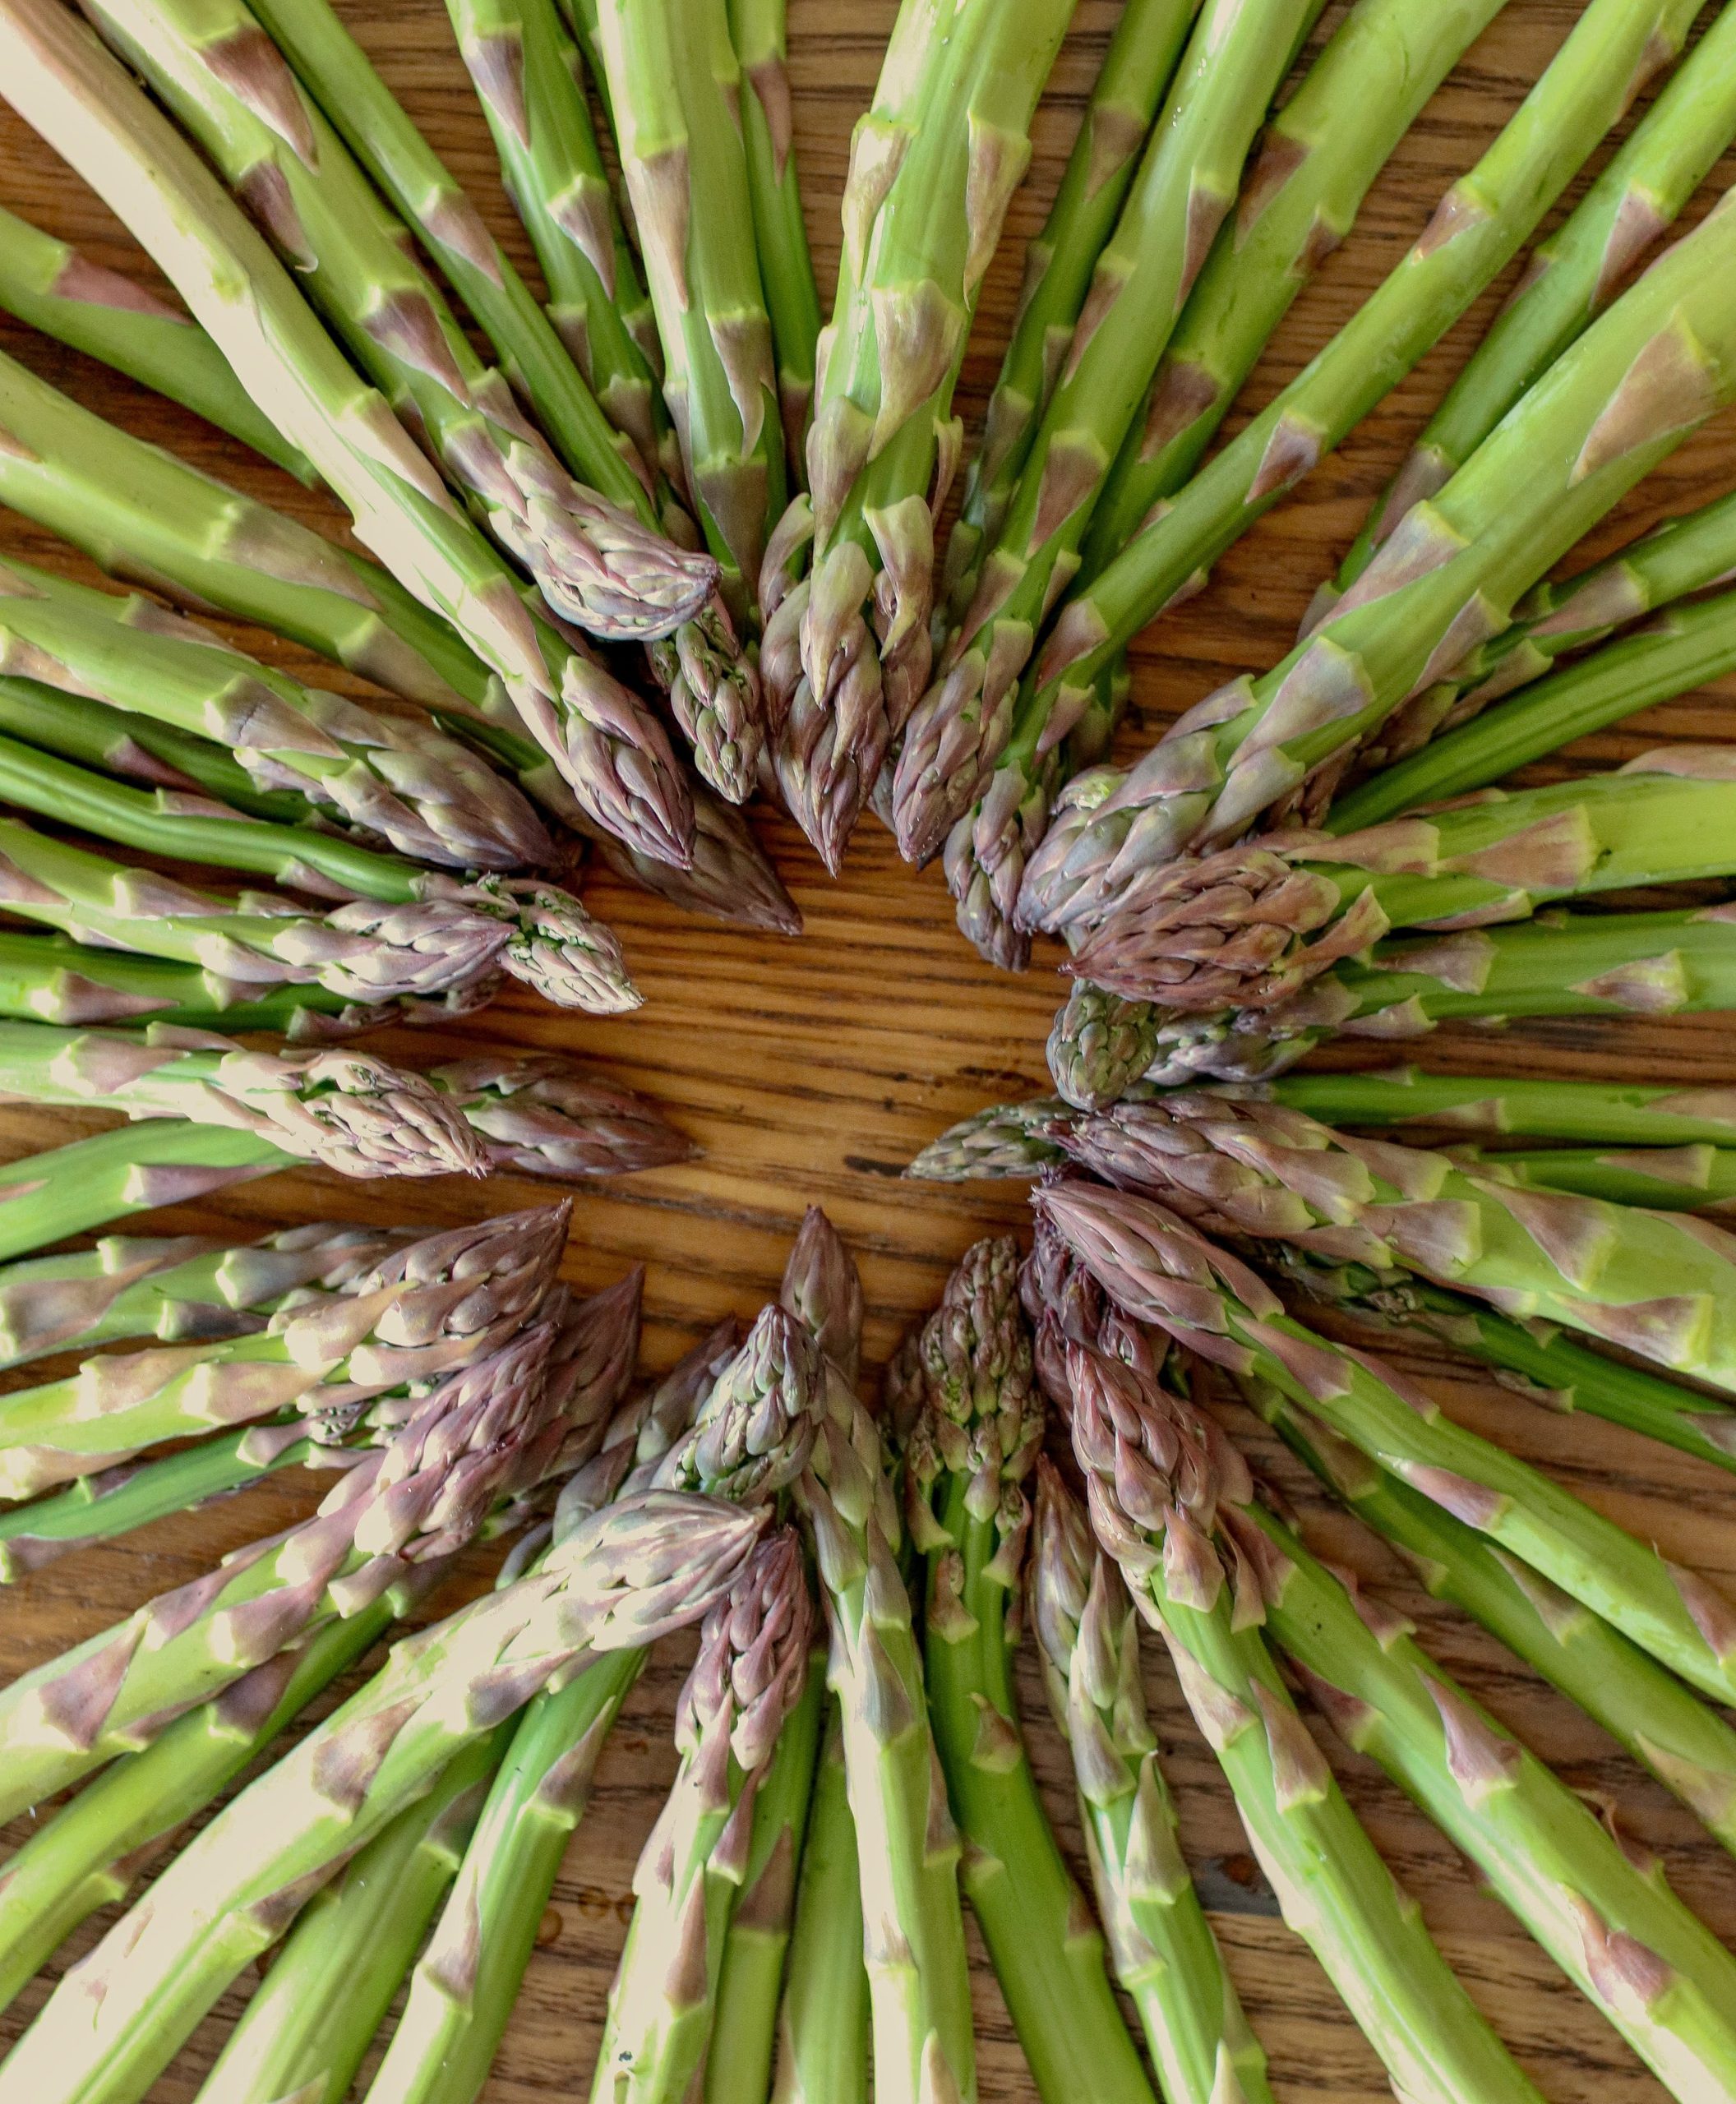
Asparagus: Best Practices for Longterm Success
So you’ve got your asparagus patch planted. Maybe it’s a few years out and it is producing well. What a thrill to have this vegetable just wake up in early spring and provide some of the first nourishment of the season year after year. We are quite enjoying our rather large patch of homegrown asparagus this month, and I wanted to share some of our best practices for keeping our asparagus bed healthy as well as some strategies to keep the pests at bay. Because like with any other crop, there are a few insects who are as attracted to these spears as we humans are.
Annual Maintenance
Being a deeply rooted perennial, asparagus needs inputs every year to produce well and put ample energy back into its spear-producing root system for next year’s crop. I’ve heard from many different home gardeners who all have secrets to feeding their asparagus and there are key threads to everyone’s approach.

I sandwiched our asparagus bed between two annual flower beds. The delicate, fernlike whispy greenery in the middle of this image is our asparagus patch in the middle of summer after the spears have grown up and matured into these beautiful ferny plants. Multiple stems (spears) per plant are left to grow and photosynthesize all summer long to nourish that all-important root system, and the asparagus beetle often continues to nosh, mate, and lay eggs all summer long.
Compost! Every asparagus bed needs a good few inches of compost applied annually. We like to apply it in early spring before the plants emerge as it is easier to apply compost across the 5-foot wide bed before the plants are actively growing. If you have an asparagus patch, you know what kind of a summer tangled mess it becomes by August (or sooner in warmer climates).
Fertilizer: We broadcast apply 1-2 gallons (10-15 pounds) of slow release organic fertilizer over our entire bed in spring, which is about 200 square feet.
Irrigation is another key ingredient to asparagus success. If you don’t get summer rains, be prepared to irrigate as asparagus roots can go four feet deep and require deep waterings to develop strong, healthy root systems that will be producing for several decades to come. We supplementally water as needed in summer.
Weeding is huge. Like with any other food crop, weeds will compete for sunlight and nutrients and should be eliminated or at least minimized in order to maintain the strength and health of the asparagus plants. With a perennial that needs to replenish its roots each summer, it is even more important, so prioritize your asparagus patch and you will get the most out of your investment with large spring harvests and decades of productivity. A weed in this bed would include asparagus seedlings, so if you have female plants, remove their offspring annually.

A small weed this year, right next to a mature plant, if not caught and weeded will appear to be part of this plant next year while it will instead be competing for resources and long-term will deteriorate the vigor of this parent plant. This is one of the main reasons we grow a male dominant variety.
The notion of companion planting comes up from time to time in discussions with asparagus patches and I’ve been asked about it numerous times. I’ve read about some large scale farmers who plant clover between their asparagus rows and then till it under in fall as mulch. I’ve even heard of interplanting things like tomatoes with your asparagus to repel the beetles. We tend to err on the side of less is more with this bed. Given the longevity expectations of asparagus as a perennial vegetable, we set aside land just for this crop, devoting inputs just for their maturing roots to grow strong, healthy, disease resistant plants for hopefully many decades to come. We minimize competition from other plants, giving them all the square footage for their growth and benefit.
Pests: The Common Asparagus Beetle
We knew about this potential pest before it arrived, but were nonetheless floored when we planted an asparagus patch where turf once was – and the beetles located it within mere months of establishment. You may have asparagus beetles in your asparagus patch and not yet realized it. Do some of your spears grow with a hooked tip? This is one of the key signs you have asparagus beetles feeding on your plants.

The telltale hooked asparagus tip, a sign that the asparagus beetle has been feeding on this plant. If you spot these, be on the lookout for adult beetles and any eggs they may have already laid on other healthy spears. Still totally edible, the bent top is a sign of asparagus beetle damage.
Common asparagus beetles overwinter in litter, like many other pests — and a lot of beneficials — and emerge from their winter hibernation in early Spring around the same time the asparagus begins to emerge. Conveniently, these beetles will happily overwinter in the standing dead asparagus stems, giving them a head start next spring with a very short commute to their next meal. So while you read a lot about leaving plants standing to provide insulation, if you are faced with an outbreak of asparagus beetles, err on the side of caution and remove all dead plant material in late fall.

An adult common asparagus beetle undoubtedly either searching for a mate or for the ideal location for egg laying.
Another sign of asparagus beetle damage is browning on your spears. That being said, the hooked spear and the beetles themselves are much easier to spot in early Spring, so those are the two signs I keep an eye out for each May. We have already interrupted several busy beetles in the asparagus patch last week, hopefully disrupting their already bustling lifecycle.

A common asparagus beetle larva. If you miss the eggs, you will want to find these sluggish foragers before they drop to the ground and pupate. They feed for about two weeks and then pupate for another week or so, and the lifecycle continues a few generations a year right under your nose.
The other somewhat easy way to recognize whether the asparagus beetles have met your asparagus or not yet is to look for small, oval eggs that are laid perpendicular to the spear, usually near the tip of the spear. They are cream colored at first, maturing to a dark brown.

They are minute, asparagus beetle eggs. Can you find them on the lower left spear and on the larger right spear? Almost impossible to locate but this is the time to catch them.
Note: there is another beetle known as the spotted asparagus beetle, but it’s not as common. Like with the eggs, if and when I come across and photo-document it, I will update this post with more information.
Best Practices
Cut down your dead asparagus stems to the ground level and remove all debris in fall. This is a best practice you should adopt annually to minimize overwintering adults that may have burrowed in the stems when the weather started to turn colder. We choose to haul it offsite to our local brush site to minimize any risk of being a harbinger for overwintering adults, trying to make it as challenging as possible for them to get a stronghold in our asparagus patch.
Develop a rhythm for amending your bed which should include slow release fertilizer and compost as well as a strategy for weed suppression. This can be accomplished in late fall or early Spring. Be consistent once you start adding the inputs, and maintain a weeding schedule all summer long. We find with a heavy layer of compost as mulch, our weed pressure is very low though we do weed regularly throughout the growing season.
Pest Management
Be proactive in monitoring your asparagus patch for signs of beetles, eggs, or damage. This is a key practice for any organic garden. We do daily walks, inspecting all our plants, observing any signs or symptoms of beetles or their damage. It starts within the first week of spears emerging and continues all summer long.
It becomes a little trickier as the asparagus patch matures, but I love engrossing myself in the middle of the asparagus fronds. It is its own ecosystem; I immerse myself in the middle of the bed – and always run into someone new I haven’t seen before in our garden. Summer is when you will be able to catch many sluggish larvae as well as adults, and wipe eggs off. It’s not an onerous task, but instead a quiet meditation we repeat daily, and is very manageable just by doing physical removal once a day throughout summer. We prefer this method to any type of spray, even organic.

Bring on the beneficials! Where there are pests, the insectivores will often hang out. We had a lot of these Familiar Bluets foraging in our asparagus patch last summer; they helped tame the asparagus beetle population while adding color and beauty to the garden.
When you locate asparagus beetles, use a bucket of soapy water and drop them into the bucket. They can be rather quick bugs to catch, so we find early morning and after supper to be the best times to successfully drop them in our pail of soapy water. Best to come at them with a hand from above and the bucket below, leaning the branch down toward the bucket in hopes gravity will encourage them to plop into the suds.
Beneficial nematodes, while not inexpensive, can be an effective biological control for common asparagus beetle larvae. You can order and apply the species Heterorhabditis bacteriaphora (Hb) to the bed by following the instructions in the package. Beneficial nematodes are efficient soil predators of larvae, and there are different species who specialize in different areas of the soil horizon, thus being more useful for certain pests who live either shallower or deeper in your soil. We applied beneficial nematodes to our soil for cabbage root maggots and Japanese beetles last year and look forward to seeing how well it worked this season.
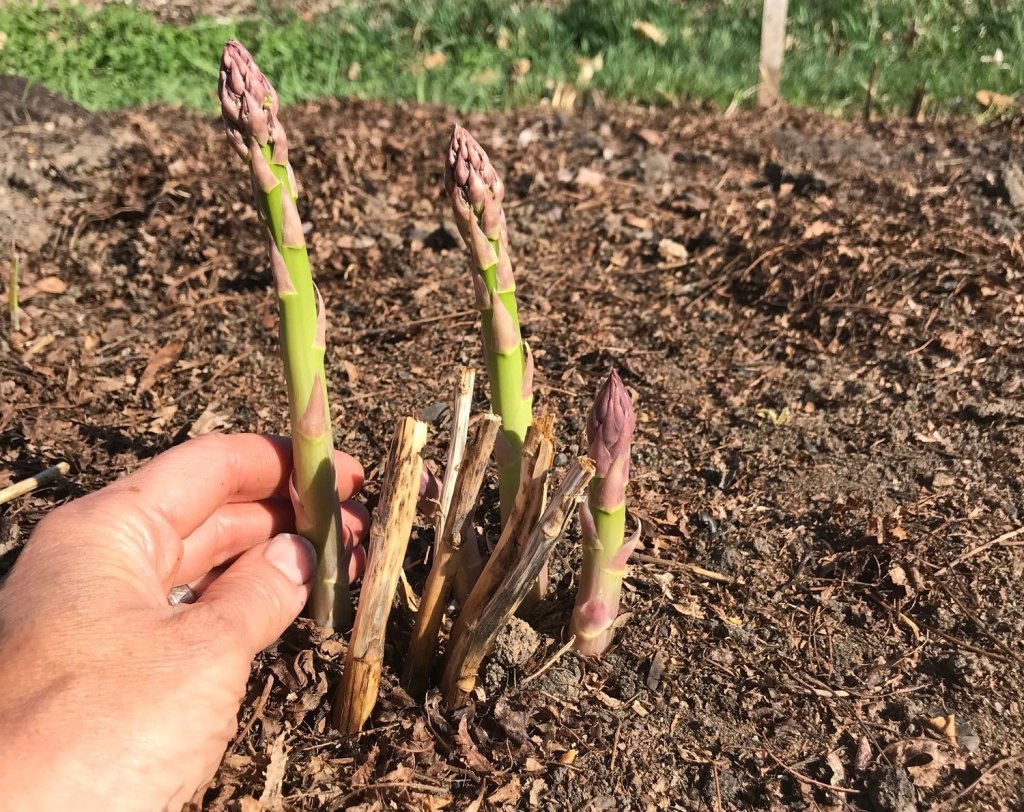
This was our 2018 spring, and you can see the remnants of the 2017 stalks that were not cut down to ground level; that was a function of very helpful children deadheading the asparagus while their father was on an international business trip. That changed last year, after learning that the asparagus beetle overwinters in the hollow stem, and we now cut every asparagus stem down to ground level to minimize overwintering beetles and overall reduce the population.
Beneficial insects such as lacewing or ladybug larvae are excellent hunters of asparagus beetles at all stages of life. These are another biological control that can be ordered online and arrive with time-sensitive release instructions. We released lacewing larvae last Summer to hunt in our asparagus patch and noticed them in our garden for most of the Summer, which means they found plenty of things to eat and were incentivized to reproduce. They are one of the top insectivores to have in a veggie patch for pest management.
Other insects who work to help curb the asparagus beetle population are the tachinid flies and the parasitoid wasps. Unlike lacewings, ladybugs, and beneficial nematodes, these must be attracted to your garden by planting a diverse array of flowers throughout your garden. If you plant it, they will come. Interplant as much as you can around the garden so the adults are incentivized to not only sip nectar but also lay some eggs and help you naturally manage garden pests. The most beneficial flowers are those shallow, simple flowers such as sweet alyssum or anything in the Umbelliferae family (carrot, yarrow, parsnip, dill, fennel).
We hardly ever resort to any kind of organic sprays in our garden, and have never even entertained the need for asparagus beetles. Hand-picking is our top choice for pest management for asparagus and Japanese beetles and other pests like cabbage moths. I am quite certain there would be organic sprays marketed for asparagus beetles, but we have found it manageable to spend a little time each day tending our little patch of Earth searching for these insects and reveling in all the beauty we find along the way.
I don’t expect to fully eradicate the asparagus beetle, but my goal is that through time and the addition of more nectar for naturally-occurring insectivores and parasites, we will eventually arrive at an ecosystem that self-manages pest outbreaks with our endemic insect populations that have come to take up residence here.
-

DIY Cattle Panel Garden Arbor
We love clean geometric lines in all aspects of design. So when I decided last Winter I wanted to add garden arbors down our main path, we knew we would want to do it economically yet without compromising form and function. Inspired by the many garden arbors I had come across online, but especially informed from seeing what Niki Jabbour did with her raised garden beds, we took inspiration and pivoted, creating something that literally fitted in our space.
Because, it turns out that adding arbors across our main, angular path was not that easy. It was, instead, nearly impossible. In fact, the only reason we could add this one, singular arbor is because of that extra large triangular bed on the west side which gave us ample leeway, allowing us to center the arbor on the small bed. I had plans for three of these down the main path, but, alas, we limited ourselves with how we laid this garden out and this one is all I get. That’s a topic for a separate post, how we chose to develop this garden, which I’ll save for another rainy day.
This garden arbor concept works much better where the beds are straight, not angular; ideal garden space for installing this would be having square and parallel beds across a wide path. The wider the path, the more gently sloping your arch. We have about a 5 foot wide path down the middle of our garden, which lends itself perfectly to a large arbor, but the angled nature of the path makes this challenging. So, trust me when I say don’t do as we did. If you are still pondering your garden layout, keep it simple and create your garden with right angles instead of acute and obtuse angles. The math is much easier this way, and your options for things like structures are much simpler to design and build when you are dealing with right angles.
Our Approach
We wanted something tall, around 7.5’ in height which we measured in place with a tape measure if memory serves correctly, eyeballing the final height and working from there for all our math. There was a lot of math, and not a lick of it did I do, even though I really love math. My husband did a lot of calculating to figure out the radius of the half moon we needed to get the height we wanted. More on that below.
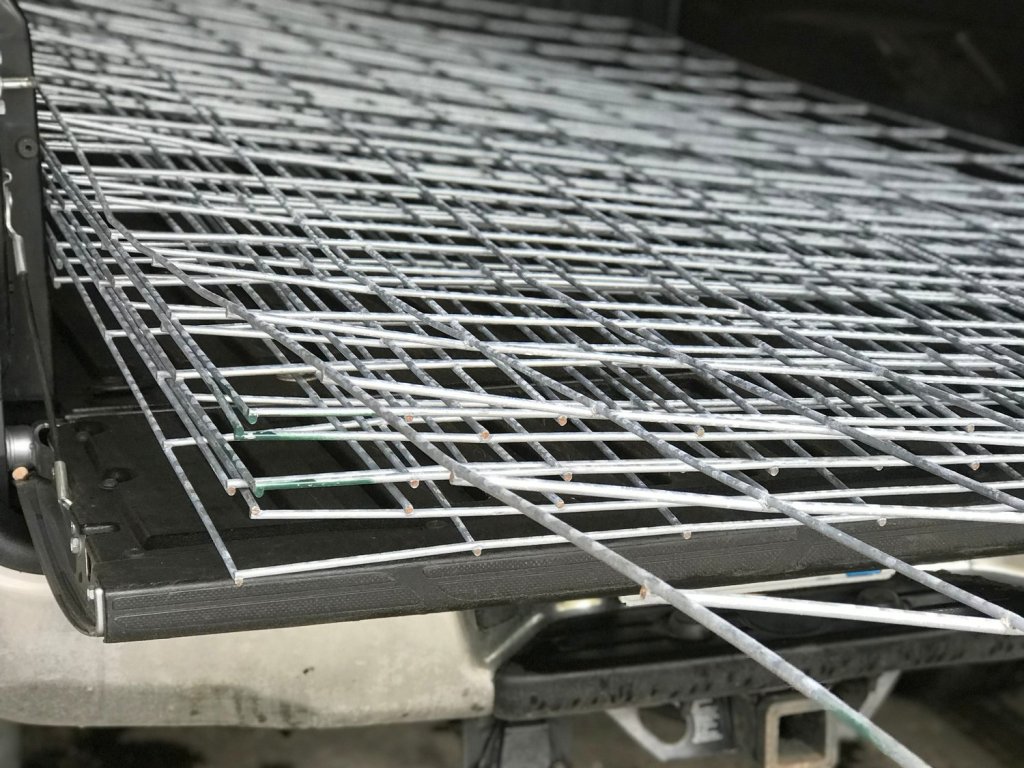
We bring our fence wire cutter/crimping tool to the farm supply store so we can cut the 16’ panels to 8’ lengths and drive home with a reasonable load. For this project, one panel was cut to 10’ for the arch, as you can see that one is projecting farther out than the rest. A 16’ panel goes for approximately $24 plus tax here in Minnesota..
We knew given the width of our path that a single, 16’ long panel was going to be a little short. That — and we did not fathom smooth sailing carting home a 16’ length panel, bouncing and jiggling down the rural highway for 10 miles from the farm supply store to our home. So we did what any sane gardener would do and we made this a little harder.
To be fair, we also did not conceive of a simple way to bend a 16’ cattle panel, so for our own peace of mind and to meet our needs — which is to just figure it out ourselves instead of following a pattern — piecing it together from 3 sections felt like the best solution. It allowed us to achieve our desired height, made transport of materials feasible, and created a not-too-long length that was left to bend into shape.

The side panels are 72” long with one full 8” square buried for an above-ground height of 64”. Figuring out the location of those t-posts was the most stressful part of this, because our beds are angled and yet the two panels needed to be parallel in an angular space. It was double, triple, and quadruple measurements with maybe a few choice curse words mixed in for good measure, too.
The other funky thing about ours that is disguised across the beds is that in order to make it square not only did it need to sit in different positions in each bed, we had to go farther into one of the beds when we installed it. This becomes completely invisible as plants grow up and around; it is also 100% avoidable if you have square beds unlike our adorable angular layout. By now I hope you’re understanding the downstream impacts of our organic layout that while it looks fun, it makes working in it more than a bit challenging.
The Numbers
I don’t believe our arbor is a rubber stamp template replicable in someone else’s garden because of our angular (challenging!) layout. However, crafty-minded individuals will be able to glean knowledge from what we did and adapt it to their circumstances. So I’ll walk you through how we built a template for the arch, the final lengths we cut the panels to for our site, and how entertaining it was to watch husband and wife teeter and totter down the main path on Mother’s Day weekend fumbling with this wonky piece of metal fastened with clamps to a large wooden archway.
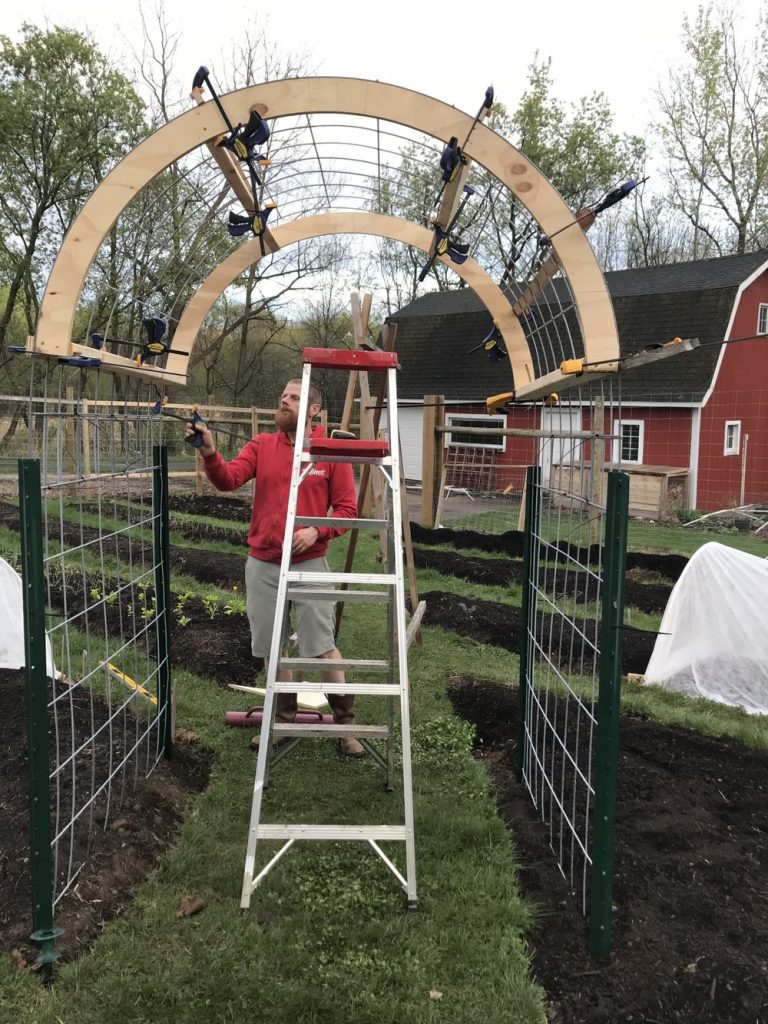
Here the three panels have been connected, overlapped by a single 8” square. We used the ladder to hold the arch up as we tried to figure out what the heck we were doing. We fastened the panels to the U posts and together using zip ties. When we had it all zip tied together, only then did we release the clamps and behold our achievement.
Materials
- 4, 6’ U-posts, sunk 1’ deep
- 1, 10’ long of cattle panel for the archway
- 2, 72” long cattle panels for the sides, sunk to 64”
- zip ties
- 2x4s for making a template
- Sheet of scrap plywood for arch frame
- 1 1/2” screws to fasten template together
The archway is 62” wide and 7 1/2 feet high. My husband used his geometry skills to determine the radius needed to achieve a 3’ high arch. In line with how he approaches all his projects, he took the time to make a custom jig to perfectly create the arch template. It was basically a giant compass, but for a router instead of a pencil. He figured out the radius and screwed the router into the jig and then screwed the other side of the jig to the sheet of plywood. Like I said earlier, we like to do things the hard way sometimes. I’m sure there is an easier way, like perhaps bending with brut force, but this is what how we approach our projects.
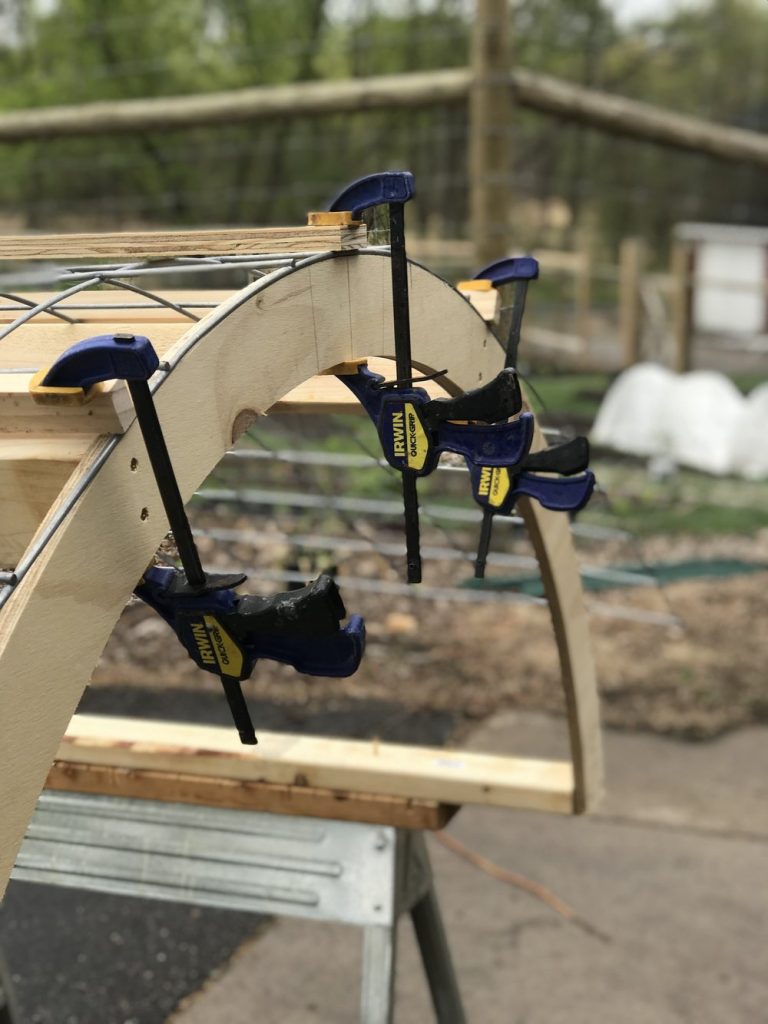
Clamps are your friend. We used every clamp we could find for this weekend project, securing the panel down in multiple places around the arch to help form it. Once we had this secured, we worked on installing the posts at the right distance and parallel to one another so we could slide the side panels in and secure them.
Once the two semi circle pieces of plywood were cut, he cut the 2x4s to length to make a template for the arch that was 50” wide, the full width of the cattle panel. The final phase was to take the arch, support it on sawhorses, and start the clamping process. We found the center and worked one side down, and then the other. We worked opposite each other, each fastening down one side the arbor at the same time. We had this notion that we were providing it some memory, so we did this first, and then did the hardest part while this arch became comfortable with its new shape.
With the U posts set and the two side panels installed, the last piece was the large arch and the ladder is ready to receive it. You can see how the posts are at different distances to the main path, a minor adjustment necessary to get the arbor to work in our angled garden layout.
In the garden, the most important phase of this construction was deciding where to install the U-posts. We needed a parallel (square) structure in an angular space, as I’ve said before. So, we had to decide how to achieve that in the path without drawing too much attention to its placement. We ended up placing each U posts in a different position relative to the path so if you were to stare at them you may conclude this is cattywampus even though it’s not. Luckily the garden grows and your eye does not notice the difference, not even in the early season, as the lack of symmetry at the ground level is inconsequential as there is symmetry above — and that’s where your eye tends to settle.
This was the most difficult part of the project for us. But the time we spent to get the U posts parallel to each other across the path and 64” apart made the final installation that much easier. For the final install, we tucked the 72” side panels into the U posts and stepped on the bottom rung to bury the bottom square into the bed leaving 64” above ground. We then used black zip ties which we thread through the holes in the U post, cinching them as tightly as possible to secure the piece in place.
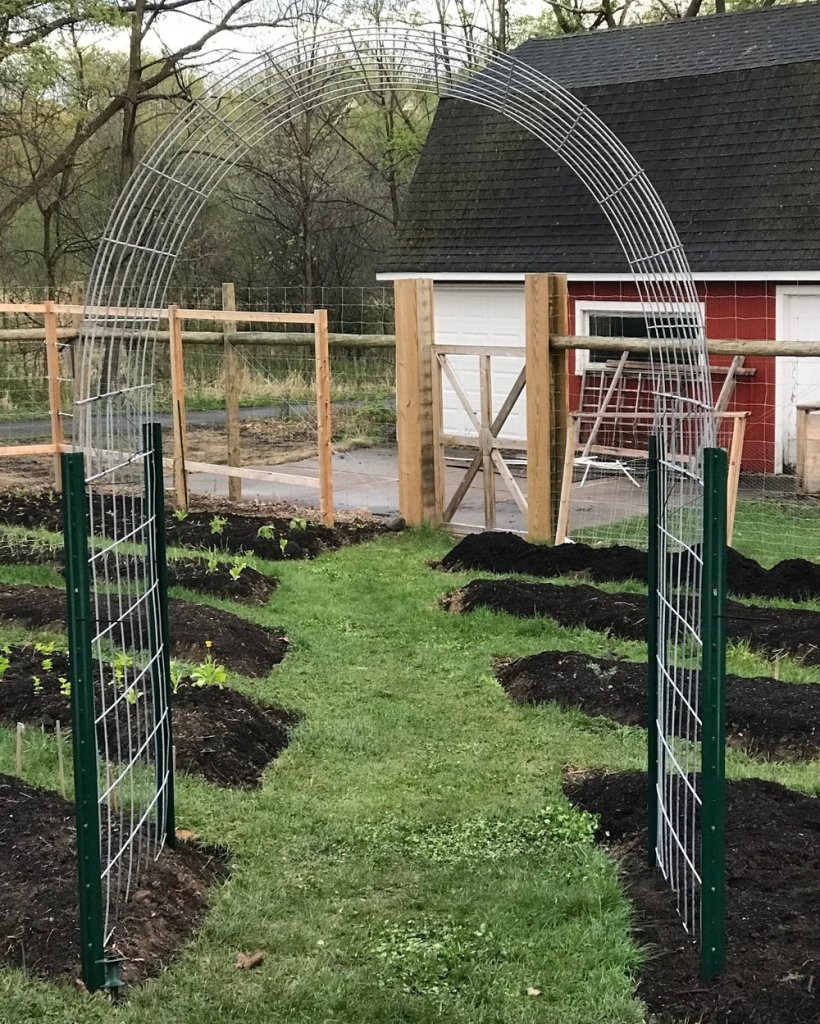
The moment of truth was when we removed all the clamps and let the template drop. It worked! As much as we were confident, it’s never until you see these projects through do you know the outcome.
The final comedic act was the transporting and installing of the arch itself by two potentially stubborn gardeners on Mother’s Day weekend. We swore, we laughed, we yelled and probably cried a little, too. It is projects like this that draw us closer, that leave a lasting mark on our garden and stand proud with a story all its own. The tears were definitely worth it. Some clamps popped off in transit which caused us stress, but the savior was that 6 foot ladder we were able to rest it on. We then did a few lifts to assess our next move, and finally were able to get it positioned just right, one side at a time. We zip tied it in place as we went and the arch overlapped a full square down into the U post.
Making a garden your own is often filled with triumphs and tragedies, these weekends of sweat and hard work that become something lasting. It is probably the most rewarding thing, to walk our paths every day and take in all we’ve made together. We have many small projects planned for this coming season, focusing on adding more raised beds to our perennial fruits. You can be sure there will be sweat and tears, laughter and swearing. And, that it will be a beautiful addition we will sit back and relish upon completion.
-

Growing Peanuts in the North
If I could wave my magic wand, tossing a handful of seeds into every open palm across the globe, I wouldn’t be sharing the still novel cucamelons nor glass gem corn though they are both incredibly magical crops. It would be the leguminous ground nuts, aka, peanuts. Peanuts are in a class all their own in my opinion, a beautiful crop that creates food in the most unique way, something children and adults alike will marvel at in your garden. In other words, a must-grow for your garden bucket list.
I was completely unsure of how peanuts would do in Minnesota, but was confident this legume deserved space in our rambling gardens simply for the adventure of it. Part of pushing the growing season is growing things that aren’t normally considered locally hardy, and peanuts are a great crop to prove that more is possible in the North than convention tells us. Thankfully, there are many other like-minded, adventurous souls out there doing the same thing all over, and until you plop those seeds down in your own little microclimate, the potential is unknown, awaiting your curiosity. And , as you’re going to learn, they are a beautiful addition to a vegetable garden and if you have children, they are a sure way to get them into the garden, too, if they aren’t already snacking on all the bite-sized fruits and veggies your garden produces.
Harvesting even a handful of peanuts was measure for success in my book, setting my expectations very low because so much was left to the weather. Knowing a hot summer was a necessary for success, I prepared the bed with PVC hoops in the event I needed to create a hotter microclimate if a cool Summer ensued, which is known to happen from time to time. Mother Nature had other plans, turning on the heat by Memorial Day and maintaining warm temperatures all summer long. Needless to say, they grew just fine without my intervention.

The harvest was pulled a little early due to happy voles who eventually stumbled into the peanut patch and began to feast. That being said, we did in fact grow more than a handful — a big success in my book and my pride clearly shows here.
The peanut is an endlessly fascinating plant to grow from seed, from its airy, pinnately compound foliage to its understated flowers that will happily blossom underfoot going unnoticed. I speak from experience, having missed some of the first blossoms but wised up well before the show was over. Besides sharing the nitrogen-fixing benefits of its leguminous cousins like the pea and bean, the peanut develops its edible nut underground like potatoes and root vegetables. The way the ground nut is produced is all the reason you need to add these to your garden. No other food grows this way, and the experience is magnificent for gardeners of every age.

The flowers are a beautiful orange-yellow and delicate, resembling a pea flower which should come as no surprise given their place in the plant kingdom. Whereas when you see a flower on your vegetable plant it typically becomes the fruit as in a cucumber, tomato, pepper, and the like who are all encased in their seeds, peanuts throw their fruit down a little farther from where the flower is pollinated. From the self-fertile flower drops what’s called a peg. This peg drops down into the ground where the tip of the ovary will swell and grow those yummy edibles we know and love. This process takes quite a bit of time, and that’s why these are not typically grown in the North.
Favorite Varieties
The two fastest maturing organic peanut seeds I have found are Tennessee Red Valencia and Schronce’s Deep Black, both 110-day varieties from Southern Exposure Seed Exchange. That’s a long time for a hot crop, to be sure. While Brussels sprouts are the crop I would peg with a maturity time like that, they can more than handle a few early frosts while still maturing. Peanuts, on the other hand, just stop growing once the nights drop down into the 40s, which happens here in September for sure.
Let’s compare the peanut’s time frame to our usual garden suspects, just to drive home this point. Most tomatoes mature within 80 days, and many are closer to 70 – or cherries can be closer to 60 days to maturity. Cucumbers and summer squash race to maturity in about 60 days too, or roughly 1/2 the time it takes peanuts to mature. Many beans mature in the 50-70 day time frame, its entire life cycle completed before peanuts are sending those pegs into the earth, which makes growing them here truly remarkable.

2 seeds per pot 2 weeks post germination. Sowing Tips
In late April, sow 2 peanut seeds in 3.25″ newspaper pots. An extra early start will help ensure enough warm summer days (and nights) for nut production.
To heed this potential issue, adjust your sowing to ensure a good 4-5 weeks before transplant. I sow my peanuts in late April and plant them out, weather permitting, right after Memorial Day or in early June.
I don’t advise direct sowing in cold northern soils in Spring. Personally, I really enjoy the sprouting of the peanut, watching the large nut split open and the cotyledon spring forth. Like with other seeds, the larger the seed the more dramatic and instant the plant is at birth. Peanuts wake up and grow, their foliage as enjoyable as the nut itself. It’s such a fabulous thing to grow, especially with children — or if you’re anything like me, an adult whose curiosity thankfully never dimmed with age.
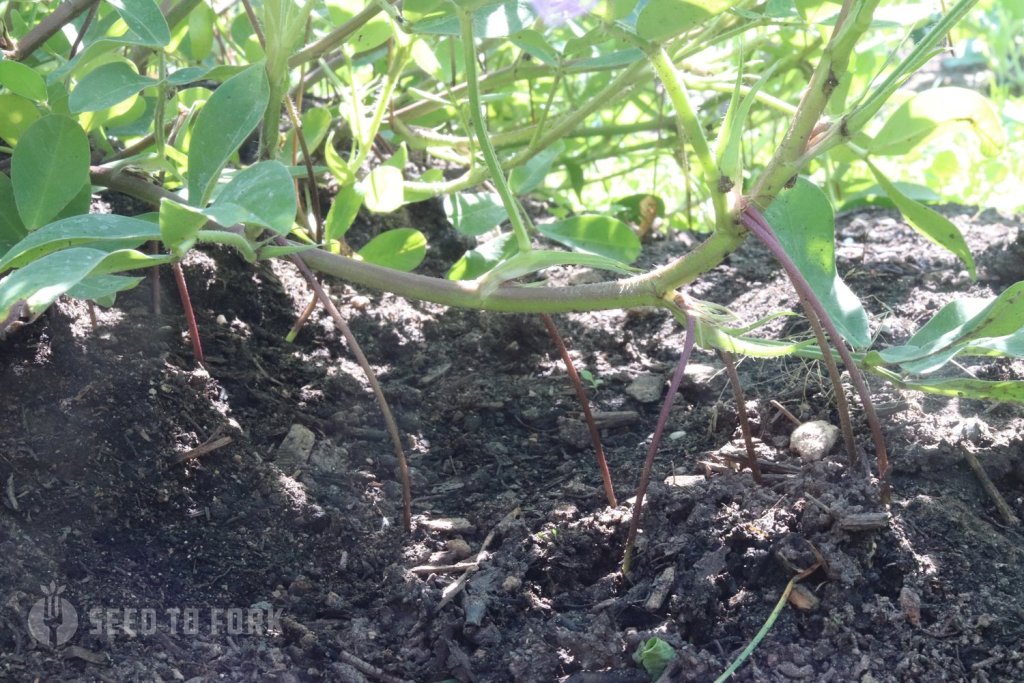
Here are those pegs, basically wandering ovaries seeking the good earth in which to swell and grow. It’s a remarkable process that I lovely spying on throughout the summer, digging back the earth to spy on the peanut development. Like potatoes, peanuts benefit from hilling to promote the development of more nuts, and I wasn’t fully thinking about this when I transplanted the starts in short rows across my bed instead of long rows parallel to my bed lengthwise last year. This year, I will transplant them in long rows and hill them like I would a potato patch; I think it’s both easier to hill and more beautiful to plant them in long rows rather than short rows.
I’ve spoken of the very long and hot summer, so we can all just cross our fingers for one of those and charge forward. Additionally and in line with that requirement, warm soil, as noted above is a must-have before setting any plants out — and that soil should be well-amended as it would be for any other darling food or flower you plan to grow. We use a complete slow-release organic fertilizer at transplant time, and do one more light top dressing once we see flowers.

A fun activity is to gently remove some of the light soil that you mounded up around your peanuts earlier in summer to check on the swelling nuts themselves. Here you can really appreciate where peanuts come from! In addition to being warm and well-fertilized, the soil should be well-draining. I’d say your soil should be in as good of shape as possible before planting anything you’ll eat, so go with what you have. Water is needed especially once they start to flower to ensure healthy formation of the pods, those underground jewels of the garden. Set plants out 6-9” apart in rows 30” apart.

They were as delicious as they appear on your screen. Better than they look, actually. As with all food, homegrown flavor and nutrition is superior, and i hope you try these one year. While we weren’t overwhelmed with pounds and pounds of fresh peanuts, the peanuts we did yield were the most flavorful we’ve ever tasted. And if my teenager could plan the garden, it would be nothing more than tomatoes, potatoes, corn, and peanuts. The large bowl of peanuts and their extraordinary flavor was more than enough for us to allot them space again this year, and probably every year to come for the foreseeable.
-

Minimum Plant Spacing Guidelines
You have limited space so you cram it all in, right?
We all want to maximize our growing space, growing as much food as possible in a given year, and for many of us, space is at such a premium and our veggie and flower list so long that we may (okay, often) push the limits of our physical growing space. This is overplanting, folks. I am here to share with you my experience with plant spacing and my infographic I created to help remind me of spacing needs.
At our homestead, we are quite fortunate in that our current home garden is as about as big as we can handle, and by that I mean it’s bigger than ever. We fenced off an 1/8 acre when we moved here in 2016. We garden it intensely, complete with 16 fruit trees (most of them espaliered); a large strawberry patch; 50 row feet of various raspberry varieties; 9 high bush blueberries; 40 asparagus plants; a patio for momentary pauses between the weeding, sowing, and reaping, plus roughly 2,000 square feet of hand-dug raised beds for vegetable production. Indeed, it is our dream garden, actualized.
Even with ample space to grow a wide variety of food for ourselves and our friends, plant spacing is something I study meticulously every year, even every time I bring a flat of veggies into the garden to transplant. I bring out my gardening books, reference my seed source website for variety specific recommendations, and remind myself how much space each plant needs. I calibrate my eye with a tape measure.

We always grow our tomatoes on a vertical trellis, trimming the suckers off and keeping only one leader. The interplanted sweet alyssum and nasturtium will attract pollinators and beneficial insects, the lettuce will be harvested before the tomatoes and peppers get really big, and the onions can just hang out in front not requiring much space or attention until they are ready to harvest in late summer.
Last year, which was our first year growing in this awesome new space, we followed Coleman’s spacing guidelines for brassicas like cabbage, broccoli, and brussels sprouts (30” on center) and it left us with a lot of underutilized space. We could have produced 50% more cabbage on that same land. Needless to say, I took note and we are doing things differently this year.
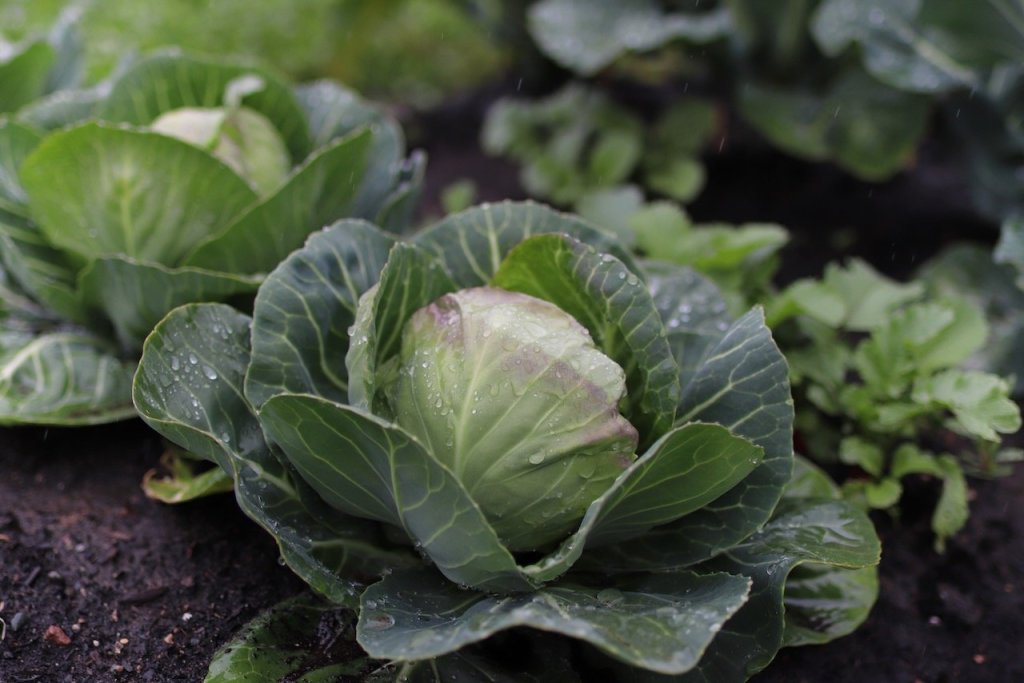
Brassicas share space with radishes, arugula, and spinach in our spring garden beds.
This year we are going for a more densely planted brassica bed by following Johnny’s Seeds spacing guidelines (all our cabbage seeds are sourced from them) and by planting some smaller varieties than can be densely planted. We are also living on the edge as I transplanted some (moderately-fast maturing) beets between our brassica rows, and interplanted head lettuce and some arugula in that same bed. Already, just in this first week in May, it is looking great.
Why Proper Spacing Is So Important
The trick to plant spacing is to give each plant enough light, water, nutrients, and air flow to promote optimal growth, strength to ward off disease, and to mature to its ideal size. If you don’t give your plants the space (and thus light, air flow, and nutrients) it needs, the result will be a smaller plant that is overall struggling to meet its needs, ultimately resulting in poor flowering and suboptimal production.
All any gardener wants is the best and strongest plants possible. That means give them the space and thus nutrition, light, and water requirements they need to thrive. If you start from seed and end up like most with more starts than you have space for, instead of overplanting and squeezing them all into your beds, plant out your best and strongest starts and offer the extras to friends or neighbors. We do this every year. I have a stash of extras waiting to be donated to friends and a local nonprofit garden. Why rob your best plants of nutrients by overcrowding? Instead, plant the right amount, where yields will be greater per plant.

Chickpeas and radishes: Faster growing interplanted crops will always mature well before the anchor crop reaches maturity. This is a great way to maximize space. Some starts seem so small such as a cabbage, tomato, or zucchini and you think you can put them close together. Oh, do resist the urge! These plants want to take up a good bit of square footage as they mature. Instead of spacing them close together, interplant those gaps with lettuce, radishes, beets, or the like and then your desire for utilizing the space will be achieved in the short term before the larger, longer maturing crop reaches its full size.
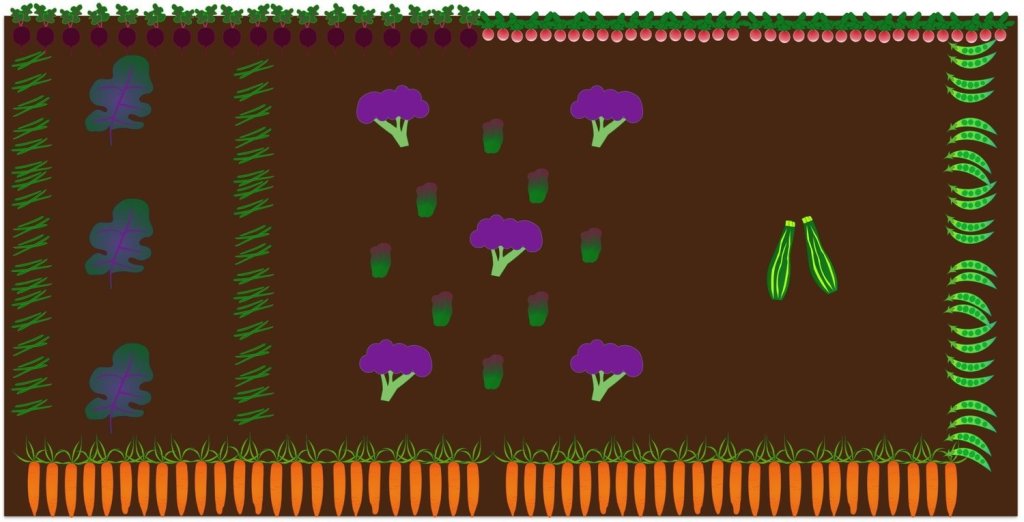
A well-designed bed includes spring and summer crops, planted from as early as possible into summer. Here I chose to anchor the bed with a center planting of broccoli, with pole beans and a summer squash flagging it. In spring, the snow, snap or shelling peas will grow up and be just about done when the zucchini is getting big and ready to produce. The carrots are planted as early as mid-May and as late as end of June. The kale resides under the shade of the green bean trellis, with the beets and radishes being harvested in late Spring.
In an effort to maximize space between broccoli, this year I spaced them at 24” apart in the shape of an X and between them, I interplanted 8 head lettuce. The lettuce are growing faster than the broccoli and filling in, and will definitely be harvested well before the broccoli start to head. Contrast that with last year’s planting of 2 plants, 30” apart in both directions — I’ve increased broccoli production be 25% in (20%) less space — and added a few weeks worth of lettuce in there for good measure. I think this spacing is tight enough for our family’s needs and my comfort zone with interplanting.
Interplant, Don’t Overplant
I’ve said this before, and I am sure I will repeat this again after today. Plant spacing works for a reason. We all would agree that the last thing you want is for your plant starts to be so overcrowded they don’t mature into the beauties you dreamed they would. Plant spacing at the minimum distance that I recommend will yield happy plants, given you have provided great soil, adequate fertilization (compost and/or slow release fertilizers), and you irrigate appropriately.
Get comfortable with the idea of giving each plant its unencumbered growing space. Envision a garden where at maturity, only the farthest reaching tips of each plant just barely touch their neighbor. If they end up being closer than that, with the exception of crops like carrots, lettuce, beets, and radishes, you may want to take note of your spacing and give them all a little more space next year. The end goal for plant spacing in my mind’s eye is for each plant tip to just touch their neighbor at maturity, when the broccoli is heading and the peppers are ripening, for example their outermost leaves will flirt with their neighbor but not be hugging one another tightly.
Bottom Line
There is no such thing as being spaced too far apart, except in the case of something like corn where good pollination require a minimum square footage planted and spacing matters so pollen can migrate from plant to plant for full ears to develop. Open grown plants will compete less for light, soil nutrients, and available water. So, when you review my suggestions, use them as a minimum guideline if at all possible.
If you have the room, space your tomatoes 3 feet apart on center, not just 30″; if you have the space for kale, I’d push them out to 18″ on center instead of 12″. What will mature will be larger, more robust, disease-resistant plants. Give them more resources and they will give back in plentitude. So, if space allows, allot the adequate square footage to each crop; your vegetables will reward you with bountiful crops.
I recommend using my Minimum Plant Spacing Guideline from my book as a starting point, and to cross-reference it with your seed source recommendations; some varieties may be able to be planted closer, and some may require more space than I propose here. But in general, these are my minimum spacing guidelines; I space some vegetables wider whenever possible. I chose these distances based not on our abundant garden space, but more for the average gardener with just a few raised beds in a more urban environment.
Our brassica-beet plant spacing is a huge experiment for me, stretching my comfort zone, and may result in what I consider overcrowding, which will mean smaller beets and smaller cabbages, cauliflower, and broccoli. Time will tell, however, and there’s always a lesson that reveals itself in the end, one you could not foresee. I love that about my garden beds.
-

Soil Blocks: A Potless Approach to Seed Starting
For years we considered changing our seed starting system from self-watering 72-plug trays we had purchased at the big box stores to an innovative tool that extrudes stable cubes via a 4-block square form that marry pot and soil into one. The magic is in the mixture and its ideal moisture content, which then utilizes the air space around it as it’s ‘pot’.
Soil blocks work by providing a nutrient rich medium for the establishing plants. At first, the moisture is a key component to the strength of the potting mixture, yet as the plant emerges and establishes, the plant roots become a key binding agent as they permeate the block. Soil blocks are a very sturdy garden invention.
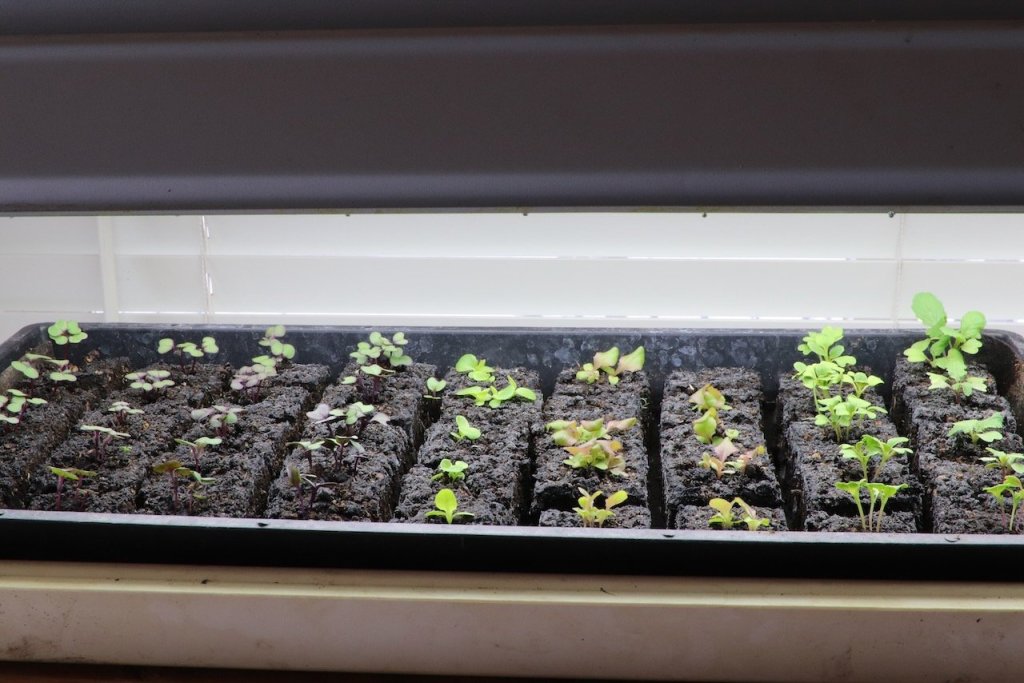
Head lettuce and early season brassicas are an annual tradition for us. There are several sizes of blocks to choose from when investing in this new tool: from a mini-block at 3/4” to large transplant size of 4”. We hemmed and hawed last Winter when we were investing in this implement, and decided, in the end, to order just one size: a 2” soil blocker; the other finalist was an 1 1/2” blocker. We chose the larger size as we read it could be used as a single pot for many crops, going straight from this block into the field. And that is what we do for almost all of our brassicas, beets, lettuce, and many flowers. The smaller sizes will almost definitely need potting up, so we opted to give some veggies extra room for their first home.
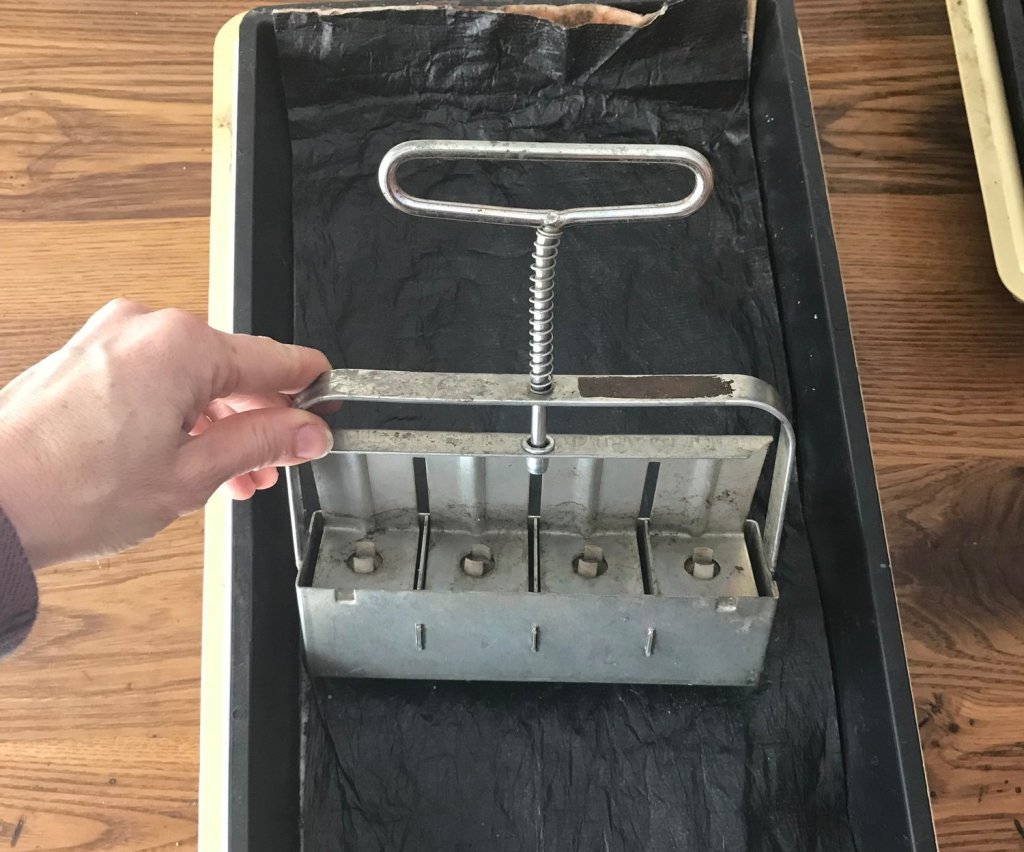
2” soil blocker makes 4 at a time. You can fit 50 into a standard tray. For starts that need extra indoor time or that establish quickly and need to be potted up, we have developed a 4.25” newspaper pot method in lieu of the 4” soil blocker. We had the opportunity to try the 4” soil blocker last Winter, and despite it being the same recipe as the 2” soil block mixture, we could not get the thing to hold together. So, next best is a cubic pot made out of paper. It feels a close approximation to what we hope to achieve by using these plastic-free soil-full, pot-less pots.
Recipe
This recipe is from The New Organic Grower by Eliot Coleman. I highly recommend this book for your garden shelves. It is a well-worn book on our homestead and one we reference throughout the year for various projects and to confirm or deepen our knowledge.
The recipe is calculated in parts. I use a 2 quart yogurt container as my “part” and my lime addition is proportional to this volume:
- 3 parts coconut coir or peat moss
- 2 parts coarse perlite
- 2 parts compost
- 1 part garden soil
- 1 ounce lime
We have diverged from Eliot Coleman’s recipe in that we are transitioning to coconut coir instead of peat moss, and we don’t add the extra nutrients he recommends to our soil block mixture. Instead, we use a diluted fertilizer once true leaves appear.
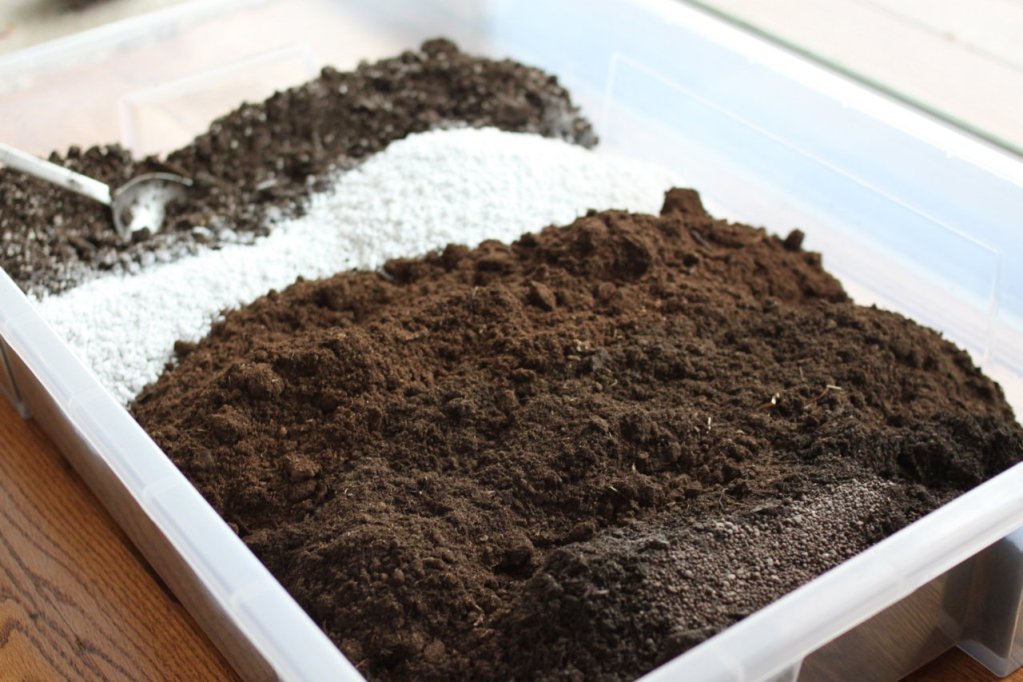
From left to right: leftover block mix from previous plantings, coarse perlite, peat moss, compost, and garden soil. I use a large, shallow plastic bin I purchased at Ikea for the purposes of mixing. I mix all the ingredients together dry, and then add as many buckets of water as needed to super saturate the mixture. I end up using at least half as much water as volume of dry ingredients to get it to the moisture level I prefer. And then, it marinates.
Once mixed, I let it sit for a few hours up to overnight to allow the mixture to fully saturate and blend. The ideal moisture makes the perfect block. I rock the blocker front to back while pressing firmly down to ensure it is a very firmly packed block. Next I inspect the underside of the block and knock off any extra soil, keeping the bottom of the block as flush as possible. If the blocks are bulging, they won’t sit flat in the tray. You can use a knife, but I like to get my hands dirty and simply knock off and smooth off any mounds I find. I usually find mounded bottoms so this is an important step to getting the blocks just right.
FIll the bottom of the perma tray with spring, well, or de-chlorinated tap water until true leaves emerge and then transitioning to a light (half the recommended dose) of liquid organic fertilizer. Keep an eye on the trays every other day as dry indoor conditions will result in dry blocks within 48 hours.
The blocks are pushed out into a soil block propagation tray. We don’t just make them and drop them into unlined trays. We weave cotton rope through the base of the tray and line the propagation tray with a wicking material to help water the soil blocks from below. This provides the base for a passive watering system and we find this system works best for us.

The pale yellow tray is the perma tray, with 1” PVC pipes laid into its grooves. We then rest the propagation tray atop the PVC pipes that act as a trough for the bottom watering system. If you are interested in seeing our shopping list for soil blocks, head on over to my Amazon storefront. I’ve put a list of seed starting supplies up there including the 2” blocker we use, the propagation trays and the perma trays.
Despite being head over heels in love with this process, there are still some vegetables we don’t start in soil blocks. Things like onions and leeks whom I sow in 4” pots from the start just go right into their 4” pot where they hang out until they make it into the garden. Other crops with large seeds like peanuts and squash I start in 3” pots because I want to give their delicate roots as much room as possible before transplant, as disturbing roots can be really detrimental to these vegetables.
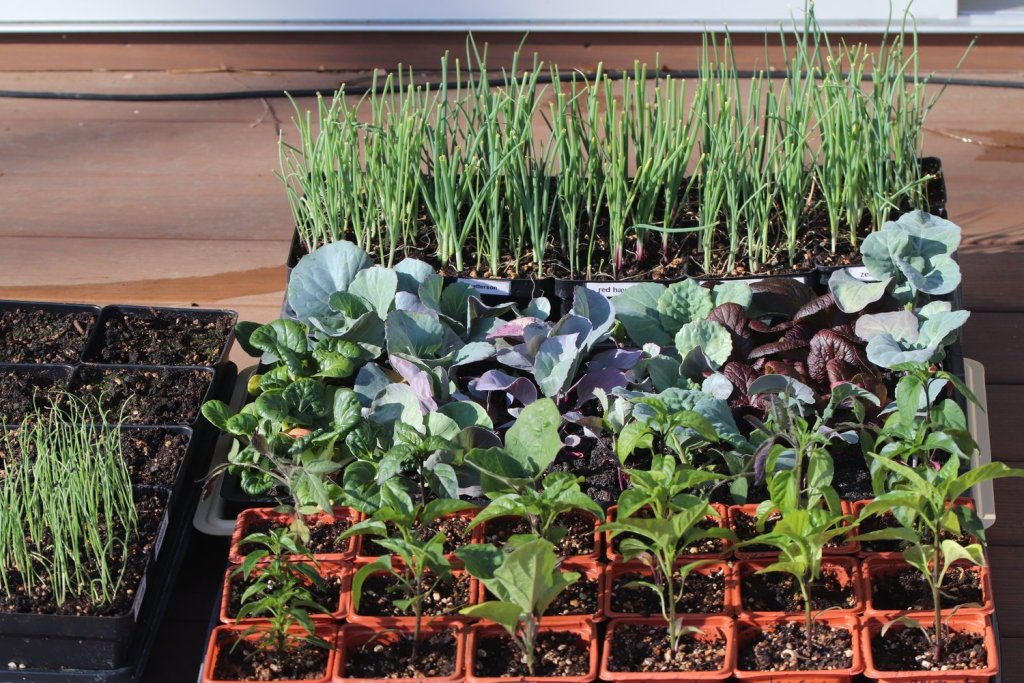
This is late March with plants taking day trips out to the deck for some hardening off. Our peppers we started in February got potted up to the 3” pots we’ve used for a few years; they are flimsy but we are very careful with them and will use them as long as possible. The onions are in their first home, a large 4” pot, while the tray of brassicas behind the peppers are in 2” soil blocks.
A Word about Coconut Coir
I would be remiss if I didn’t discuss the use of peat moss in this recipe. Since this recipe first came to popularity, much research has been done comparing coconut coir to peat moss, with mixed results. It took me several years of trials before I landed on an alternative that in general works nearly as well as this original recipe.
I first tried using just coir instead of peat and was never been happy with the results. Lots of stunted growth, and I now believe it’s because the coir wasn’t properly rinsed. But I’m happy to share that I’ve found Coco Loco potting soil is much higher quality and in general works as an alternative in this recipe.
-
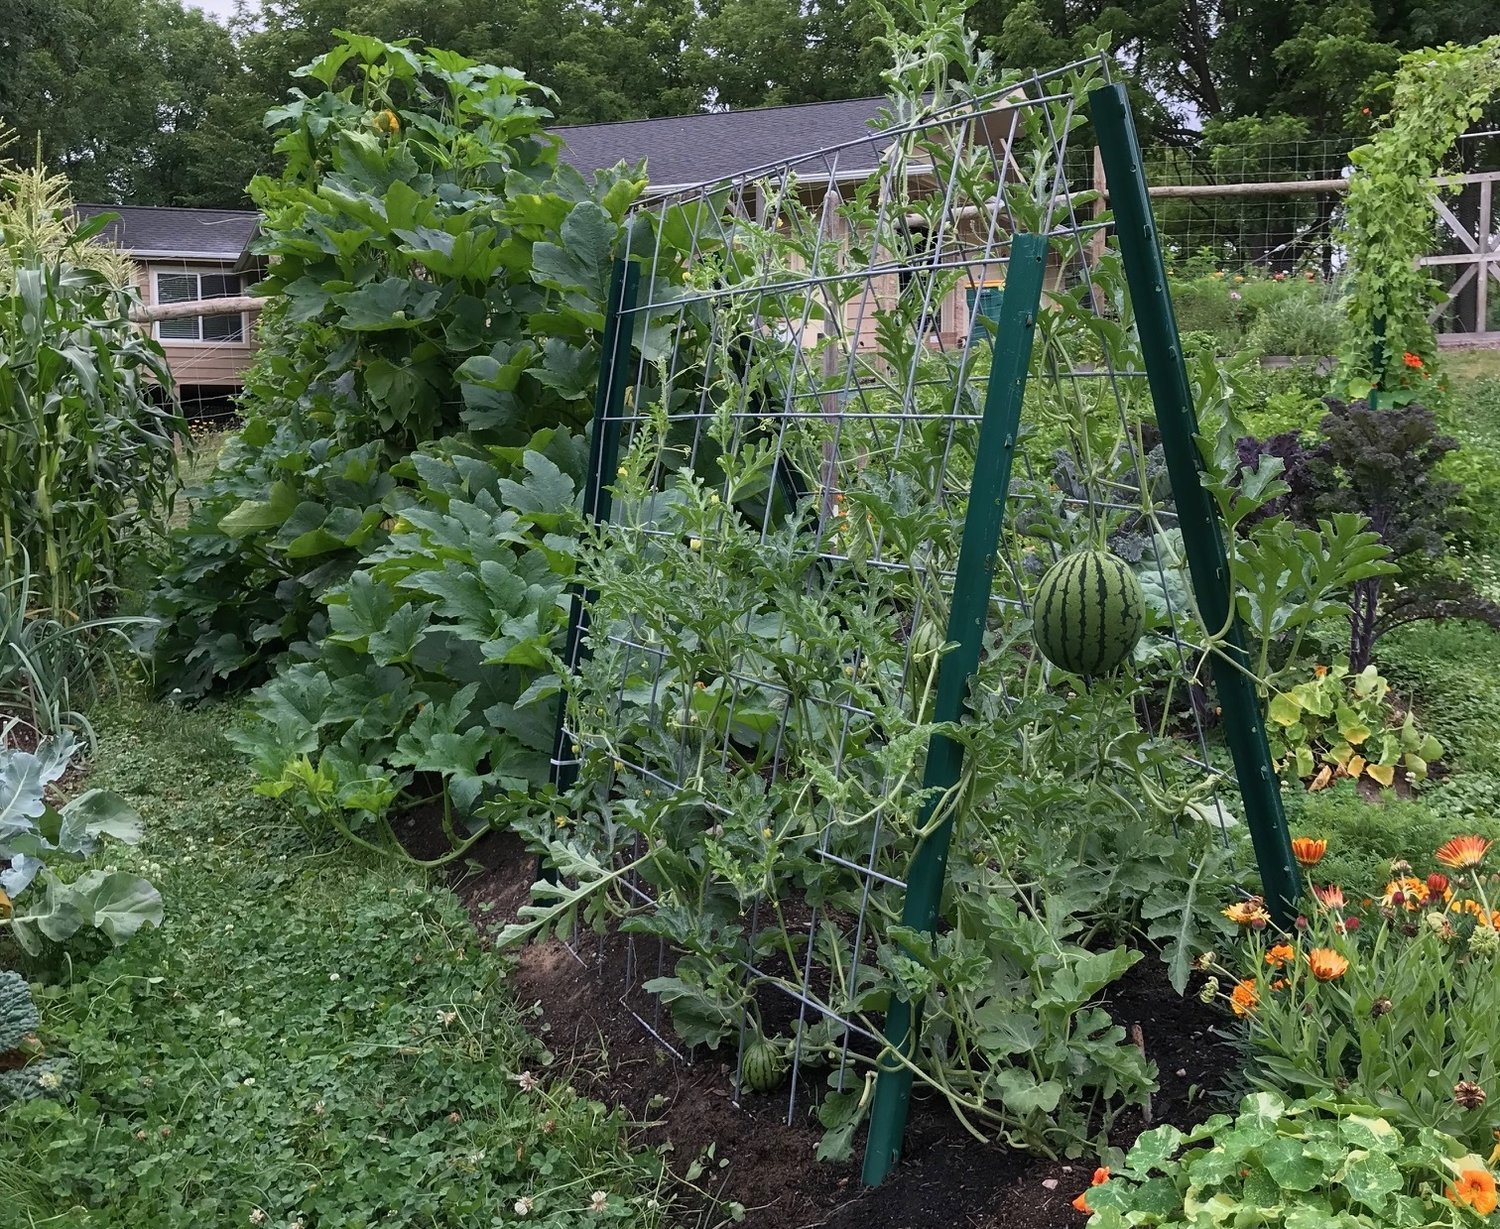
Growing Up: Trellises as Functional Art
The garden trellis, the structure of a beloved and well-tended veggie patch, the architecture that ties together even the smallest of spaces, is not only a utilitarian and necessary strategy for square foot challenged garden spaces, growing vertically adds that unspoken yet coveted visual interest to your landscape.
The eastern bluebirds perch atop our espalier orchard as they fly through our yard, as do the ruby-throated hummingbirds, finches, wrens with their sweet songs, and other wonderful winged friends. Last summer, we grew winter squash (kabocha!) vertically. Yes, a 4-pound winter squash held fast to its vine while dangling 3+ feet off the ground. Imagine sturdy stems that hold fast to the vine while the several pounded fruits drooped elegantly from mid-air. It was such fun to see, yet a bit of a challenge to photo-document.
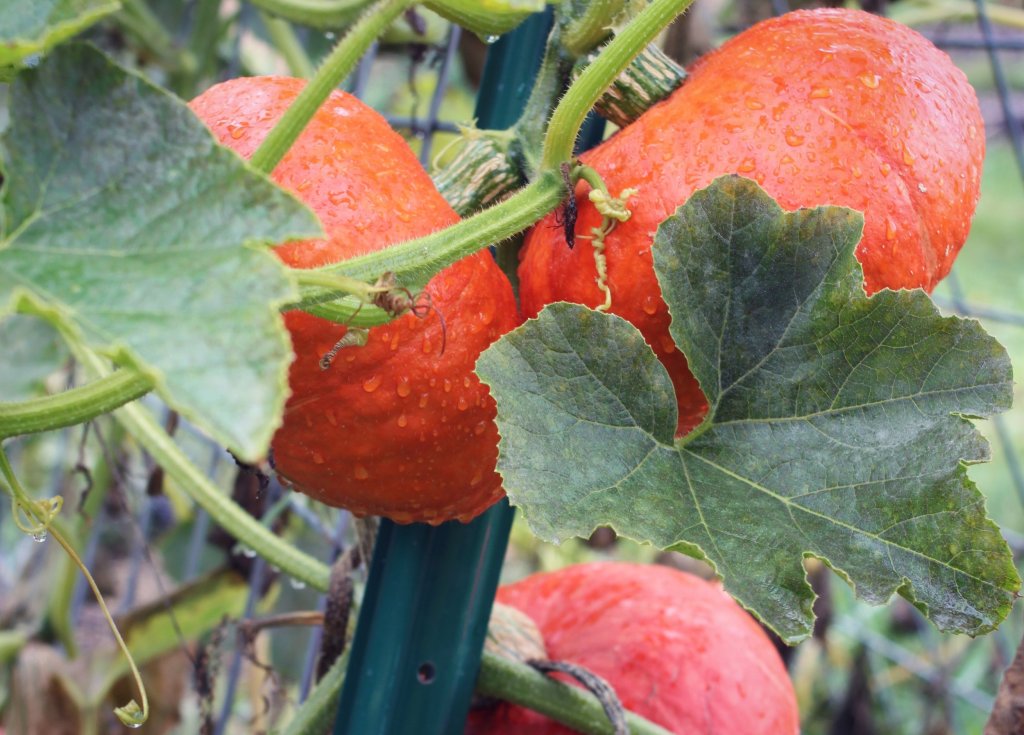
Even though space abounds in our home garden, we continue to enjoy the visual interest growing vertically invites into our garden, and each year find new ways and new foods to grow up. Vertical trellising anchors your space while increasing your overall growing space, saving all that ground where the butternuts or cantaloupes once roamed for other crops. So whether you are short on space or not, trellising benefits every gardener.
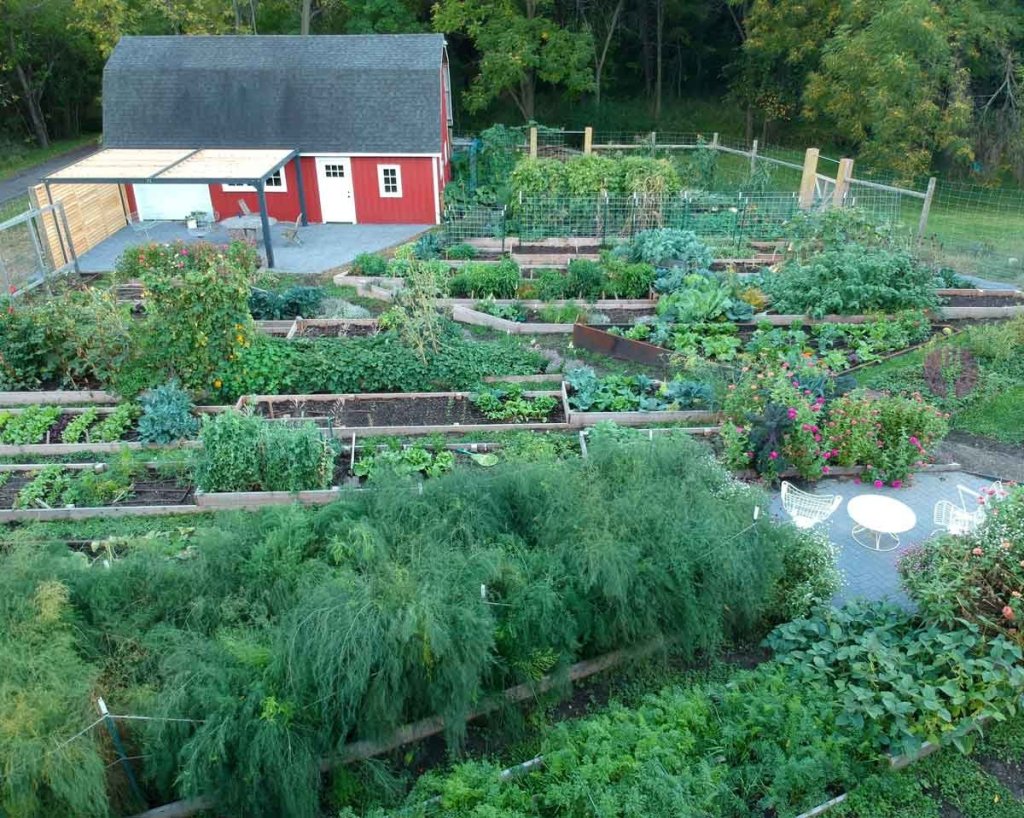
The following vegetables are vining and absolutely need some type of structure to grow up in our opinion, though not very heavy, so you can get away with sturdy twine for these crops:
- cucumbers
- pole beans
- cucamelon
- snow and snap peas
- tomatoes (except determinate varieties)
Food we like to grow on trellises to save space:
- winter squash
- cantaloupe
- watermelon
This year we are growing watermelon and cantaloupe vertically, a new challenge to us. Last year we grew them in the same space we are currently using for our sweet corn, but this year they are taking up, collectively, half the space they did last year. This is all due to their trellises. Their tendrils are much more tender than a winter squash, so panty hose are at the ready for fruit hammocks. If the need arises, I will tie up a sling for the fruit that looks like it needs support, but I am a believer in my plants who set fruit dangling in midair, so I think they know what their growing conditions are and don’t anticipate needing to intervene.

I really pushed our luck with this watermelon by marveling at its growth throughout July and not giving it one ounce of extra support. I let it grow and grow and it held fast. It was equal parts benign neglect and curiosity. Then, one morning I noticed it was on the ground. Luckily, it was pretty close to fully ripe so we enjoyed it over the course of last week.
There are bush varieties of string beans, snow, snap, and other sweet peas that don’t require trellising. However, we find that even the bush varieties of snow and snap peas benefit from a little support. To that end, we install a 3’ high trellis for them to latch onto – and they always take us up on the offer.
Additionally, you can purchase bush type varieties of winter squash. Personally, we enjoy the look of a butternut or kabocha squash dangling effortlessly off a sturdy trellis in early September. It never ceases to amaze me how a single flower in summer grows into this sturdy, food stable food source in the waning days of the season.
Choose Your Materials to Your Liking
Trellises can be made from whatever is around, piecing together your resources to a custom cedar design – or as simple as metal panels. Whatever you dream up within your budget are the right materials for the project. The only rules are to create a structure tall enough and strong enough to accommodate the crop’s ultimate height and fruit-bearing weight.
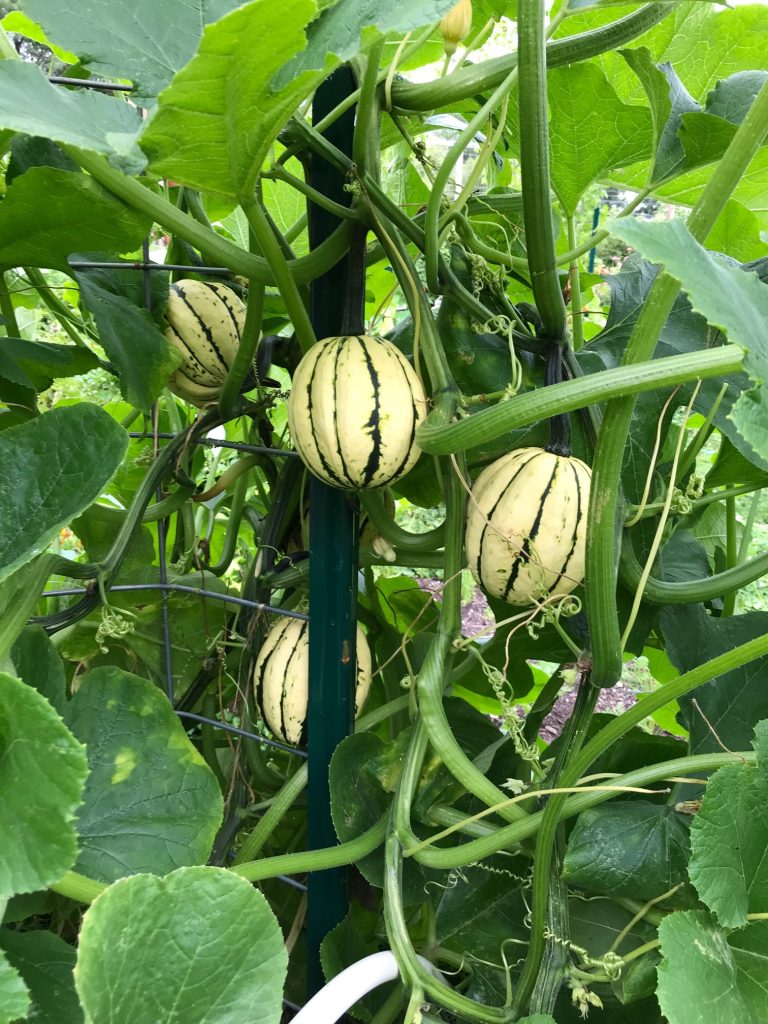
We have built trellises that span the full gamut, from bamboo stakes and twine to custom-built cedar panels with intricate, geometric patterns. Over the past few years, we have transitioned to using cattle panels, due in large part to their affordability and versatility. Not to mention they go together in a matter of minutes with zip-ties as fasteners and u-posts as anchors. And because they are light on the eyes, the foliage and plants will climb and cover them and the panels practically disappear on the landscape, which I really love. It’s like magic, plant magic.
We purchase 16-foot panels from our local farm supply store (roughly $24/panel) and cut them in half with our metal crimper before bringing them home. Generally, the base panels for our trellising is 50” x 8’. We put these both horizontally and vertically in the garden depending on the vining crop.
For cucumbers and peas, the panels go horizontally. For melons, winter squash, cucamelons and pole peans, they go vertically. We have been using U-posts at an angle to make a teepee with the panels, then zip tying the panel at the top and in one or two places along the U-post for added sturdiness.
I highly recommend growing any and all vines vertically; it looks beautiful and increases your growing space. And even for us, where you might think space isn’t at a premium we both love the look of vertical growth but we also appreciate the added flexibility of having a bit more growing room to explore last minute ideas to max the space out.