
Your cart is currently empty!
Welcome to Meg’s Blog
-
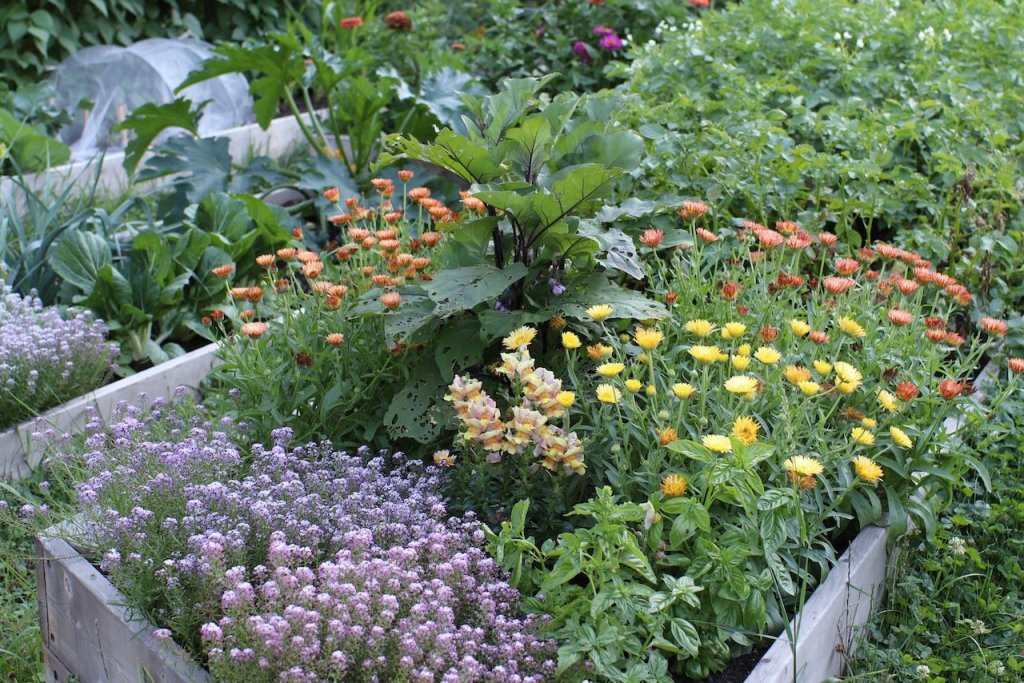
How I Keep my Lettuce Crisp
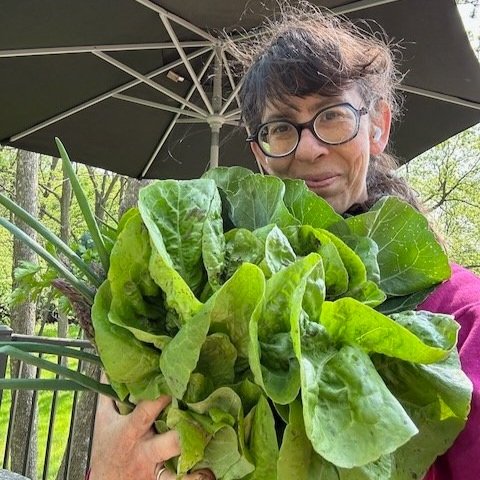
We are head lettuce enthusiasts. It’s crunchier and crisper than leaf lettuces. But if you are like me, maybe you forget or don’t have time to pick your lettuce first thing in the morning and you’re running out at whatever time you remember for a head of lettuce for dinner.
Or maybe you’re like me and you harvest it all and then forget to put it in the fridge and it stays on the countertop a bit longer than you’d publicly admit and ends up looking lifeless.
Well, I’ve suffered from all of these woes and I’ve found a few tricks for perking our lettuce back up to life.
First, of course, whenever feasible, harvest as early as you get up and into the garden. And then get that lettuce out of the sunshine and into the kitchen Either drop it into a large bag or better yet, rinse it with water and then put it into a bag or bowl and into the fridge.
I’ve been playing around with just leaving our rinsed lettuce in our salad spinner. This is a bit bulky, but I do this and then usually don’t spin it until I need it.
This seems to keep the greens in a cold, high moisture environment which keep them in pristine quality for often more than a week, though it’s only in the height of lettuce season in late spring that we need to store it for that long.

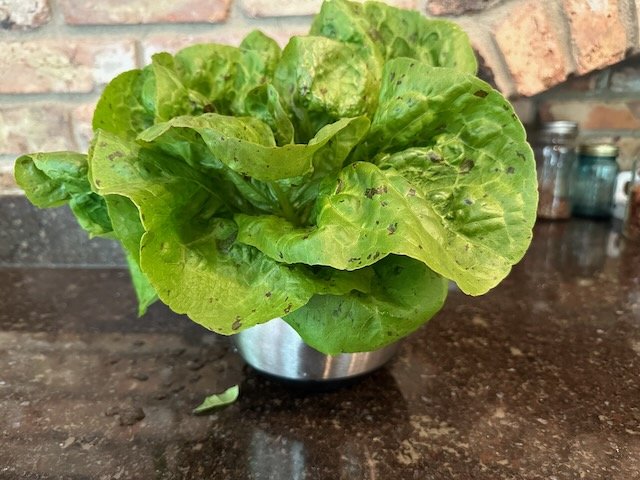
Rinsed, pulled off the main stem of the head, and stored with the lid on. We pull from this every night for a fresh salad. I’m also a fan of the 2 gallon plastic bags for storage once they are rinsed well. It is an alternative to locking in the moisture.
The key is to keep them in an enclosed container. I just found the head I harvested yesterday that was sitting in a shallow bowl of cold water inside the fridge completely wilted. So I’ve pulled all the leaves off and dunked them completely in cool water and put them back in the fridge.
A very short term way to store lettuce is to put them in a bowl with ice cold water. This will keep for a few hours on the countertop if you’ll be using them soon and they were perky at harvest. Think of lettuce like flowers. If they don’t continue to uptake moisture, they will wilt. We want the longest vase life out of them, and for lettuce that means perky leaves and a nice crunch.

My lettuce left in the fridge in that bowl of water completely wilted overnight, so I tore it all off the stem and it’s back in the fridge rehydrating. This lettuce is not doomed, but this is also a last-ditch effort for extraordinary circumstances (that some of us may call everyday life).

Much improved after a few hours in an ice water bath. After I soaked it in ice water for several hours, it went into a 2 gallon bag along with the salad spinner lettuce. I wrapped the dripping leaves with a fwe paper towels and deflated the bag. It went into our cooler and up north with us, and we enjoyed three nights of fresh salad and you’d never know the lettuce was limp and lifeless a few hours before we departed!
-
Garden Novelty
I grow tired of routines. I thrive in new situations, relishing the unknown. I derive deep joy in building new friendships and making new connections.
I’m growing more and more certain this is exactly why gardening has outlasted many friendships. It never gets old, and easily keeps my undivided attention.

Each spring I can — and often do — reinvent myself.
Try new things. Garden in different ways, with different plants. And new interplantings. Build trellises in new ways. Succession plant even more unconventionally. Compost my 25 years of experience and plant it anew.
Gardening will remain new beyond my lifetime. The newness is what a garden thrives on. Seeds emerging and promising a future.
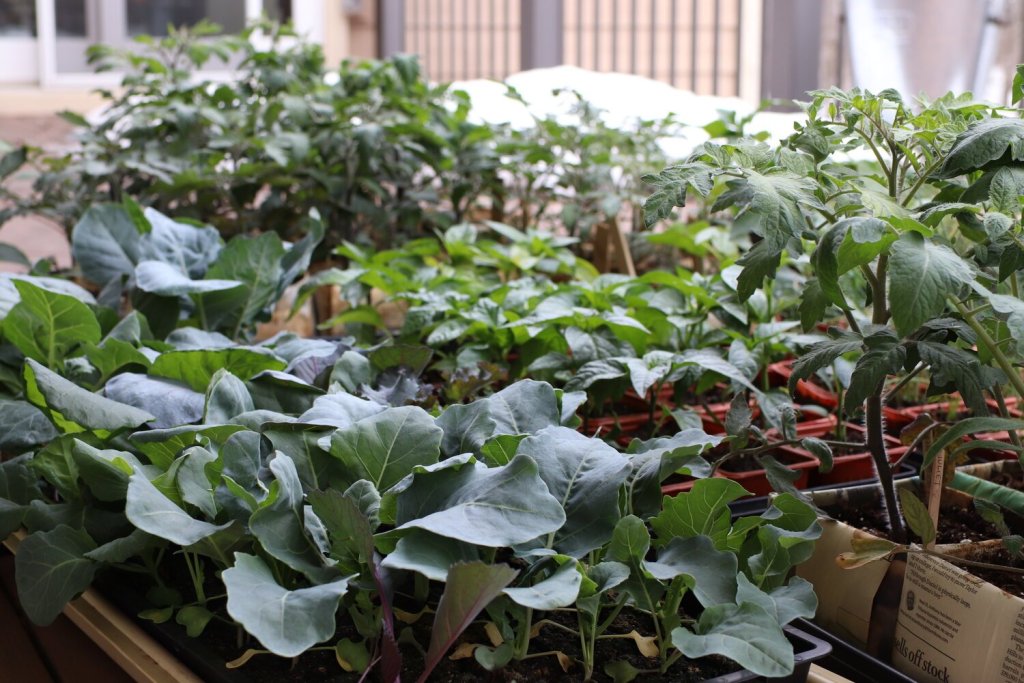
With this newness I took on 4” soil blocks this spring. One MGG member questioned why I don’t use them, and an attendee from one of my local talks this winter shared that she uses them and loves them.
These two interactions were enough impetus to return to the unruly technology that I had borrowed from my friend Joe back in 2019 only to send it back to Georgia after a few unsuccessful attempts.
It’s not an inexpensive garden gadget and because I’d failed years ago, I was reluctant to try again. But I figured the only way to grow was to questions what you consider a tried and true method. Sometimes questioning them brings you back to your initial way of being, but it’s possible you will build new pathways too.
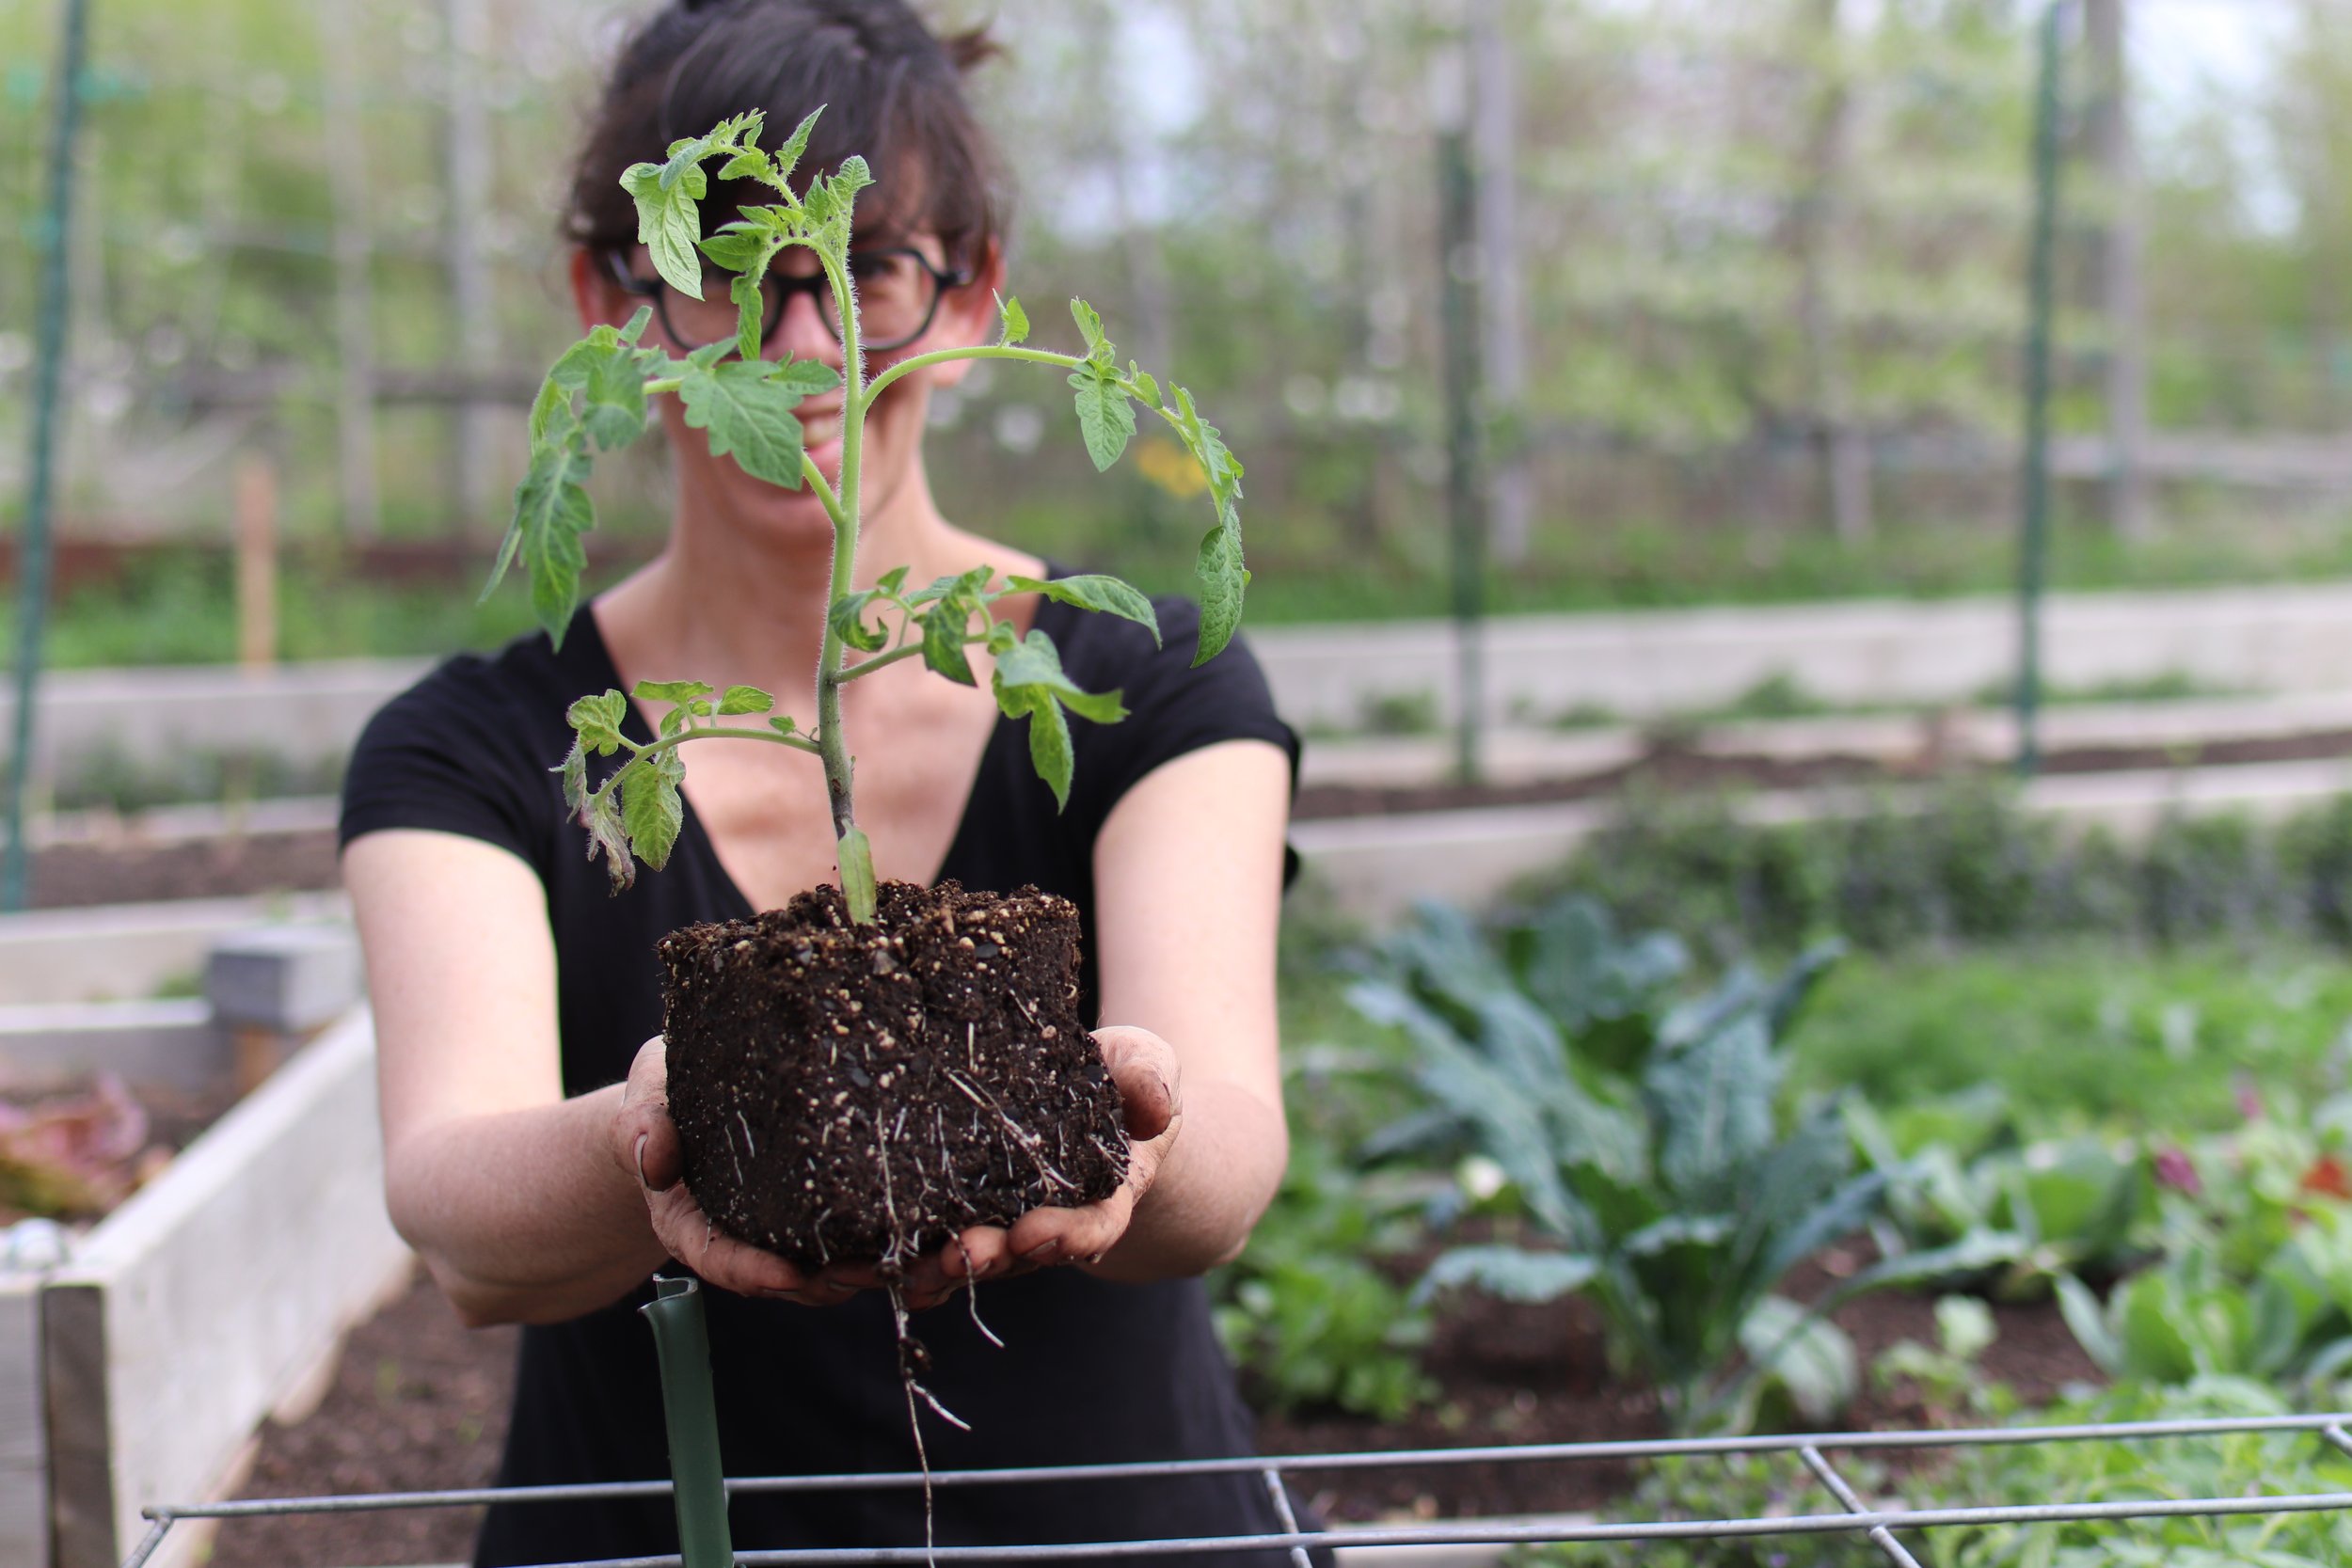
With this curiosity and a commitment to give this technology many trials this season, I used them for some of my determinate paste tomatoes (Italian Romas); the other paste tomatoes went into newspaper pots. In hindsight I’d have planted them earlier because you can’t plant them deeply.
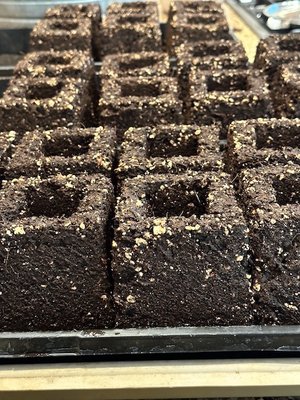
I also used them for some of my celery and artichokes. It is taking some time to get used to making them, but I may have convinced myself this is a superior pot to my larger newspaper pots.
More on making this coming soon, but they didn’t really save time I don’t think. The amount of care needed to mix the soil to the right wetness (it’s much soupier than my regular soil blocks) I believe negated any time needed to fold larger pots.
That being said, these are probably 50% deeper than my newspaper pots. And that is significant.
I’m enjoying watching my cucurbits sprout in these, marveling at the opportunity to reinvent my garden rituals.
-

Mid-May Garden Tour
First virtual tour of the season is up on my You Tube channel. Enjoy!
-
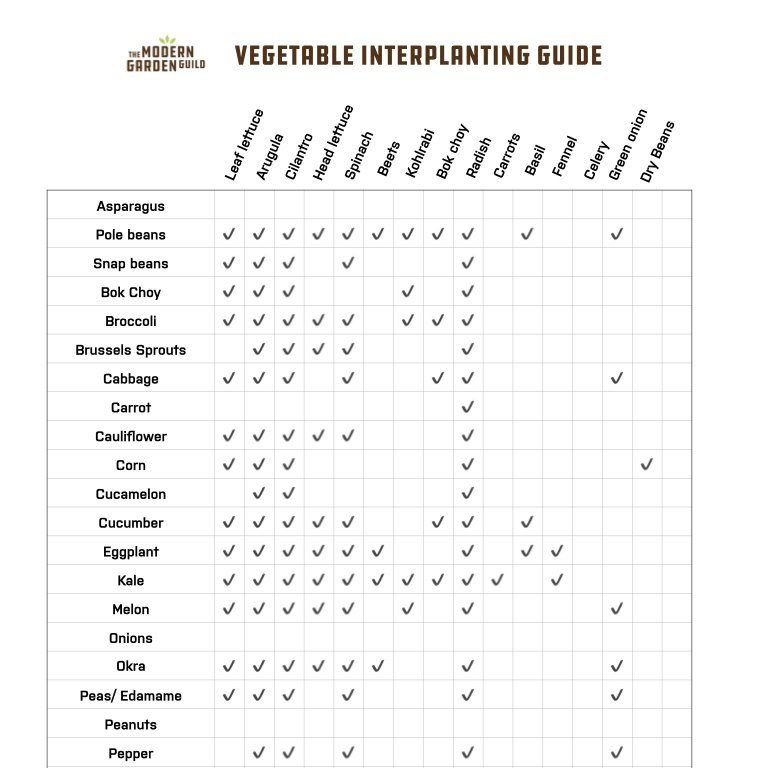
Interplanting Vegetable Guide
Even though our garden is admittedly sprawling, I do have some hard and fast rules about how I interplant.
And I sometimes break them, like last year when I did my intensively planted bed and interplanted onions. That didn’t go well, as expected, even though I’d hoped for better results because not everyone has space for a bed of just onions.
But there is quite a long list of vegetables and herbs that I do regularly interplant. It allows me to maximize even our rambling space more effectively.
The lesson I hope you’ll take away from this guide is that I tend to pair understory, or low growing, veggies and flowers with overstory, or rambling/vining crops. The understory plants usually mature before the overstory has fully matured and shaded out the soil (or understory).
- Tomatoes and alyssum
- Pole beans and arugula
- Corn and radishes.
- Cucumbers and calendula
The Never Interplanting List
Before we get to the good news, let’s get the serious business out of the way. I have a short list of things I don’t ever interplant.
Onions and Garlic
These crops are somewhat counterintuitively a bit of heavy feeders (I guess maybe not so counterintuitive because they produce bulbs and are in the ground for a while). With shallower roots, they don’t have access to deeper nutrients or water so if you interplant with them, they will not reach their full potential though it’s likely they will produce for you. I’ve grown them for many years interplanted but now just keep them as their own planting block and it’s by far superior quality produce.
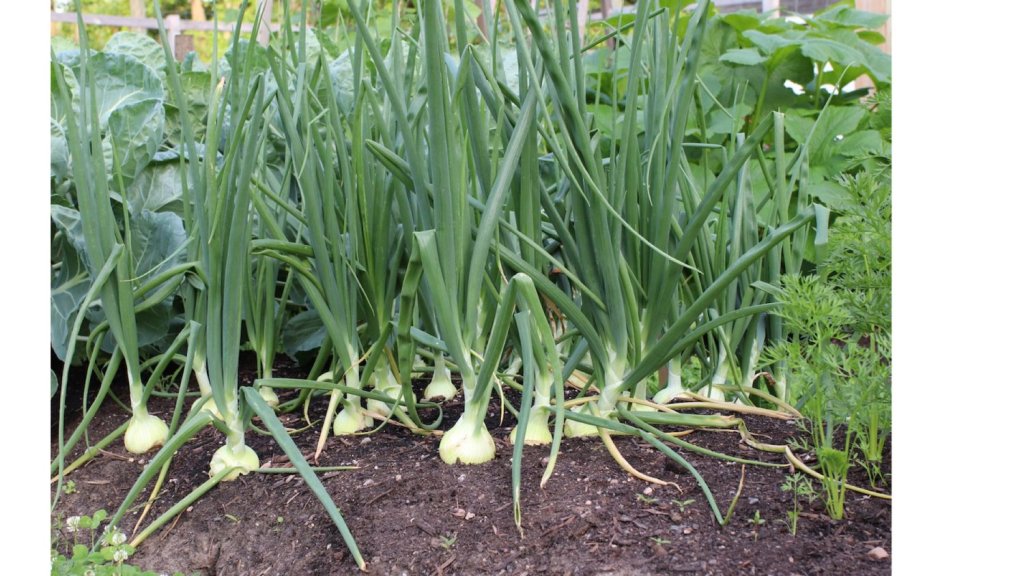
There’s just not room for other crops with garlic and onions, so give them the space they need to.thrive. Peanuts
Low growing and needing to be hilled, there’s zero negotiating this one. I never interplant my peanuts.
Potatoes
Similar to peanuts, we always hill them so the soil gets disturbed several times a growing season so for that reason potatoes are a one-succession space hog in the garden annually.
Staggering Successions — Interplanting with caveats
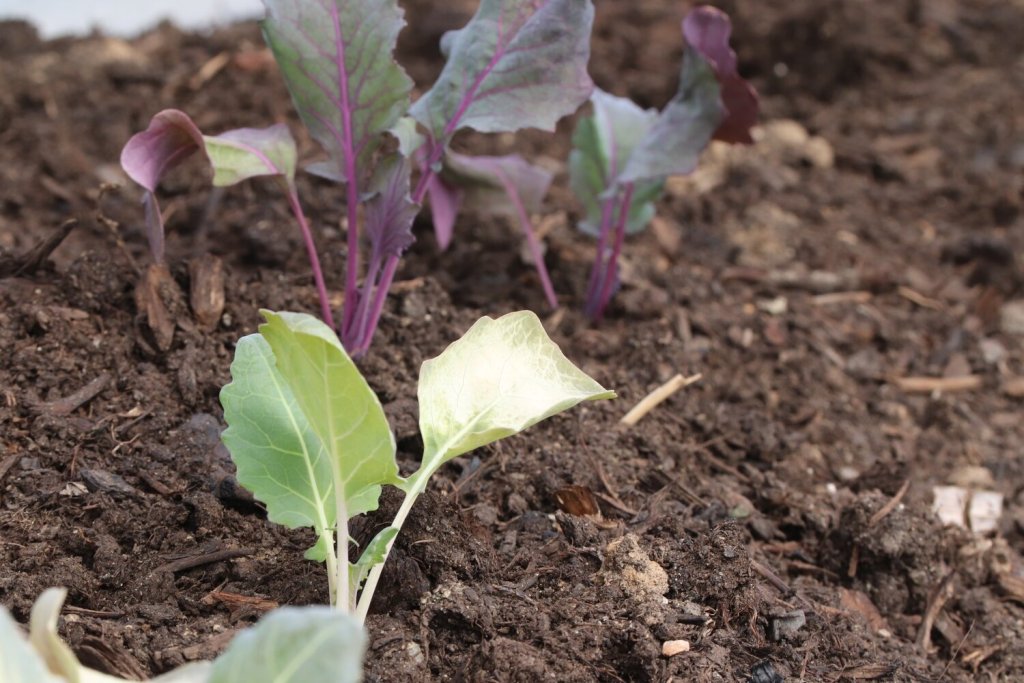
There’s a large list of crops or allocated space where I do interplant, but it’s almost always half a succession apart. What do I mean by this? Where my summer cantaloupe will eventually climb currently has our second succession of kohlrabi underneath and bok choy and a cabbage quite close (and will be shaded out eventually if the cabbage lingers longer than I hope it does).
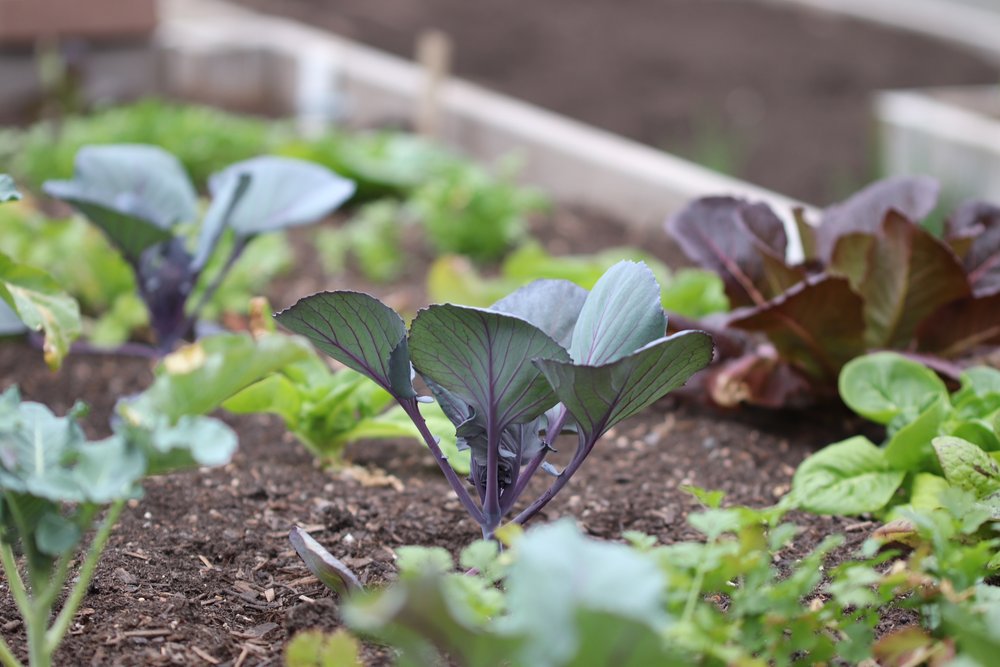
When you interplant two similar growth habits, you probably should be giving them a little more room. For me that’s things like beets, which I tend to try and tuck in between cauliflower sometimes, but not broccoli or cabbage as their leaves tend to grow more wide than tall. Cauliflower has a bit of a cupped growth, which leaves a small but feasible understory for beets if timed right.
I can utilize the wide row spacing of sweet corn in the first six weeks of growth by sowing rows of radish, arugula, or cilantro around the same time as I plant the corn. Mature corn really shades out the understory, but you can stagger those successions to make the most of that square footage.
Best Bets for Interplanting Vegetables
The most utilitarian interplanters include leafy herbs and greens, radishes, and green onions. I will transplant these almost anywhere. Almost, except between peanuts, potatoes, and onions or garlic, as mentioned above. They mature quickly and remain in the understory so provide a very low risk for outcompeting whatever main/overstory succession I plan for that space.
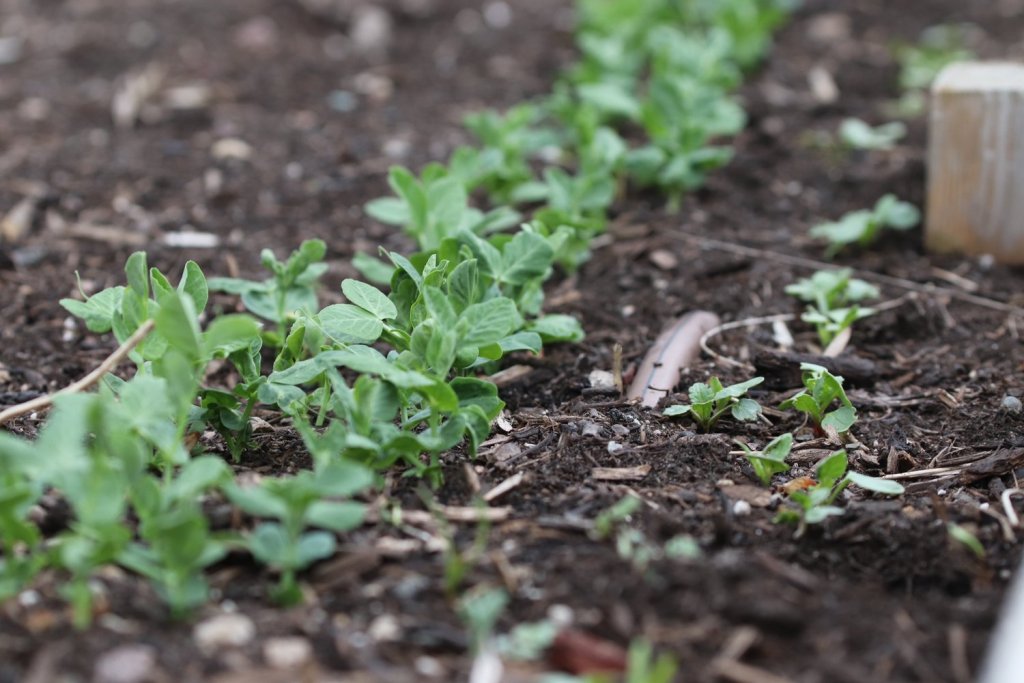
Peas and radish are a happy combination. Green onions, arugula, and cilantro also play well with spring peas. Even with cabbages or broccoli that only top out around 24” tall I can safely tuck a row of cilantro, radish, or arugula in between rows safely due to the slower growth of the brassicas.
Interplanting for Beauty
I use interplanting as end caps for my main garden path with some key vegetables: eggplants, fennel, and some of our peppers. In part it’s because I run out of space elsewhere, but also because these are often strikingly beautiful vegetables that deserve to be front and center and comingled with each other and lots of flowers.
Basil, alyssum, calendula, and snapdragons engulf a happy eggplant in this end cap of a garden row.
Interplanting Flowers
I have taken my own personal approach to interplanting flowers, but a lot of the same rules apply with flowers that do with vegetables. You must keep an eye on the pairings, understanding their growth and if they will overlap spatially. You want to avoid that as much as possible, because it will reduce productivity of the more shaded out plant.

Alyssum stays low and flops out of the bed, reaching for sunlight. The result is a cottage garden feel by mid-August.
My most-used interplanted flower is probably alyssum, followed by calendula. These also, by design, tend to remain low growing and have some tolerance for shade.
Marigolds I interplant almost exclusively with peppers, an admittedly biased approach; they work well with most vegetables, including tomatoes. They will get pretty large and mounded, though not as thuggish as the beautiful tufts of nasturtium.
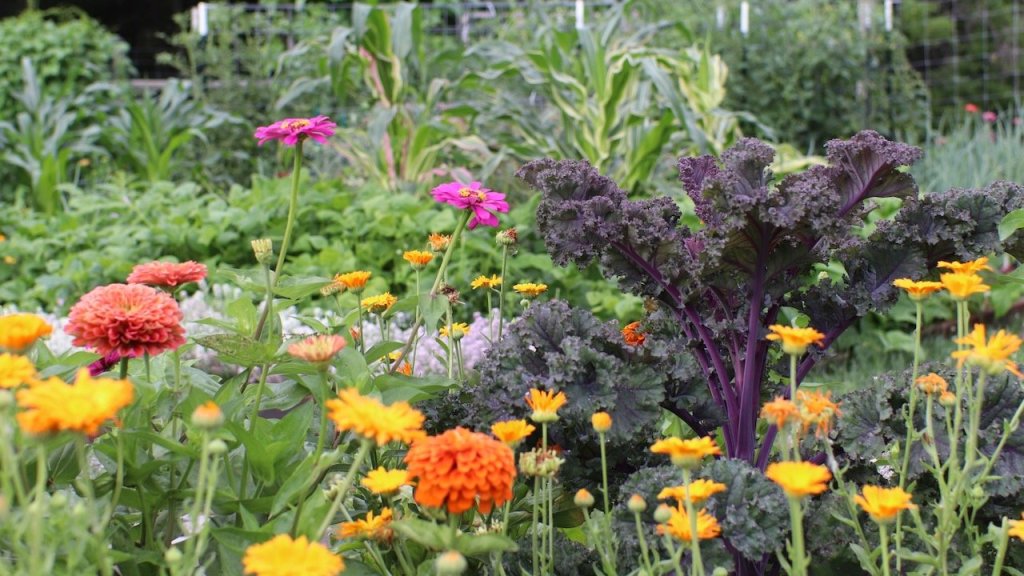
Is the kale interplanted or are the flowers interplanted? Kale is another ornamental in our garden and gets planted almost exclusively among our flower beds. You’ll notice on my downloadable guide that I didn’t put strawflower, dahlia, or globe amaranth with any other vegetables. These are larger flowers and as such I plant them in the garden but in flower beds. Sunflowers and zinnia have very specific interplanting criteria for me: sunflowers go with tomatoes, though I increase my spacing to allow their cohabitation, and zinnia get interplanted with my scarlet kale in one of my flower beds, so it’s more like the kale in interplanted with flowers than the other way around.
I hope these charts give you some ideas, confidence, and opportunities to squeeze more food and flowers into whatever size garden you’re tending this year. I am sure I overlooked something, so use this as it’s intended to be used: as a guide. Let your favorite foods and flowers be your ultimate guide.
-

Nicking Nasturtium Seeds
A few years ago, I had my abysmal nasturtium germination rates. My first sowing of probably 40 seeds yielded TWO, yes two, plants. I overnight soaked the seeds, then drained them and put them in soil later the second day. I kept the soil moist and it took about a week for the first — and only — seeds to germinate.
Ugh.
It was enough for me to question if I actually know anything about anything at all. And what I mean by that is am I even a gardener?
The seed coat on nasturtium seeds is solid, like a thick protection. Think a fairy-sized walnut. And that seed coat needs to soften to allow moisture inside to the seed so it knows it’s time to grow.
In previous years I’ve usually either sanded (nicked) the seeds or soaked them. I may have even sometimes done both.
Because I really wanted lush pink nasturtium tufts in the garden this summer, I ordered more cherry jubilee nasturtium from Renee’s Seeds about 2 weeks ago and started over. This time I wanted to be more methodical to see if I there was a different way to help these seeds successfully germinate.

Simply take some rough (60 grit) sandpaper and carefully sand off a corner of the seed coat to hasten hydration and thus germination. A little bit goes a long way! Now, for perspective, in years past my nasturtium seedlings have thrived (see my April calendar below). So finding myself in this humbling situation is perhaps compounded by the seed quality of this new source. Or possibly the Coco Loco soil I’m now using. But I don’t feel like I’ve changed that much, and suddenly everything I took for granted failed for me. Well, not everything, but that’s what it felt like after 2 weeks and hardly any seedlings. Was I being punished?

So I decided to return to the concept of nicking, something I’ve tried but have been inconsistent about applying it to seed starting.
Nasturtium seeds are the only seeds I nick, by the way.
Nicking simply exposes a small area of the seed directly to the moisture in your soil. The results continue to blow me away. I have nearly 100% germination on these. And my soaked seeds have 2 plants across 6 pots (15 seeds) that have sprouted, and one started to emerge and has stalled.

Noteworthy is that my 2023 nasturtium are nowhere near where my 2022 nasturtium seedlings were. This is the great unknown of how our gardens will unfold. It will all catch up come summer.
I planted the seeds into 4” pots instead of 2” soil blocks or my 72 plug tray. In the past, both of those were viable options for germination, so I’m not convinced that was my issue.
I am keeping the soil a bit drier this time around; it is the same soil medium, so that variable should not be impacting me.
But seeing how much faster and better they germinate with this little extra step, I will definitely keep doing this for many years.
This will work for seeds you want to direct sow, too. Just give them a little sand in one spot and drop them into your garden.
-

To Cover or Not to Cover
As we hover around our last frost here in zone 4 (it may have passed already, but I won’t call it for another couple weeks), the big question is what needs protection and what doesn’t. Is it safe to plant all the things right at last frost? What caution should I be taking and who can I set free?
Let’s talk about this. I love to plant my garden little by little, starting with the most frost-friendly plants: broccoli, cabbage, kohlrabi, bok choy, kale, radishes, spinach, arugula, head lettuce, radishes, and others. For me, those go both under cover 4-6 weeks before last frost AND they get planted or seeded out 2 weeks before last frost uncovered. At that point in spring, I’m pretty confident we won’t get a 22F degree evening, one that would be damaging but not lethal to what’s outside. I don’t lose sleep over a frost of 28 degrees, uncovered, with my cold hardy crops, especially if they’ve been in the ground for a few weeks. It is a truly liberating time of early spring for me!
If you have seeds for these crops and want to sow them, you can confidently go ahead without any need for extra protection. The exception is I always grow my cabbages, broccoli, and kohlrabi from transplants. Everything else can safely be sowed now, along with carrots, beets, and even peas (mine are just getting going, another nod to this most sluggish warm up).
Celery, cold hardy flowers such as alyssum, snapdragon, poppies, and calendula can also go out during these 40-60 degree days with nights hovering in the low 40s. Artichokes also need a cold period (about a week and a half) to produce buds (cold vernalization is the term) and if hardened off, now would be a great time for me to transplant them.
Onions get transplanted without any protection about 2 weeks before our last frost. Because they are frost hardy, I’ve learned to get them in the ground a few weeks before my major flower and vegetable transplanting marathon. It spreads out the workload, and I appreciate them for this.
But just because we are beyond our last spring frost doesn’t mean the garden is ready to welcome summer crops — not by a long shot. Here is what I am not planting out yet, because soil temperatures and evenings remain too cool for them to be remotely happy: tomatoes, peppers, eggplants, summer squash, melons, cucumbers, cucamelons, and sweet potatoes. These plants need soils warmer than 65, ideally at least in the 70s, before they will happily go into the ground.
I am just starting to harden off my tomatoes this week. I hope to get a low tunnel up to expedite soil warmth for some of the tomatoes so we can get them in the ground in about a week’s time. I don’t anticipate the delay of a week will do much to hamper our earliest cherry tomatoes, so I am just rolling with it.
Many hot season crops I haven’t even seeded yet and won’t until at least next weekend: cucumbers, melons, summer and winter squash, and my first sunflowers. I like to sow these indoors in newspaper pots to get a jump start on summer production — not necessary but it’s a tradition. If I was going to plant peanuts, now is the time to sow those too! These all need really warm soils and I never transplant or direct seed them until after the first week of June. Even a mild cool off in June will really throw a wrench in these heat lovers establishment, and while I push the season with cold tolerant crops, I’ve learned I gain very little by trying to grow hot crops in less ideal soil temperatures.
If you have tomatoes and are hardening them off, pay close attention to your soil temperatures at depth. What I mean by that is stick that meat thermometer as deep as the plants’ roots will need to be buried and do not transplant until the soil is at least 60F. I’ll chronicle my tomato hardening off approach all week, and share my transplanting and support systems too.
There’s another group of seeds that can go out imminently, crops I didn’t used to consider for early spring but now know better: potatoes, beans, and corn. Farmers here sow their earliest corn in April, as soon as they can get into their fields. I rarely get to it that early, but this year I did plop some sweet corn into a bed on April 26, the earliest I’ve ever sowed it. I always plant a second, late summer succession of sweet corn too. And potatoes can be planted in early spring, even before last frost, though I tend to use them more as a late season crop. Like brassicas, lettuce, peas, carrots, beets and such, these also need zero extra protection at this point. My kind of garden companion, to be sure. Beans need minimum soil temps of 50F to germinate, and we’ve got that, so those are seeds I’ll also be sowing earlier than ever.
Are you braving the elements with cold hardy plants?
-
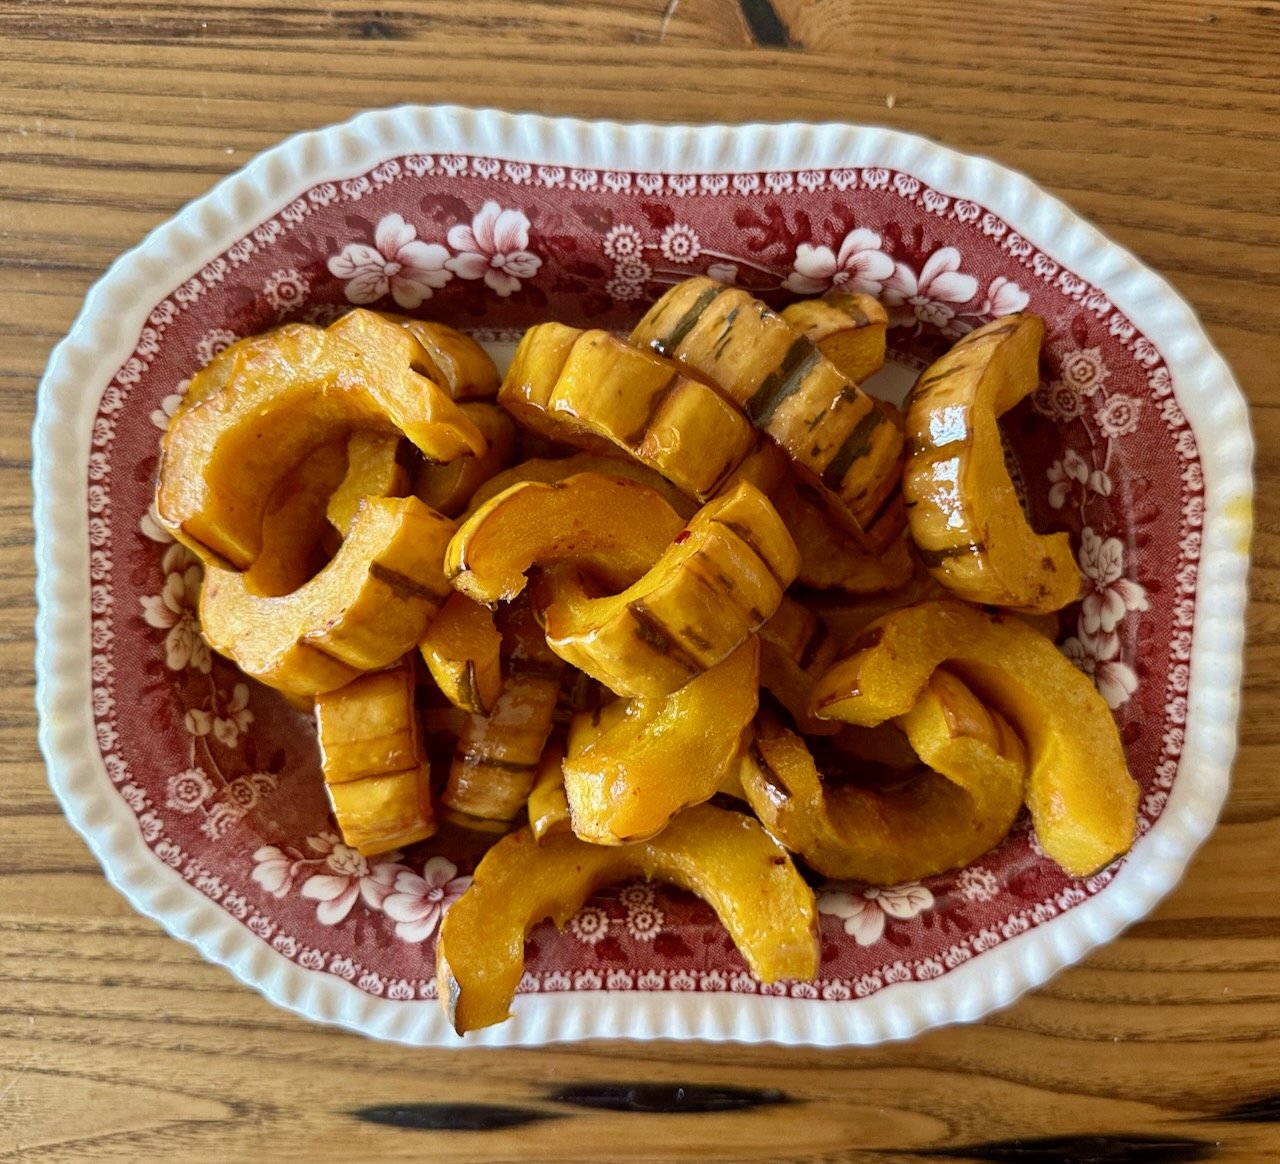
Oven-Roasted Delicata
Supposedly not as long of a storage squash as butternut or kabocha, I roasted these up just a few days ago in early spring. So, there’s that.
And that’s saying a lot, especially since some of my stored butternuts are softening at the base. These delicata are also nearing the end of their storage, and I thought this would be a great time for you to perhaps try this recipe out to see if you want to add these (I want you to want them!) to your grow list. These are Candystick Dessert Delicata from Adaptive Seeds, and honestly they are super sweet and wonderful.
Oven Roasted Delicata

My favorite thing about delicata is that the skin is edible. So the only thing you need to do to prep them is cut the stem off, halve them, and scoop the seeds out. It’s practically garden fast food, in winter. My kind of meal.
This recipe calls for my Everything Rub.
Ingredients
- 1 or 2 delicata, halved and deseeded
- 1-2 tsp Everything rub
- Olive oil
Instructions
- Preheat oven to 350 Convection (or just 350 bake if no convection option).
- Cut the halves into generous 1/2” thick slices (1.5cm).

- Gently drizzle and mix olive oil over all slices in a shallow bowl. Sprinkle and thoroughly mix everyting rub in as well.
- Lay flat on a sheet of parchment on a sheet pan.
- Bake for 30 minutes. Take out and flip all pieces. Bake 10 minutes more.
Notes
These are delicious warm with a burger or even cold as a quick afternoon snack out of the fridge.
-
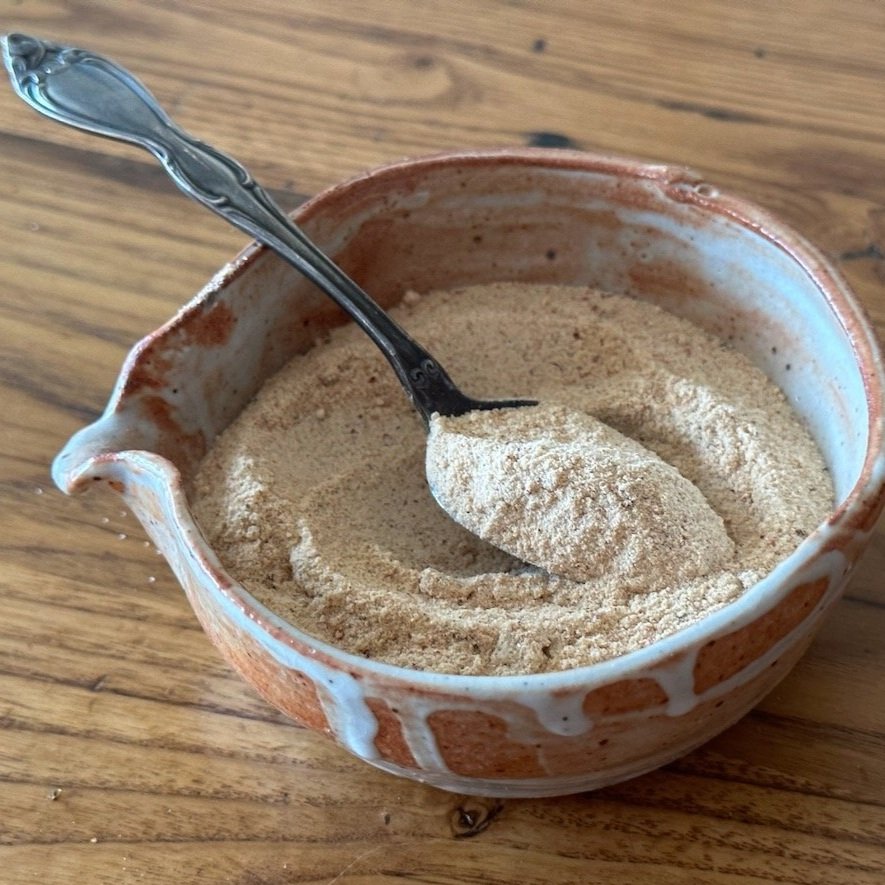
Everything Rub
Everything Rub

Ingredients
- 2 Tablespoons Smoked Paprika
- 2 Tablespoons Sea salt
- 2 Tablespoons Garlic powder
- 1 dried chipotle, to taste
Instructions
- The paprika, chipotle, and garlic is usually homegrown.
- Grind the paprika and chipotle fresh for this recipe using an old coffee mill. Be careful breathing in the flakes … it will be arresting. It happens to me every time.
-

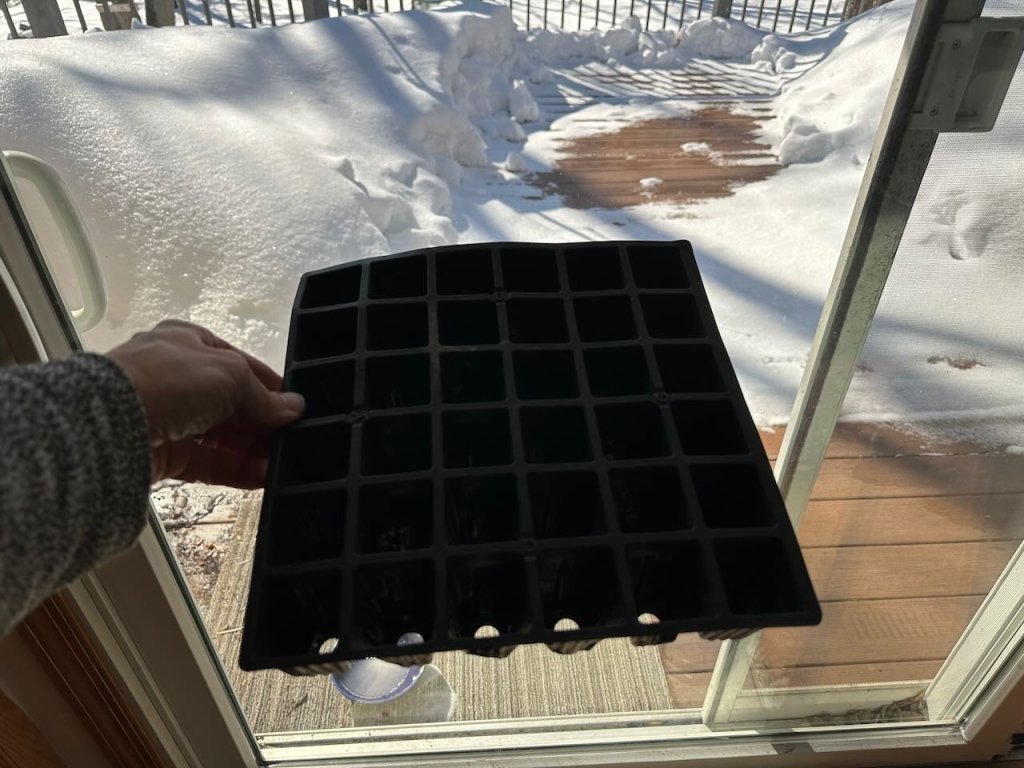
Self-watering seed starting trays
Subscribers asked, and I shared. Learn how I setup our self-watering trays for seed starting season, which is already here!
-

Hardening Off Schedule
Tis the season for trying our patience. And this topic is a perennial must-cover because for many new gardeners this process is confusing. And even for seasoned gardeners, it’s often rushed or even, gasp, a fleeting day before the planting itch is irresistible.
I’ve been thinking about how to make this process straightforward for everyone, and this is my best attempt. If you know me, you know that I am anything but a straightforward kind of person with writing and speaking, so bare with me. I hope this makes sense to all of you!
This is a 10-day process. It’s designed to slowly acclimate your plants to full strength sunlight. And also, by design, it will test your patience and may cause logistical headaches, the latter of which I try to workaround as much as possible. Sure, it’s possible to shortcut the 10-days, but there’s risk involved. I may use cloudy days around Day 8 as my green light to transplant, but I won’t ever risk it will full sun days and just throw them out into the wild before getting a really slow ramp up to the scorching full sun garden light.
Some highlights:
- Cloudy days are my absolute favorite for hardening off. They are softer light, and thus we can be looser with the amount of time outside. If days are cloudy, I set my starts outside under some row cover all day long. It can be that easy, but we need clouds to navigate with ease.
- Create a part to full shade scenario if you need to leave them out all day and can’t tend them. I know many of us can’t be home all day to pamper our seedlings. I personally prefer agribon/fabric row cover over shade cloth for this time of year as it adds frost protection and will create a bit of a hot house while also lowering the light transmitted.
- Using row cover will create a light shade — the more layers you add, the more you’re cutting sunlight. I will layer them for a couple of reasons. First, because if it’s going to be cool, more layers will mean more warmth. Second, If I want to leave them out all day, on a cloudy Day 1, I will cut the light by about 40% by doing AG30+AG19. Shade cloth will also work but it’s not a frost blanket, so that’s why I use agribon (also called row cover) for this purpose.
- Temperature: For cold hardy crops, I start this process when days will be above 40 for highs. For warm season crops, I prefer to begin this process when days will be close to 50F (10C) or warmer. These are minimum temperatures. I will keep brassicas and alliums out overnight down to a freeze, usually covered to keep their momentum going strong. For tomatoes and peppers and such, I will more likely bring them inside overnight if temps will drop into mid to upper 30s here. If I’m feeling crazy, I will leave them out, covered, under. the row cover as described below.

Shade is the way for the first half of my hardening off schedule. I don’t see a need for full sunlight until close to a week in. This will all but guarantee zero sunscald, which is irreversible foliar damage. Why risk it? - AG30 cuts out 30% sunlight
- AG19 cuts out 15% sunlight
- AG15, which is a lightweight insect protector and not a frost blanket, cuts out 10% sunlight
- 6 mil poly cuts between 10-12% sunlight
Day 1
Is it sunny? If yes, limit full sunshine to no more than 60 minutes. Alternatively, tuck them in shade and they can stay outside for about 2 hours.
Is it partly cloudy? Expose to no more than 2 hours of partly cloudy sunshine.
Is it cloudy or rainy? I let my plants stay out all day on cloudy days from day 1 under protection (row cover that cuts 30-40% of the light out).
****After the duration of full sun exposure, bring indoors. I don’t put mine under lights again once I start hardening off.
Evening: If temps will be warm enough, leave outside. This just makes the whole process easier on us.
Day 2
Is it sunny? If yes, limit full sunshine to no more than 90 minutes.
Is it partly cloudy? Limit to partly cloudy to no more than 3 hours.
Is it cloudy or rainy? Repeat Day 1 (stay out all day under cover).
****After the duration of full sun exposure, bring indoors. I don’t put mine under lights again once I start hardening off.
Evening: If temps will be warm enough, leave outside. This just makes the whole process easier on us.
Day 3
Is it sunny? If yes, limit full sunshine to no more than 3 hours.
Is it partly cloudy? Limit to partly cloudy to no more than 4 hours.
Is it cloudy or rainy? Repeat Day 1 (stay out all day under cover).
****After the duration of full sun exposure, bring indoors. I don’t put mine under lights again once I start hardening off.
Evening: If temps will be warm enough, leave outside. This just makes the whole process easier on us.
Day 4
Is it sunny? If yes, limit full sunshine to no more than 4 hours.
Is it partly cloudy? Limit to partly cloudy to no more than 5 hours.
Is it cloudy or rainy? Repeat Day 1 (stay out all day under cover).
****After the duration of full or part sun exposure, bring indoors. I don’t put mine under lights again once I start hardening off.
Evening: If temps will be warm enough, leave outside. This just makes the whole process easier on us.
Day 5
Is it sunny? If yes, limit full sunshine to no more than 5 hours.
Is it partly cloudy? Limit to partly cloudy to no more than 6 hours.
Is it cloudy or rainy? Repeat Day 1 (stay out all day under cover).
****After the duration of full or part sun exposure, bring indoors. I don’t put mine under lights again once I start hardening off.
Evening: If temps will be warm enough, leave outside. This just makes the whole process easier on us.

Before Day 6, I really lean on my row cover and hopeful cloud decks to make this process easy. Day 6 commences my first longer periods of direct and part sun. Day 6
Is it sunny? If yes, limit full sunshine to no more than 6 hours.
Is it partly cloudy? Limit to partly cloudy to no more than 7 hours.
Is it cloudy or rainy? Leave outside no cover (perhaps under an eave if it’s really a downpour).
****After the duration of full or part sun exposure, bring indoors. I don’t put mine under lights again once I start hardening off.
Evening: If temps will be warm enough, leave outside. This just makes the whole process easier on us.
Day 7
Is it sunny? If yes, limit full sunshine to no more than 7 hours.
Is it partly cloudy? Limit to partly cloudy to no more than 8 hours.
Is it cloudy or rainy? Leave outside no cover (perhaps under an eave if it’s really a downpour).
****After the duration of full or part sun exposure, bring indoors or set under a picnic table or other deep shade. I don’t put mine under lights again once I start hardening off.
Evening: If temps will be warm enough, leave outside. This just makes the whole process easier on us.

Full sunshine I try to reserve for after the first week! I know this sounds crazy, but at this point I know they are almost fully hardened off, having had many days of protected sun. At this point, sunscald is almost a non-issue. Once I’m a week in, I’m more or less letting them stay outside all day and night. Day 8
Is it sunny? If yes, limit full sunshine to no more than 8 hours.
Is it partly cloudy? Limit to partly cloudy to no more than 9 hours.
Is it cloudy or rainy? Leave outside no cover (perhaps under an eave if it’s really a downpour).
****After the duration of full or part sun exposure, bring indoors or set under a picnic table or other deep shade. I don’t put mine under lights again once I start hardening off.
Evening: If temps will be warm enough, leave outside. This just makes the whole process easier on us.
Day 9
Is it sunny? If yes, limit full sunshine to no more than 10 hours.
Is it partly cloudy? Leave outside no cover all day.
Is it cloudy or rainy? Leave outside no cover (perhaps under an eave if it’s really a downpour).
Evening: If temps will be warm enough, leave outside. This just makes the whole process easier on us.
Day 10
It’s transplanting day! I usually wait until the evening to do this to ease the transition. This gives them the night to acclimate to their new environs.
-

Growing Strong, Healthy Vegetable Starts from Seed
So you want to have your best garden ever? I join you on this venture, and each year we strive to do better. A seasoned gardener knows all too intimately that some years are better than others due to factors well beyond our control, but a lot of little things at the beginning of it all directly effect how strong your starts become. So I’m digging and sharing my top tips we religiously implement that produce our hardiest, healthiest transplants.
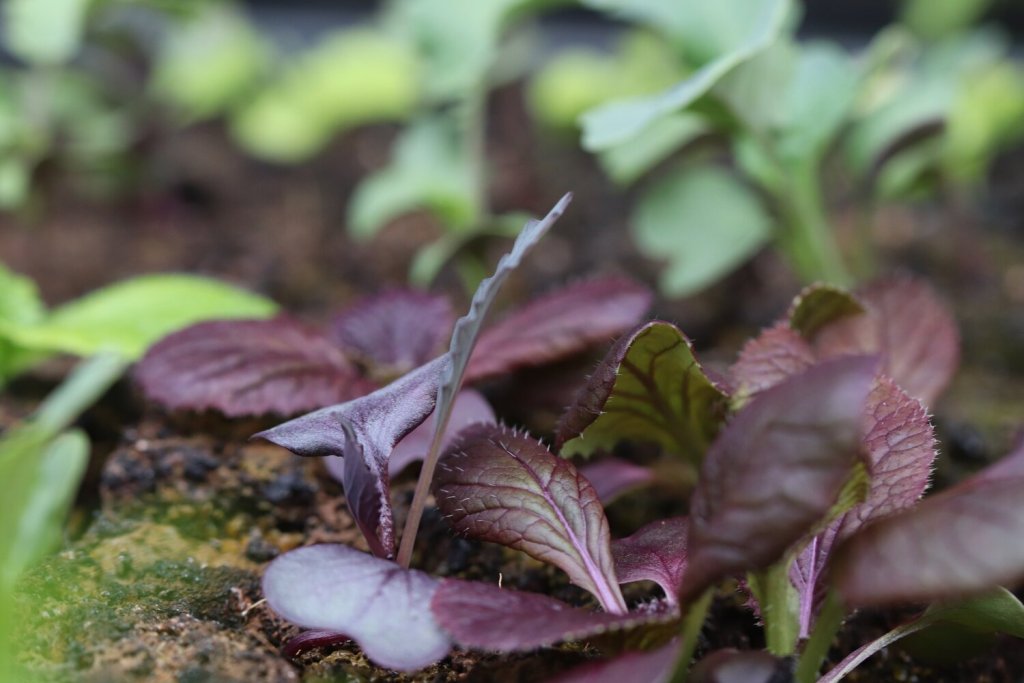
Seedlings are undeniably the most endearing indoors friends of late winter, and brassicas comprise a large proportion of the party. We love gardening from seed, from the endless options to bearing witness to the life cycle from seed to plate. It’s always been a huge focus of our garden journey, and thus garden planning. While it is nearly exclusively how we grow our food at this point, there were a few lean years where our garden was modest and our time short and our lives, well, enormously complicated, and we bought starts for many plants.
And guess what? The food tasted just as delicious and the joy just as deep, although the harvests weren’t as early as other years. However your path to growing food wanders, I am simply thrilled to know you are taking the steps to grow your own. It’s definitely the highlight of our years, and I hope it brings you the same joy and nutrition it does for us.
Before you jump into seed starting, you want to set yourself up for the best possible outcome: successful, thriving and strong plant starts. Because going through all the extraordinary — and often expensive — effort to source seed and supplies will only be as successful as your system and approach. We have a very specific way we grow our starts, and they are consistently vigorous and healthy. Over 20 years of growing from seed does that — it helps you hone and refine your craft, giving you this bounty of intrinsic knowledge from which you naturally draw your plant tending instincts.
In my heart of hearts I know it is more than just instincts. I know it’s experience, and for us that amounts to a collective four decades of growing and learning, and it’s the (now) innate process we implement to our land and our seed starting process that result in robust, healthy, and very productive plants. So I’m going to try to lay it all out for you, to spill my secrets, even the ones that are yet unknown to me. I will invite the keyboard to wander until I’m satisfied it has uncovered every last delicate morsel and peered inside each emergent blossom of this great mystery even I behold as a wonder.
The Glory of a Seed
In April the flower frenzy begins as I sow hundreds of flats of flowers into these 128 plug trays. I use these for zinnia, marigold, sweet alyssum, and cosmos.
Seed starting satisfies a lot of yearnings for me personally. First and foremost, to watch life literally erupt from a single seed, this ancient ritual, a world within a world waiting for the ideal conditions to flourish, is the most personally fulfilling, humbling, and exciting thing about gardening. To nurture that seed through to maturity where it then produces an entire head of cabbage, floret of broccoli, pounds upon pounds of cucumbers, basketfuls of tomatoes, overflowing bounties of beans and cucamelons and all the rest is the deepest, most satisfying work there is. It feels more like a privilege than anything else to grow alongside my plants each year, learning as much from my time in the garden as any other form of instruction.
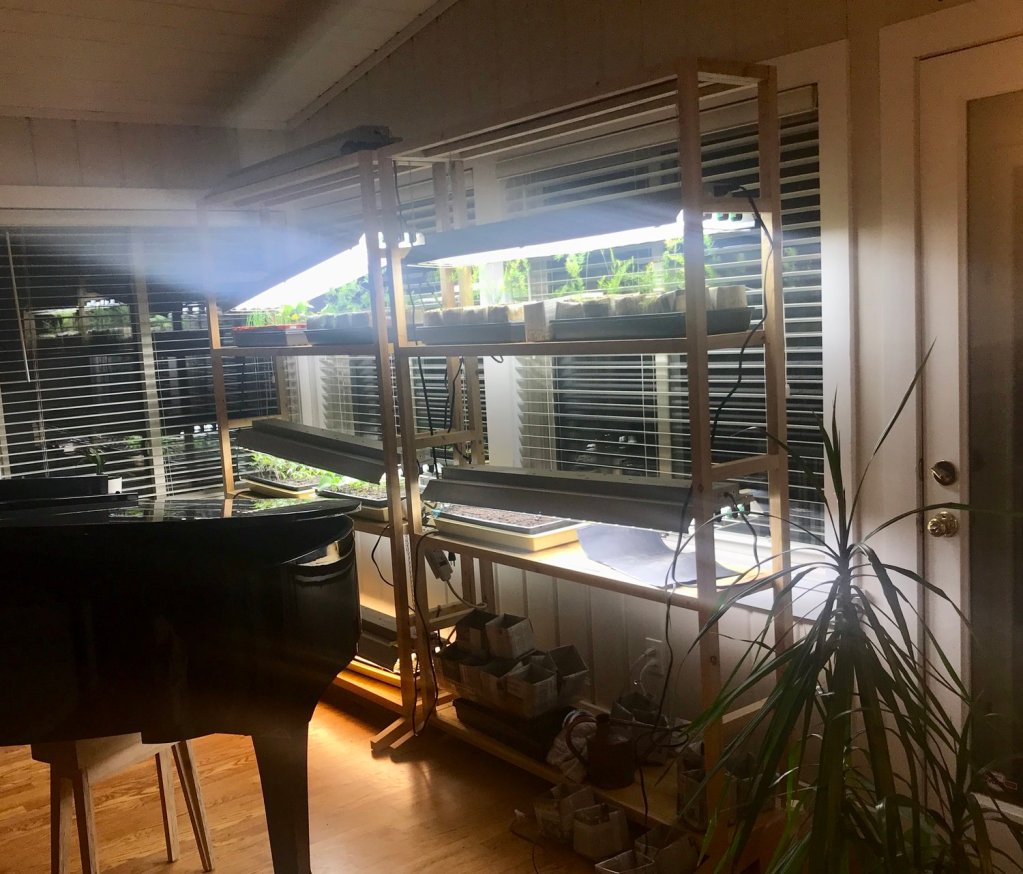
Tucked just off our main living area these beautiful plant stands my husband built house our seedlings starting in early February annually. The sunny spot is supplemented with our four-bulb shop lights. Growing from seed is so much a part of our lives that it takes over a physically large part of our living space from January through April – and we love that. Between snowstorms and arctic blasts of air, we huddle inside by the fire, watering our seedlings, bumping them up as needed, making room for new seeds and more and more flats of seedlings. We tend to these starts daily, checking for health and keeping a watchful eye on new germination. Providing the ideal growing conditions — basically creating a microclimate inside your home — is paramount to strong, healthy starts. This careful eye and thoughtful approach is what makes the difference between healthy and weak starts. As do a few other key ingredients.
The Right Stuff
For us, seed starting begins with the best growing medium, good quality and ample light, and warm soil. These are the three essential ingredients to successful and healthy garden starts sown indoors. And for us, it is the combination of these three elements that produce our strongest, healthiest veggie and flower starts.
The Growing Medium
Our soil block mixture blends compost and a lightweight soilless mixture with a small percentage of garden soil. While it contains available nutrients from the compost, we irrigate with a low concentration of liquid fertilizer after the first set of true leaves appear.
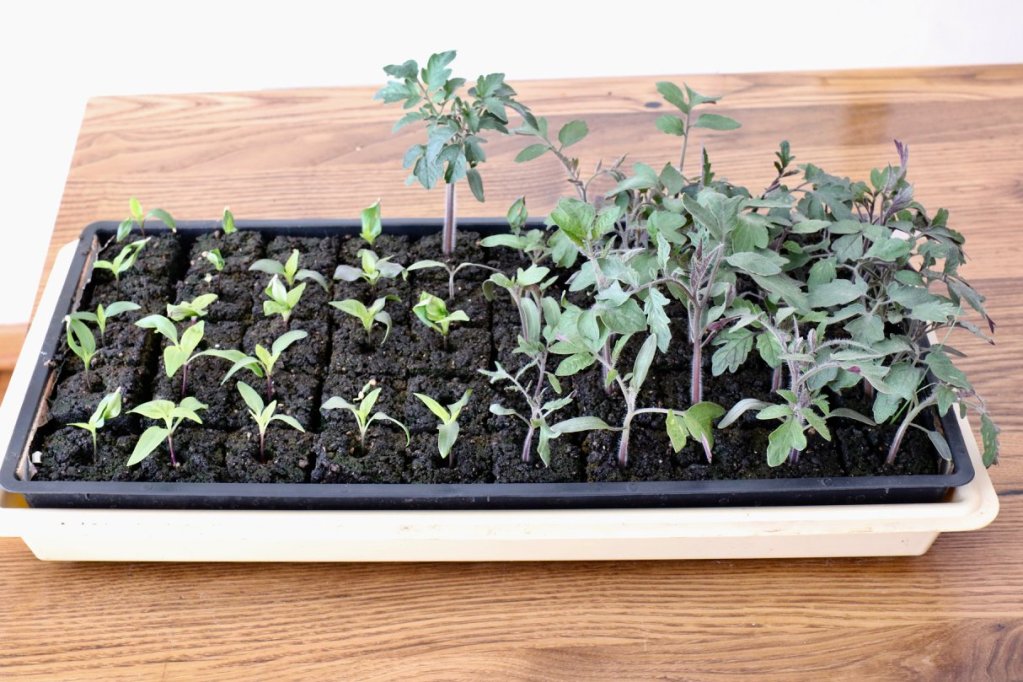
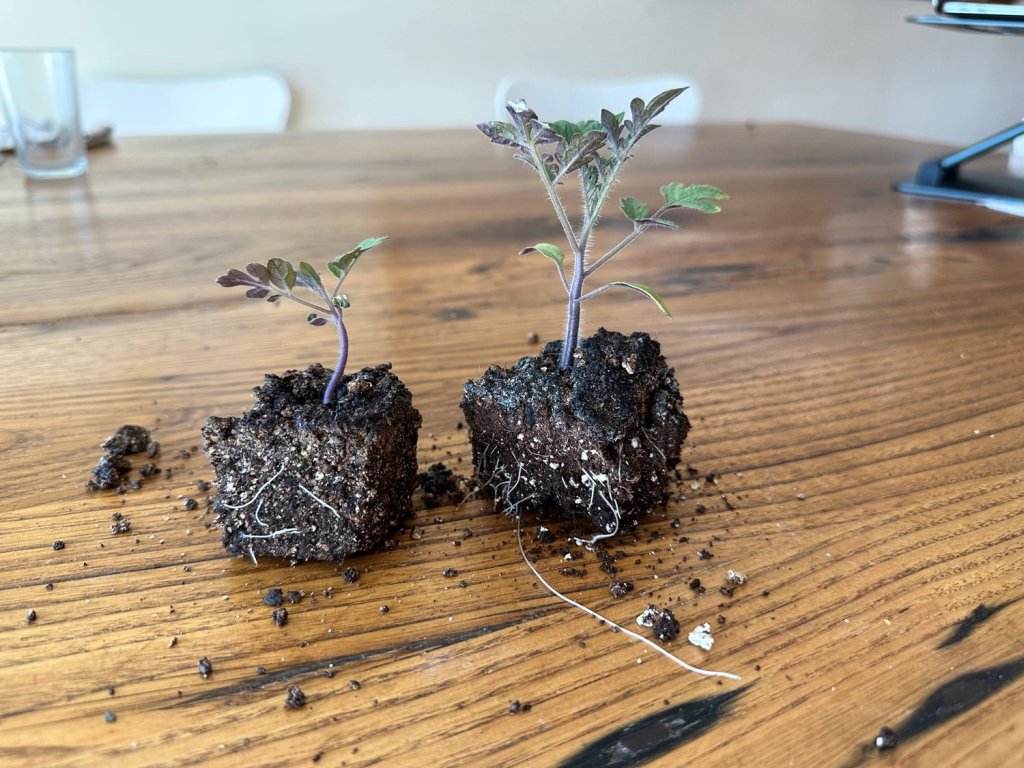
I always sow my tomatoes and peppers together, and they always end up growing at different rates. One of these years I may sow a tray of each, but we are limited by the number of lights we have so I cram as many soil blocks into each tray as I feasibly can, which is maxed out at 50.
Additionally, we maintain this light feeding schedule until they are transplanted into the garden, where we add our slow release complete organic fertilizer into their own transplant hole. On occasion, I will start seeds in potting soil and I typically amend it with about 1/4 to 1/3 compost before sowing. We like to ensure available nutrients are at the ready for our young plants and I hope after reading this you will, too.
Ready, Set, Lights
Lighting is another indispensable aspect to our seed starting setup and I’m convinced after over two years of sharing our journey with like-minded gardeners via social media that it is a large reason our starts look so strong and healthy. I shared a brief post in 2018 about our lighting setup. And after trying full spectrum LED lights that same winter, we remain staunch fans of our current system. This is something I get asked about frequently as people share their seed starting woes with me, and it bears repeating here.

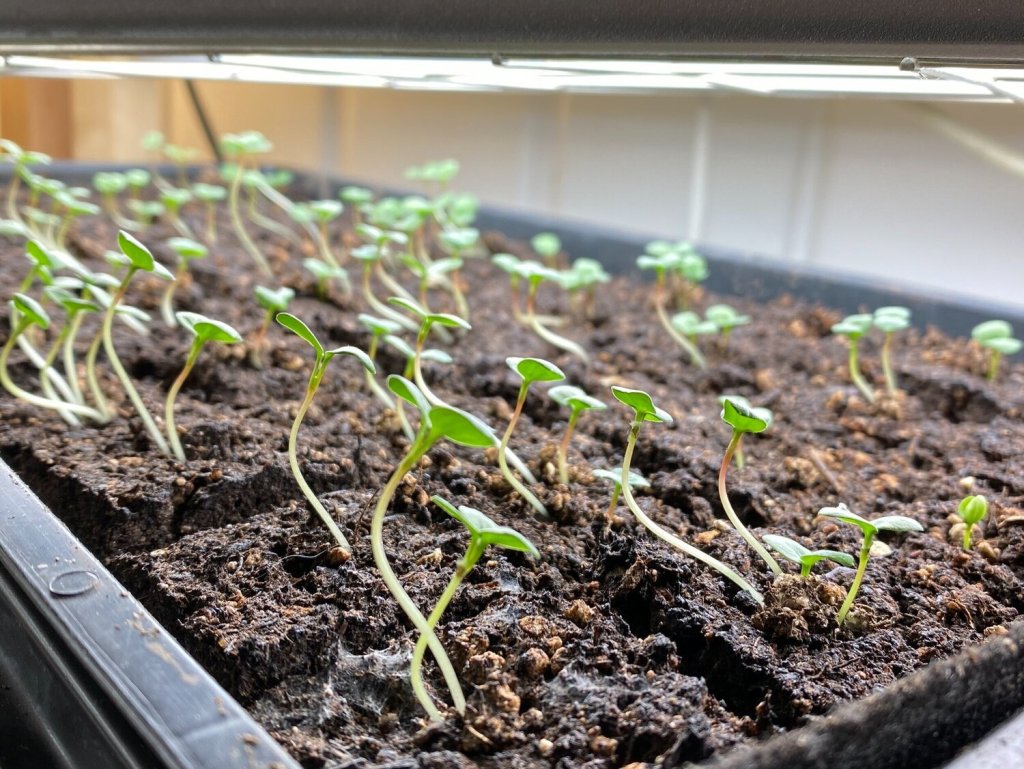
You can see how we adjust the lights to meet seedling height requirements. Also visible are the heat mats that are still on the tomato and pepper tray (middle left shelf). We use T8 fluorescent lights and leave them on all the time once the first seedlings emerge. Yes, that’s right. We bathe our starts in light, 24 hours a day, and you should try it, too. In a tray with multiple species and varying germination rates, this means some seeds may be exposed to light before germination, which we have never found to be a hindrance to our seed starting endeavor. Even things that require darkness seem to do okay, like calendula, because I am careful to bury and cover those seeds requiring darkness into the soil.
The other important aspect to our light setup is this: we use a 48” four-light ballast (see it here at my Amazon storefront) with half cool white and half warm white bulbs. This is a really important part of your light setup and as far as I’m concerned a non-negotiable for strong plants — you must use a mix of cool white and warm white bulbs as this gives a broader spectrum of light than either can provide on its own, thus more effectively mimicking natural sunlight. You really need to bathe these plants in your mock “sunlight”. Just think about how much stronger the real deal sunshine is than a few fluorescent bulbs. In the case of fluorescent, more is better, though not all light is equal. I cannot speak to other types of lighting except fluorescents.
A four-bulb ballast is what we consider a minimum amount of light for two 1020 trays, the standard size growing trays. If you use fewer lights or not the right spectrum balance, your plants may become leggy due to insufficient light (the botanical terminology for this is etiolation). Fluorescent light loses its power rapidly the farther you get from it, thus keeping them as close to the light as possible will alleviate their desire to stretch toward the dim light; it may not seem dim to you, but if they are leggy, it’s too dim for them.

Keep those lights close to those plants to minimize etiolation and give them as near outdoor light conditions as you possibly can in this indoor setup. If you can, you should be bathing your starts in at least 2,000 lumens per square foot, with plants as close to the light source as possible, as mentioned above. With our setup, we produce almost 3,000 lumens per square foot. I recommend if you experience a lot of legginess with your starts, you need to check your current bulbs and see how they compare to our ideal output. If yours is less, see if you can find a way to bump up the output. You can look up the lumens of your bulb by doing a simple google search.
We keep our starts as close to the lights as physically possible without touching the light. It is okay if a plant touches the light, but ideally your starts are growing at similar rate (haha, let’s be real, that never happens for me!) and so you adjust the light for the entire tray, lifting it as needed so the starts are right below the ballast, receiving the maximum amount of light available. In reality, our lights end up at angles rather quickly; I try to seed trays thinking about germination rates and how my starts can thrive harmoniously under these lights until they are ready to be hardened off and then placed in the ground.
Let’s Get Cozy
Heating mats is the final and equally important key to healthy starts that we have been experimenting with over the past few years. In previous years, we used a heat mat until full germination of any given tray and then would back the warmth off the seedlings and allow them to acclimatize to our living space, which we keep at a cozy 67F.
Air Flow
I mention this because fans are something a lot of well-respected gardeners use with their seedlings. At Seed to Fork, we don’t use fans, but I can definitely speak to their usefulness and you can decide for yourself whether or not you need this accessory. Many other garden gurus run oscillating fans near there starts to increase stem turgidity. This helps the plants develop strong stems and prepares them a little more for the real world, which, of course, is the end goal. Gently rubbing your hands over your starts every now and then does the same thing, and that’s how we meet this need.
Timing is Everything
Or is it? You know we like to push the season, and we start things on the very early side here. The upside of that is starts ready as early as the soil is. The downside is that some years the plants will be ready BEFORE the soil is. So it’s a bit of roulette, and if you want to play it safe, delay your planting so that your seedlings are about 6 weeks old at your average last frost. And by delay I mean start them no earlier than mid-March (in zone 4) for your earliest brassicas, and then tomatoes, peppers, and eggplants would soon follow after in the end of March for a mid-May transplant into a prepared bed.
Our 2019 growing season was extremely stressful in April because our indoor starts grew so incredibly well. They were on a mission. It was a bizarre phenomenon, made more fantastical witnessing it happening to many gardeners the continent over. It worked out for us in the end, but not before potting our tomato starts up not once, but twice, eventually into 1 gallon pots. And many of them needed to be buried deeply at transplant.
Early Spring transplants often exhibit exuberant growth under our care, and we are always grateful when the soils are ready for our little garden to welcome them.
To ameliorate this unprecedented situation, I am delaying my tomato starts two full weeks this Winter. All my indeterminate tomatoes will get sowed in mid-February. Now, if my hunch is right, something will go awry and the starts will not demonstrate the same vigor and will to live they did last year and I’ll be fretting their underdevelopment.
Do What You Can
I encourage you to play with your timing a bit, perhaps sow some at different intervals this winter. We will be doing this for our tomatoes, sowing our indeterminate tomatoes about a month earlier than our determinate tomatoes. I am taking this step in the hopes of delaying our harvest of determinate tomatoes until very late Summer.Do What You Can
In the end, be realistic with your seed starting endeavors. Our first indoor seedlings were grown using only one two-light fluorescent fixture, and they were, I’m certain, predominantly tomato and broccoli starts (this was a long time before our cabbage craze arrived). We may have paired two lights together, which we propped up on cinder blocks on our kitchen floor. It was a humble and suitable beginning, sufficiently meeting our needs for our garden that we mostly sowed directly in the ground. As you know, gardeners evolve with each passing year.
Our seed starting setup mimics as closely as possible a sunny late Spring day: warm, inviting soils to encourage germination and growth, sunshine — and lots of it, and healthy, nutrient rich soil that has ample available water. These are the essential ingredients for seedling success, and I hope you’ve found something useful here to help propel your seed starting to the next level.
-

The Art of Hardening Off
You did it! You grew your own garden starts from seed this winter. Congratulations! Now, let’s plant our gardens.
Not so fast.
I know this is the next logical step to planting a garden, but there is a very crucial and slow step in the process that we can’t just glaze over. And it’s called hardening off.
It can be frustrating. And boring. And deflate all the excitement for planting the garden. And, it can also be devastating to our seedlings if we don’t take the time to acclimate our seedlings to the bright, full sunlight slowly. Plants, like us, can and do get sunburned. If they are young and weak seedlings, it can be lethal, but at a minimum it will severely impact the plant’s vigor and potential and set them back many weeks.

The first sips of sunshine should be brief. I start this process as soon as my daytime temperatures are in the upper 40s, even for tomatoes (so long as the days are sunny and not too brisk).
In order to prepare our indoor-sown seedlings to the harsh reality of the outdoors, we must do it slowly. Basically, we are weaning them off a controlled environment with softer light and usually slightly warmer and even temperatures with zero wind to more of a wildly fluctuating environment. Let’s talk about how to do it well.
The Guidelines
From start to finish, properly hardened off plants take a good 10-14 days to be ready for their permanent home outdoors. Each day, you expose the plants to a little more full sunlight, alternating with shade (or if you’re up for it, bringing them back indoors). If the nights are above freezing and depending on what plants you’re working with, they can potentially stay outside once you begin the process.

It takes a few days for the sunburn to show, but this is what it looks like. I expose these tender globe amaranths to a day of partial sunshine and it was too much too fast. They recovered, thankfully, but were definitely setback because of it.
If, during this process, you have a cold snap and your plants return to their cozy, controlled environment indoors, you’ll want to start over again as soon as you can commence the process.

The stop and start may happen, especially in our cooler climates where sudden bursts of winter return, even in spring. I tend to evict these seedlings to the deck and if they need to come back inside, all I can afford them in the south-facing slider until we can re-commence the hardening off process anew.
Some of my favorite ways to begin the hardening off process is by bringing the plants out in the mid to late afternoon as the sun gets softer. Dappled sunlight from tree branches is another soft landing for the first sips of full-strength, sunburning sunshine. Just a few hours the first day of partly protected sun is plenty of exposure.

Dappled sunlight is the safest step in the early days of hardening off. A little bit goes a long way, so remember to take it easy, especially in the first few days. Each day I add a little more light — 30-60 minutes depending on the conditions. A cloudy day is softer, though still stronger than our inside fluorescent and LED grow lights. If you’re a few days in and it’s cloudy, you can be much looser with your minute-counting. And if you are hardening off under cloudy conditions where you live, you just can’t go from indoors to a full day of clouds without repercussions either. You still need to take the care and time to slowly increase the amount of light you expose your plants to each day.
By the end of the first week, the plants should be outside in full to dappled sun for 5-6 hours, almost of “full day” of sunshine.
The Added Benefits
In addition to exposing our plants to the sunlight, the winds, precipitation, and temperature fluctuations are also key factors we are working with as we acclimate our plants to the great outdoors. This is the other key to hardening off. Helping ensure the stems are strong and can withstand high winds, backing off the warmth of the indoors to get them ready for transplanting into what almost undeniably will be cooler soils (excepting maybe in summer), and giving their plant cells time to literally do the hardening off, becoming stronger in response to the stronger light and variable winds.
But for all intents and purposes, it’s really the light that determines how you proceed with the process. The rest will follow in line. Get creative and develop partly shaded stations for your plants to acclimate. Enjoy the momentary slowing down, knowing that it will hasten the transition into the garden even though as you’re doing it you feel like you’re perhaps at a standstill. Fear not, this purgatory won’t last too long.

I try my best to time plantings for a stretch of cloudy, moderate weather. Even with studying the longterm forecast, this is never a sure thing so it’s best to know the plants can withstand full-strength sunlight before you gently tuck them into their final home. Transplanting the plants on cloudy days or with cloudy weather in the forecast is another favorite way to get them in the garden with a little buffer time in the early days to continue to harden off. This is more than a gamble, and I’ve had years where it was suppose to be cloudy all week and it was sunny and blue skies — and my still tender plants suffered as a result and got sunscald. They recovered, but it definitely knocked them back a few weeks. The extra few days I could have taken would have resulted in stronger plants that would have produced sooner. Lesson learned.
You know your garden best. How sunny is your garden? Is it 7 hours or 13 hours of sunlight? Our garden gets well over 12 hours of sunlight by midsummer and so when I harden off, I tend to take a little longer to be sure my plants are ready for a very full day of baking hot sun without any reprieve before I transition them into the garden.
-

Eight Seed Starting Mistakes to Avoid
I have had many decades of ease with seed starting. We always did the same thing every winter. It wasn’t until recently that I have bumped into some glaring and show-stopping issues. This article humbly highlights the mistakes I’ve made so that you can learn and be on the lookout for these same mistakes. I am firm believer that first-hand, experiential knowledge is the fastest way to grow as a gardener. So, with that in mind, let’s dig in.
Poor Timing
Before you sow your first seeds, you should ask yourself, is this the right time to sow these seeds? Each vegetable has a sweet spot both in terms of germination rates and the conditions it needs post germination to thrive. Sowing spinach and radishes in a 90-degree heat wave is not recommended, nor is direct seeding tomatoes in chilly early spring soils. Seeds that persist in cold, damp soil may rot instead of germinate — and we don’t want that.
While I admittedly tend to sow seeds earlier than most, it comes at a cost. If you cannot provide your plants with ample light and temperature levels for a prolonged period of time before garden-ready, time your sowing so even your tomatoes and peppers are not indoors for more than 6 weeks before planting. For my zone, that would mean sowing them indoors around the end of March. For more seed starting inspiration, check out the updated sowing charts in my new book.
This is a hard thing to balance, as every year brings with it different weather. This year has been very mild so far this spring, and yet I decided to put off my seeds for an extra few weeks. Now, I am feeling behind, but on the flip side, I won’t have to coddle seedlings as long indoors and will be able to send them outside faster.
And with that, comes the opportunity to truly weigh the tradeoffs of starting early indoors with more extraneous tending versus starting later and with a faster transplant date. It’s good to test what you know, and meander through your garden honing your own skills that bring you the most joy. Many believe plants thrive when transplanted younger, and you better believe I am paying attention this season to see if this rings true for me.
Light Placement
I’ll give it to you straight: do not seed start in a windowsill. I don’t care how sunny it is, the plants will suffer and you will be disappointed. Their stems will weaken and you will be left with mediocre starts at best. If you don’t have the space for indoor lights and live in cooler climates where seed starting is paramount to our growing season’s success, find a local organic farmer and buy starts for your tomatoes and peppers from them and skip the indoor seed starting routine, and focus instead on direct sowing your brassicas, beans, corn, potatoes, herbs, and flowers. It will limit what you can grow, but what you can grow will thrive.
Even with lights, if you don’t keep your plants close enough, the seedlings will naturally lengthen their “spine” (stem) and reach for the light. This is an irreversible process, and one that can and should be avoided by proper light placement relative to your plants, depending on the lights you use. LEDs need to be farther away from your plants than fluorescents, and we continue to experiment with switching to LEDs as our fluorescent lights wear out. There’s no perfect system, except one where the light distance eliminates plants need to stretch out and get leggy.
More on lights can be found on a previous blog post.
Soil Sagas
The crux of seed starting is what is going on in your soil medium. The type of soil you use, its porosity (how much air space is between the particles), and its nutrient density all impact your seeds’ ability to germinate. This lesson has been handed to me two years in a row in two very different ways, and here’s what I’ve learned.
Wet Soil
Plants need water, right? Yes, to a point. I have been surprised to learn and read that many plants need much less water than we think to sprout, peppers and turmeric are included in these literary epiphanies I recently had. If soil is too wet, it is also not breathing.

Too wet and soggy leads to stagnant growth weeks after germination. These pepper leaves even turned yellow and brown due to the excessive water and lack of breathing room below ground. The hardest thing is that this symptom does not appear until well after the soggy bottoms caused harm to the tender seedlings.
Plants are living, breathing organisms from the moment they germinate. If their roots emerge into soggy soil, there’s no air in the soil in which to breath. Instead, they are basically under water. And they suffocate and, worst case, subsequently rot.
You can remediate wet soil with heat and fans and time. A lot of time. We had overwatered peppers last winter and it was weeks of stress but by August there was no difference between my healthy seedlings and the ones that suffered from overwatering and stunted growth at a young age.
Wet soil is often a symptom of another issue with your soil, so read on.
Dense Soil
Following with the young root discussion, they need open, porous soil to thrive. If your soil is dense, the fine young roots won’t be able to navigate the soil medium and this will also result in stress and stunted growth. Your soil will also not drain as well, leaving the blocks wet for longer and thus potentially stressing out those feathery young roots.

These are some of my heartbreaker soil blocks of 2021: nutrient dense soil led to poor germination and failure to thrive.
Dense soil and saturated soil go hand in hand in my experience. If you mix your own seed starting mixture like we do, be sure you have enough perlite or vermiculite to keep the mixture light.
Cold Soil
Temperature is one of the biggest keys to seed starting. If you don’t already use seedling mats to aide in germination, stop what you are doing and invest in them. Plants can germinate over a wide temperature range, but there are ideal ranges for different types of vegetables, and generally speaking, 70-80 is the sweet spot for almost all garden vegetables.
A heat mat removes this issue from your seed starting woes, and we would never try to start vegetables indoors without our heat mats.
Too Rich
The single biggest lesson of the 2021 growing season so far has been my seed starting failure. It involved adding our slow release organic fertilizer into our soil block recipe, a tried and true seed starting mixture that I use for ALL our seed starting needs, not just soil blocks.
I am still working to unravel all that this did to our soil blocks, but I believe it was a combination of the slow release organic fertilizer starting to break down in the warm soil combined with becoming heavier and denser than my normal block recipe (without the added fertilizer), which led to soggy, heavy, and very rich soil. There are probably microbiological factors as play, including nutrient availability and soil microorganism activity that created an inhospitable environment for the seeds to thrive.
Many of the seeds either germinated and then froze, only putting out first leaves, or got stuck right after germination, such as the few peppers and tomatoes that did actually manage, miraculously, to germinate. They had a will to live, I just did not give them the right home in which to thrive.
While this was a complete failure, I am grateful for this lesson, as we had never tried to add fertilizer to our soil blocks from the onset. Now we know that less is more, and that our soil block recipe need not be changed ever again. The soil blocks are headed to the compost bin and will be added to our future garden beds.
The Swift Transplant
The hardest thing to do with indoor seedlings is to wait. And wait. And wait until they hare acclimatized to real sunlight. Our super bright glow from inside our house dims in comparison to even a cloudy day. Take the time you need to properly harden off your seedlings. This process slowly adds full-strength sunlight each day for about a week to 10 days for every single plant that is started indoors. If you try to hasten this process by throwing things out into the garden too soon, you will be cursed with sunscald — plant sunburn — which sets the plants back a few days or more, depending on the size of the seedling.
Sunscald in plants looks like this: leaves turn white several days after the event. There’s nothing to do at this point but to buckle in for the ride and hope for a full recovery.
Truth be told, this does happen to some of our brassica seedlings every spring, despite my best efforts to take it easy and not rush things. However, it is a blip on their lifespan and they come back with new, healthy leaves within the week. I’m not encouraging you to follow my lead, just letting you know that our starts always rebound from it.
The Goldilocks Soil
So, do I have it figured out now? Yes, and in fact I already did.
- Soils need to be loose.
- If you desire, amend with compost, but not slow-release organic fertilizer.
- Keep the soil moist but not wet, best achieved by watering passively from below.
- Soil temperatures should be at least 75 degrees to hasten germination of all vegetable seeds. Keep the starts on heat until at least the first true leaves appear.
The thing was, I changed something without testing it first. And I just dove right in with about 200 seeds and 150 soil blocks; my confidence was met with massive disappointment this time around. While that’s not always the case, it is a cautionary tale. In hindsight, I should have re-read my article Growing Strong Healthy Vegetable Starts From Seed.
Failing Fast
So if you want to try something new, don’t invest your entire grow space to it — it is a risky proposition and while it might work out, you don’t want to be in the precarious position I was in having to start all over and having lost over a week of germination and growth.
Also, somewhat contradictory, go ahead and try new things. Because these failures are the fastest way to grow. I would have never known just how dubious adding slow-release fertilizer could be to seed starting until I had this experience.
-

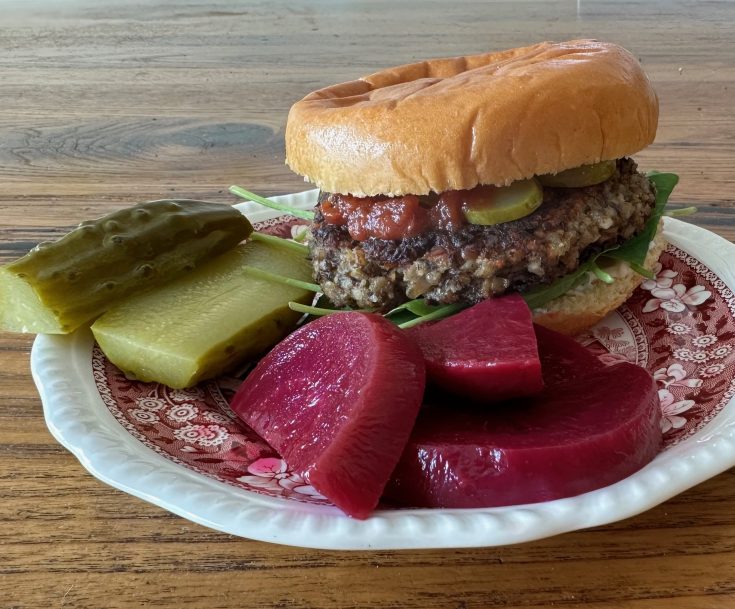
Veggie Burgers
One of my favorite recipes that has made its way back into our monthly rotation are veggie burgers. Our recipe is a riff off a 2005 Cooks Illustrated issue. Grains, lentils, mushrooms, and sourdough crumbs anchor them. They make tender burgers or a meatless loaf. I have been able to make it and cook the burgers over 2-3 days.
I’ve also shaped patties and frozen on parchment for the freezer. This recipe makes a solid dozen burgers, so it’s definitely one for a party, large family, part burger part loaf, or for those who love to bulk cook and stock up the freezer for busy nights.
Yield: 12Veggie Burgers
Ingredients
- 3/4 cup green or brown lentils, cooked (see below)
- 3/4 cup bulgur, cooked (see below)
- 1 onion finely diced (about a cup)
- 1 medium carrot (about a cup) finely diced
- 1 celery rib, finely diced (about 1/2 cup)
- 1 medium leek, finely diced (about 2/3 cup)
- 1 lb mushrooms, chopped (about 6 cups)
- 1 cup cashews
- Salt and pepper to taste
- 2 1/4 cup sourdough bread crumbs (any substitute will work!)
- 3 eggs
Instructions
- For the Lentils: Combine lentils with 3 cups of water. Bring to a boil and then lower to simmer, stirring occasionally. In about 25 minutes, check for doneness. You want them to be tender but not overdone. At this stage, some lentils will be split apart but not the majority of them. Check frequently and taste as they cook to find the right texture for you. Salt to taste. Cool on a clean tea towel which will help pull out some excess moisture.
- For the Bulgar: Bring the water to a boil in a small pot. Add the bulgar, cover, and turn off. Set a timer for 20 minutes. Strain and set on a towel for a few minutes to pull out excess moisture. Combine with lentils and either cover and put in fridge overnight or set aside and start with the veggies.

- Heat several tablespoons of olive oil in a large saucepan to saute the diced onions, leeks, celery, carrots, and garlic together. Cook for about 10 minutes until the onions are translucent and the carrots are tender. Set aside. Using the same pan, cook the mushrooms, adding more olive oil to the pan before you cook them. When softened, in about 10 minutes, set aside with the other cooked veggies.
- Let the veggies cool off for about 20 minutes before combining in a large bowl with the bulgur and lentils.
- In a food processor, take your cashews and pulse to a coarse texture. Mix in with the veggies. Don’t clean the bowl; instead, working in batches, run the entire mixture through the food processor. Pulse 15-20 one-second-pulses. The texture should be small but a little grainy still.
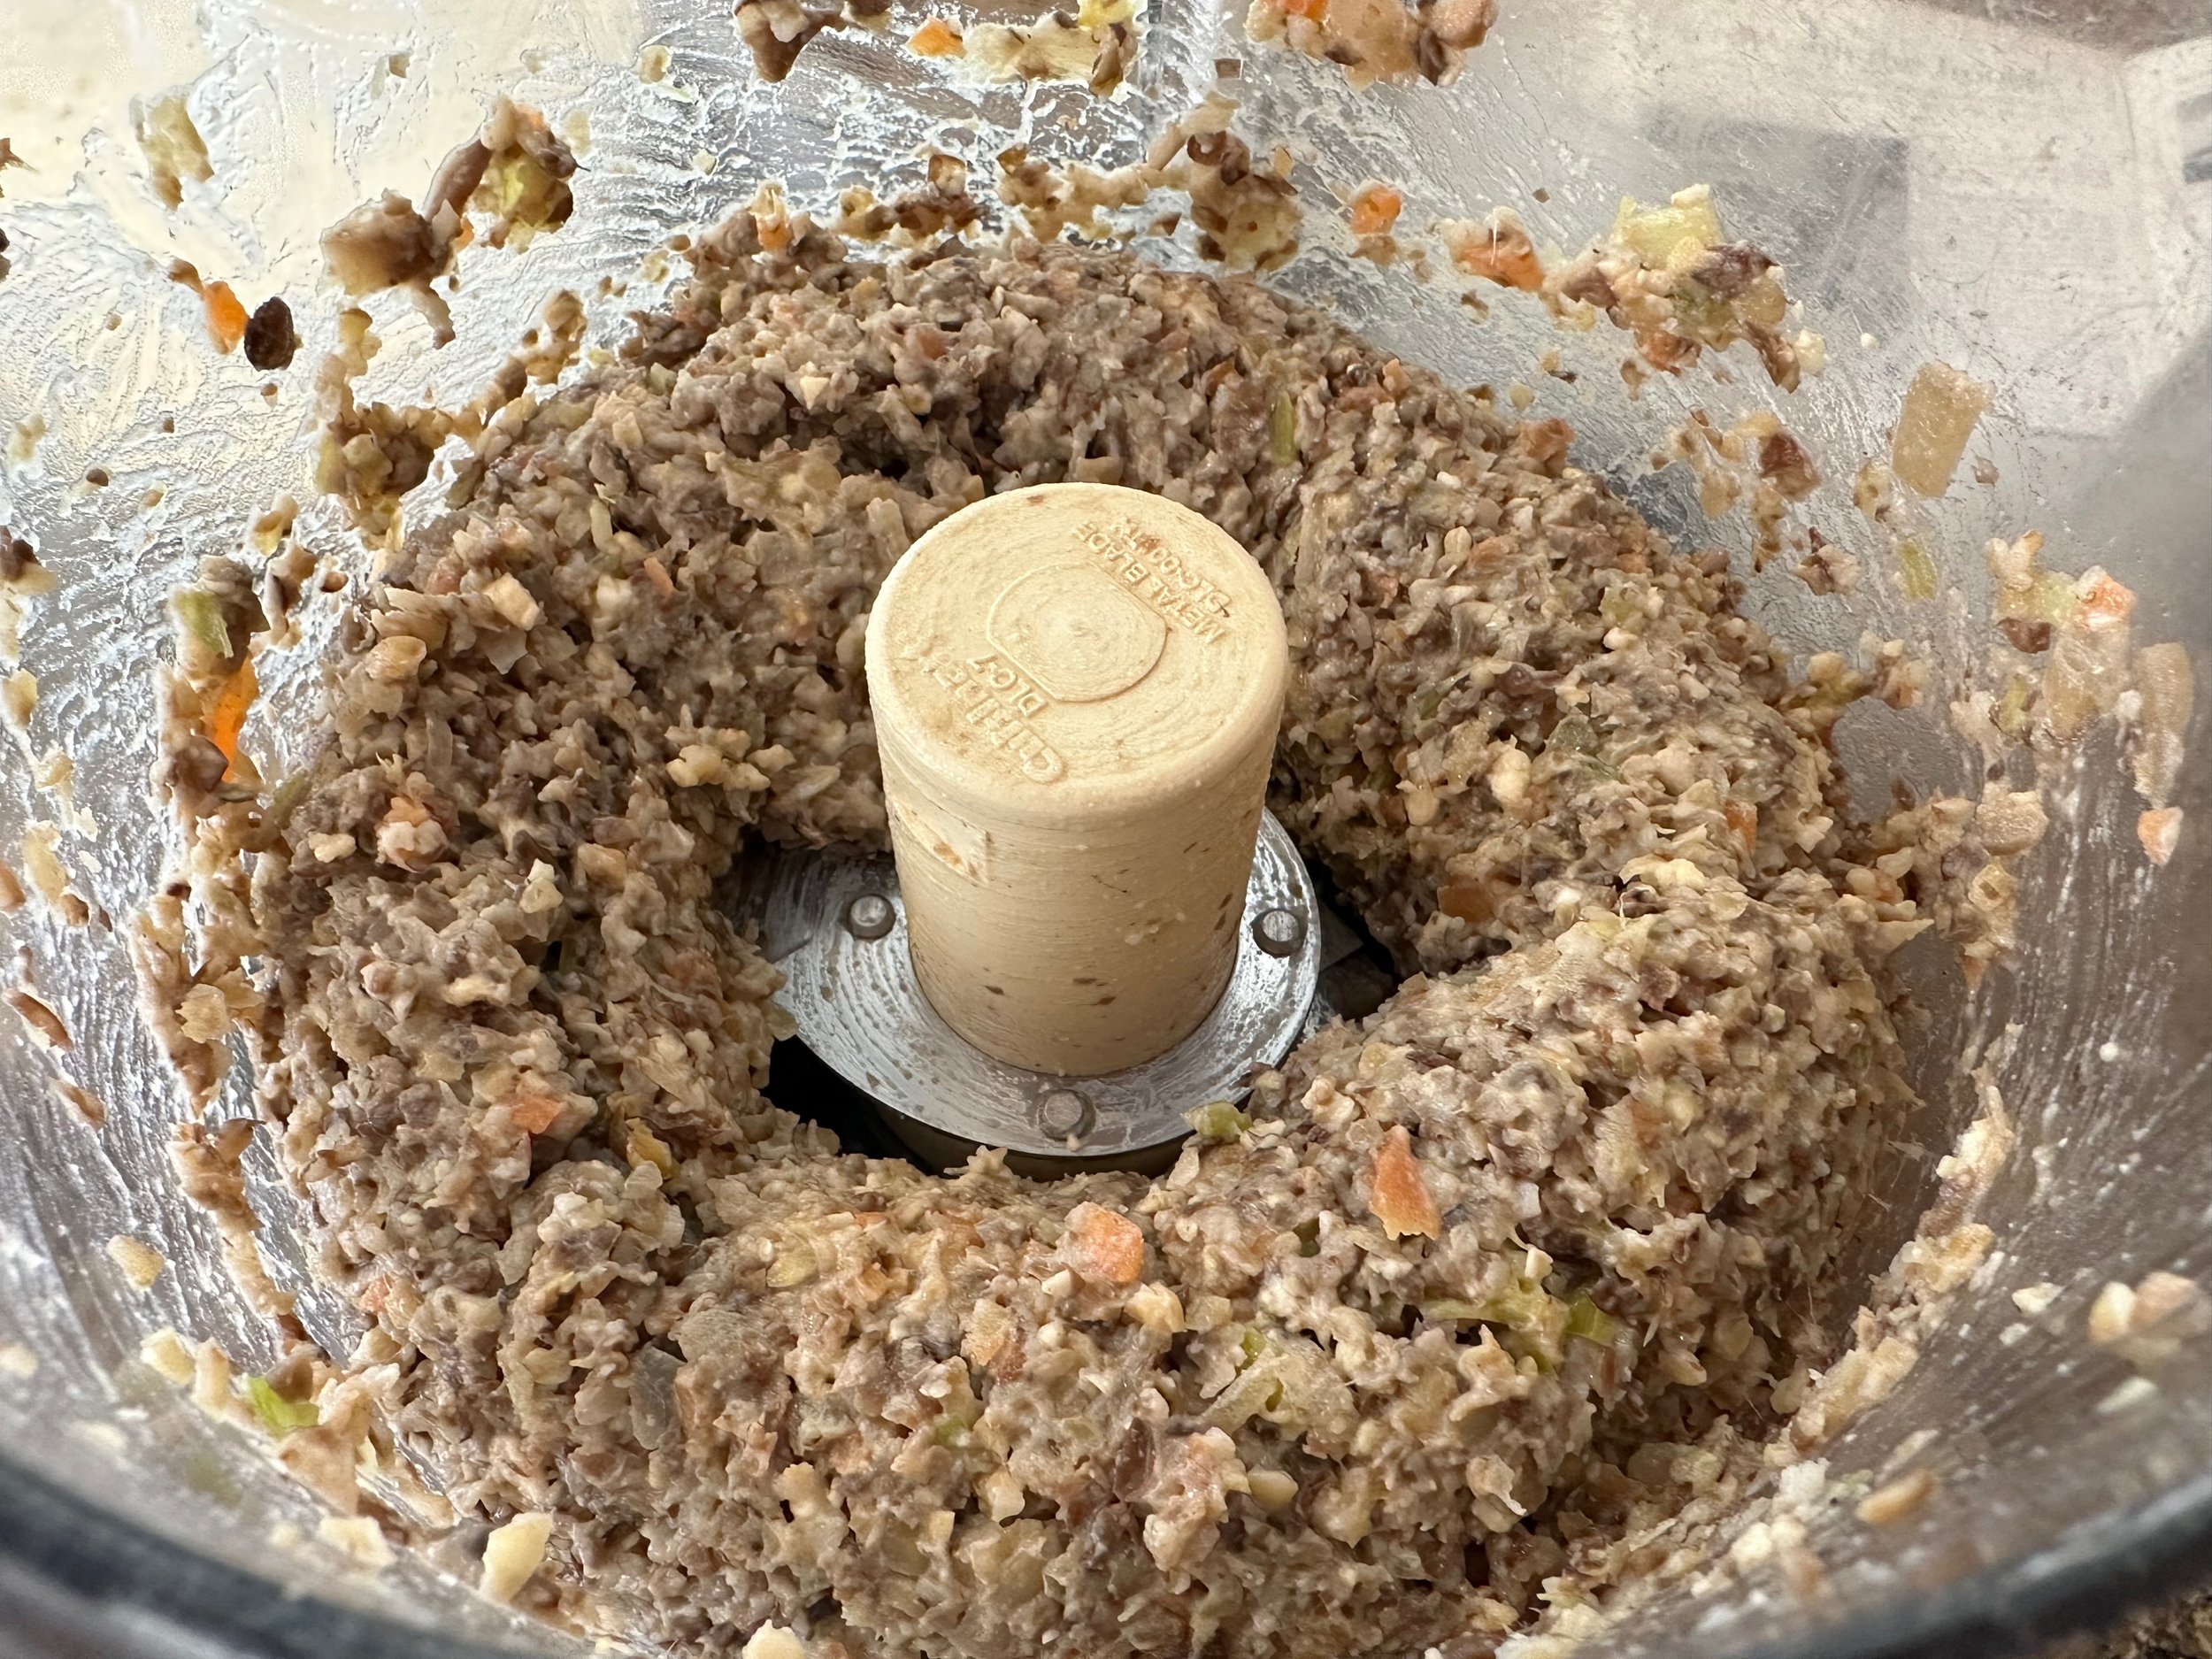
- Set aside pulsed mixture into a clean bowl and repeat this pulsing until all the cooked vegetables, bulgur, and cashews are processed.
- Add 3 eggs, 1-2 tsp salt, and some freshly cracked pepper to your liking at this point and mix together until combined.
- Finally, add the breadcrumbs and mix until thoroughly combined.
- You can set this aside and cook over a few days, freeze some, make some patties or a veggie loaf with this too. It’s a really versatile recipe! For burgers, shape the patties into about 5 ounce burgers. I do weigh this out using our kitchen scale. Flatten to about 1/2” high by 4” wide. At this stage, you can shape them and freeze on individual parchment sheets for freezer storage. Alternatively, shape and cook them all and freeze as cooked patties to reheat later. Either option works well for us.
- In a large skillet, put about 1/8-1/4” of vegetable oil in the bottom of the pan. You want to be able to have the bottom and part of the sides of the veggie burger submerged in the oil. It’s kind of a fried burger.

- Heat to medium high and then reduce heat to medium or medium low to cook the burgers. Cook for about 4 minutes and then carefully flip over. Our favorite kitchen cooking utensil is this very simple fish flipper, seen below in action.

There’s a fine line between getting them perfectly browned and possibly taking it too far. I have been cooking mine in a 12” cast iron skillet and once I flip them, I usually lower the heat to medium low, depending on how golden brown the first side cooks up.
Notes
I like to make these over two days. The day before, I cook both the lentils and the bulgar and set aside in a medium bowl in the fridge. It makes them feel a little easier to cook, though you could feasibly do it all in a few hours in one day. This is just how I’ve been doing them lately and instead of them feeling overwhelming they are now a lot of fun to make.
-

Winter Sowing
A popular northern climate alternative to indoor seed starting, I first learned about winter sowing from an enthusiastic and passionate gardening and volunteer friend back in 2012. It’s safe to say, she was well ahead of the trend, and while I never got into it, I thought of her every year as I carried on with my indoor rituals and she set her rows of jugs out with glee, abandon, and confidence.
No one system is the right system for all gardeners, and that’s what makes this a great alternative for those who are new to gardening and want to try growing flowers from seed but find indoor seed starting overwhelming. It’s especially effective for native seeds, things like milkweed, echinacea, and blazing stars that are pollinator power houses but need exposure (a few months’ time) to cold and damp conditions in order for the seed to break dormancy and germinate.
Winter sowing can also be as simple as sowing annual seeds outside and letting them germinate when conditions are right. Our heavy self-seeders do just that each winter. For us that’s larkspur, viola, and chamomile, annual flowers with small seeds that we sowed indoors once — and they just keep coming back on their own!
Poppies, snapdragons, and calendula are three other flower seeds that would do well sowed outdoors in winter. And I mean setting the seeds out in late fall before the snow flies or in early winter if you’re in a milder climate — and letting them take cues from the soil and moisture as to when to germinate. Most of these seeds also need light to germinate, and that’s why sowing directly on bare soil or a prepared bed in fall makes this a set it and forget it task.
I will see chamomile, larkspur, and snapdragon seedlings in early April in our garden every year. It even seems like the chamomile and larkspur germinate UNDER the snow because they have true leaves by the time the snow recedes. It’s garden magic, to be sure.

Sowing native seeds is most commonly done by winter sowing. This is how we do it. Dampen potting soil or peat moss or sand in a large pot or wheelbarrow. Then evenly distribute the seed mix throughout. Toss like sprinkles on a cake over a prepared area, preferably with snow on the ground AND snow about to fall to cover them up and protect against nibbling birds. The snow really helps you see where you’ve already sowed seeds so you don’t throw too much seed in any one place. The end-game is usually a 12”x12” plant spacing.
For those that want more control over where and when native flowers germinate on their property, winter sowing in jugs is the perfect project. First, you need to mimic this cold stratification by placing them in damp potting soil inside their fridge for 60 days before planting. Outside, nature simply goes about its business and this is done with the passing of the seasons. And we can capitalize on nature and the benefits of these micro greenhouses and produce seedlings a good bit earlier than if they were simply seeded on top of snow and left to their own devices. I think of this as an intermediary between indoor seed sowing and direct seeding our gardens.

The benefits of this alternative seed starting method include:
- Less resources than indoor seed starting (no grow lights, shelves, or heat mats needed)
- No need to harden seedlings off
- A modest jumpstart on the growing season over direct seeding, which means earlier blooms and yields
Here’s how I made mine.
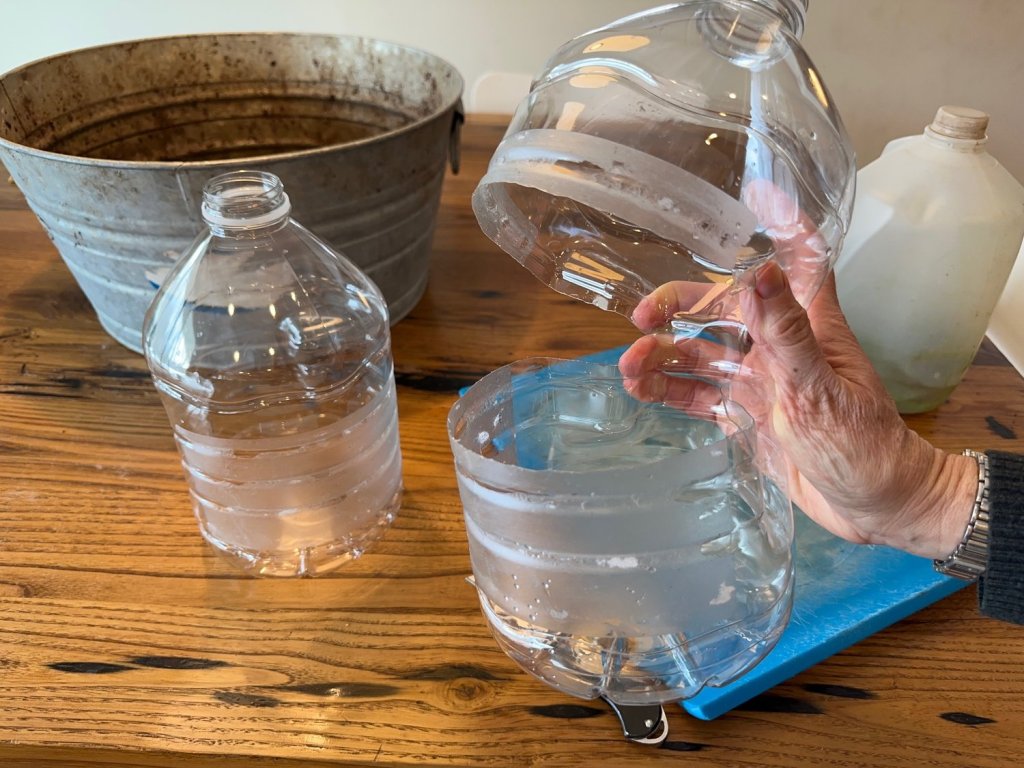
Cut gallon jugs about in half, with the bottom tall enough for several inches of potting soil.

Cut about 95% around the container. You want the back to hinge open with ease. I left about an 1.5 inches (4cm) attached on the back side.
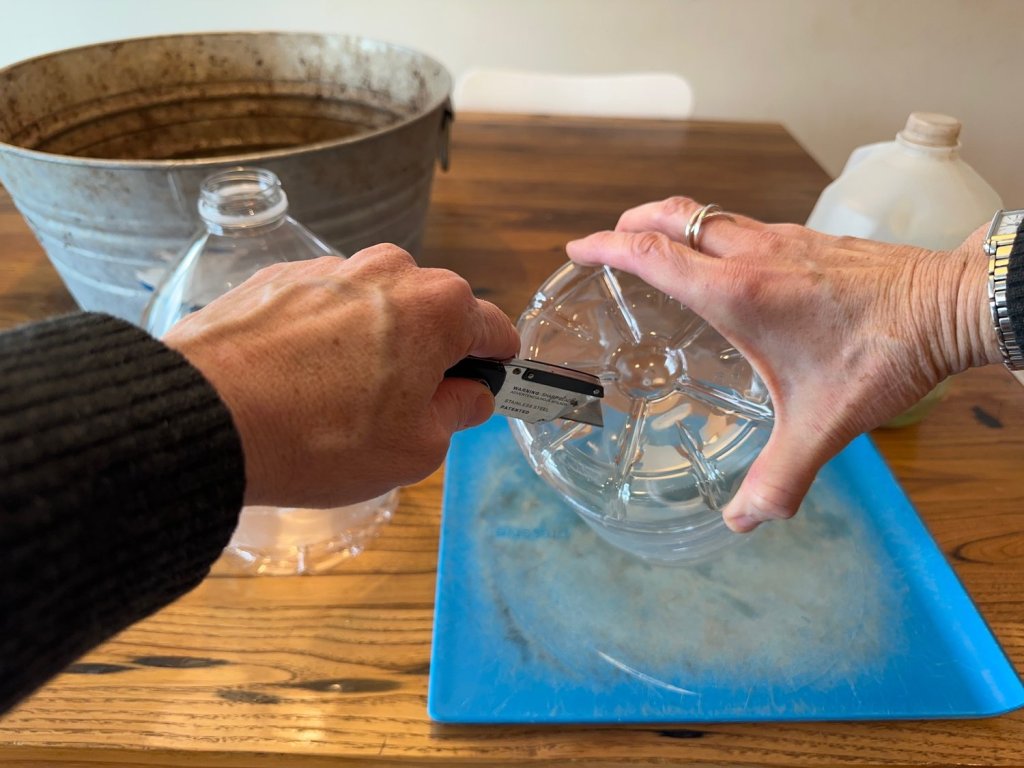
Do as I say, not as I do. Using a drill for these bottom drainage holes would be easier. I used the box knife, because I was trying to make this as accessible as possible for people who don’t own a drill. It worked, but required a different kind of muscling than a drill would involve.
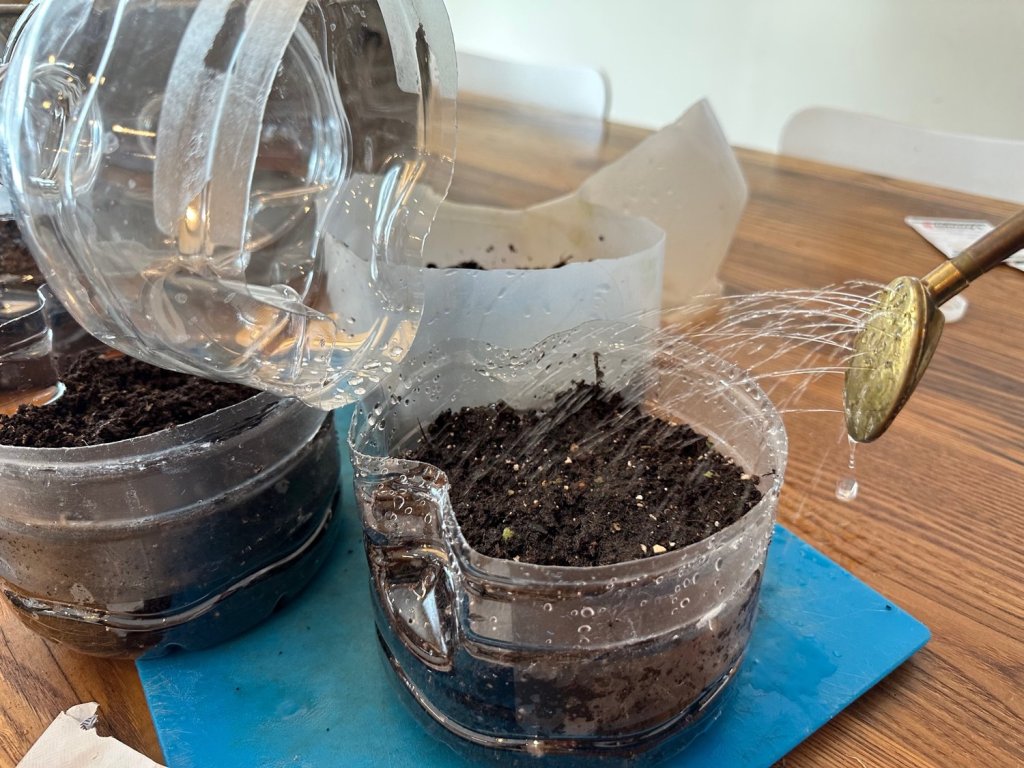
Fill with damp potting soil in the bottom 3” or so. Space seeds a reasonable distance apart. These are calendula and 1” spacing will work fine for teasing apart at transplant time. Smaller seeds like larkspur, alyssum, and snapdragon were more densely sowed and I may need to thin them out a bit.

or seeds that needed covering, I then added more potting soil on top (calendula). I did make a mess watering them in, but I wanted this very gentle stream. Doing this in the kitchen sink would have been smarter.
both air flow and allowing moisture in over the weeks and months. Set outside in a snow back, preferable a western or northern aspect (I broke this rule and these are on our south-facing deck, which is where I’ve always done this).

Share your experiences with winter sowing in the comments. I know somevery enthusiastic winter sowers who have transitioned almost all their flowers to this method. Brassicas and lettuce which are both cold hardy are also excellent seeds to winter sow. I hope to hear from folks in the comments about how they’ve used this and what their favorite veggies are to winter sow.
-

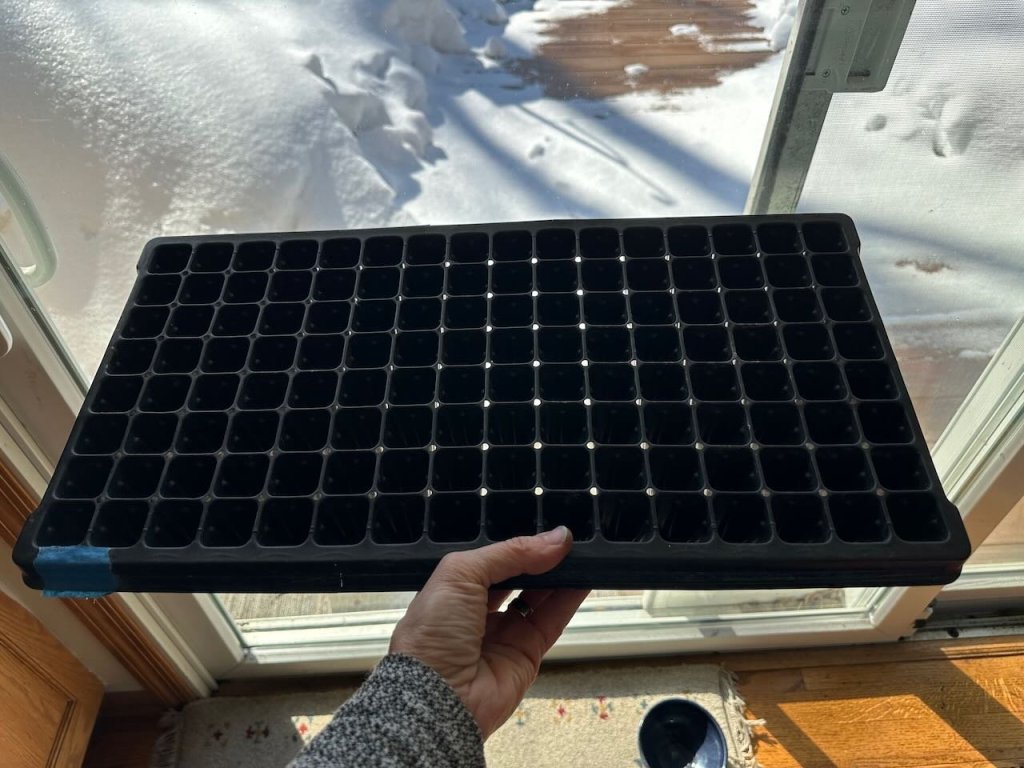
How to Choose the Right Size Pot for Seed Starting
Choosing the right pot for your seeds isn’t something to overlook. A pot too small will lead to rootbound seedlings quickly. A too large home for small seeds may run the risk of waterlogging them rather easily, which will stunt their growth.
Our OG seed starting trays: this is half of a 72-plug tray, that probably came with a self-watering reservoir too. There’s a link to a system like this on my amazon storefront (affiliate link).
The goldilocks rule for me is as follows. Sow seeds into a minimum 72 plug tray or 2” soil block. Of course, you’ll read and about exceptions below, but for veg, this is where the majority of them start.

1.5” soil blocker was new to us last year and it’s not as versatile as our 2” blocker because they dry out faster. But beets, lettuce, and flowers are what I use this size for. A full tray is 78 plugs so that’s 50% more seedlings than our 2” blocker. This might be the end of the container needs for many seedlings, as transplanting into the garden is not too far off. If you can time it, that’s ideal: less inputs and resources needed before they are outside in your ground and enjoying sunlight. For my needs, this includes things like cabbages, head lettuce, broccoli, kale, brussels sprouts, bok choy, and summer celery. If plants only need about a month head start, they can safely stay in that first soil block or pot as you harden them off and prepare for transplanting.
But for slower establishing plants such as tomatoes, peppers, eggplants, and spring celery, you’ll need to bump them up (up pot them, or pot them up … interchangeable phrases for transplanting into a larger pot) at least once before the ground is warm and welcoming enough to accept them.
I don’t recommend using this seed tray for much of anything
except flowers that will be quickly transplanted.The seed starting tray, above, a 128-plug tray. I don’t recommend you use even though I still will, for a small group of flowers, because the trays are still functional.
Then there are flowers. I admittedly don’t give the same root space needs to my flowers as I do to my vegetables. I tend to crowd them, because I am often short on grow lights at this time of the season and I’ve found that even though it’s fraught with challenges, the large trays allow me to seed hundreds of flower starts in a small amount of space.
Here’s my list of what size pot I use for different seeds:
4” Plastic Pots
- Onions
- Leeks
- Shallots
2” Soil Blocker, or the equivalent: 1.5” cell / 72 plug tray
- Tomatoes
- Peppers
- Eggplants
- Celery
- Brassicas
- Beets
- Head lettuce
- Bok choy
- Cape Gooseberry
- Tomatillo
- Ground Cherry
- All herbs, including fennel
- Nasturtium
- Calendula
- Globe amaranth
- Strawflower
- Dahlia
- Tithonia
3.25” Newspaper Pots
- Peanuts (2 seeds per pot, split at transplanting)
- Squash
- Zucchini
- Cucumbers
- Melons
- Sunflowers

Melons and sunflowers both don’t enjoy being transplanted so I circumvent that with newspaper pots that are easy to rip open at transplanting time, keeping the roots from protesting from being torn out of a plastic tray or pot.
1” plug tray (128 cell) (the one I don’t recommend using, but because I know you might anyway …)
Annual flowers only:
- Zinnia
- Cosmos
- Marigold
- Sweet alyssum
-

Peat-free Experiment
UPDATED March 10, 2023
Peat, the great 21st century garden debate and efficient and vast carbon sink, is a perfect ingredient for starting seeds. It’s light and fluffy, a friendly medium for very tender and delicate emerging roots. But in this time of environmental crisis, one that I learned was already here in college in the 90s, it’s hard to accept that removing a functioning carbon sink is a good idea, even and especially as people who garden.
Does my other carbon sinking offset my usage? I mean, I guess maybe. We are actively converting our other grassy lawn into carbon-sinking native prairies. We’ve added dozens of trees and shrubs to our property too. But my demand for peat is part of a collective demand, which impacts the supply. And thus, why I do really hope that once we finish the large bag I bought last year, I will have a better alternative going forward.

Peat-free above, and peat-full below. It’s a clear loser for tomatoes, but less clear for some of the other seeds I sowed. Years ago I did try making soil blocks with coconut coir. My recipe is still one of my most-watched You Tube videos and also something that gets traffic on my public garden resource library. I didn’t like how most plants grew with coconut coir; the one exception is I did use the block mixed half and half with compost for growing ginger.
So I thought maybe what if I try to completely remove that fluffy ingredient and replace it with coarse materials that also allow for pore space, those spaces through which the tender roots will reach and grow. And that’s where I started with this winter’s trials.
Peat Free Recipe #1
This recipe was truly free of peat and anything like it. I mixed 3 parts compost with 2 parts perlite and 1 part coarse sand. It was immediately heavier than my peat soil blocks, both in the real weight of it (sand weighs a lot more than peat) and in its texture. I was immediately skeptical.
The Traditional Recipe
A few days later, I mixed up my traditional recipe, which can be found in my book and also here. This recipe is roughly 3 parts peat to 2 parts compost and 2 parts perlite. If you have a bucket of “garden soil” you can add that too, which is what Eliot Coleman calls for in the OG recipe, but I’ve always bought “garden soil” and in all honesty it’s like adding another part of peat because it’s a peat-based soil mixture. It’s a little heavier and ideally, if actual garden soil, would contain some clay and smaller particles that will help give them structure.
The Experiment: Phase 1
I sowed the same Botanical Interests seeds in both trays: Sweetie tomato, Beefsteak, Nero Toscano kale, Sweet Alyssum, and Ventura celery from Adaptive Seeds (I think). The Peat free ones were planted on January 15 and the Peat-ful ones on January 17.
Results (as of Feb. 9)
I had rather lofty hopes that this would be a panacea. It was based on some peat-free recipes I’ve read about in recent years, so I wasn’t entirely making this up. But, it was far from it.
I’ve always used really light potting soil medium for seed starting, and had never have faced poor germination in my 25 years of growing. So I quickly concluded that in addition to heat mats and lights, the soil blend is probably another big unknown when folks ask me why their plants aren’t growing well. I usually ask them about lights, watering, and heat mats but don’t really consider the soil. But I can clearly see. that if their tomatoes germinated a month ago and look nothing like mine, the soil could very well be the culprit.
Peat free on the left. Everything about that plant from the way the stem bends and how thin it is to the smaller and fewer true leaves tells me this soil is not as welcoming as my trusty peat moss soil block recipe. Sometimes doing these things even though we know so much already brings new knowledge and understanding into our lives. I love experiments like this. Being a perennial student is why I garden with such passion and determination.
Soil that is too heavy is a rather unwelcome home for those tender roots I’d mentioned above. And, unfortunately, this mixture is not a good fit for tomatoes at all, and it’s also not great for the alyssum.
But it wasn’t a complete failure. The kale and celery both seem to be growing at similar rates. And this is both fascinating and curious. Celery seedlings are minuscule! Smaller than the Sweet alyssum. And what’s also strange is that the Sweetie tomatoes germinated a bit slower but then sort of stopped growing, while the Beefsteak just didn’t even break ground at all, except for a few that are stuck in just germinated land.
Phase 2: PittMoss vs Coco Loco + Cowsmo
Now that I know the compost/sand/perlite mixture is too heavy for germinating tomatoes, I won’t be using that mixture for seed starting, and needed to research other methods. PittMoss is a recycled paper product and OMRI (organic) certified. I used it as a 1:1 replacement for peat moss. (3 parts PittMoss, 2 parts perlite, 2 parts Cowsmo compost)

Coco Loco is something I’ve been hearing about recently, both from MGG members and from an IG friend I met up with in Seattle. It is suppose to be triple washed, has some perlite in it, and bat guano for nutrition. I mixed 2 parts CocoLoco to 1 part Cowsmo compost for those soil blocks.
Both sets when really well hydrated (with a little standing water in the bin) formed soil blocks just as well as the peat, which is important for viability. I am hoping, since I’ve invested in both these bags, that the results will be similar and I can use them each for the remainder of the growing season.
I sowed the same Botanical Interests seeds in both trays: Sweetie tomato, Beefsteak, Nero Toscano kale, Sweet Alyssum, and Ventura celery from Adaptive Seeds (I think). Both trays were seeded in February 28.
The sweet alyssum and kale has already started germinating. The tomatoes and celery will take a little longer, but I’m sort of banking on better celery germination since the celery in my pepper tray was so dismal.
What happened to those first two trays? I did pot some of the celery and alyssum up, and they are growing great under the lights. I harvested the kale and will make a yummy kale salad for us this weekend. I composted all the tomatoes, as I don’t grow Sweetie anymore and I prefer Whittemore beefsteak above others we’ve grown.

I kept the celery and some sweet alyssum from the first two trays, and will hopefully have extra early celery this spring thanks to these experiments.
Phase 2 Results
I was honestly not expecting such stark differences in germination, but it’s clear 11 days in that the Coco Loco is a superior product compared to the PittMoss. Coco Loco is the front tray in the photo:

I’ve had slow or no germination in the PittMoss, and the seedlings have largely stalled, especially the tomatoes. The alyssum is equally unhappy in the PittMoss and the kale is shorter and less vigorous too.

Left: Coco Loco and Cowsmo Compost
Right: Pittmoss (1:1 replacement for peat) in soil blocks
Just like the first experiment, these trials are all under the same lights, with the same kind of heat mat, and have received the same type of watering — as well as been sowed with the same packet of seeds (even as the first set of test trays, peat vs compost, perlite, and coarse sand).
If I were forced to rank the best peat-free soils, it would be Coco Loco or the heavy compost/perlite/sand mixture the best alternative–and then honestly the old standard peat recipe would be runner up.
As I’ve been pondering this more, with our heavy 2” of compost on top of our beds each fall, we germinate all of our direct-seeded crops pretty much right into 100% compost. Makes me wonder what that would look like. Perhaps sowing into a top dressing of compost during the growing season isn’t a fair comparison because of all the soil microbial activity outdoors, but I might try sowing into straight compost as a future experiment.
But for now I know that Coco Loco is a great alternative to peat.
-

Butternut ChickPea Chana Masala
We grow what we love to eat, and butternuts are easy to store, a breeze to prep in the kitchen, and I just love their texture and flavor. I’m partial to the traditional Waltham Butternut Squash, even though many new and improved tempting varieties come out often.
This recipe was created back in 2008 or so when a friend and picky eater was coming for Thanksgiving dinner and we had a very short ingredient list with which to work. A vegetarian, we wanted to celebrate fall while making a nutritious meal with complete proteins. And that is how this Indian-inspired winter meal was born.
I really recommend playing with proportions with this recipe. I honestly rarely follow this exactly anymore, and instead use an oven-roasted butternut partly for this and the rest for soup. I use a can of pureed tomatoes, and I have gone heavier on the chick peas lately than the original recipe.
Butternut Chickpea Chana Masala

Ingredients
- 2-3 cups chickpeas
- 1 small butternut, peeled and cut into small cubes
- enough broth to just cover butternut
- 1 stick salted butter
- 2 medium onions, diced
- 1 tsp ground fresh ginger
- 1-2 garlic cloves (optional)
- 1 tbs garam masala (can buy in bulk at Linden hills Coop)
- 3/4 tsp ground cumin
- 1 tsp sea salt
- 16 ounces tomatoes (canned, whole or diced — or grab some frozen tomatoes from last summer, thawed)
Instructions
- Prep the butternut and get it boiling with the broth in a medium-sized stock pot. Bring to a boil and lower to a simmer, stirring occasionally. Alternatively: open roast the butternut. This takes longer but is really delicious too. If you decide to roast instead, you’ll need to add about a cup or more of broth to the butternut when you combine it (see below).
- Next, chop the onion and saute in butter. When softened, add the ginger, garlic, garam masala, cumin, and salt. Cook for a few minutes more. Your kitchen should be smelling amazing by now.
- After fully cooked and softened, add the onions to the now softened butternut, and add the tomatoes. (If you oven-roasted your butternut instead, this would be the time to add extra broth to the pot).
- Puree it all with an immersion blender or mash by hand. You can choose your texture at this point — totally smooth or with some chunks of onion, tomato and butternut.
- Finally, mix in the chick peas and let simmer for 15-20 minutes more.
- Taste and make adjustments: if too sweet, add a tablespoon or more of lemon juice. Salt to your liking.
- Serve with rice, warm naan, or a buttered flour tortilla heated up on a griddle.
-

Onion Grow Guide
People often ask me what my favorite vegetable to grow is, and I always struggle to answer the question, often forgetting what I’ve told other people. Mentally scanning the summer garden, I always land on onions, because growing them from seed is the singular food we grow that ties all the seasons together. And then some.
They are some of the first seeds we sow, and some of the most storage friendly crops that we are still enjoying from summer — all while this year’s seeds are about to be sowed. They take a good 180 days from seed to harvest, and go on to last more than another 180 days, encircling the seasons in overlapping, pungent wafts of culinary utility. They are a part of our everyday lives, year after year, and I think that makes them both rather mundane and invaluably unique to grow.
I also believe growing them from seed is both rewarding and easy. Admittedly, I’ve never grown onions from sets, so I don’t know how they compare. I imagine you’d get earlier harvests with all that bulb energy ready to set roots and shoots, but there’s something so simple about a 4” square pot chock full of onion seedlings under my grow lights that makes me so happy.
And I definitely want all of you who’ve never tried them to consider growing them from seed.
Types of Onions
There are so many different kinds of onions. Scallions (green onions), storage/bulbing onions (yellow, red, white, sweet, for example) and even more delicate culinary onions that bulb but are for fresh eating. Let’s not forget, while they are not onions, I’ll lump shallots in here too because I treat them exactly the same as onions in our garden. And let’s be inclusive and apply this knowledge to leeks as well, because I don’t give them any different treatment than my onions.
It hopefully comes as no surprise that I like to grow some of each that grow well in northern latitudes, as onions are daylight sensitive. They will start to bulb when they are exposed to the correct day length, their internal clocks set to mature based on their geographical location. Another reason I am fascinated and in awe of an onion seed!
Here in Minnesota, I’ve not tried growing any sweet onions as they are a short-day variety that is suited to growing in more southern latitudes. Being 45 North, our days are filled with long sun, and thus long-day onions are the only types that thrive here. I could probably pull them off, but because of the added day length, the bulbs won’t form as robustly as they will in more southern latitudes.
The key to any crop is to grow a variety. I strongly recommend picking a storage onion and a fresh eating onion to grow from seed (if choose from my recommended onion varieties). When timed right, you’ll have amazing fresh onions for dinner while the storage onions slowly mature and flop over. If simple is your thing, just sow more bulbing storage onions and plan to start eating them fresh as soon as they are a harvestable size; I am usually reaching for a bulbing onion around the 4th of July here.
This is both for succession planting, to spread out the harvests, but also to use that diversity as insurance against any unforeseen issues. Thankfully for us, we have few (read: none) pest issues with onions, though I know that leek moths are an issue in some areas of New England, upstate New York, and even the mid-Atlantic states. And the notion of my onions not being a shoe-in is a terribly daunting concept I try not to think about lest I conjure the moths to take up residence in Minnesota.
To Indoor Sow or Direct Sow
Onions can be started indoors from mid-February through mid-March here. This puts me starting them 8-10 weeks before my last frost. It’s pretty common to recommend indoor sowing them 6-8 weeks before your last spring frost for cold climates with short growing seasons. And that’s exactly what I do: sow some in mid-February AND then sow another round in early March too. It’s sort of like insurance for me, but also I like to try and see if sowing early really makes a huge difference. And, honestly, it hasn’t made a visible difference come summer, but I can’t resist waiting until march to break the seal on my indoor seed starting, so I do both.
Last spring for the first time ever, I direct seeded spring onions uncovered in early April interplanted on the northside of our spring shelling peas. It worked out really great and honestly has turned my “must sow indoors in February” method on its head. I will try direct seeding some bulbing onions in early April to further test this approach.
Because onions are cold hardy, they can go out a bit early and thus can even germinate in cooler soils. I always. transplant mine 2 weeks before last frost or sometime in late April here.
Starting Indoors
In mid-February, I sow an indiscriminate number of onion seeds in 4” plastic pots — I usually aim for 25 or so. This puts them about 1/4” apart spacing in this pot. I cover them lightly with soil, burying the seeds 1/4” or so, and put a germination dome on top. I lightly water the seeds in and set them atop a seedling mat.
With new onion seeds, I usually see germination in less than a week, but total germination can take 1-2 weeks. I will remove the heat mat once all the pots have a majority of seeds germinated.
I’ve been using the same plastic pots for a decade, and it’s a tried and true method for us. I’ve also done some soil blocking with multi-sown onions but I feel the pots are a more efficient use of indoor space, aka, precious real estate under grow lights,
Onions sprouted in February here will need light and water and occasional fertilizer until you start to harden them off sometime in April. To keep them manageable, it’s common practice to trim onion seedlings to 4-5” tall while growing indoors. It not only makes them tidier under the lights, it will help redirect energy into root development.
Hardening Off
Just like every plant started indoors, your onion seedlings while a simple structure with minimal foliage, will indeed need to be properly hardened off before being transplanted into your garden. You can follow the same rules for this as I’ve highlighted in my Hardening Off blog post. Definitely take the time to do this, otherwise you’ll risk severely damaging the plants and stunting their growth.
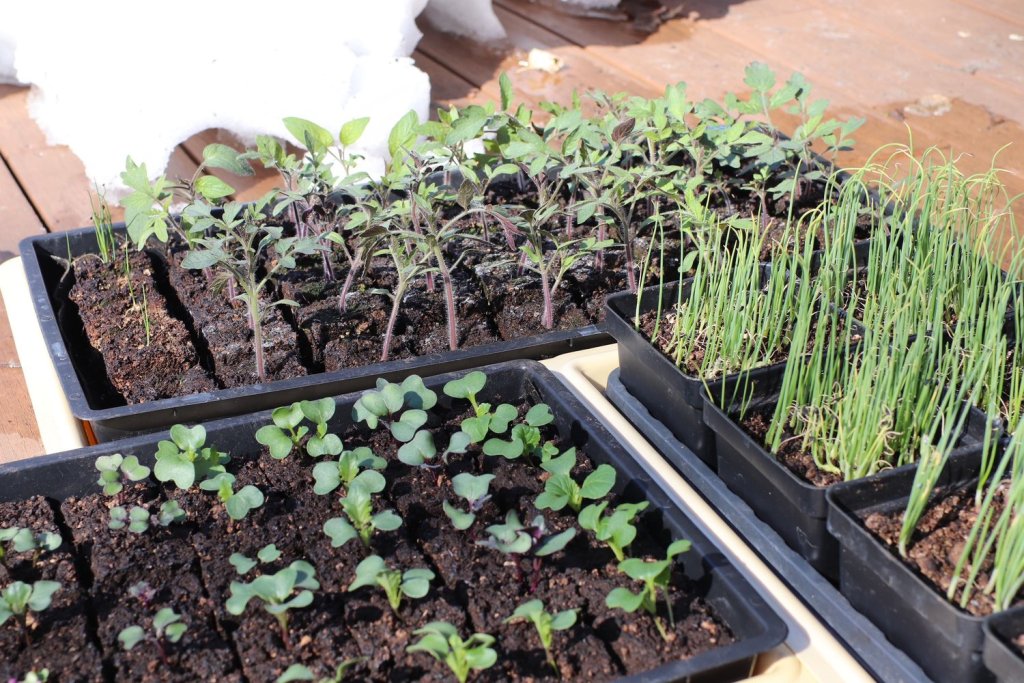
To get them in as early as possible, start hardening them off in early April. Not only is planting them early kind of fun, it helps spread out the transplanting marathon that is the month of May and June! Transplanting
Onions are hungry vegetables and need a lot of nutrition. Good compost, slow release organic fertilizer, and excellent irrigation are all keys to growing big, fat bulbing onions. They also love sunshine and don’t do well in shade or interplanted. I give them their own prominent space and relish the statement a tidy block of onions brings to the summer garden.

Plant them 4” apart in rows 12” apart. Dig a wide trench and generously spread several scoops of the slow release organic fertilizer into the furrow. Separate out the onion seedlings and carefully lay them out, leaning them against the side of the trench. Quickly fill in the soil from the opposite side and using both hands mound the soil up and together and stand them up.
It will feel like you are burying them too deep but don’t even worry about that. Inevitably, some will flop over. Others will even die. But the majority, if watered in well and watered by hand daily for the first week will establish quickly.

While the above is my preferred onion planting method, I’ve also planted multi-sown onions as an experiment a few years ago. The result was smaller overall onions, but it does save a little space. If smaller onions are your jam, multi-sowing them might be just what you need. This method is also used for beets, and you can harvest one onion at a time, letting the remainder continue to mature.
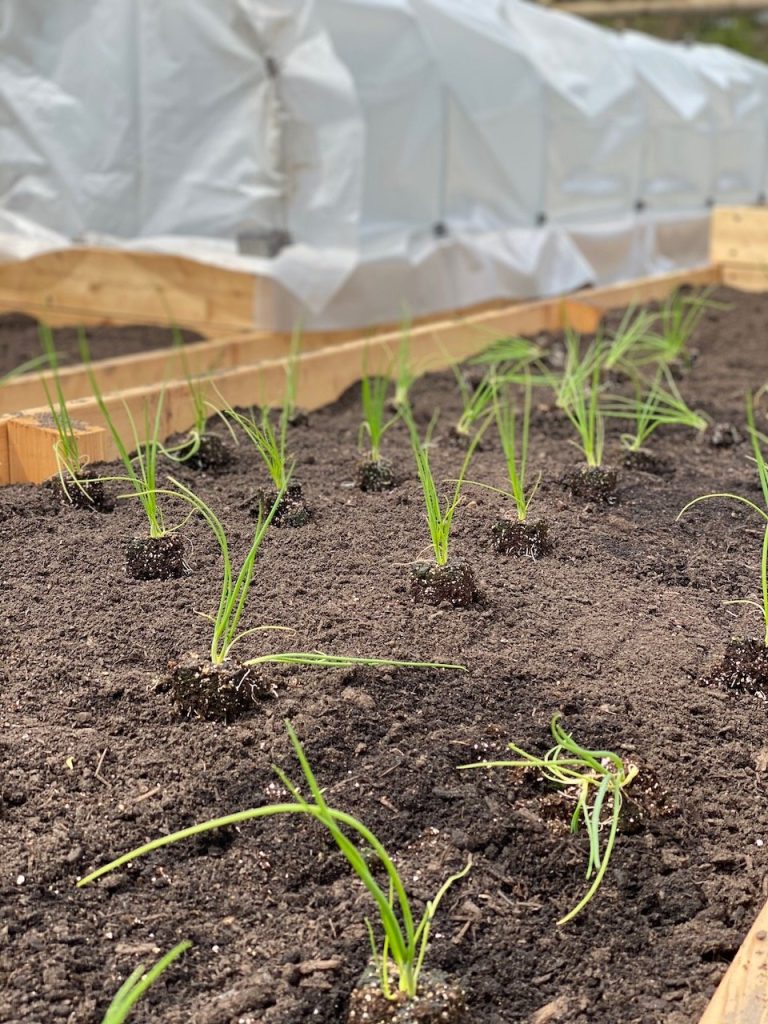
Multi-sown onions all spaced out and ready for planting. The ease of this is no root disturbance at transplanting. Note that I am not interplanting ANY of my onions. Full sun for these precious veggies. I love this method for scallions but not for bunching onions, as we often need a few scallions at a time.
When to Harvest
You can truly harvest your onions at any time. True, if you pull a bulbing onion in late May to use in lieu of a green onion for a meal, it’s one less bulbing onion you’ll have come August, but it is one less trip to your grocery store for a bunch of scallions when you only needed one. (Just me, or does this happen to you too?)
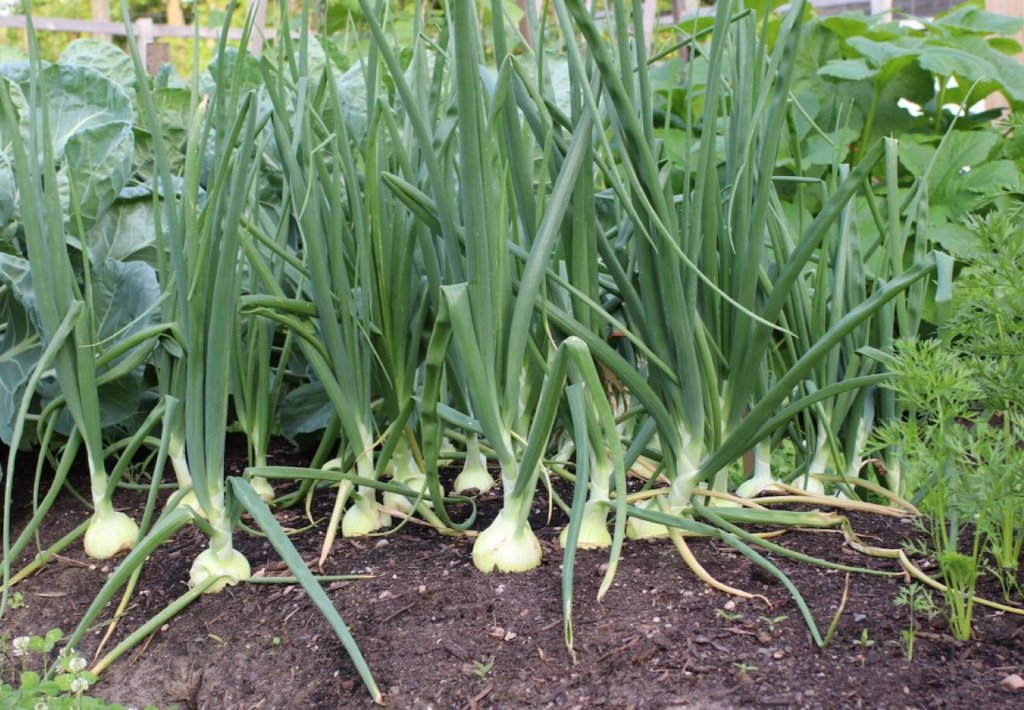
My point is that they are “mature” in every stage of development, unlike potatoes, winter squash, corn, or tomatoes. They are more like brassicas in this way to me, and again reminds me of their limitless utility in our home gardens.
Now if you are growing for bulbs, you want to be sure you wait to harvest until they are as big as they will get. The other major tell is that the foliage will start to flop over and bend; this is crucial to cut off flow from the bulb to the leaves, otherwise they will slowly rot from the inside out. Truthfully, even with my careful attention to the tops being fully bent and curing them for 3-6 weeks on our onion rack, we still get about 10% that rot by this time of winter.
If weather permits, after you harvest them all and let them lay in sun in the garden bed for a few days to upwards of a week. This obviously requires a good stretch of sunny days, so think about this when you are timing your harvest.
I usually harvest them for curing around mid-August, which happens to coincide with our wedding anniversary and this now annual photo tradition.

We end up with quite a range of bulbs, from softball sized to golf ball sized. It all depends on how strong those roots developed and quite frankly how much we may have damaged them at transplanting. Again, this is why I grow a lot of them — between 250-300 a year I think. I estimate that nearly half are consumed fresh or used for canning — my ketchup recipe, salsas, and bloody mary mix. That leaves our shallots and the rest of the yellow and red onions that will get cured and put into bins for storage.
Storing Onions
Once cured, onions are one of the easiest foods to store. Our first year growing here, I put them in an old milk crate on our mudroom floor. Looking back, it was my achievement that they crossed the threshold from the garden into the home and that was a much as I could accomplish at that time. We dug for onions for many months, and they stored just fine on the dusty floor. It was probably a bit too humid and warmer than other areas of the house, but it worked and reminded me that sometimes we make things harder on ourselves than necessary.
We enjoy fresh onions until usually sometime in April. We tend to save the shallots for very late in the winter as they do store better for me than onions, so we prioritize onions first.
Here’s a link to our root cellar blog post that shows how I created a “dry root cellar” in one of our closets.
-

Sourdough Bagels
Never buy a bagel again! You actually won’t need or want to after perfecting these, I promise.
Bagel (and pretzel) dough is significantly drier than bread or pizza dough. Just like with every sourdough endeavor, we use our high gluten Sir Lancelot bread flour throughout the feeding and dough-making process. You can read more about that in my sourdough starter post. It will feel too dry when you’re doing the first few feedings and even the final feeding will be much tighter. Don’t despair, with those few stretches during bulk proofing, the gluten will develop and it will feel familiar soon.
We hope these become a staple in your home kitchen as they have ours since my husband developed this recipe last fall. I’ve included both written (photos with captions) and a video format for this recipe. I recommend reviewing both before endeavoring as the video has more details on shaping, boiling, and baking than the still images.
This recipe makes 18 bagels.
We always start with the initial 11am refresh up feeding like we follow for our bread, so here we go:
Yield: 18 bagelsSourdough Bagels

Never buy a bagel again! You actually won’t need or want to after perfecting these, I promise. This recipe makes 18 bagels.
We always start with the initial 11am refresh up feeding like we follow for our bread, so here we go:
Ingredients
Instructions
Refresh Sourdough, 11am, Day 1:
- 3/8 ounces starter
- 1 ounce high gluten flour (we use Sir Lancelot flour for ALL sourdough recipes)
- 3/4 ounce filtered water
Ingredients listed in ounces (grams)
- 3/4 ounces starter (21 g)
- 1/75 ounces flour (50 g)
- 1.5 ounces water (43 g)

Day 2, SECOND FEEDING (7am):
- 4 ounces starter (all from above)
- 10 ounces flour (283 g)
- 6.25 ounces filtered water (177 g)
- Mix together by hand again and return to warm proofing station for 4 hours or so.
Day 2, FINAL FEEDING (11am-12pm):
- All of previous feeding
- 30.75 ounces flour (872 g)
- 17 ounces warm filtered water (482 g)
- 7/8 ounce sea salt or kosher salt (25 g)
- 2 1/8 ounces malt syrup (60 g)
- 3/8 ounce diastatic malt (11 g)
- Microwave the liquids (water and malt syrup for 45 seconds, then add to starter with rest of ingredients.
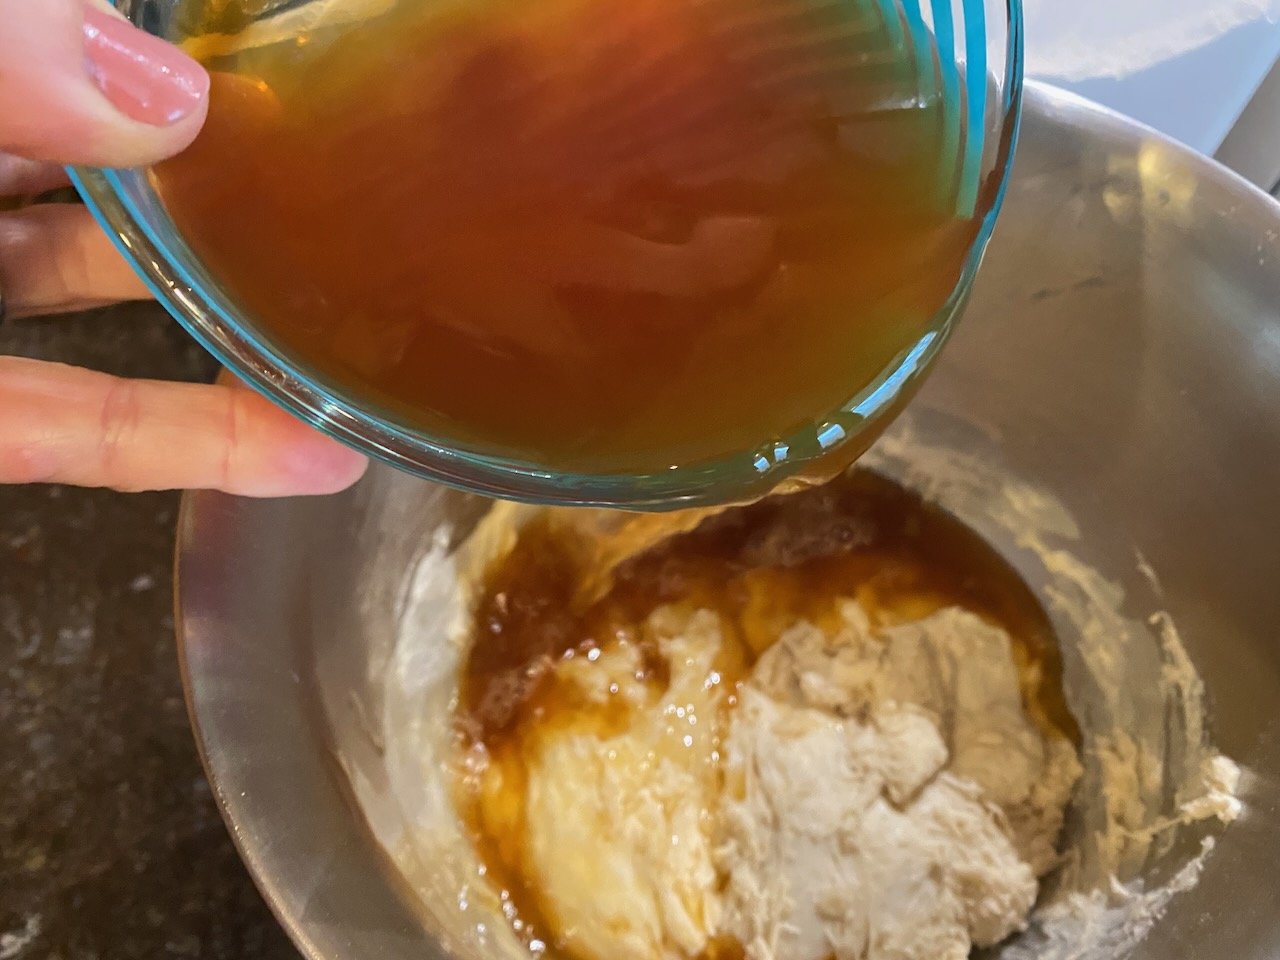
- The viscous malt syrup works into the dough much better when warmed. Warm water hastens the proofing. It’s a win-win.
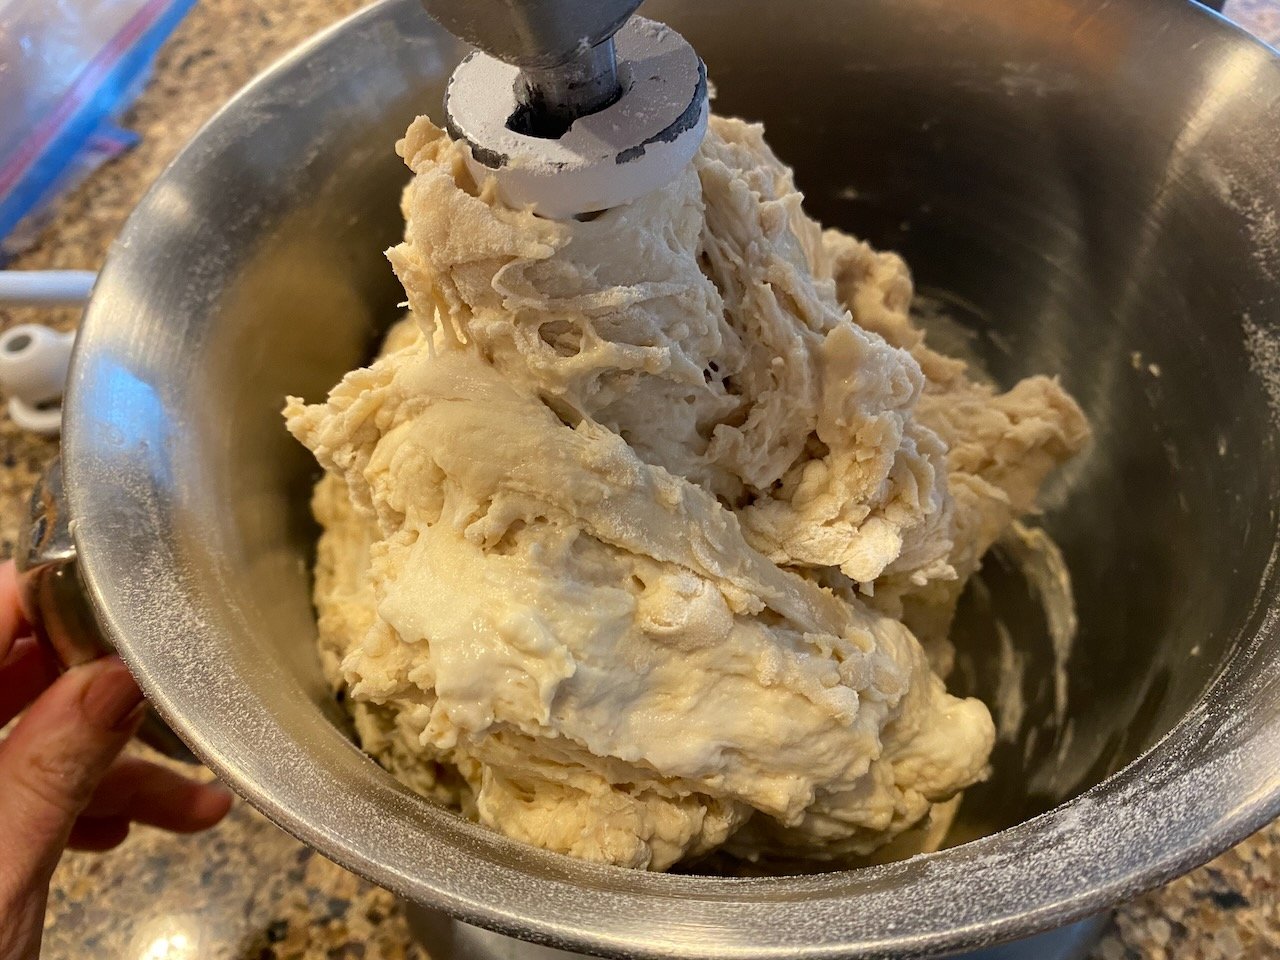
- Mix the ingredients with the paddle attachment for 30-45 seconds.

- Switch to dough hook and mix for another 30-45 seconds or so. Don’t overmix but it should look incorporated and look like this.

- Stretch with wet hands and place in proofing area. This photo was a third stretch, so the gluten was well-developed. Your first stretch will be jagged and may rip a little. Be gentle with it.
- Repeat stretching 2 more times, stretching once an hour around 1pm and 2pm, and then at 3pm it’s time to shape the bagels!
- Measure your bulk dough. We do this by removing it from our proofing bowl, taring the bowl on our scale and then adding the dough to it. I measure bagels in grams, and ours usually turn out between 113-114.5 grams.
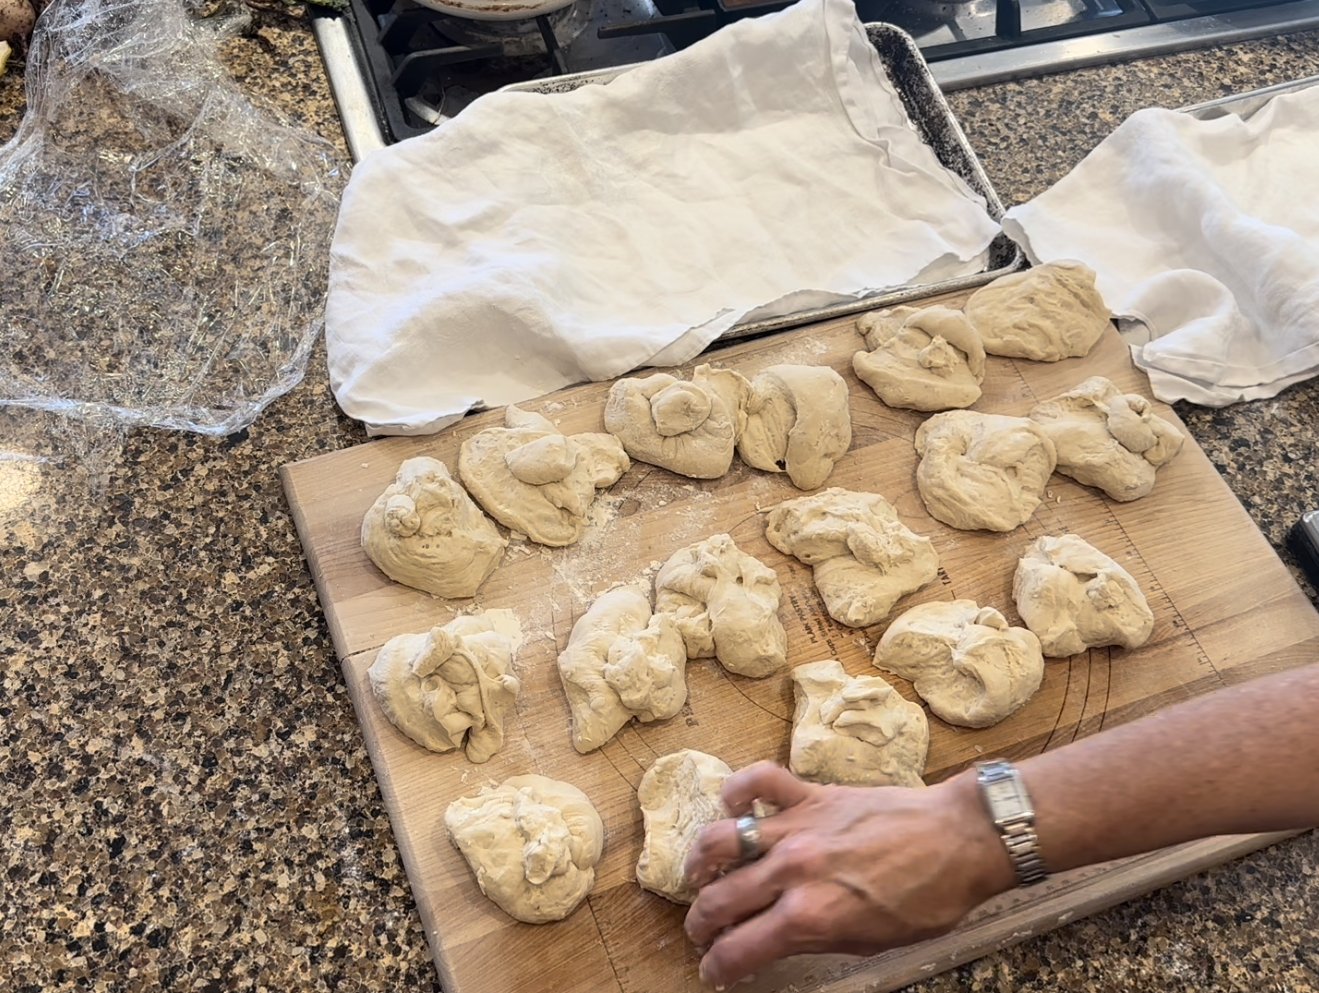
- Weigh each bagel out individually. This will require some removing and adding of dough.
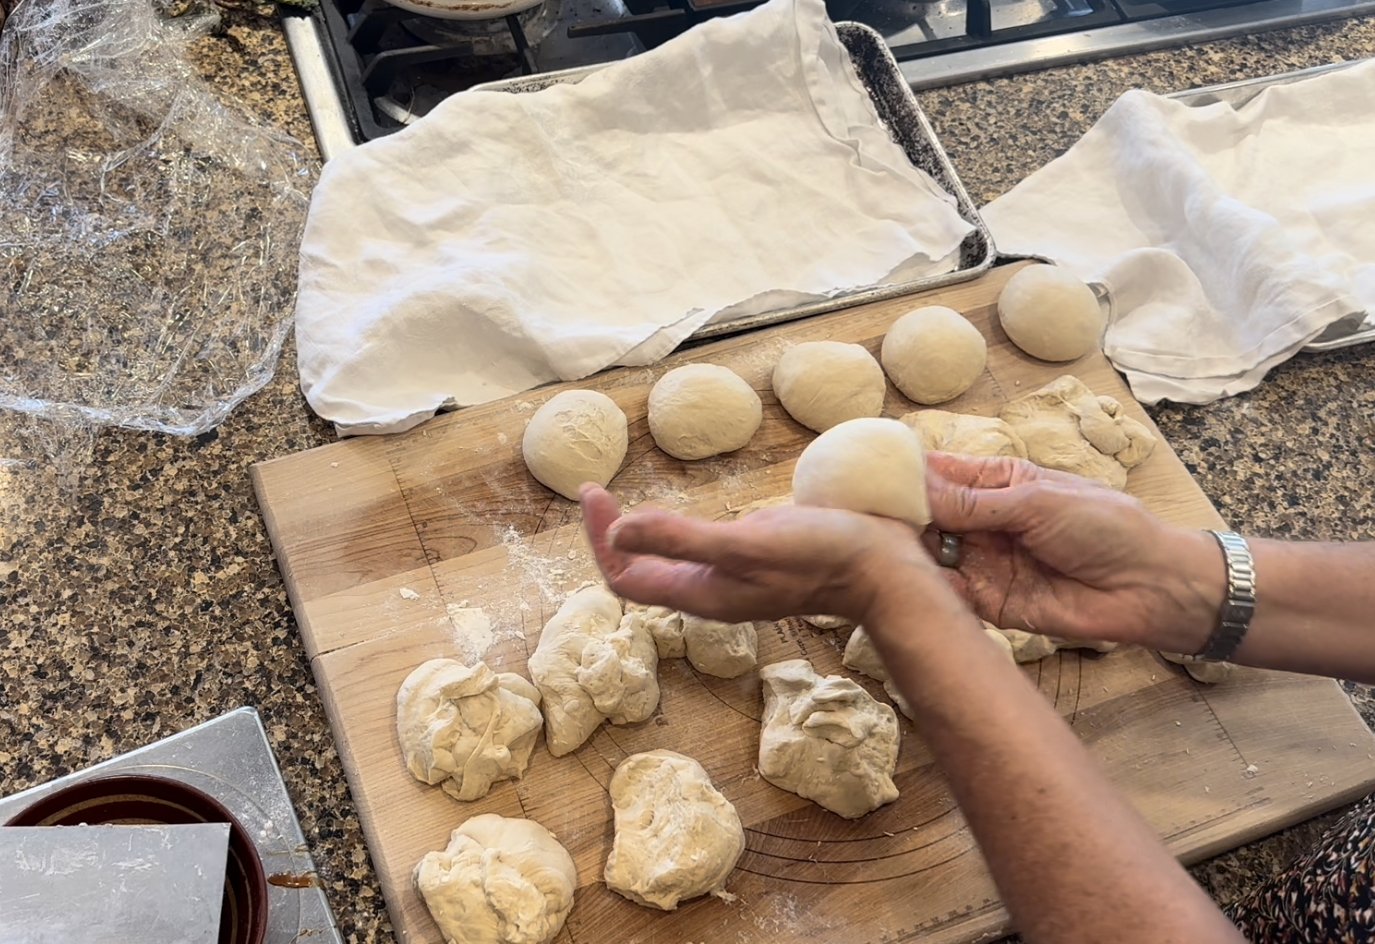
- Fold the dough under on itself from the outside. Then roll the dough between the palms of your hand in a forward motion, with one hand moving forward and the other backward. You are helping to create a smooth outer layer. If need be, pinch the underside of the bagel to close it up.

- Next, with your thumb and forefinger, make a hole in the center of the dough. Slowly tease the center apart. Be gentle and try not to rip the dough.
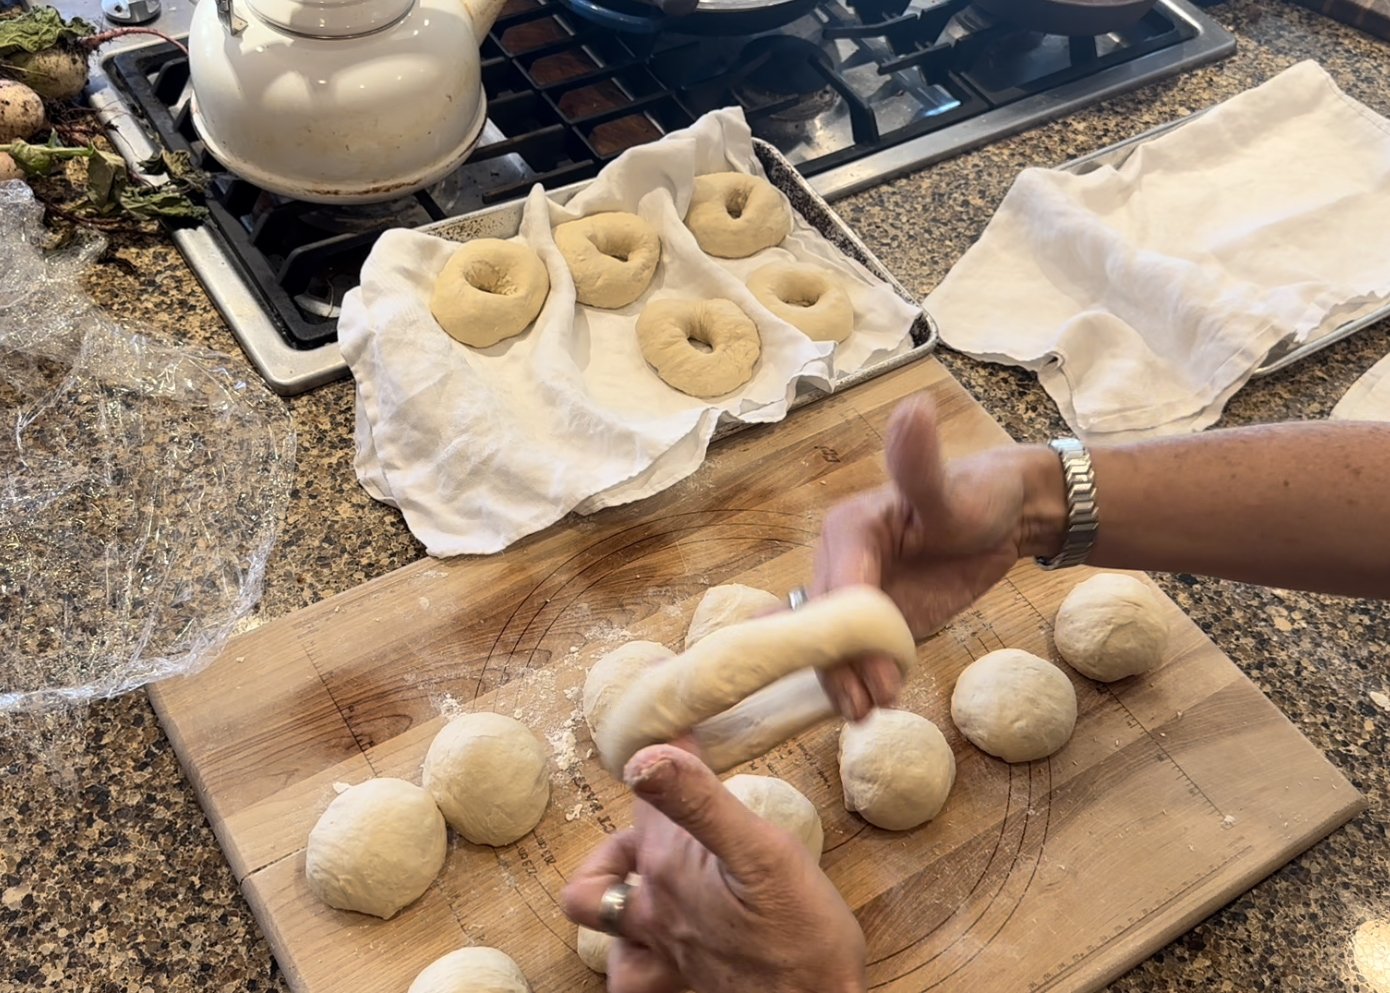
- With your index and middle fingers, roll the hole out as wide as the dough will give, making quick circles with your hands to stretch and shape the bagel hole. Place all bagels onto a linen or cotton towel for proofing. Stretch one more time before covering with plastic wrap for proofing.

- Proof for 1 hour. We use our proof setting in our oven which is set to 100F. Remove and refrigerate for several hours before baking, or overnight. We have tried waiting as long as 3-4 days after proofing to bake and it works too, though they definitely come out best when baked that evening or the following morning.
Baking the Bagels
- This recipe bakes 9 bagels at a time, and yields 18 bagels total.
- Preheat oven to 550 with your pizza stones and small cast iron skillet inside.
- When the oven is at 450, start to boil the water for the bagels.
- Add 1-2 T of malt syrup to the water for the boil.
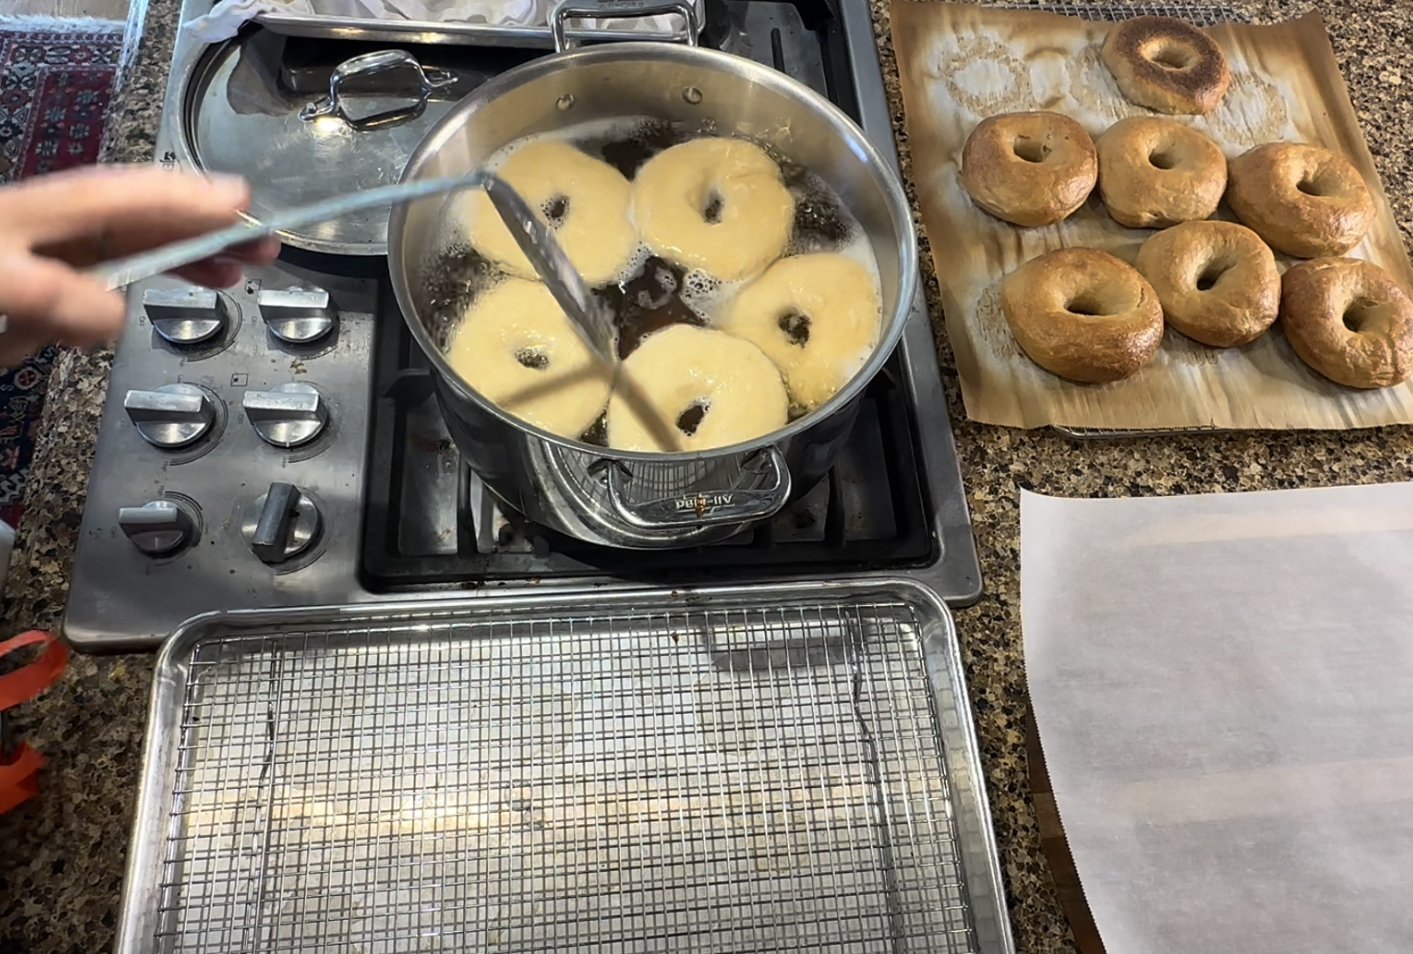
- Boil for 45 seconds on each side and then place on a wire rack to drain. I boil 5 the first time and 4 the second. Turn water off (you’ll need it in about an hour when the oven is ready to bake the other half).
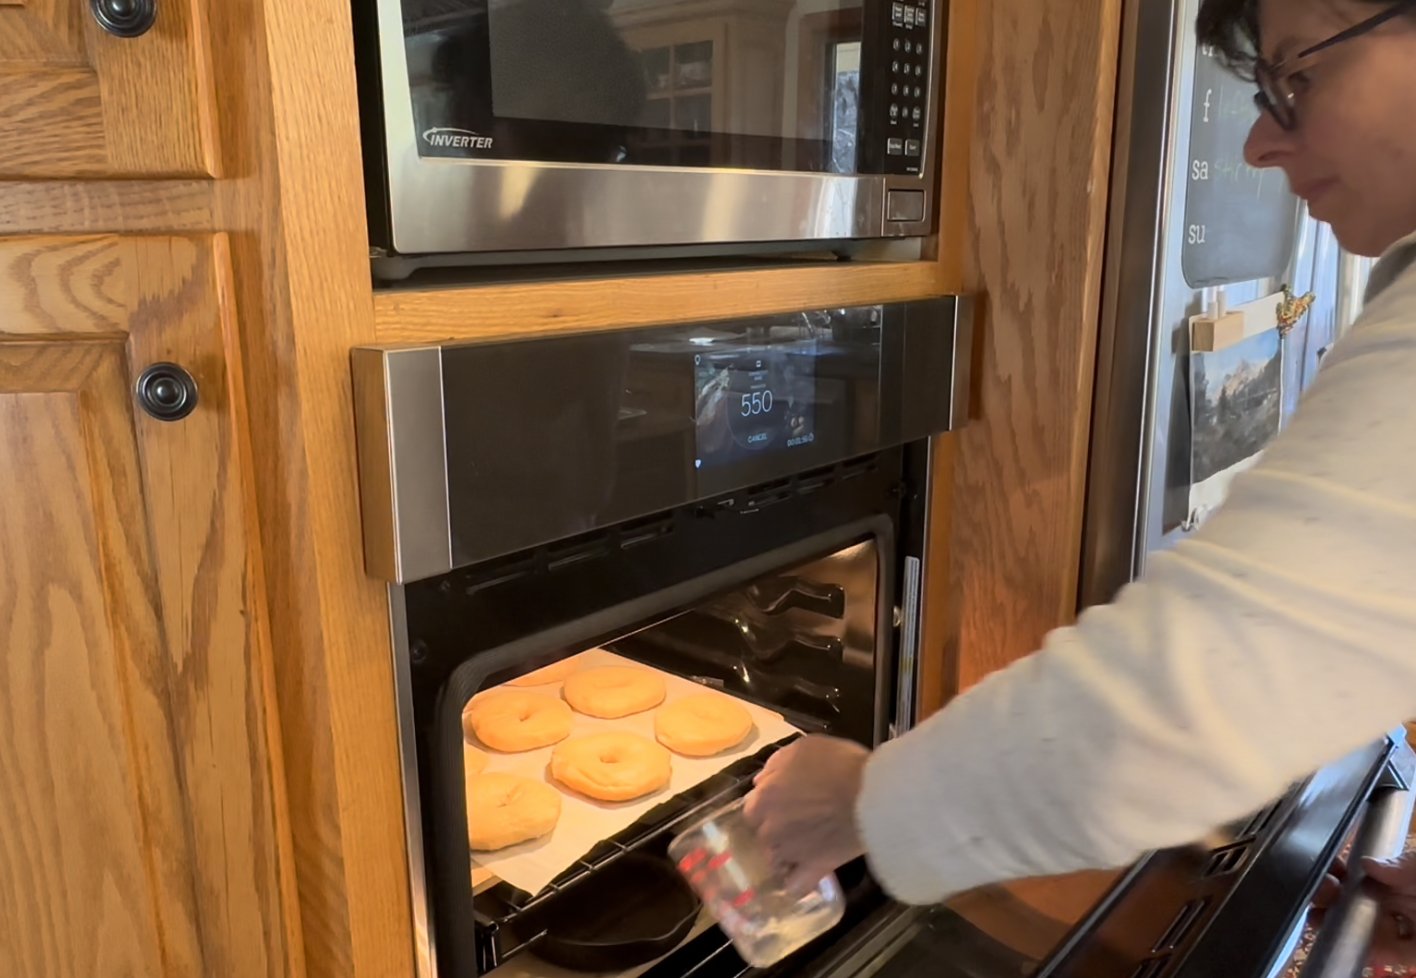
- Boil a few ounces of water for 60 seconds in microwave while the second set of bagels are boiling in the malt syrup water. As soon as you add the bagels, pour the water into the hot skillet and promptly close. We bake on convection, I recommend using it if you have it.
- Bake for 3 minutes at 550F (convection, if you can).
- Lower to 350 and bake for 18 minutes.
-

Stuffed Delicata Squash
Our second year growing Candystick Delicata from Adaptive Seeds and I have to say, this is the BEST delicata we’ve ever grown. The first year I grew it in part shade (and late), and we only got a few squash. But this past summer it had prime sunlight and ample support and this squash has delighted.
You can stuff these fully edible — yes, skins and all — vessels with anything you dream up. Sometimes I go for a pesto-rice dish, other times I saute mixed veggies, add paprika, garlic, salt and pepper and loads of cheese.
Easy Stuffed Delicata

Stuffed delicata make a great leftover plan for those beans and rice you may have recently made, or perhaps some extra pesto that needs to be used up. Grab your favorite grains, some veggies, and make a fun twist on a meal in a bowl!
Ingredients
- 2-3 delicata squash, halved and cored
- Olive oil
- Sea salt
- Filling of your choice
Instructions
- Preheat oven to 350F. Line a rimmed baking sheet with parchment or foil.
- Place delicata skin side down and pour water into the cavities.
- Flip them over, keeping as much water in them as possible, which helps them steam.
- Bake for about 30 minutes. Check them for doneness.
- Because the skins are tender and edible when baked just right, be sure to keep an eye on them. Lower heat is what I’ve found works best.
- When they are tender but not totally soft, which is usually about half an hour for me, take them out and fill the centers with rice and beans. Top with your preferred cheese. (I like a mixture of cheddar and mozzarella, personally).
- Put back in oven for another 15 minutes to thoroughly warm the filling and melt the cheese. You can raise the heat during this time to 400 to get some caramelizing if you want to try that.
- Top with any number of typical buddha bowl toppings such as shredded cabbage or daikon, sliced or fermented radish, fermented foods such as fermented cucamelons or curtido, avocado, and anything else that sounds tasty to you!
-

The Hidden Gifts of Rest
I was pretty sick for about a month this winter, as many of you know. It started on December 23, while traveling, and lingered too long into January. It included two infections, losing my voice and hearing, going on antibiotics and steroids, and having to extend deadlines in early January due to being sick.
It’s not lost on me that my ability to communicate effectively was temporarily suspended. And I think it’s a key to how this illness ended up working its restorative magic on me.
It was hard to rest. I wasn’t raised in a household that rested much; it was seen as laziness, not necessary or virtuous. My mom, who I adored and respected for her fastidious kitchen dedication, napped religiously but was otherwise busy from dawn till dusk caring for 5 daughters. We didn’t live overscheduled lives (it was the 1980s, Atari and MTV were the wow factors) but we did have a lot of commitments and structure to our weeks.
So when I say it was hard to rest, I mean it. The Catholic guilt sits there right next to me the whole time, telling me I should be able to get up and prepare dinner or get that email out. I resisted the urge for probably 2 weeks. It was the most rest I’ve gotten since perhaps my second was born over 14 years ago.
I started to feel completely better last week, over a month later. But when I did start to feel better, it wasn’t just that I felt better. I feel like for the first time since my dad’s passing in July 2021 I tapped back into my creativity.
Looking back, I have felt burnt out, unoriginal, tired, behind in creating unique content, and generally exhausted by social media since 2020. I know you’ve heard me discuss this before, but I hadn’t given myself any real time off except for a day here or there. But in the back of my mind I was always trying to come up with the next post, even on those days off. And my posting and my creativity is very in-the-moment. Even this writing. I don’t schedule posts, not even here, because that’s not in keeping with how my creativity works.
And 2021 was a difficult year personally. I finished editing my book and it went to press, but not before we laid my dad to rest. Most of the year I was really focused on his care and treatment and coming to terms with his mortality. We also rebuilt the garden, had an epic drought, and because of his illness I was gone for many weeks at a time throughout the year, which resulted in weeds, less photography, and even more chaos than normal.
After his passing, I stopped seeing my photography, the garden, and even my writing as interesting or beautiful. I would take photos and think there was something worth writing about, and then by the time I saw the images on my phone I had no words. Like, literally zero words. And if you know me and read my posts, there are more words than there need to be most days.
My mind was blank. My tank was empty. I wasn’t enough anymore, because I had given too much away.
Then came 2022, the year I became an author. It was a monumental year. We also moved my sweet mom out of our family home, cleaned it out and sold it, and had a lot of other major life events scattered about. I weathered all the firsts without my dad that year. I also focused on creating this new community and seeing how this new space would or wouldn’t work. It was a magical year, and I worked hard to shed that grief-shaken haze from my heart and mind, but it persisted throughout.
So, you see, this illness was a gift. To start 2023 laid up and going practically crazy and bored streaming The Great Pottery Throw Down (it was actually some of the best reality TV I’ve seen in years!!. This forced rest somehow managed to burn it all down, release the tension I was holding, accept and transform the grief into something beautiful, and rebuild my drive to create and be creative.
I feel like maybe I am finally ready to be the person I am meant to be after losing my father. It took about 18 months to arrive.
The most surprising twist of fate is that I recently reached out to my publisher to start talking about another book. Surprised? Yeah, me too. I have about 5 different book ideas, though I’m not sure they would all make great books. Some require a few more years of research and growing trials, while others would need travel and interviews to pull off. All have merit, so I’m excited to talk with them soon. I don’t want to commit to writing the book until next year, so it wouldn’t publish until 2026, 3 years from now, but I’ve started the conversation. All because of that forced rest.
But if you had told me I’d be extending myself like that this winter, I’d have laughed at you. Something in that required rest transformed, released, and opened my heart and soul to this next phase of life. And the way the past few weeks have gone in our personal lives, I’m intimately realizing this rest was all part of the larger shift that is happening around me and with those loved ones in our life.
All this to say, I really hope you have created or found some real rest this winter. Maybe it’s a ritual. Perhaps it’s a social media detox, or a long weekend where you just shut your phone off and cook great food. Maybe it involves partying with your best friends, or binge watching some light TV or reading books all weekend. After this completely cathartic month, even if I don’t get sick next winter, which I sure hope I don’t, I will try my best to replicate this fundamental rest.
I have a suspicion the years just get harder and harder, and we need to be as balanced and open to what lies ahead as our hearts can manage, so we can be our best selves for our favorite people, including to ourselves.
-
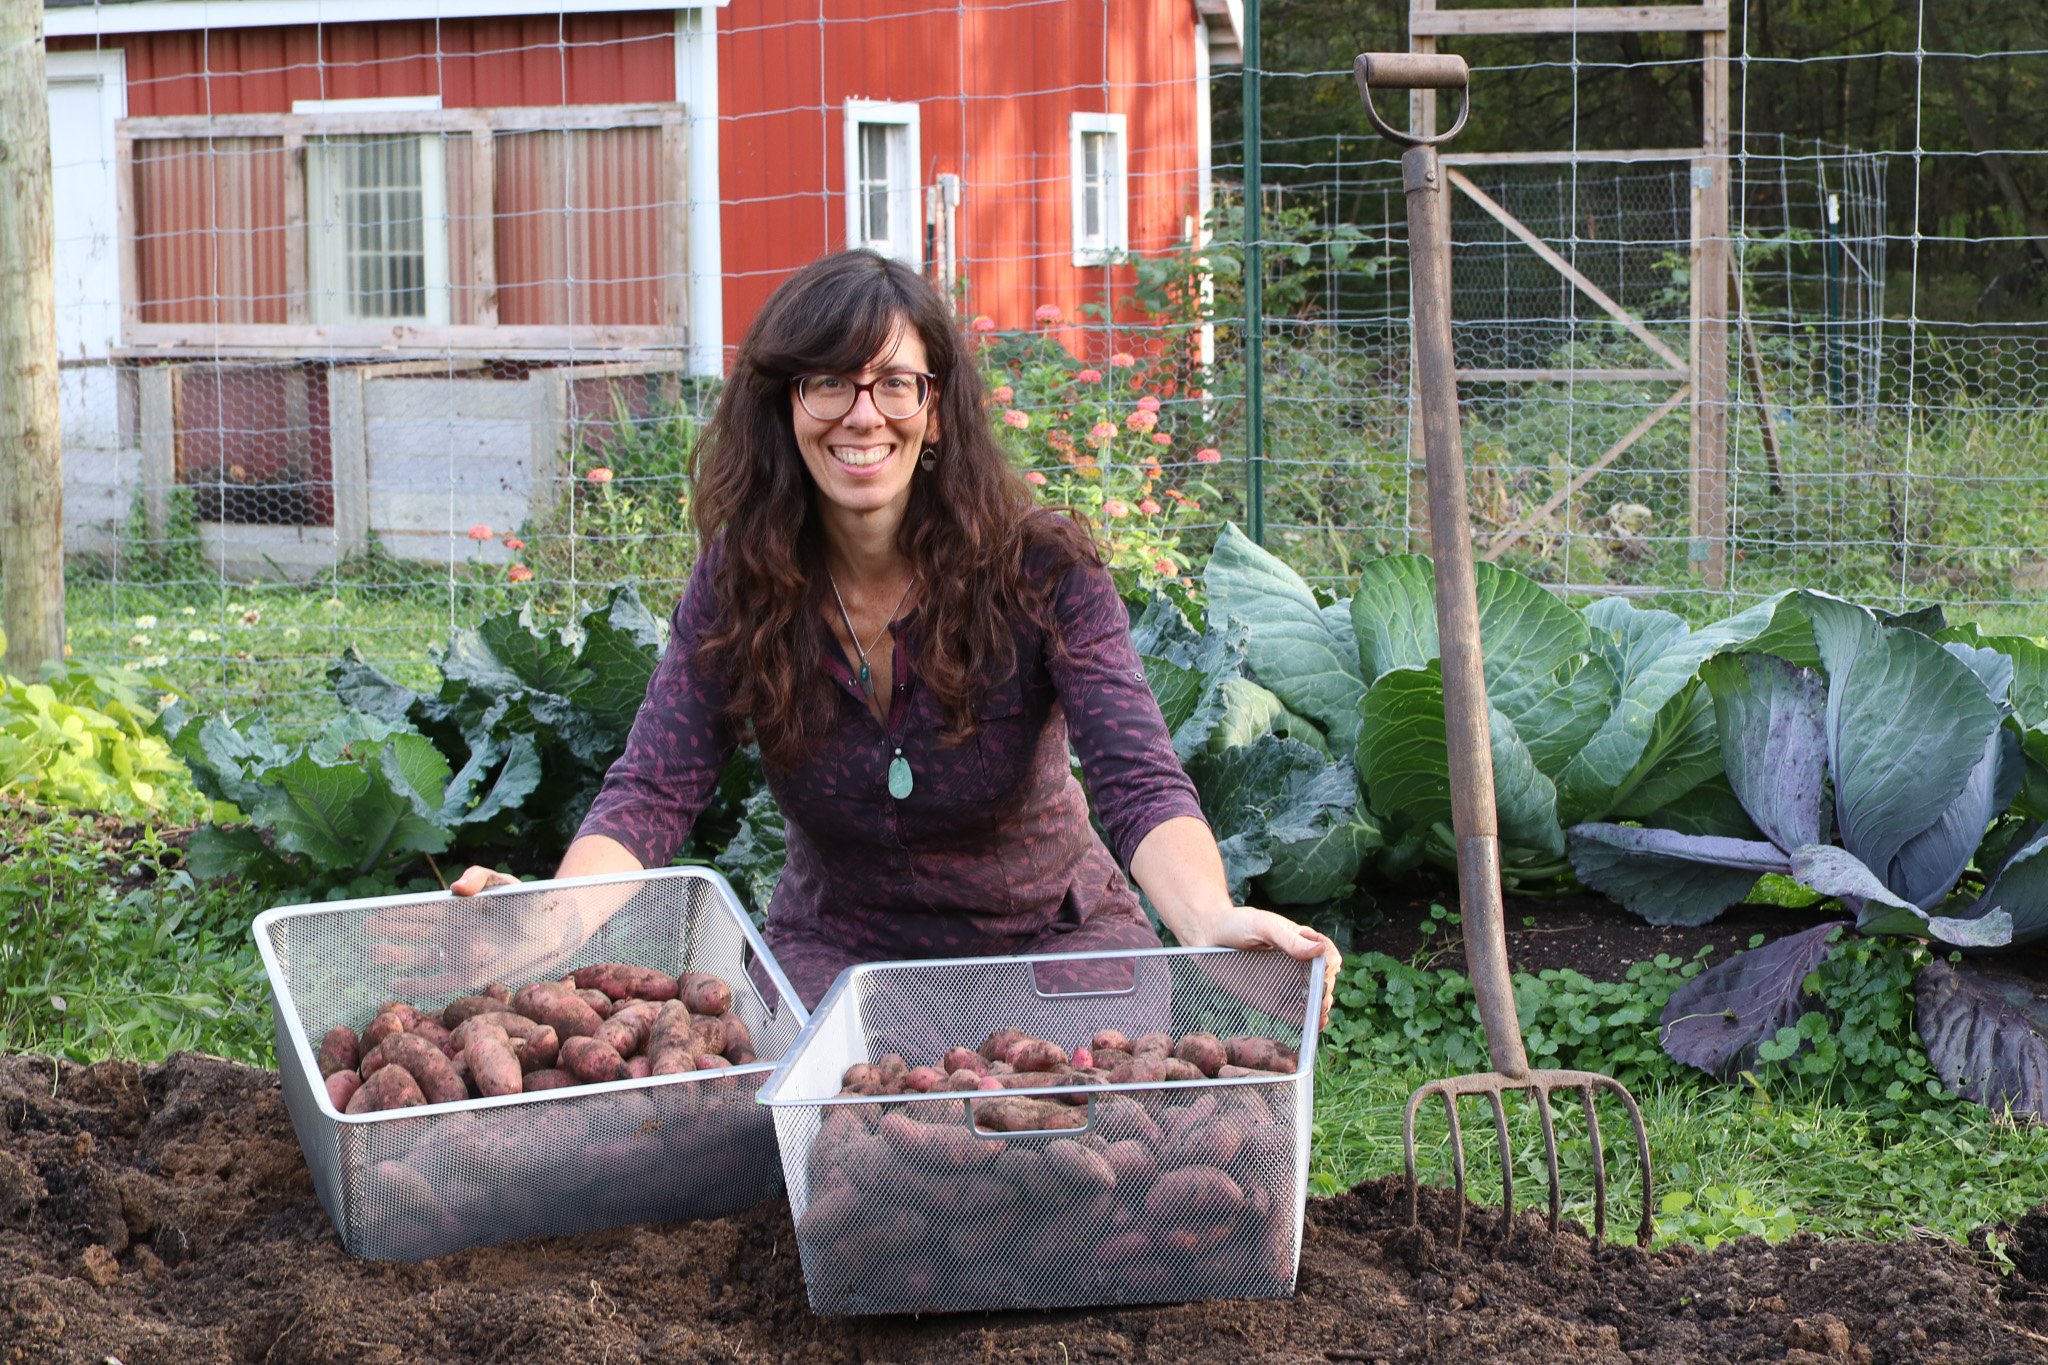
Favorite Varieties: Potatoes
Oh the mighty potato. It’s hard to remember a time when we didn’t grow them, but it really is rather recently in our long history of growing food.
We did grow them our third year growing food, in 2001, but we had to co-opt other land to get them planted. And as I recall, neighbors went and dug some up before they were ready, but that’s a whole other story. Oh, and my husband lost his wedding band while hilling them and our good friend and gardening guru at that time came biking over with a headlamp and helped find it among the rows of mounded taters.
For some reason, when we moved to Minneapolis we didn’t really consider growing them again. And we didn’t plant them until we moved out to this oversized exurban garden in 2017. And of course, that first growing season was fraught with disease as the soil was new, the nearby black walnut trees had just been removed, and we were in transition.

Potatoes add a gorgeous pop of color midway through their season, and I always marvel at how their ephemeral blooms play with their surrounding colors and textures. It’s possible, but quite uncommon, to grow potatoes from their true seeds that form from these flowers.
We have trialed over 12 varieties over the past 8 years. This past season, we grew 8 varieties across the equivalent of 3, 4’x8’ raised beds. And I fully recognize that’s not a normal garden size, so I narrowed our favorites down into Top 3, Honorable Mentions, and Tried to Love Them. I will grow all the potatoes listed except those in the tried to love them category, as those we really did try to make work for us, growing them multiple years, but it just wasn’t worth the space due to repeated issues.

Our first growing season with our expanded garden meant seeing how much more we could stretch our potato yields. We gfewa bout 170 pounds that year, and were really impressed with the Burbank Russet and Huckleberry Golds — and the AmaRosa’s still outproduced all varieties.
That being said, your soil, climate, and growing conditions are uniquely yours. Maybe yukon types would grow well for you. So I caution you to experiment and find potatoes well suited to your microclimate. On my Business of Seed Buying post, I do list where I purchase different veggies from, and include potatoes in that. We currently order our seed potatoes from Wood Prairie Organic Farm but I’ve recently learned about Mythic Farm in the driftless region of Wisconsin, a rather local option for us Upper Midwesterners. Their collection is pretty extensive and I plan to order seed potatoes from them as well in future seasons.
Here are our favorites, plus the ones we grew a few times and parted ways with because of disease pressure, productivity, growth habit, or a combination of all of the above.
My Top 3

The 1 lb of AmaRosa became 56 pounds of potatoes! This was a crazy potato harvest that turned out to not be a fluke year. AmaRosa
We bought this seed potato from High Mowing Organic Seed in 2019, along with Yukon Gem. From one pound of seed potatoes we harvested 56 pounds of potatoes. That yield is insane! They are an okay tasting potato, very tender flesh, but milder than other potatoes. However, the sheer volume of productivity is why I grow these. They are a certainty, having grown them for four years, from that original seed potato, and with pounds left over to give away to local donation gardens. This past year they yielded 5.75 pounds per square foot of growing space.
Baltic Rose
New to us this year, Baltic Rose is a pink-skinned, yellow-fleshed potato. Now in comparison to AmaRosa, they yielded 15 pounds at harvest for the one pound of seed potato, which is 1.25 pounds per square foot, really kind of sad relative to the others in this category. However, I had pulled a few plants in August for fresh eating so let’s call it closer to 2 pounds per square foot.

The reason this is on my top 3 list is their flavor. We just did a side by side taste test on Sunday night, and across all 7 varieties we have in our root cellar this winter, this one is the most flavorful and delicate of all. I will definitely be growing these again this summer, and hope to try and increase yields by giving them some extra hilling around their main stem. (More specifics on growing potatoes in spring!)
Honorable Mentions
Caribou Russet
A classic russet type, I don’t know why we didn’t think of growing these before a few years ago. Sort of like how I didn’t used to think of growing celery here, I guess I chalked these up to being difficult or something. Well, I was completely wrong about that. These are your impressive, massive thick-skinned russet you’d find in a grocery store, only grown at home so fresher and more delicious and rewarding! We couldn’t believe the size of some of them. We use them primarily for baked potatoes or oven fries so far, but I think they’d be great for mashed potatoes too. They yielded 4.1 pounds per square foot
Honorable MentionsBurbank Russet
This was our second season growing Burbank Russet and we really enjoyed them both seasons. They are delicious and were our gateway to demystifying the russet potato. Smaller relative to Caribou Russet, which makes them easier to process for oven fries and friendlier sizes for smaller appetite, they could easily be in my top 3, hence their spot as my first Honorable Mention. They are more productive than the Caribou yielding about 4 pounds per square foot of garden space, so that’s perhaps enticing to some of you.
Carola
This is a yellow-fleshed, delicate skinned potato. It’s a nice alternative to the Yukon Gold or Yukon Gem which you’ll read about shortly. More productive than the Baltic Rose or Huckleberry Gold, we have enjoyed having it in our rotation this winter and will definitely grow it again. It’s medium productive, which for us was just over 2 pounds produced per square foot of space.
Magic Molly
If you’re into growing colorful food, this is definitely a winner. And like the AmaRosa, these potatoes are generally more productive than many of the gold fleshed potatoes we grow. The flavor on these is lacking, and we find the texture a bit gluey. Definitely doesn’t hold a candle to the Baltic Rose, but it’s also a novelty and I only planted 3 plants and yielded 16 pounds. We will grow this one again but I largely use this as a gift and I tend to be the sole consumer of this variety in winter.

In 2021, when we grew 5 varieties, I thought we were really growing a lot of diversity. It’s funny how hindsight changes our perspective.
Huckleberry Gold
I wish this potato was up in our Top 3, but unfortunately after its debut year with us, its productivity crashed. I’m not sure why, but it was growing in a bed that also had some paltry results with the Charlotte potato (see below), so it’s possible this crash is a reflection of the soil microbiome in that bed more than the varieties. This is one of the reason I like to give varieties more than one growing season to assess their suitability in our home garden.
Despite it’s lackluster performance, these potatoes are really tasty and in 2021 I fell in love and they had taken over our yukon slot. I was, and still am, delighted with this potato, though as you’ve gathered the Baltic Rose has clouded my vision lately. It’s a medium sized, purple-skinned yellow fleshed beauty.
We Tried to Love Them
Yukon Gold & Yukon Gem
We had several terrible growing seasons with these varieties. It was possibly blight, though I’m wondering if it was more likely the juglone in the soil from the black walnut tree that was right in front of the barn that was lingering in the soil. We tried in 2017-2020 to grow one or the other of these and they ended up with heart rot or blight and were not very productive. This is why we transitioned to Huckleberry Gold in 2021.
Rose Finn Apple
I wanted to love this potato so much, but because of how shallow the tubers grow, so many of ours were exposed to sunlight and turned green. They are also extremely prone to malformations if irrigation is not regulated, and back when we grew them we were not on drip so it was pretty wild. I don’t have harvest weights from it either, but I know that it was not as productive for the square footage as I expected. And yes, I was growing AmaRosa at the time so my demands for my potato plants had gotten a little unrealistic.
Russian Banana Fingerling
Another futile attempt to love growing fingerlings. You guys, I really wanted to love these ones too, but as I recall they were not as productive as I’d hoped (or as advertised) and might have been because of late season disease pressure. Based on their bio in Wood Prairie, they should at least have made it to my honorable mention and this is the moment in writing blog posts when I ask myself if I should try them one more time because I can’t exactly pinpoint why we stopped growing them (though it’s safe to assume low productivity was the driving factor).
Charlotte
Touted as Eliot Coleman’s favorite European potato, it is now offered through Wood Prairie. I had high hopes for it but it performed terribly for us last summer, as poorly as the Yukons in previous growing seasons. And the harvest we did yield was well under a pound per plant, so that was all the information I needed to let this one be a one and done. In part because we have a wide range of textures and flavors accrued, I think this one could work in the right garden, but it seems that garden definitely not ours.
As of this writing, I have been perusing the Wood Prairie site and added two new potatoes to our 2023 grow list: Butte (another russet!), Keuka Gold (a Cornell developed, northern climate high yielder … yes, yes, I’m suspect of that last bit but I went for it anyway).
-
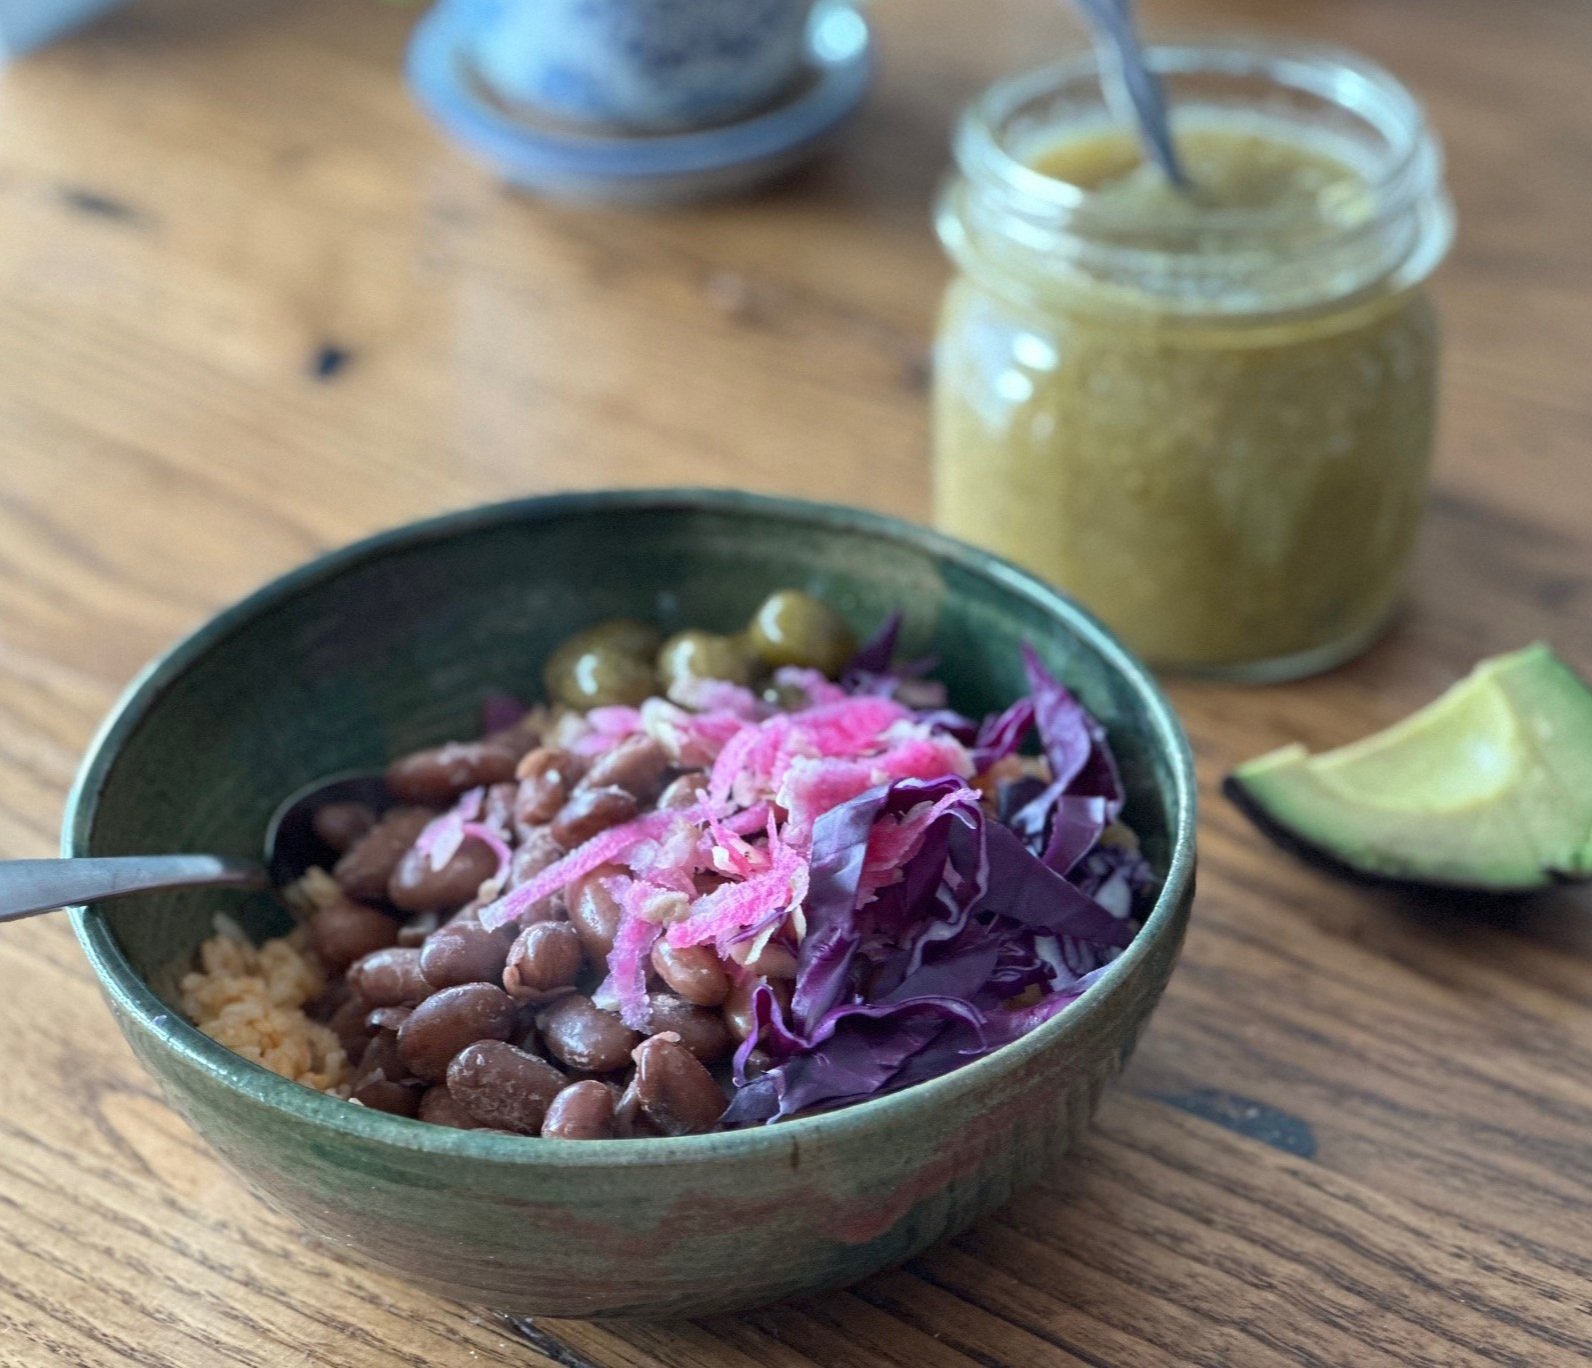
{Homegrown} Beans & Mexican Rice
A staple nearly weekly in our kitchen is the mighty yet simple flavors of beans and rice. It really is the perfect food. It’s vegetarian, can be altered any number of ways to add flavor and texture, and the bean-grain combination is present in just about every culture as a staple of the cuisine.
This is a pretty traditional flavor, and can be made into many slightly different meals as leftovers. And if you tire of the beans as is, I’ve been known to transform them into chili later in the week.
The Mexican Rice recipe is another one of these pre-internet day recipes I found in a library book in Corvallis, Oregon (like my candy making recipes). I have modified it slightly, but this recipe is based on one from a Mexican cookbook we borrowed as graduate school newlyweds. It’s that quintessential rice you get with refried beans at Mexican restaurants and I’m convinced the oil used is a major part of how this rice tastes and cooks.
Classic Beans and Mexican Rice
 Prep Time 15 minutesCook Time 3 hoursTotal Time 15 minutes
Ingredients
For the Beans
- 8 ounces dry beans of your choice, about 1.5 cups
- 1 medium onion peeled but left whole
- 2 bay leaves
- 1 large garlic clove
- 1 dried chili of your choice (I usually use a medium hot pepper)
- 4 juniper berries
- Salt, near the end to taste
Mexican Rice
- 1 1/2 cups jasmine rice
- 1/2 cup stock (we use chicken broth)
- 1/2-1 cup tomato sauce (you can sub tomato powder for this and increase water)
- 1 medium onion, diced large (about 2/3 cup, though I never measure)
- 1 large clove garlic, crushed
- 1 tsp paprika (for color) (optional)
- 1/3 cup peanut oil (don’t use olive oil!)
- 3 cups broth
Instructions
- Sort and rinse your beans and set in a pot with at least 1” covering, overnight ideally. (See shortcut in Notes.)
- Next morning, rinse well several times. Add the rest of the ingredients except the salt and bring to a boil. Turn to low, let simmer for about 1-2 hours, depending on age of beans, stirring occasionally. Salt to taste when they have fully softened but still need a bit more time to cook.
- You’ll need to use a slotted spoon to fish out the juniper berries, onion, garlic, bay leaves, and pepper.
- Optional: Take about a cup of the cooked beans out and mash with a potato masher and return to the pot. This will yield more of a refried bean texture. We keep ours whole but that’s just our texture preference. Heck, you could mash them all up and add a little extra broth to get a really smooth texture.
- While the beans are cooking, bring your teapot to a boil and cover the rice in a 4 cup measuring cup or quart capacity container. Let stand for about 20 minutes. Drain and rinse well in cold water. Get as much water out as you can.
- Meanwhile, in your blender, add the 1/2 cup stock, small onion, garlic, tomato sauce, and optional paprika and blend until completely smooth. Set aside.
- In a large 12” skillet (or or your largest cooking pot), heat the peanut oil on medium high heat. I often also don’t measure this out precisely but I’m looking for a solid layer of oil throughout the bottom of the pan. Add the drained rice to this and fry, stirring frequently, until it glistens and has changed color. The original recipe says until gold in color, but I just go for a fully changed color and a light fry (they will look opaque when fried).
- Now you add the tomato puree to the pan and cook this over medium high heat for several minutes until it’s almost dry and big bubbles are popping through. This takes several minutes. Finally, add the 3 cups broth and cook over medium heat until the liquid is almost completely absorbed, 5-10 minutes.
- Cover and cook for 15 more minutes. Then turn it off . Don’t open it yet. Let stand for another 30 minutes to steam and soften. This rice takes about 75 minutes from start to finish, but, again, it’s totally worth the extra effort.
Notes
Bean Shortcut: Bring to a boil and turn off water. Let sit for about an hour. Rinse well and refill water to about 2” above the beans.
I don't measure my water for the beans but keep an eye on it and top off if/as needed.