Your cart is currently empty!
Welcome to Meg’s Blog
-

November Monthly Task List
I’m still wishing for colder weather, because I’m ready to have all our food put up in the root cellar and all the beds as tidy as we can be until February when I will waltz into the space and ceremoniously shroud a low tunnel with greenhouse plastic to commence the beginning of our growing season, aka, let’s melt the snow and thaw the frozen raised bed already!
There is a very long list of tasks we need to complete before I can shut the gate for a few months. They include:
-
planting garlic! (see below)
-
harvesting carrots
-
harvesting daikon and watermelon radish
-
harvesting brussels sprouts
-
layering carrots and other roots in damp sawdust for winter storage in the root cellar
-
chipping the biomass for our annual compost pile
-
weeding the raised beds
-
adding compost to weeded raised beds
The weeding and compost is currently taking priority, along with the garlic planting. Of the 8 yards of compost we had delivered, we’ve maybe moved 2 of them so far. We don’t expect the 8 yards to fully cover the entire garden, but we hope to add a layer of compost onto: both triangle beds, the large asparagus bed, the honeyberry bed, and as many veggie raised beds as possible starting from the north side of the garden working down toward the barn. I don’t anticipate completing the weeding in all beds this fall, and full expect the perennial quackgrass to stare me down all winter and into spring as it continues to flourish where I have not consistently and relentlessly weeded it out.
At the end of the day, the weeds can wait. What we seem to be realizing and learning this year is that we are growing older. Our bodies aren’t able to handle as many loads of compost a day as they could 4 years ago. My back is still tender from when I harvested potatoes and then heaved compost last week. It’s not worse, but it’s also not improved much. It won’t improve until all the vegetables are harvested and put up, and the compost is all loaded and unloaded. This is just the way of this work. So we will take it day by day, work for an hour here and another hour there, employ our sprightly teenager to do the compost shoveling into the wheelbarrows and see how far we can get.
The weather outlook is promising for doing a bit of work each day for the next week and a half (highs in the 40s/50s with lows in the 30s). My hope is that we will be done with the compost at the end of next weekend, but like with most things I set out to do, I think that’s highly ambitious and destined for failure. I don’t see a real cold snap yet, and that’s why I hope to move compost daily, following behind our weeding, one bed at a time.
The other thing I’m really thinking about this month is seeds. I keep my empty seed packets in a binder clip in the kitchen all summer to help me remember what I need to re-order. I imagine like you, I’ve been getting emails with new varieties and 2025 catalog launches. And guess what? I’m not that interested in new, flashy varieties. Yes, I may want to try to find more brassicas to play with, but I’m good with most things. I’ve spent almost 10 years trying to diversify and keep up with the newest tomatoes, flashiest peppers, and I guess, to a varying extent, be an inspiration with interplanting flowers in your vegetable garden. But I’m satiated. I’m good. If I add more seeds to my stash, it will be an open-pollinated red cabbage, more open pollinated broccoli varieties, and more spices and herbs.
This feels like an alignment with my social media exit (temporary or not), inviting myself to pause and jump off the hamster wheel. It’s me realizing I have enough seeds to grow a garden. Let me reframe that: I already have enough seeds to grow a beautiful garden, even if I don’t spend a single dollar on seeds this fall. I do value small seed growers and like to support them, and I am hooked on some hybrid varieties like Plum Perfect and Sun Gold tomatoes and many hybrid green cabbages, but for many of the veggies we grow, we know what we like and it works. Maybe this is me getting older and tiring of the relentless hustle of capitalism throwing new and better at us, but I’m hoping it’s me getting sager and acknowledging that keeping up isn’t what life is all about.
All that being said, I am realizing that what I really need to focus on is the harvesting and putting up. We worked so hard to grow this food to feed us all winter, why am I so obsessed with the garden looking tidy this winter? It’s part aesthetic, but also, it makes spring easier. And yet, if I don’t get the food out at the right time, it won’t store as well. So, I think I’ll be taking in food every day this week, one or two baskets at a time, enough for a few hours of work and hopefully, as the bins accumulate, the root cellar temps and humidity will settle into their winter routine (temps in the mid-30s and humidity 95%). I’ll start with the daikon which are quick and easy, then move onto the carrots which are messier but a bigger lift. Finally, I’ll dig up some of the napa cabbage and brussels sprouts to replant into damp sawdust in the root cellar. I will share more about how I store veggies this month in my guide, which should arrive this coming weekend.
If You Haven’t ….
Plant your garlic NOW: zone 4 and 5 I’ve put it off long enough. The weather has been warm enough in October that I was not late. I wait to plant garlic until we’ve had at least 2 hard frosts (26F). By my count, we’ve had one so far, but with the daylength shortening even more, today is the day (November 9). This will also be the latest I’ve ever planted it, by about a week. If you’ve been following closely with my succession planting this year, many crops have been planted 1-2 weeks late without consequence, so perhaps I’m a quick study or, also possibly, my 2025 garlic crop is doomed.
Get Your Soil Tested Fall is prime time to get your soils tested, whether you’re about to build a new garden or have been growing for several years and want to see how your soils are doing. Your state university extension agency offers this service in the US.
Keep tearing down the Garden I’m a huge proponent of a full fall cleanup. Because having to cleanup in spring will only delay the start of the garden season. Cleaning up the diseased plants in particular will reduce disease pressure by removing spores in your soil as well as provide a welcome mental clarity that will be difficult to achieve otherwise. If I see hanging plants well after frost, it’s more nagging than an undone to do list, weighing my shoulders down until I face the quiet task of thanking my garden for a long season of beauty and nourishment. It’s not glorious work, but it’s grateful work.
Sterilize your trellises with Hydrogen Peroxide More heavy lifting in fall. You can wait to do this, but I find it easy to spray them and then take them down the next day or next week. We sterilized all trellises once they are empty, then take them down and store for winter. It’s one of my more grateful tasks in fall, to undo what we built, to deconstruct it back down to bare bones. To even take the bones out. There’s something hauntingly beautiful about the sparseness to come.
Top Dressing with Compost (now until the ground is frozen) I hope you all know by now that we love using compost as mulch. I don’t cover my soils in fall with a cover crop or leaf mulch or straw. Instead, I add a healthy layer — 1-2” of compost — atop each bed as my mulch. It will work its way in next spring, but for now it holds the active soil microbiome in place over winter, protects our garlic when planted, and helps suppress annual weeds too.
Set up low tunnels Once the compost is laid, the low tunnel hoops will get erected, ready for the poly in February. Follow my instructions in my Guide to Setting up a Low Tunnel: https://seedtofork.com/monthly-guides/low-tunnel-guide
-
-

Reclaiming my Attention
I’m going on 2 months of removing Instagram, Facebook, Threads and all news apps off my phone. I’ve reduced my phone email to just 2 accounts, eliminating unnecessary noise too. My daily screen time average last week was 2.5 hours. Maybe that doesn’t sound like a small amount to some, but that is easily down 75% from earlier this year. And honestly, I hope to never go back to being on my phone more. I’ve learned so much about myself and this tech, and I want to share some raw and unedited thoughts with you that may either delight or frighten you. Or possibly a little of both.
What I’m learning is that my attention is a precious resource. Time is the resource tech companies are profiting off of: my time. Your time. They want our time in the form of being glued to our screen. They calculate how long we linger or how quickly we swipe through or away to inform the algorithm what to feed us next. And yes, I do see this as a kind of food. Our phones do seem to be our daily bread. How many pick it up first thing in the morning? This undeniably useful camera-camcorder-phone informs how we think about ourselves. It shapes how we think about the world. They are feeding us ideas, some nefarious, some good.
But the thing I keenly understand right now is that there’s no competing with real life, even though I believe that’s their end game. My time off screens has become richer with each day as my senses return, senses I didn’t know had been so dulled by the lure of the glass. I sense my hearing attuning to the nuanced language of my surroundings: the roaring scuffle of walnut leaflets as they tumble across the deck; the deafening scrape of my shoe ungluing itself from the hardwood floors where the tomato juice dribbled onto the floor mere hours earlier. This one is a distinct form of onomatopoeia, if you listen for it. S t i c k. I sense my sight attuning to the glistening light that cascades across the garden on a sunny morning, cloaked in late season dew that hearkens of colder days. I can’t stop watching so I invite time, my own precious time, to slip through my fingers as I laze away a good 20 minutes with nature, fully immersed – and fully unplugged — chasing the glistening light around the garden like a child trying to catch a balloon.
How we listen and why we listen are questions marinating inside my soul right now. It’s a kind of freedom I forgot I had, the agency to turn down the volume. The invitation to shut off the phone. The desire to tune out the noise completely. And tune in. Strangely, one of the first things I did the week I broke up with social media was stopped listening to my radio in the car. I don’t even play music often anymore, but more importantly, I no longer stream podcasts or MPR (it’s talk radio all day long). It was repulsive to me to continue to feed myself information (laced with ads) all the time. The more of a rest I had, the more of a rest I wanted.
And in this rest is a kind of friendship with myself. A reacquainting. A recognizing. An indulging in a kind of self care that is beyond market economics: a reclaiming of my time by removing the ad-forward noise of my life. And in doing so I feel a kind of peace and creative freedom slowly healing.
I frankly don’t miss the extra noise. Yes, I was feeling a bit lonelier at first, and I did miss the attention, which should be no surprise really. But it made me mad that so much of my day was framed around seeing myself on screen or responding to people talking about something I shared. But I would call a friend, workout, cook, bake, pick up my knitting, or go into the garden. Without expectations of sharing or performing, the garden feels expansive not constrictive. I marvel at the late season butterflies. They seem even later this season. The skippers flocked to the gomphrena and the clouded sulphur, the cute spotted yellow ones, not to be confused with a cabbage white, transform a momentary annoyance into a sustained pleasure. They signal apple season, the arrival of a first frost and the digging of potatoes. They dance more casually and are larger that my garden nemesis, the cabbage whites. It’s a carefree end of season, and their relaxed state relaxes me. I sit and just take it all in. Wasps, bumblebees, and honeybees intermingle too, dipping and sipping and swerving. If I was performing for others, I’d not be attuned to the details of this day. I’d have been trying to get the best video or photo to load into my stories to keep them live so my account would continue to be “seen” by others. And now, all I want is to be seen by myself, but that didn’t come without some confusing days.
What I missed most at first was sharing videos. I missed recording and sharing my daily tidbits, things that in reality I recorded multiple times before sharing, telling and retelling my story until I was satisfied before sharing with the world. Then reality struck me. So much of what I contribute to is a culture of narcissism. My camera roll is full of …. me. Me talking to myself. Me making myself laugh in this intimate kind of way, confessing what I haven’t done or what I got away with this week by procrastinating in the garden. My confessions amuse me, but really I’m performing. I’m performing for public consumption. I’m performing for you. Because people want to consume our private lives these days. It’s an insatiable drive to live vicariously, and I’m certainly prone to enjoy a binge reality TV show or to watch others garden or share theirs. This is the thing I now miss least. And I feel grateful to have centered my privacy again after 8 years of daily (over)sharing.
Which had me wondering about something. If everyone on Instagram — 100 million active users, let say for these purposes, which I’m guessing is a gross underestimate — watches 10 minutes of videos a day, that is the equivalent of 1,141 years. Let’s time travel back 1,141 years for a minute. That would put us back at 882 AD. I’d guess in many ways, that’s exactly what the algorithm wants: collective regression.
They want us to follow, without questioning. They want to maintain our attention. Many days we want to be pacified, want the aches and noise and stress of our days to evaporate. We reach for a glass of wine, a sugary treat, an endorphin rush from an intense workout, and our other addiction, that glass screen. That screen surely succeeded at containing my attention and in doing so lining their pocketbooks, with a lingering aftertaste of personal insecurity. This relationship will never be balanced. It won’t ever be something that cares for us because they are hunting us, and we are what they so desperately need to consume. They are consuming our time, our precious time. Even just 10 minutes from each of us is years of advertising dollars. And by choosing to participate we are consumed by a barrage of humans publicly self-medicating by being gobsmackingly stupid.
But that’s just the thing. I want to be gobsmacked too. I want life to rush at me every day with such intention that I am burning alive. I want the earth to saturate my being from my roots to my crown, electrifying me. Our modern lives are designed to starve us of this joy, but we are ultimately in control. Our modern lives prey on our ability to be reprogrammed. But when I’m gobsmacked by everyday wonder, I feel at deeply at home. At home in the awe and wonder that everyday busyness tamps down. Stomps out. Stows away.
So I’m tending to the tamped ground. I’m planting seeds over the stomped patches. I’m dusting off the stowed away treasures. Because once you reclaim your time, you can’t stop witnessing the minor and major moments of life surrounding you. And you don’t want to.
I want to witness every single clinging cottonwood leaf’s final severe, the moment they decide they’ve given all they can and let go. Cut the tether from their mother and let the wind carry them on. It’s a gift of trust, to witness this loss. How do trees know when to cut ties? We often carry things with us for years longer than needed, fearing the severing pain. This is why I love autumn. I love the trees cheering each other on with their pom pom shakes that glimmer in the sunlight, bringing a levity and joy to an ending. As the glittering cottonwood showers the front yard with golden petals, the nearby handkerchief farewells of the swaying black walnut trees move at a lumbering pace, like a wise old friend helping you find your breath amid the fear and panic of jumping off a cliff.
I’m here to encourage you to take the time and space you need to care for yourself, especially during this very long and consequential week.
-

Weekly Videos: Week of November 4, 2024
See what happened last week
This weekly video update is a part of your Seed to Fork subscription. You can always look back on previous weekly garden updates here. -
Weekly Videos: Week of October 28, 2024
See what happened last week
This weekly video update is a part of your Seed to Fork subscription. You can always look back on previous weekly garden updates here. -
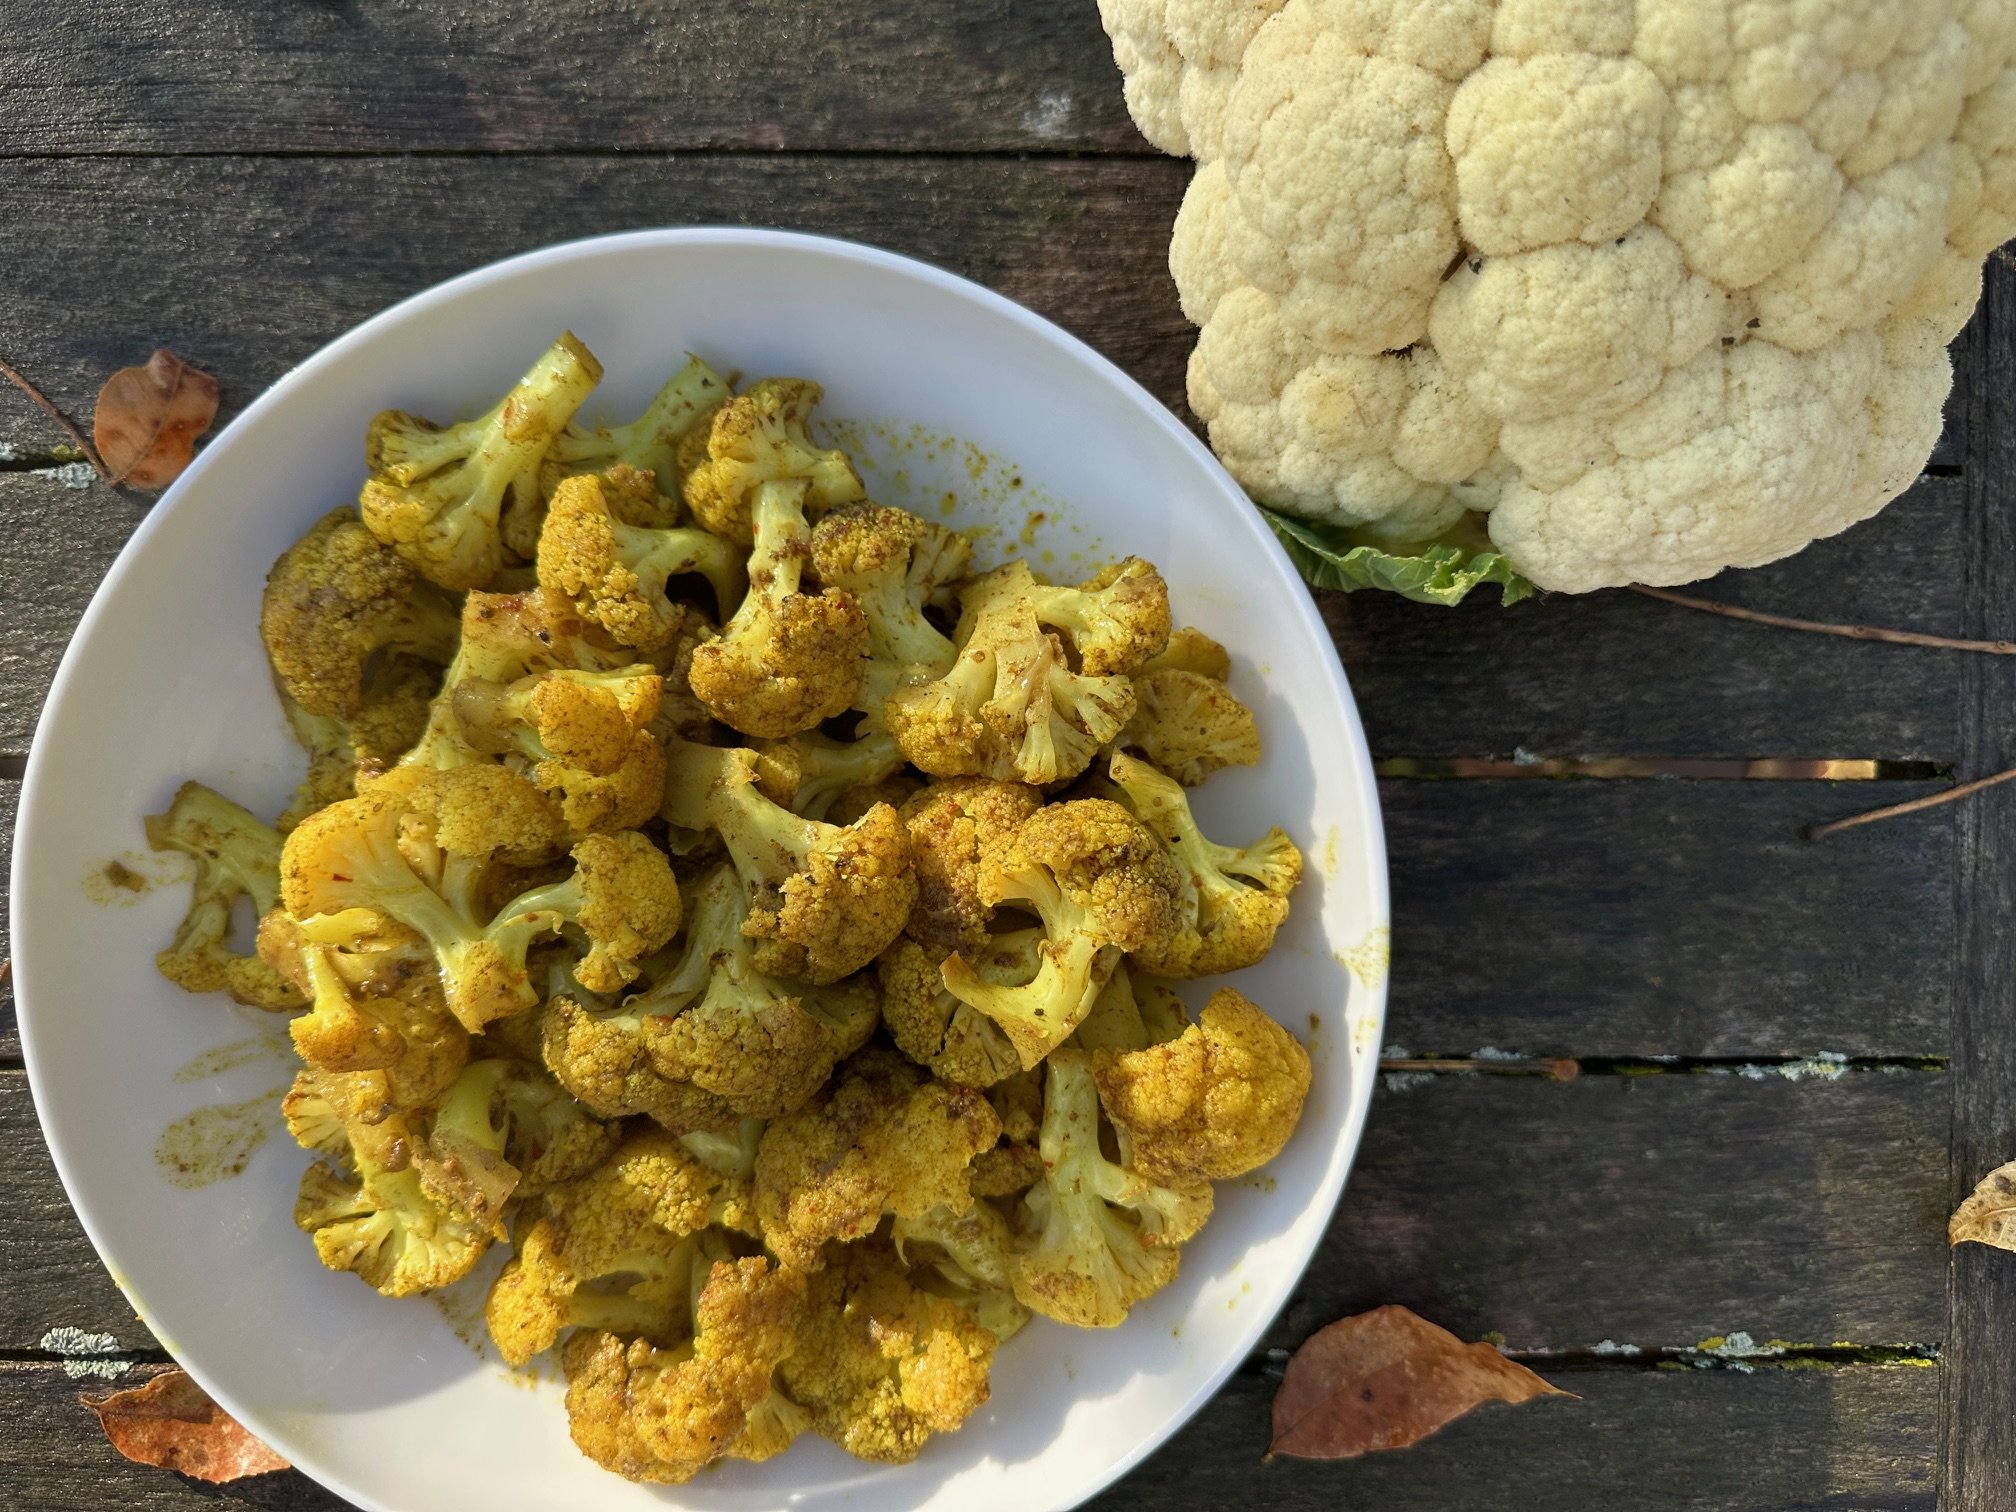
Curried Cauliflower
It’s cauliflower season here, and has been since September. I love the meatiness and versatility of cauliflower. It really takes on flavors and so, naturally, we love to douse it with spices and cook it in butter. I often pair this with our Butternut Chana Masala
Yield: 4-6 servingsCurried Cauliflower

Ingredients
- 1 medium head of cauliflower, cut into florets (about 4 cups)
- 6 tablespoons butter
- 1 garlic clove, minced
- 1 tablespoon fresh ginger, microplaned
- 1/4 cup water
- 1.25 teaspoon salt
- 1.25 teaspoon pepper
- 1.5 teaspoon cumin
- 1.5 teaspoon coriander
- 3/4 teaspoon turmeric
- 3/4 teaspoon cinnamon
- 1/2 teaspoon hot paprika or other hot pepper, to taste
- 1/8 teaspoon freshly grated nutmeg
Instructions
- Measure out all masala ingredients and mix together in a small bowl: salt through nutmeg. Set aside.
- Heat a large cast iron skillet to medium high.
- Melt butter and add dry masala mixture. Stir and let cook for 30 seconds.
- Add cauliflower, garlic and ginger and toss to coat. Cook for another minute.
- Finally, add 1/4 cup or so of water and let braise for a few minutes (3-4 is plenty).
-
Weekly Videos: Week of October 21, 2024
See what happened last week
This weekly video update is a part of your Seed to Fork subscription. You can always look back on previous weekly garden updates here. -
Weekly Videos: Week of October 14, 2024
See what happened last week
This weekly video update is a part of your Seed to Fork subscription. You can always look back on previous weekly garden updates here. -
Cultivating a Seed and Spice Garden
We’ve loved how the added space over the years afforded more nuanced and obscure garden goals like a year’s supply of sesame seeds, becoming self-sufficient with homegrown corn meal, or growing our own paprika and chili powder. It’s continued to cultivate new, more outrageous curiosity, wondering what else is possible to grow, namely the many seeds we use as spices in our kitchens. Think fennel seed for sausage seasoning, mustard seeds for pickling cucumbers, and cumin for so very many cuisines the world over.
This guide shares my growing experience and tips to date on all the spices/seeds we’ve tended in our garden.
From Easy to Impossible
Like with all gardening endeavors, there’s easy and there’s expert. I found this out the quick way with my novice attempts at growing spices. And the lesson repeated itself again this year.
Not all seeds are that easy to grow here. But all seeds emerge from flowers of all shapes and sizes, so if you adore flowers, this may be an exciting side journey for you to consider in the coming years.
Many are tropical and subtropical annuals that frankly probably don’t love my latitude or coolish evenings. While I can ignore peanuts and they form ground nuts and I set and forget my mustard seeds and they do their familiar brassica-y thing, cumin and fenugreek, and nigella have so far stumped me.
Note: All of these seeds I consider a full or late season crop, meaning set aside their square footage for the entire growing season. While breadseed poppies will mature before a frost, they still need the space from very early in spring through summer.
If this garden experiment is new to you, start simple with seeds like breadseed poppies, mustard seeds, and flax.
Breadseed Poppies
I do love a lemon poppyseed cake. I’ve only grown poppies successfully one season. And the season I did, I started them indoors. Ironically, it’s recommended to direct seed poppies because they don’t love being transplanted. Clearly for me, indoor sowing was a more successful strategy.

Paper thin flowers seem more suited to a drier climate than ours, as they were pummeled by a typical early summer storm.
Poppy seeds like a bit of chill time before breaking dormancy. So it’s best if you want to try and direct seed to set them out in some bare ground in February-March. Do not cover them! They should germinate sometime in late April.
Days to Maturity: 100 days
Plant Spacing: 12” or closer, if you live in a windy area. (I tend to overplant my flowers a bit.)
Harvesting & Storing: Harvest when pods have desiccated. You’ll hear the minuscule seeds rattling around in the pod. Cut and let cure and invert into a glass jar to store.
Seed Sources: I love the selection from Botanical Interests, as they are plentiful in many stores in our metro area and at a great price point. Their Hungarian Blue Breadseed Poppy is, in fact, the only poppy I’ve ever grown successfully.
Mustard Seeds
Brassicas are one of the most dependable vegetables for me, and mustard seeds has proven to be no exception. The plants are, however, significantly more wild than a cabbage or broccoli, so prepare yourself and your aesthetic for some sprawling plants. Black mustard seeds grow much larger and wider — they can grow to 8’ tall! — than Dijon mustard seeds, which top out around 3’. You can grow many more Dijon plants in the same square footage as a few black mustard plants.
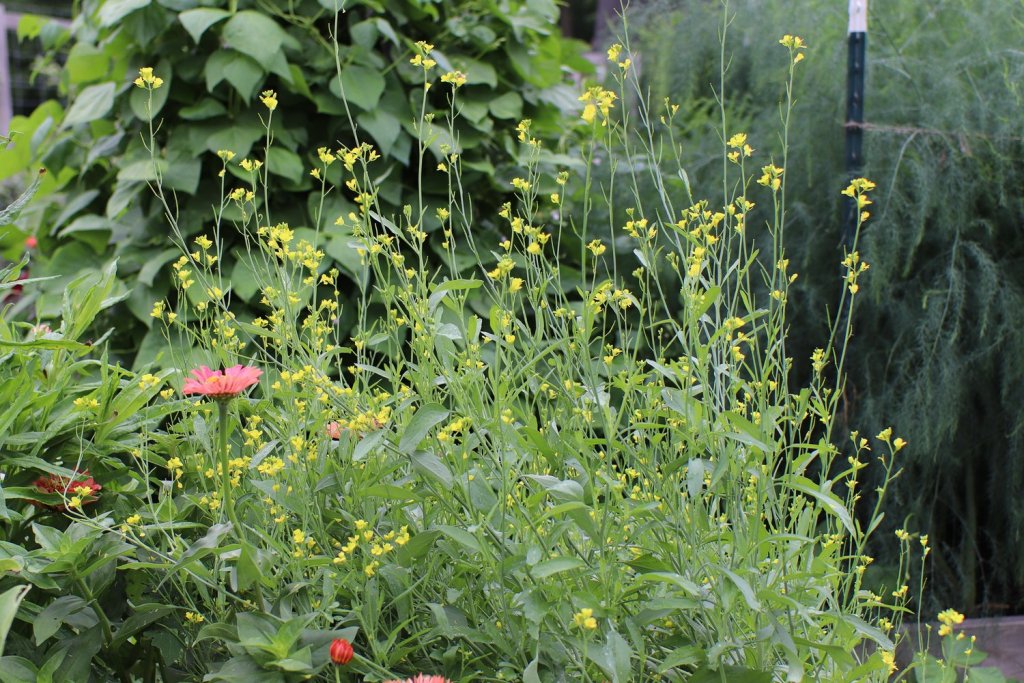
Black mustard seeds grew larger and were more productive than I’d expected them to be. They also happen to be way spicier and not as good for use in mustard, so there’s that. Flavor is also a huge factor in choosing which seed to grow. Most pickling recipes call for mustard seeds. And traditionally in stores, I’ve only seen brown mustard seeds. Black mustard seeds are more pungent (hotter in the mouth) than yellow so pack more of a punch.
I’ve grown both easily, and at 90 days to maturity I think they could even be direct seeded in many gardens. I do usually sow them in 2” soil blocks in mid- to late April for a late May transplant in the garden.
I highly recommend trying this seed if you’re curious about seeds and make your own pickles in summer.
Days to Maturity: 90 days
Plant Spacing: 12”-18” spacing for Black mustard; 8”-12” for Dijon. Black grows +4’ tall, Dijon 2-3’ tall.
Harvesting & Storing: Harvest when seed pods have formed and dried. It’s possible they won’t all be dried but when the majority are dried, I recommend cutting into 12” lengths and inverting into a paper bag. This will allow the pods to continue to air dry and as the pods fully dry, they may crack open and release the seeds, though I’ve found mustard seeds to need threshing, by means of being in a pillow and stepping on it or hitting against a brick wall then winnowing the chaff away from the seed.
Seed Sources: Since this isn’t as common of a garden crop, I’ve purchased seeds from smaller seed companies: Experimental Farm Network and Siskiyou Seed.
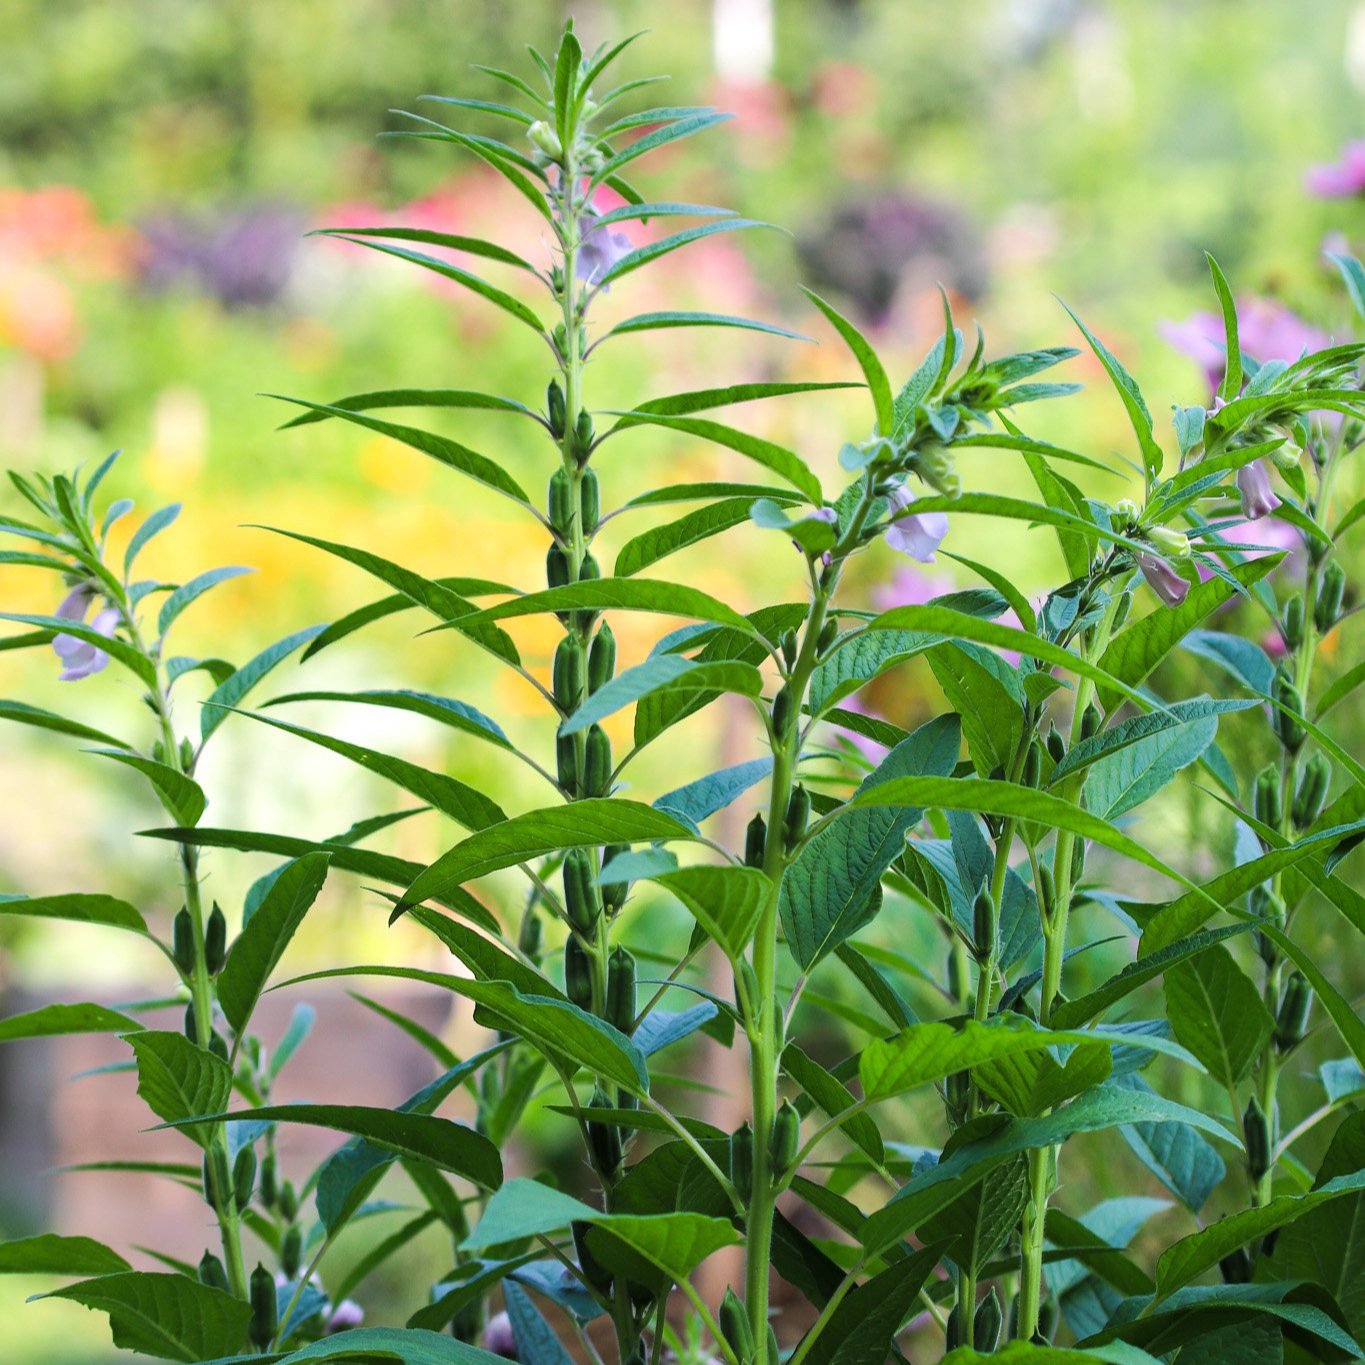
Sesame
Sesame has been one of the more surprisingly easy tropical seed crops I’ve grown. The best part about it is that it’s a very beautiful flower, flowering all summer long from July – September. It’s tubular blossoms really attract the bumblebees who have to drive in and back out to get the goods.
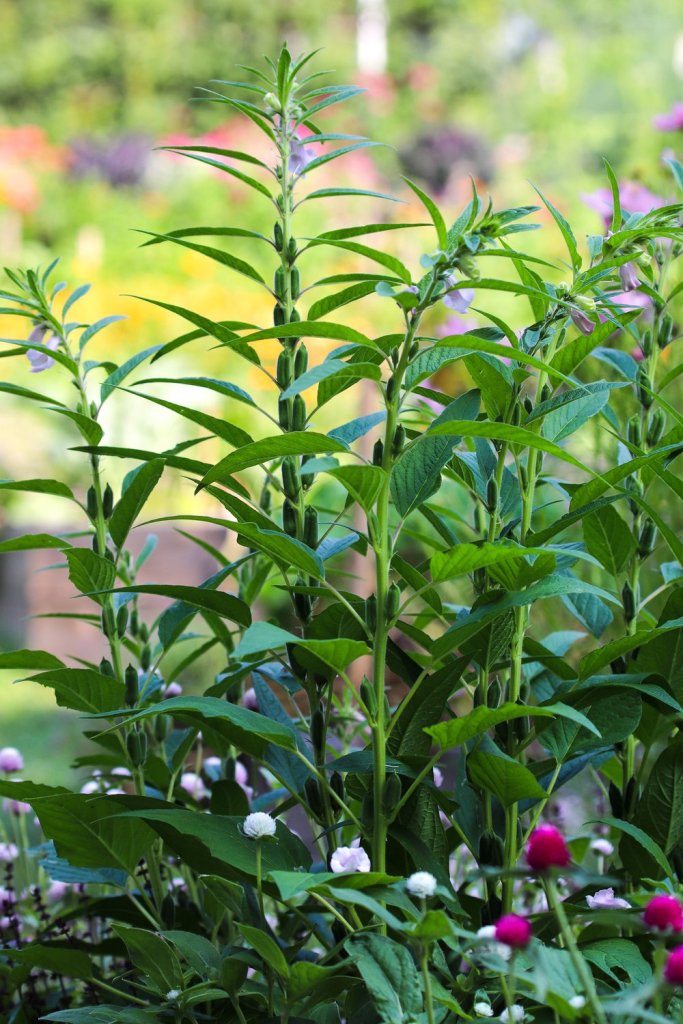
Truly a foundational plant in the food garden, sesame is a standout! I am very curious if it would mature in time if I direct seeded it. You know I’m obsessed with direct seeding. It’s a 90-days to maturity plant, but with it’s heat requirement I haven’t yet been brave enough to go all in. But I’d be in zones 6 and warmer it would easily be a direct seeded.
For zones 4 and cooler, I’d recommend starting in mid- to late April for an early June transplant. 2” soil blocks or 3” newspaper pots would work well. They can be divided at transplanting — so up to a few seedlings per pot is ok. I plant them out about 12” apart.
Planting tip: I love to interplant sesame with other flowers. Because it tops out between 3-4 feet, it’s not bothered by things like tusli basil or calendula or sweet alyssum which will remain low in its understory. I wouldn’t plant it in full shade or even part shade and hope for good results. I tend to assume full sun for everything. It really gives the plants the best chance for success.
Days to Maturity: 95-100 days
Plant Spacing: 12” spacing, grows 3-4’ tall with multi-branching stems. Tends to flop over by end of season, likely due to weight of seeds.
Harvesting & Storing: Like with mustard, I harvest when seed pods have formed and dried, with a caveat. I always wait to harvest until the lowest seed pods (they flower from bottom up) have dried and started to open. You don’t need to have all seed pods open to harvest them. They will dry and cure in a paper bag. I recommend cutting into 12” lengths and inverting into a paper bag. This will allow the pods to continue to air dry and release their oily seeds as they naturally crack open. Store winnowed seeds in a glass jar for 1-2 years, if they last that long!
Seed Sources: These seeds also come from Experimental Farm Network: Monticello White Sesame and Black Sesame. Once you grow it, you will have plenty to save, eat, share, and grow again. You’ll never have to buy more seed.
Fennel
Not to be confused with Florence fennel, I purchased fennel seed this year. As in, it won’t bulb and I’ll let it explode into a raucous, all out wasp party and hope to harvest loads of seeds. It’s taken a LONG time for seeds to start showing up, which makes me wonder if I didn’t have the right pollinators until more recently. The first month or more of flowers all shriveled in an epic failure. But finally, in the last month or so, as the wasps do their late summer rounds and feast ravenously on these umbelliferous structures have the seeds started to form.
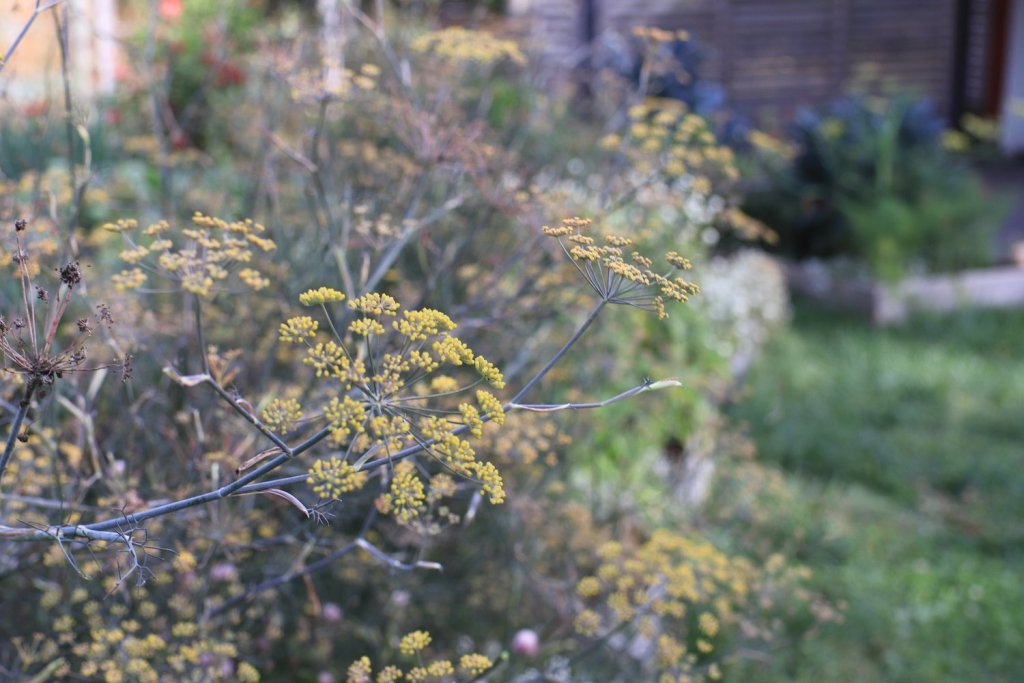
There’s no shortage of flowers, but the real question is: how much are 4 plants and a 4×4 space going to yield? Hint it’s not always just about the yield.
It takes up a lot of space for not a lot of output (in my limited experience), but if you love to blend your own spices, this might be a fun, hands off crop to try growing.
Note: I am just reading the fine print on these seeds, and they may be a perennial. So use even more caution with this one. than I mention below.
Days to Maturity: 100+ days
Plant Spacing: 12-24” apart, grows to 4’ tall
Harvesting & Storing: You can harvest this as an herb and a spice. Harvest leaves as an herb to add to dishes; for seeds, collect green to brown seeds as they mature. I imagine this could potentially be a source of weeding for many of you, so plant with caution!
Seed Sources: Siskiyou Seeds for the win.
Flax
Flax is a versatile, ancient crop. It’s a super food. It’s spun into linen. It’s oil is used as a varnish for furniture. And it’s a very beautiful and dainty flower.
I grew flax for the first time this summer. It was sort of a joke, because both John and I eat about an ounce of ground golden flax seed daily (high in antioxidants, short chain Omega 3’s, and tasty). So my thought was, hey, let’s grow our own. I wonder if I could grow enough for a day’s worth of consumption?
And here’s what happened. I started too few seedlings. I learned that flax loves to be overplanted. Plant it densely. They were like blue fairy dust in early July that were promptly and aggressively swallowed whole by the 898 Butternut squash vines in August. I suspect my yield directly suffered from this lack of “weed management” from the nearby winter squash.

Flax being a delicate and short stature seed cannot compete with much of any weed competition so this is not an interplanter, especially with cucurbits or other large-leaved, shadow-casting vegetables (or flowers, for that matter).
I am very curious about the bast: the interior fiber that is used to spin linen. I will attempt to peel back the stems to see if I can find it! But more than anything, this seed felt much more like a cute flower in early summer, and even just for that, I think I’ll grow it again.
And, I have a feeling that with my neglect, I’ve already overseeded that garden bed for 2025 by my lackadaisical harvesting schedule which did not commence until, oh, a few days ago.
Planting Tip: Flax would do well direct seeded and can endure some frosts at seedling stage (short light frosts). Direct seed around your last frost date, and you should be good. Seeds should be covered, but plant no deeper than 1/3”
Days to Maturity: 100-110 days
Plant Spacing: 12” spacing, grows to 24” tall. Benefits from tight plant spacing.
Harvesting & Storing: Flax should stand in the garden until the stem and boll (it’s seed pod) have both dried. you can pull before an impending frost as long as 75% of the bolls have browned. They should easily thresh and winnow down. I’ll keep you posted on my approximate tablespoon (perhaps hopeful, at that) of flax I managed to harvest this week.
Seed Sources: Again, the theme here is supporting small seed farmers: Siskiyou Seeds.
Fenugreek
Fenugreek (or Methi) is another ancient spice used in many Asian and Middle Eastern. cuisines. Seeds were found in Tuthankamen’s tomb, and like flax, dates back many, many thousands of years. Interestingly, it’s in the Fabaceae family (the bean family). The leaves and seeds are used in the kitchen in some dishes.
We are huge fans of Indian cooking, and knowing how potent our homegrown sesame seeds and paprika taste, I really wanted to excel at this spice this summer. Alas, this was a flop. But I think I know why.
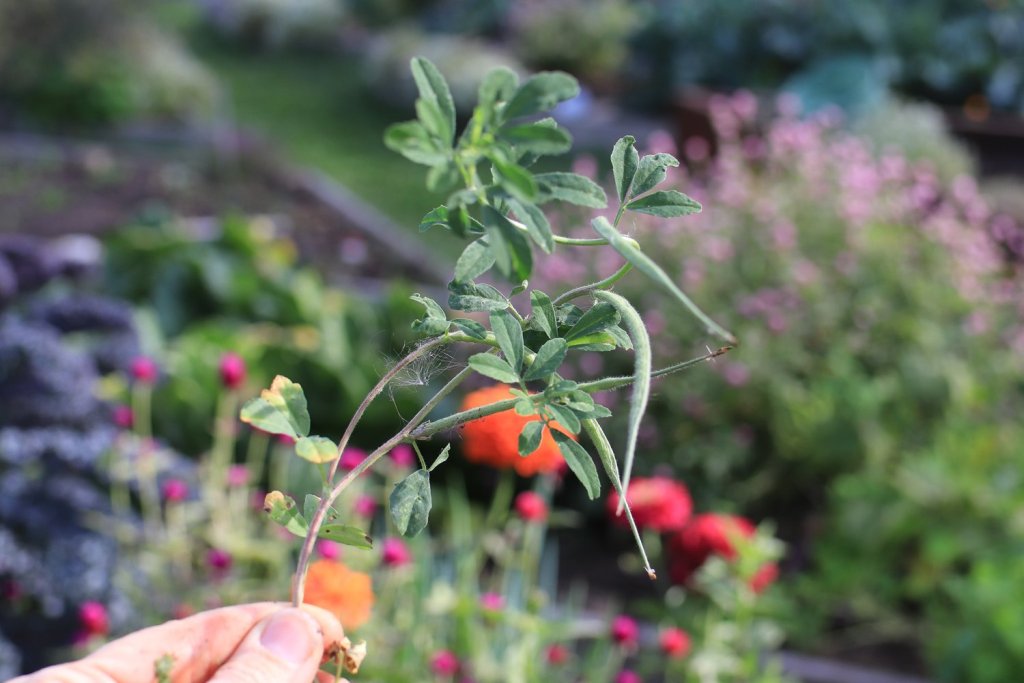
Trifoliate leaves and a “bean pod” make this fenugreek a relative to many in the garden. I just found this plant today, along with some self-seeded fenugreek growing in a crack in the patio … so clearly the plants made seed behind my back.
First, I didn’t give it enough room and it’s a short plant so got shaded out. I also may have started it too early, which I tend to do with new seeds, wanting to coddle and watch and marvel at them, having no knowledge or business trying to push their season all the while hoping my love and attention will help them succeed.
Second, from all I’m now reading about it — I prefer to grow things the first time blind, meaning I don’t read up too much on them except days to maturity and work back from that for timing — it hates to be transplanted. So, dear reader, please direct seed this one in early spring, when soils are in the 60s or warmer.
Days to Maturity: 90 days
Plant Spacing: 3-6”, grows up to 24” tall
Harvesting & Storing: You can harvest this as an herb and a spice. Harvest leaves as an herb to add to dishes; for seeds, let pods turn yellow and dry before harvesting.
Seed Sources: Siskiyou Seeds strikes again!
Nigella
Also known as black cumin or kalonji, this is plant name may also be known to you as Love in a Mist. However, they are not both edible, though they are plant cousins. This is Nigella sativa.
Honestly, I don’t even have business writing about this because the 2 seedlings I managed to transplant in with the flax were swallowed up faster than the flax. I saw a flower, once, and honestly moved on. Too busy a season to tend to such small plants. I am not giving up on this one, though, as I do love the flavor of nigella seeds.
This is another case where direct seeding, and not having competing vegetation should aide in my future pursuits. I will try again next summer!!!
Days to Maturity: 80 days
Plant Spacing: 6-12” spacing, grows to 12” tall; don’t interplant
Harvesting & Storing: Harvest single seed pods as they dry and invert into a paper bag. Store seeds in a glass jar.
Seed Sources: Siskiyou Seeds strikes again!
Cumin
Two years in a row I’ve cultivated adorable cumin seedlings and two years in a row they die when I transplant them. Or maybe they fade away, are forgotten, get under/overwatered, or foraged by pests. They are truly fragile looking plants, so I need to rethink how I grow them. Crowd them together? Attempt direct seeding, as seems to be the growing trend in this guide? Probably a little of both because this one needs it HOT and it’s the longest days to maturity. And, it doesn’t like to be transplanted. That’s a tall order for a Minnesota climate. Might need to try this in a container if I want to be successful.
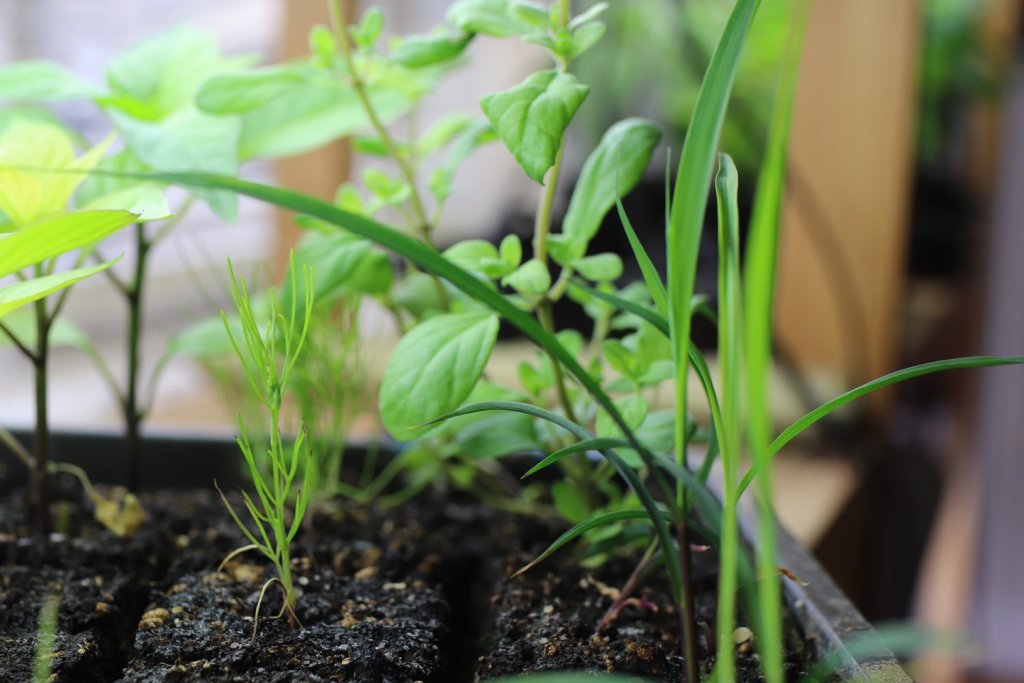
As seedlings, they almost look like miniature asparagus ferns. I swear my garden just swallowed them whole. Twice. It was ruthless.
Days to Maturity: 110-120 days
Plant Spacing: 6” plant spacing, grows to 6-12” tall; don’t interplant
Harvesting & Storing: Harvest as flowers dry. Invert into a paper bag. Store seeds in a glass jar.
Seed Sources: Johnny’s Seeds
-
Weekly Videos: Week of October 7, 2024
See what happened last week
This weekly video update is a part of your Seed to Fork subscription. You can always look back on previous weekly garden updates here. -
Weekly Videos: Week of September 30, 2024
See what happened last week
This weekly video update is a part of your Seed to Fork subscription. You can always look back on previous weekly garden updates here. -

Direct Seeded Update: Tomatoes, Onions, & Peppers
It’s nearly October and my direct seeded main season crops continue to delight.
To recap: I direct seeded tomatoes for the second year in a row. This year instead of trying all different types, I just focused on my determinate paste tomatoes. I only planted my paste tomatoes direct seeded. I didn’t start any backups indoors!
And furthermore, I decided to only grow my favorite hybrid paste, Plum Perfect. This tomato is hefty: dense and dry, full of flesh and has incredibly high yields after oven roasting. I hope this hybrid is here for the long haul!
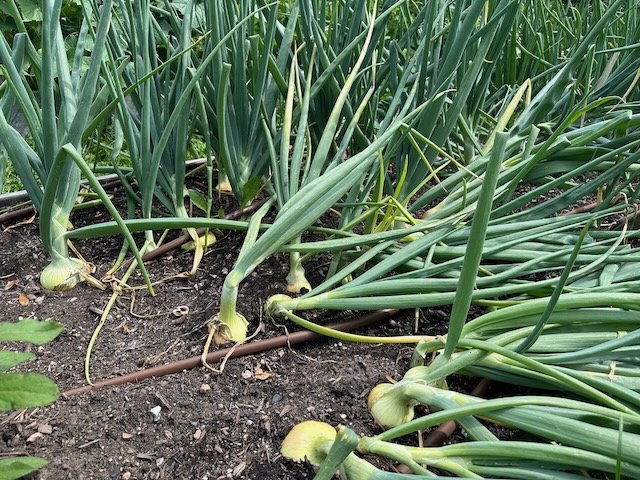
I direct seeded my onions both under a low tunnel and fully exposed to early spring fluctuations, uncovered, in early April. This was a bonus sowing as I’d already sowed my onions indoors in the end of February.
Regular sized onions, later but still robust tomatoes, and, delightedly, ripe red bell peppers! Indeed, it does seem the lemongrass that’s surrounding me is equally excited too. Lastly, like with the onions, I played with peppers by direct seeding some of those in my cold frame around the same time I sowed the tomato seeds. I yielded one pepper seedling worthy of transplanting, and transplanted it into my pepper bed sometime in early June.
The Results
Tomatoes
I’m both delighted and a little grieved to know that I don’t need to infuse my living space with the aroma of tomato foliage each winter in order to have a robust tomato garden here in Minnesota. This really hurts my heart and head, as this has been the cornerstone of our entire indoor seed-starting setup for 25 years! Start your tomatoes in February. It’s just what you do. Or, did.
Over the last few years, I started sowing them later. Even my April 1 determinate tomatoes produced tomatoes in mid to late August. And my direct seeded beefsteak last summer produced ripe tomatoes before September too. So, the garden has been shepherding me to this conclusion for a few years now. I’m finally ready to listen.
I’m not entirely sure I’ll direct seed ALL my tomatoes next year, but I can say, with confidence, that even in zone 4, I don’t need to buy starts (for those who don’t seed start) OR start them early to produce an excessive amount of ripe tomatoes in August and September.
Sowing tomatoes indoors on April 1 will yield great results, with confidence. This is a lesson I’ve resisted listening to, but I’m finally embracing it. It also means we can travel in late winter and not have to have someone babysit our indoor seedlings. That’s a win-win.
Onions
This is a much less clear result. As you’ll hear in the video below, on the one hand, it did work. But on the other, the size and timing didn’t compare with our indoor started onions.
The direct seeded onions — both those that germinated under row cover and those that germinated uncovered — both produced similar sized onions at the same time too. I didn’t notice a difference in vigor or really timing. However, when compared to the indoor sowed and transplanted starts, they fell short by a significant amount. I’d guess the indoor started/transplanted seedlings were, on average 1/3 larger than my direct seeded onions. Seed to seed, that’s a significant “crop loss” if we’re thinking in terms of biomass or pounds produced.
The other tricky thing is that the plants weren’t mature at the same time. The direct seeded onions were about 3-4 weeks behind the indoor sowed ones. Because I use my onion beds as a main succession planting tool for my fall garden, this is not as easy of a decision to direct seed them all going forward.
I think at most I’ll continue to play with this, but will for sure keep indoor starting some of my onions and leeks and shallots to ensure a productive crop. We love our homegrown onions, and haven’t proven yet that it’s a sure thing, but maybe a few more years and I’ll feel the same way I do about the tomatoes.
Peppers
This was the biggest and best surprise of the summer. My single Wisconsin Lakes pepper that was the smallest seedling in June has produced not one, not two, but six ripe bell peppers this week. Six! What a beauty.
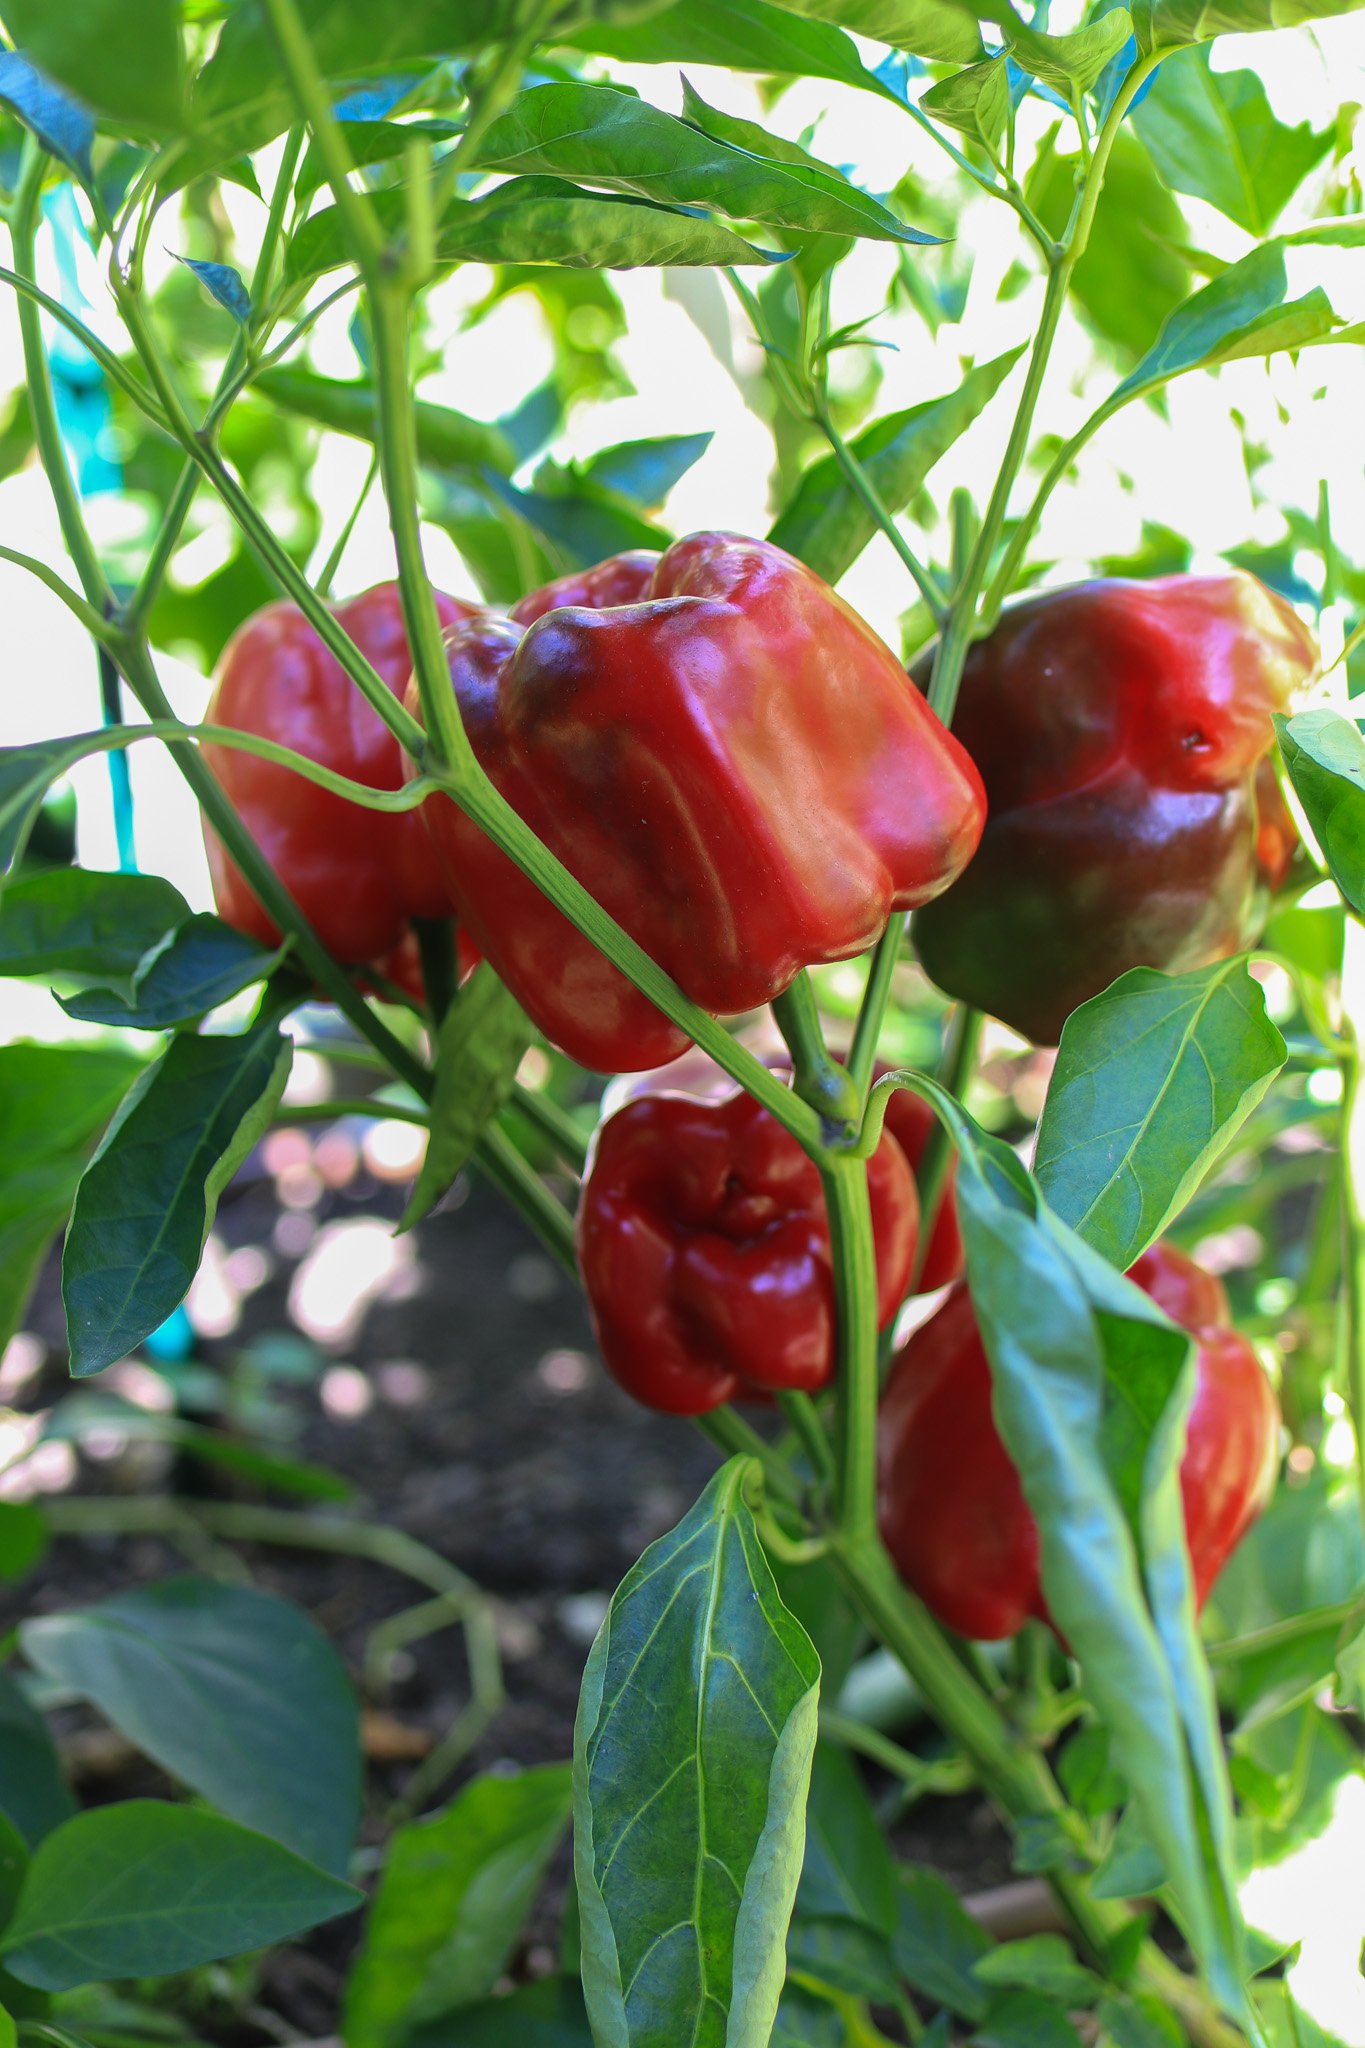
This was an enormous leap of faith to think a pepper plant, of all the hot season, slow growing crops we believe MUST be planted from starts, can do in my zone. I admittedly had little faith this would yield ripe peppers.
Last year I direct seeded a hybrid poblano and some candlelight peppers alongside the tomatoes mentioned above. The candlelight peppers did mature to produce red hot peppers, not as exciting of a feat as a single large chunky bell pepper as smaller fruit do ripen faster (think the speedy cherry tomato). The poblanos did germinate and produced fruit but again, only green peppers. So I didn’t go into this season blind to the idea of direct seeding peppers being a far flung reach. I knew something was possible.
And yet, like with the onions, this is another case of blending seasons. I will lean into direct seeding to take some burden off our lights and other resources that indoor sowing relies on, but I won’t fully decouple my gardening routine from indoor sowing peppers. I will for sure be direct seeding more next year, including some paprika, jalapeños, and more bells.
If I’m brave, it will be a 50/50 indoor started vs direct seeded, with my indoor started plants being sowed at the end of March or beginning of April.
-
Weekly Videos: Week of September 23, 2024
See what happened last week
This weekly video update is a part of your Seed to Fork subscription. You can always look back on previous weekly garden updates here. -

A Plant Spacing Case Study: artichokes & zinnia
We all do it. Shoving plants or seeds into a space that feels so empty and vast, only to be met with the inevitable struggles. Some plants are slower growing which, in turn, creates the need to stretch and elongate, making them leggy and weak. Other plants have massive leaves and their leaf area, the density and space that their leaves collectively occupy and thus shade out below, quickly becomes the dominant planting for the season. Still more seem to dwell happily in the understory, perhaps not producing at maximum vigor but also, remarkably, producing in spite of that shade cast by their vivacious neighbors.
Short of coming to each of your gardens and working side by side with you to help with plant spacing, I want to share some ideas for how to ruminate on this during the off-season so when it’s time for that trowel, you have a solid plan that will yield a perfectly-planted garden come late summer.
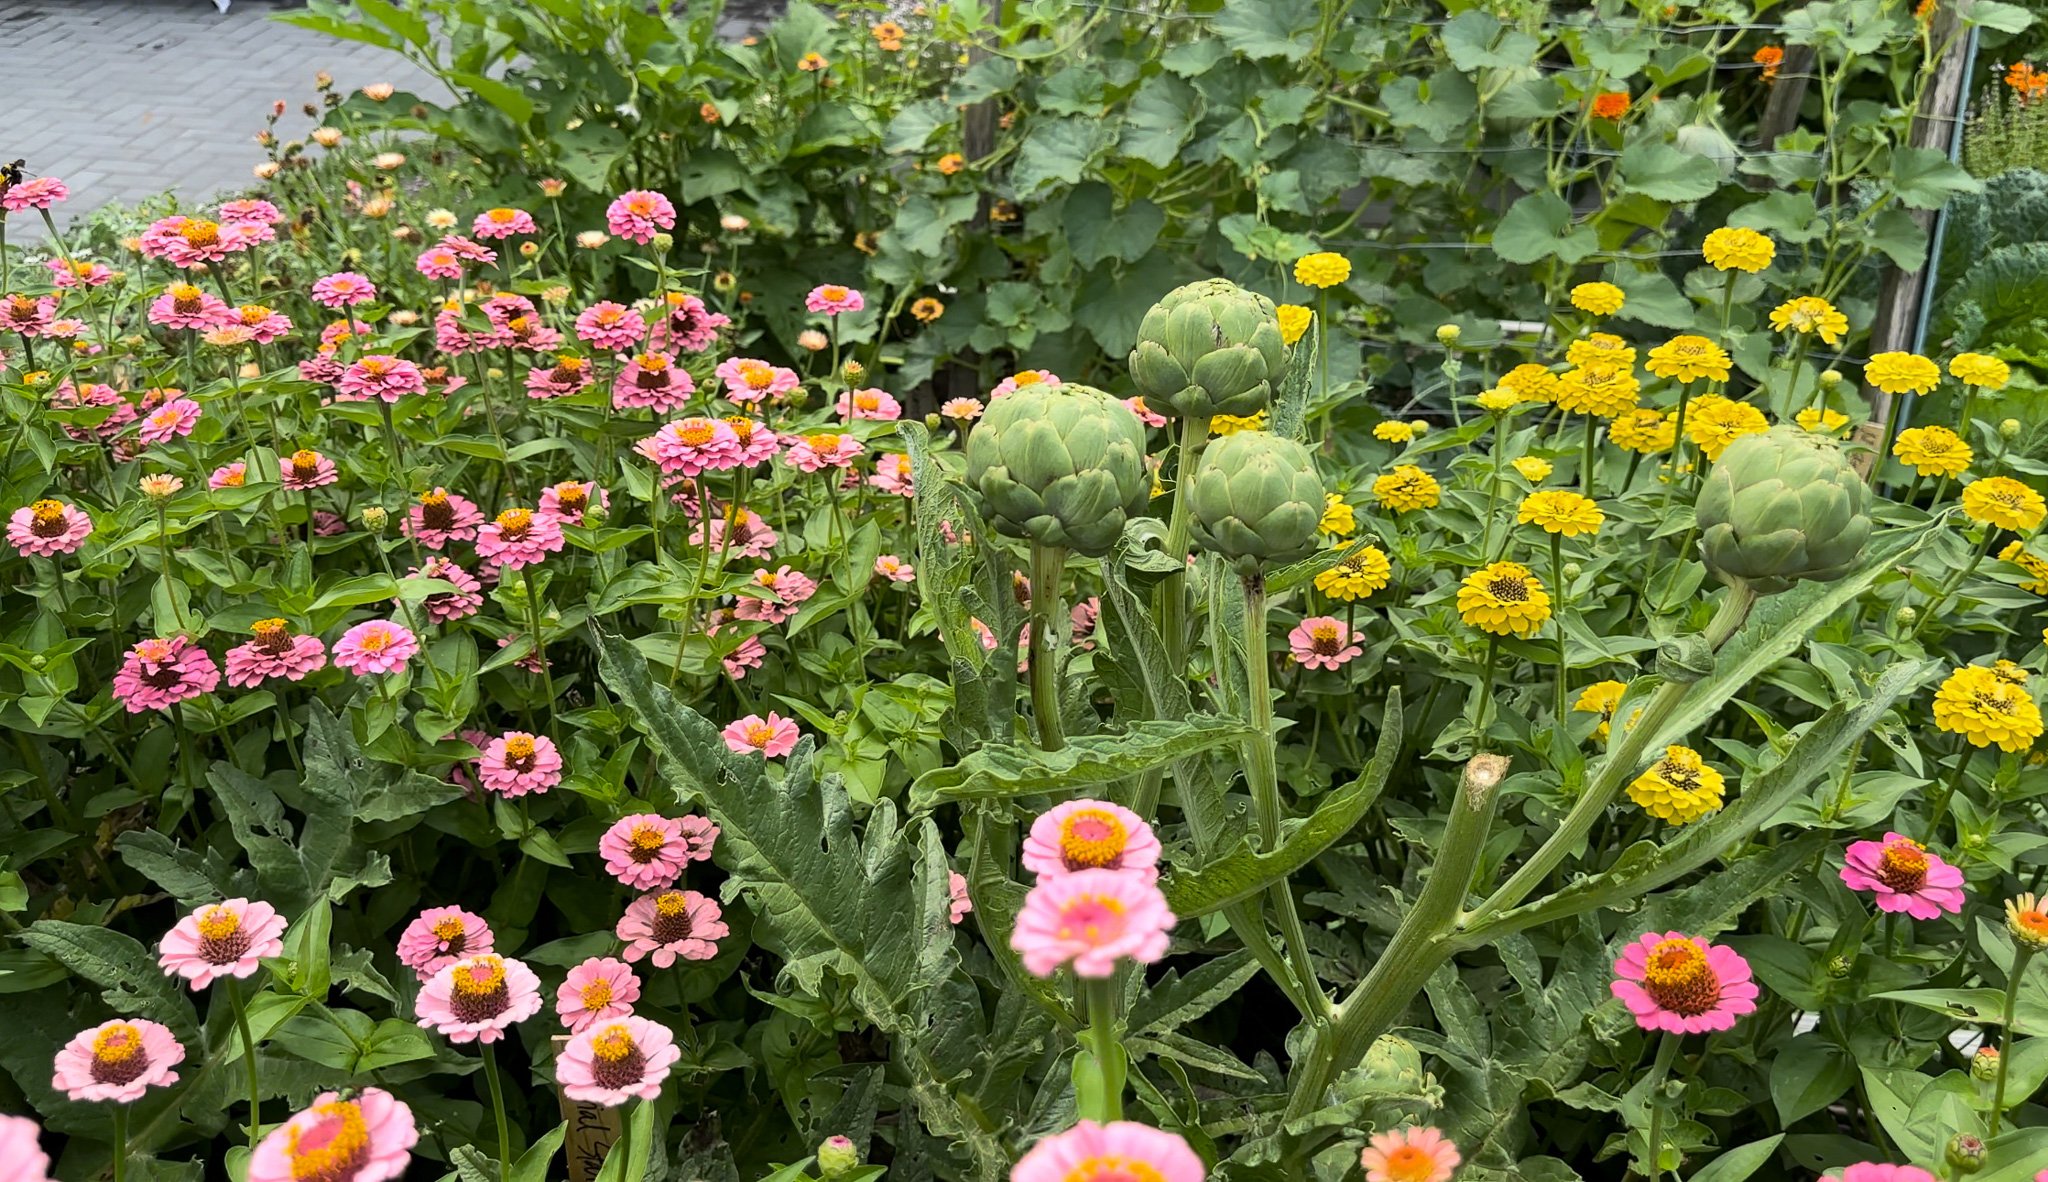
More plants don’t mean more food or more flowers. One of the biggest shocks to me was when some of you couldn’t believe that my Thumbelina zinnia were spaced 12” apart and were looking so massive and lush in my artichoke bed. This planting was intentional and caused much oohing and ahhing from hundreds of visitors this past summer.
One of you admitted yours were planted much, much closer and they looked much, much smaller. I don’t know if sunlight was a factor, but plant spacing unequivocally was.
That is a huge lesson learned. It even greatly helped me understand what might be troubling more than one of you, the fact that you might be planting everything too close together. The reason we have minimum plant spacing guidelines is because plants need space in the soil, that mysterious unseen buffet of nutrition, to thrive above ground.
And if it’s the only lesson you carry with you between now and when your spring garden is planted, it will serve you really well for years to come.
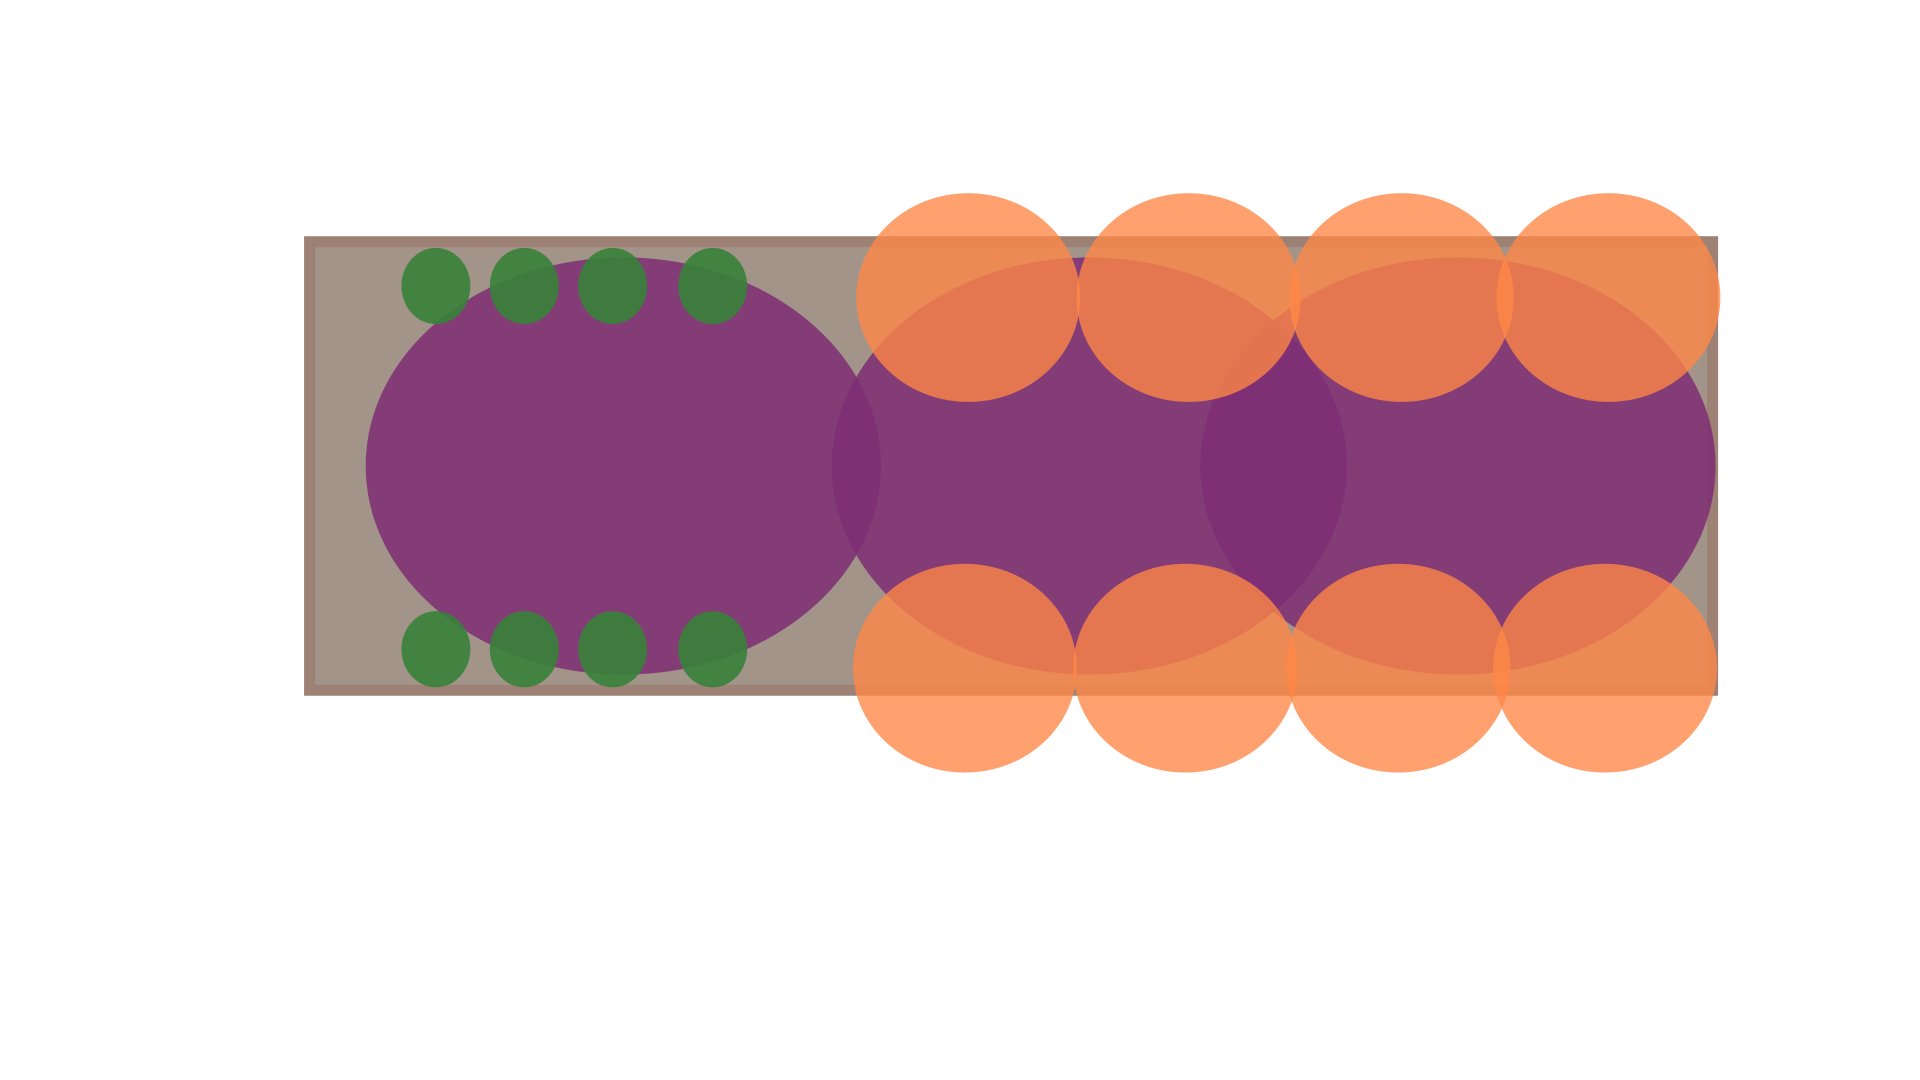
The most effective way to achieve this is to envision the empty space full, if that makes sense. And if you’re not a visual thinker, use circles on a computer to scale or draw it on a piece of paper. What you want to understand is what the planting will look like at maturity.
So let’s take my artichoke and zinnia bed as a case study.
What I had intended the maturity to become, fully grown and overlapping slightly, but with more space for the artichokes than zinnia.
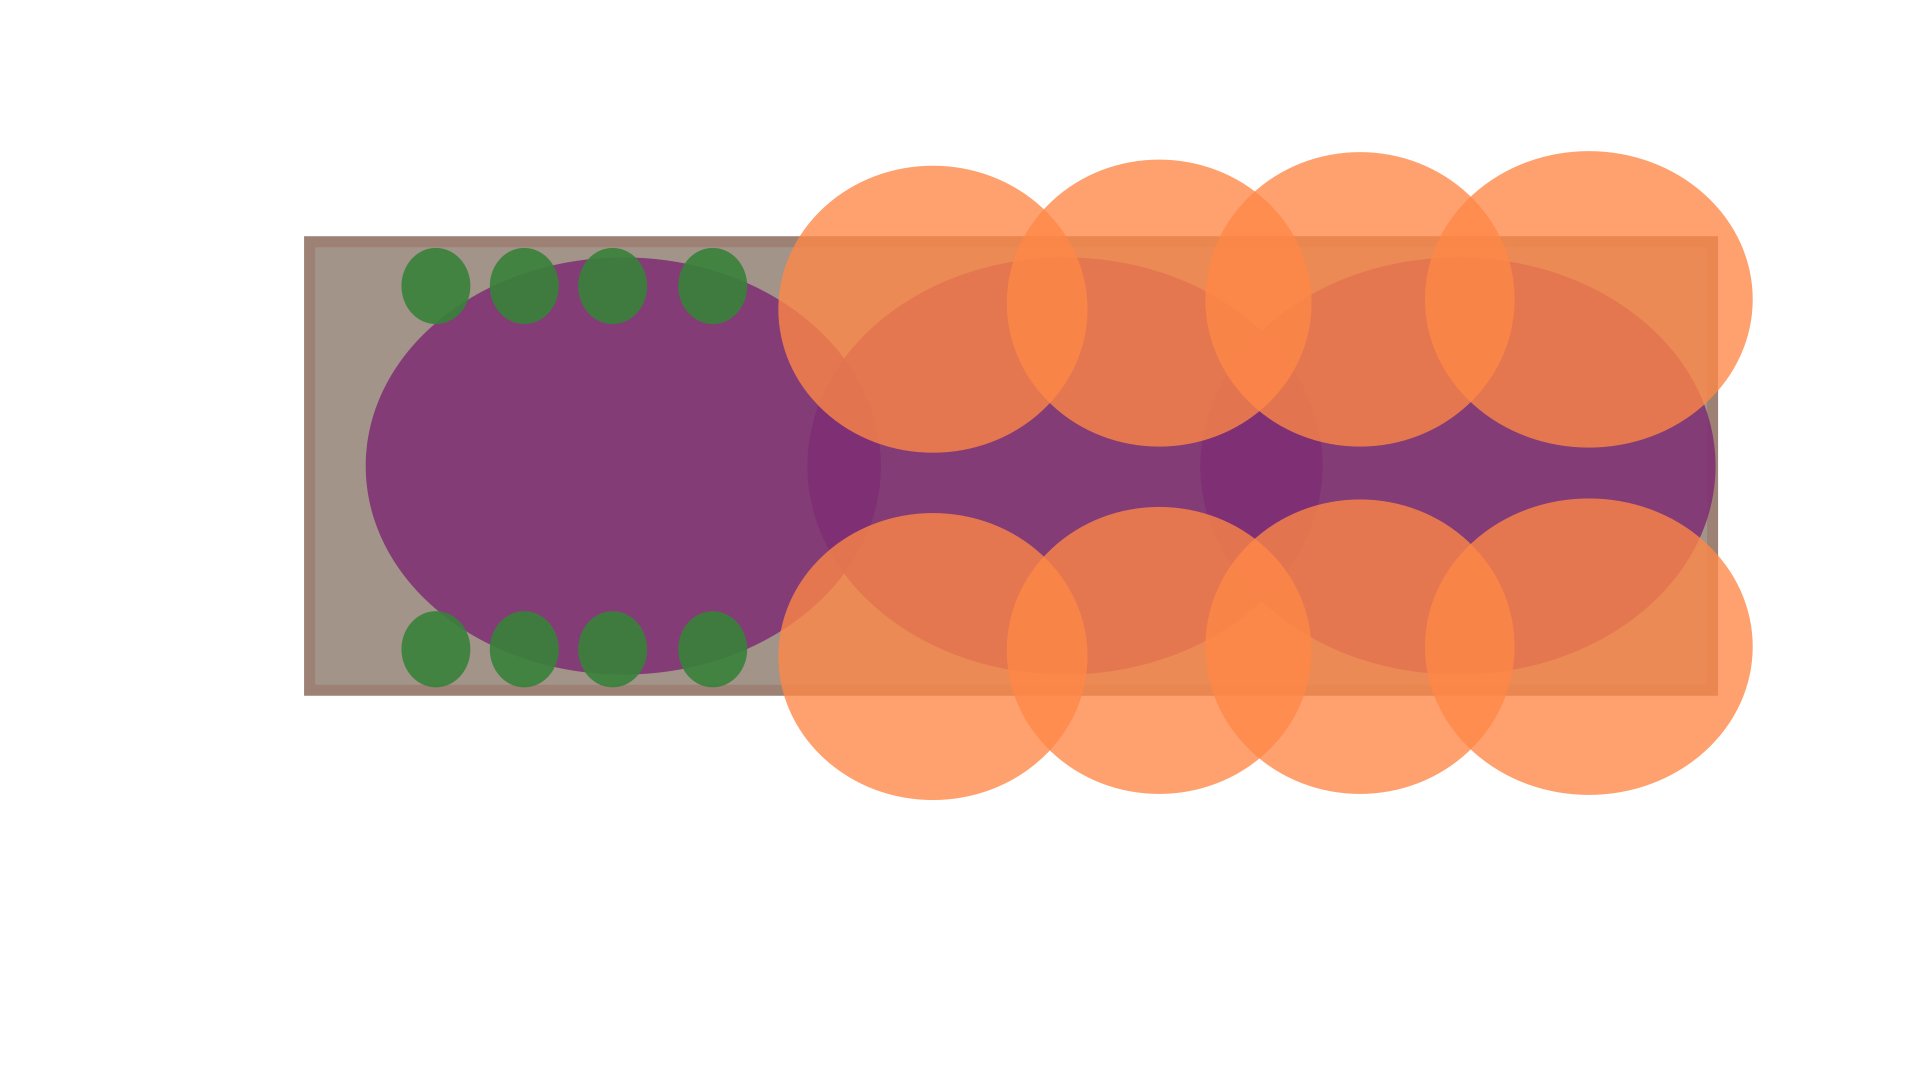
How it actually grew out … while the intended dominant plant, the artichokes, still clung to the center of the bed and did in fact grow taller, the zinnias were actually the dominant planting here by square footage. And while it could have gone terribly wrong, it worked out, luckily.
Read your seed packets carefully, and really take in the size at which plants will mature. If a flower packet says plants will grow 12-18” wide and tall and you want them to look full and lush and eventually grow together into one massing, plant them 12” apart. If you want a more stand-alone look for that flower, like a fully grown shrub with space around it, plant it at 24” apart. If you want them to just fill out the space, I’d go for 18” plant spacing and hope that when late August comes they are just starting to touch tips.
The other big factor with spacing things is what else is going on in that bed. Take my new love, Thumbelina zinnia. I interplanted them at 12” apart with my Imperial Star artichoke. They looked possibly not close enough for part of July. Then they filled in more and in August they were perfect: the artichokes were producing and the zinnia were lush and full and covered in pollinators. Come late August, I could barely see the artichokes, and, ironically, the zinnia had nearly choked them out.
In early June I was momentarily wondering if I didn’t plant it all close enough. Soon I’d be asking myself why I don’t trust my instincts more.
And I chose this plant spacing carefully. I read the seed packet which stated plants would grow 10″–16″ tall and 8″–10″ wide. Boy were these numbers wrong! This plant easily grew 24” wide and tall. This has happened to me with many varieties, seed packets not reflecting reality. Most notably Tiger’s Eye half runner beans which Seed Savers Exchange calls a bush bean has always grown 5’ tall for me.
I share this as a tale of caution.
This bed could have been called a zinnia bed with a touch of artichokes. Actually, it really was a flower bed, as I let many artichokes fully flower just for the experience.
Sometimes our garden dreams require a season or two of learning alongside plants to dial in plant spacing needs of varieties. Don’t despair. Instead, revel in the wonder of our annual plants and listen as they teach us how to be in relationship with them.
Now I knew that the artichokes needed 3-5’ plant spacing. I gave them 3’ between plants. And by that I mean just the artichokes. I then went on to plant zinnia at 12” plant spacing on both sides of the artichokes, lining the bed with flowers. The artichoke-zinnia plant spacing was more like 18” apart, a far cry from the 3-5’ spacing the artichokes requested. And this is how the zinnia choked the ‘chokes.
All that being said, I knew what I was doing. I was going for an overplanted massing. I wanted the plants to end up mingling. But I also thought that the zinnia would have stayed a little shorter and the artichokes would have grown a bit taller, thus not competing in the same space they ended up lingering in after all.
The artichokes did grow taller than the zinnia, but not a 24” difference I was expecting between the flowers and the artichokes.
So with an empty space, try and envision plants in their full maturity if you know what they will look like. And work back from there. And understand that seed companies don’t always have the best or most accurate information about their seeds, even though they should.
And take some time to understand what kind of an aesthetic you’re going for. Formal, tidy gardens have a lot of elements that have space around them, fully mature specimens with some literal breathing room. That means planting things a good 6-12” wider than the recommended plant spacing.
The only right way to plant is to create what you’re dreaming. And because we can only have these experiences once a year, enjoy the process of experiential knowledge. For me, it is the most exciting part of gardening. Each year I am more expert in some areas and a complete novice in others. I find comfort in the gained knowledge, and sheer joy at not knowing what I’m doing in other areas.
This is why I grew artichokes, to nurture that wide-eye little girl ever curious, ever hopeful. And she sure was happy I took care of her.
-
Weekly Videos: Week of September 15, 2024
See what happened last week
This weekly video update is a part of your Seed to Fork subscription. You can always look back on previous weekly garden updates here. -

How to Carve Out a Fall Garden Now
This post is as much for all of you as it is for me this year. I am still stuck in limbo with the garden, trying to wrangle it, harvest and process, and haven’t found the time (or I’m just procrastinating) to drop seeds into the ground. Yesterday’s excuse was that when I went to the shed for a hand trowel, there were none hanging: all 3 hand trowels are somewhere in the garden. I know I’ve seen one of them this week, so I just have to wander to locate it. We tend to leave them stuck into the beds, as if marking our accomplishment with a kind of physical punctuation mark. It’s completely unhelpful and rather a hindrance for my succession planting.
Alas, if your garden is overrun and you haven’t dropped a single seed in for fall, I’m here to rescue the guilt and assuage the doubt. It’s not too late. So together, this weekend, we will do this!
Greens
Spinach, arugula, and lettuce are all still game. The lettuce won’t be heads, but they will be harvestable in about a month, so toss those older seeds into the garden and lay them on thick. All these seeds can handle being overcrowded. Thinning is a great strategy as you harvest the first, tender round of green in October.
Radish / Turnips
Globe radishes and salad turnips are overdue to be planted. I could have planted them a month ago, but that was the college crunch so it didn’t happen. I know we will still get some nice radishes, as long as I remember to thin them to 1” apart and give them full sunshine. Salad turnips are one of my very favorites (I liken the flavor to a candied horseradish), but I keep forgetting to order the seed in winter so I don’t have any to plant, sadly. They take just a bit longer — 35 days — but store really well in the fridge. I love adding them to salads or a taco bowl.
Asian Greens
Mizuna and mustard greens are also a great very fast crop. They take 40 days to mature, so, if all goes well, they should be mature and hold (assuming we don’t plummet into the teens in late October, which is more than probable) in the garden into November. We will see if I get the motivation to cover — or double cover — a bed of greens this fall. It could happen!
Tatsoi is another super fast Asian green. Think of this like an even faster, miniature bok choy. It has more of a basal form, meaning, it spreads out laterally rather than heading up vertically. It’s really a fun, fast green to grow!
Broccoli Raab
As I said in my video, this is my gardening white whale. I haven’t figured the timing out yet on this. I do think it’s more of a maritime crop than suited for us here. But I’m hoping my very late sowing of it will prove the key to finding the right pocket of late season for this to not completely just go to flower. At 40 days to maturity, and if we have a hot October, it will end up flowering and going to seed, because that’s what it’s meant to do.
Think of this like broccoli-light: Smaller, looser heads. Tender stem and leaves. The few raabs I’ve snacked on in the garden over the years has been a real treat, so I’m hoping I’ve figured it out, finally.
Cilantro
It’s always a good day to sow cilantro. This cilantro sowed now should keep in the garden for a while. I’ll probably add some to the cold frame to give us some extra time with our favorite herb in late fall.
Green Onions
I sow these now like with spinach as an overwintering crop. Some will go into the cold frame and some will be out with the spinach. These, like cilantro, really can be sowed any time of the season.
Hope this gives you some ideas for a quick and successful last hurrah with your seed packets this weekend!
-
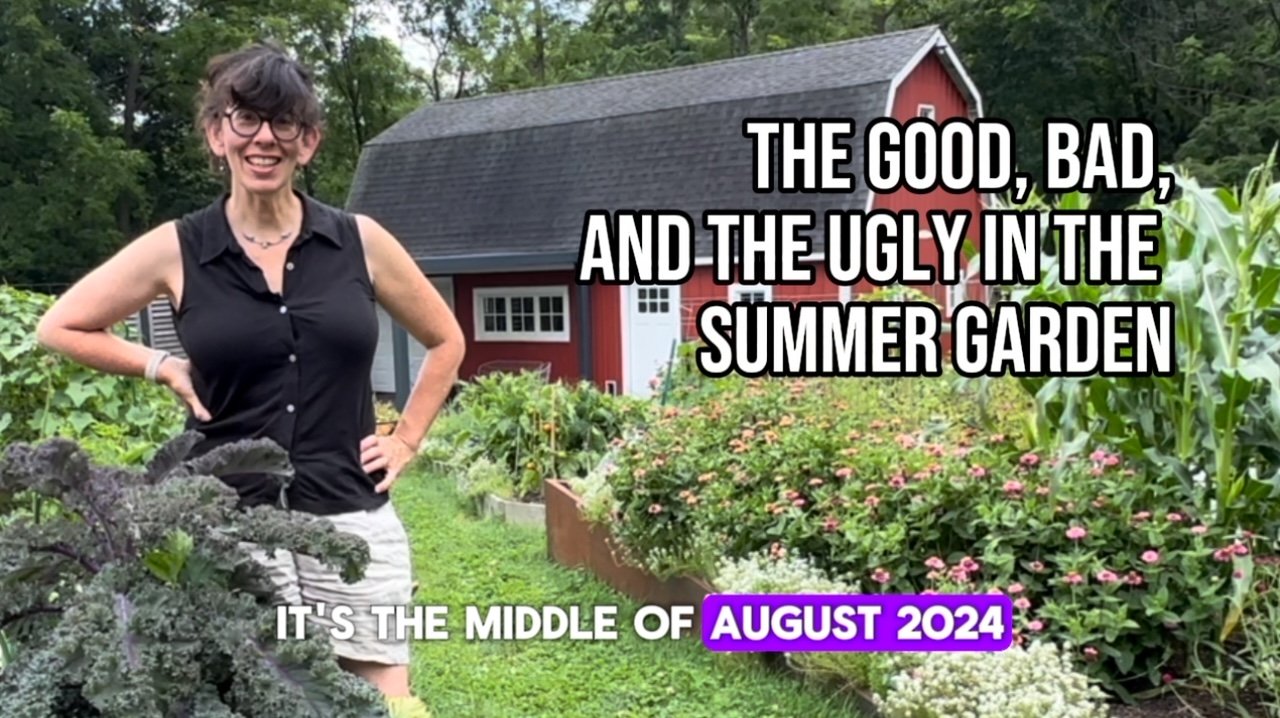
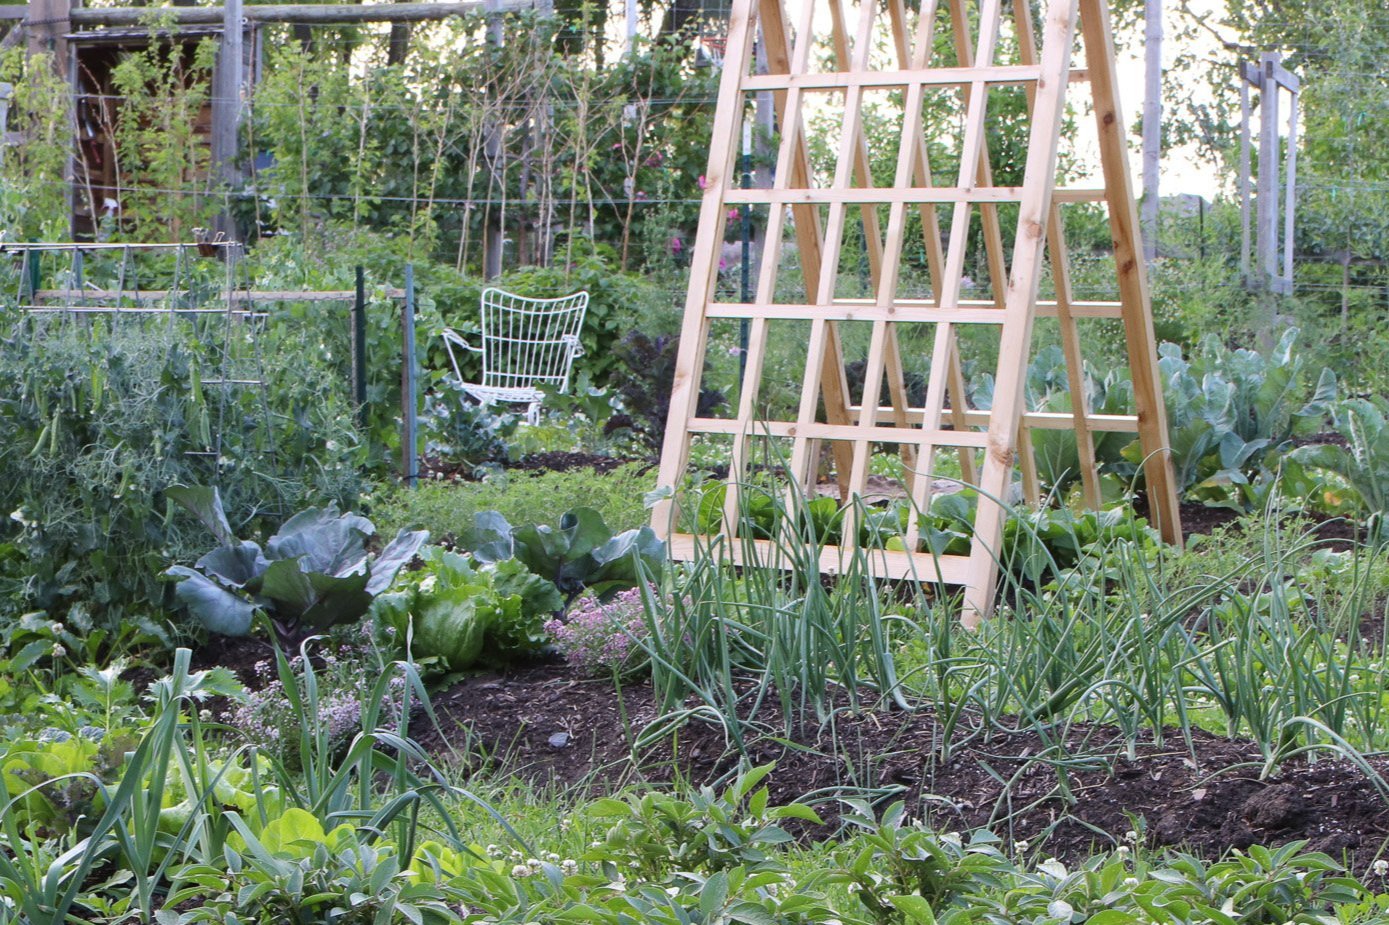
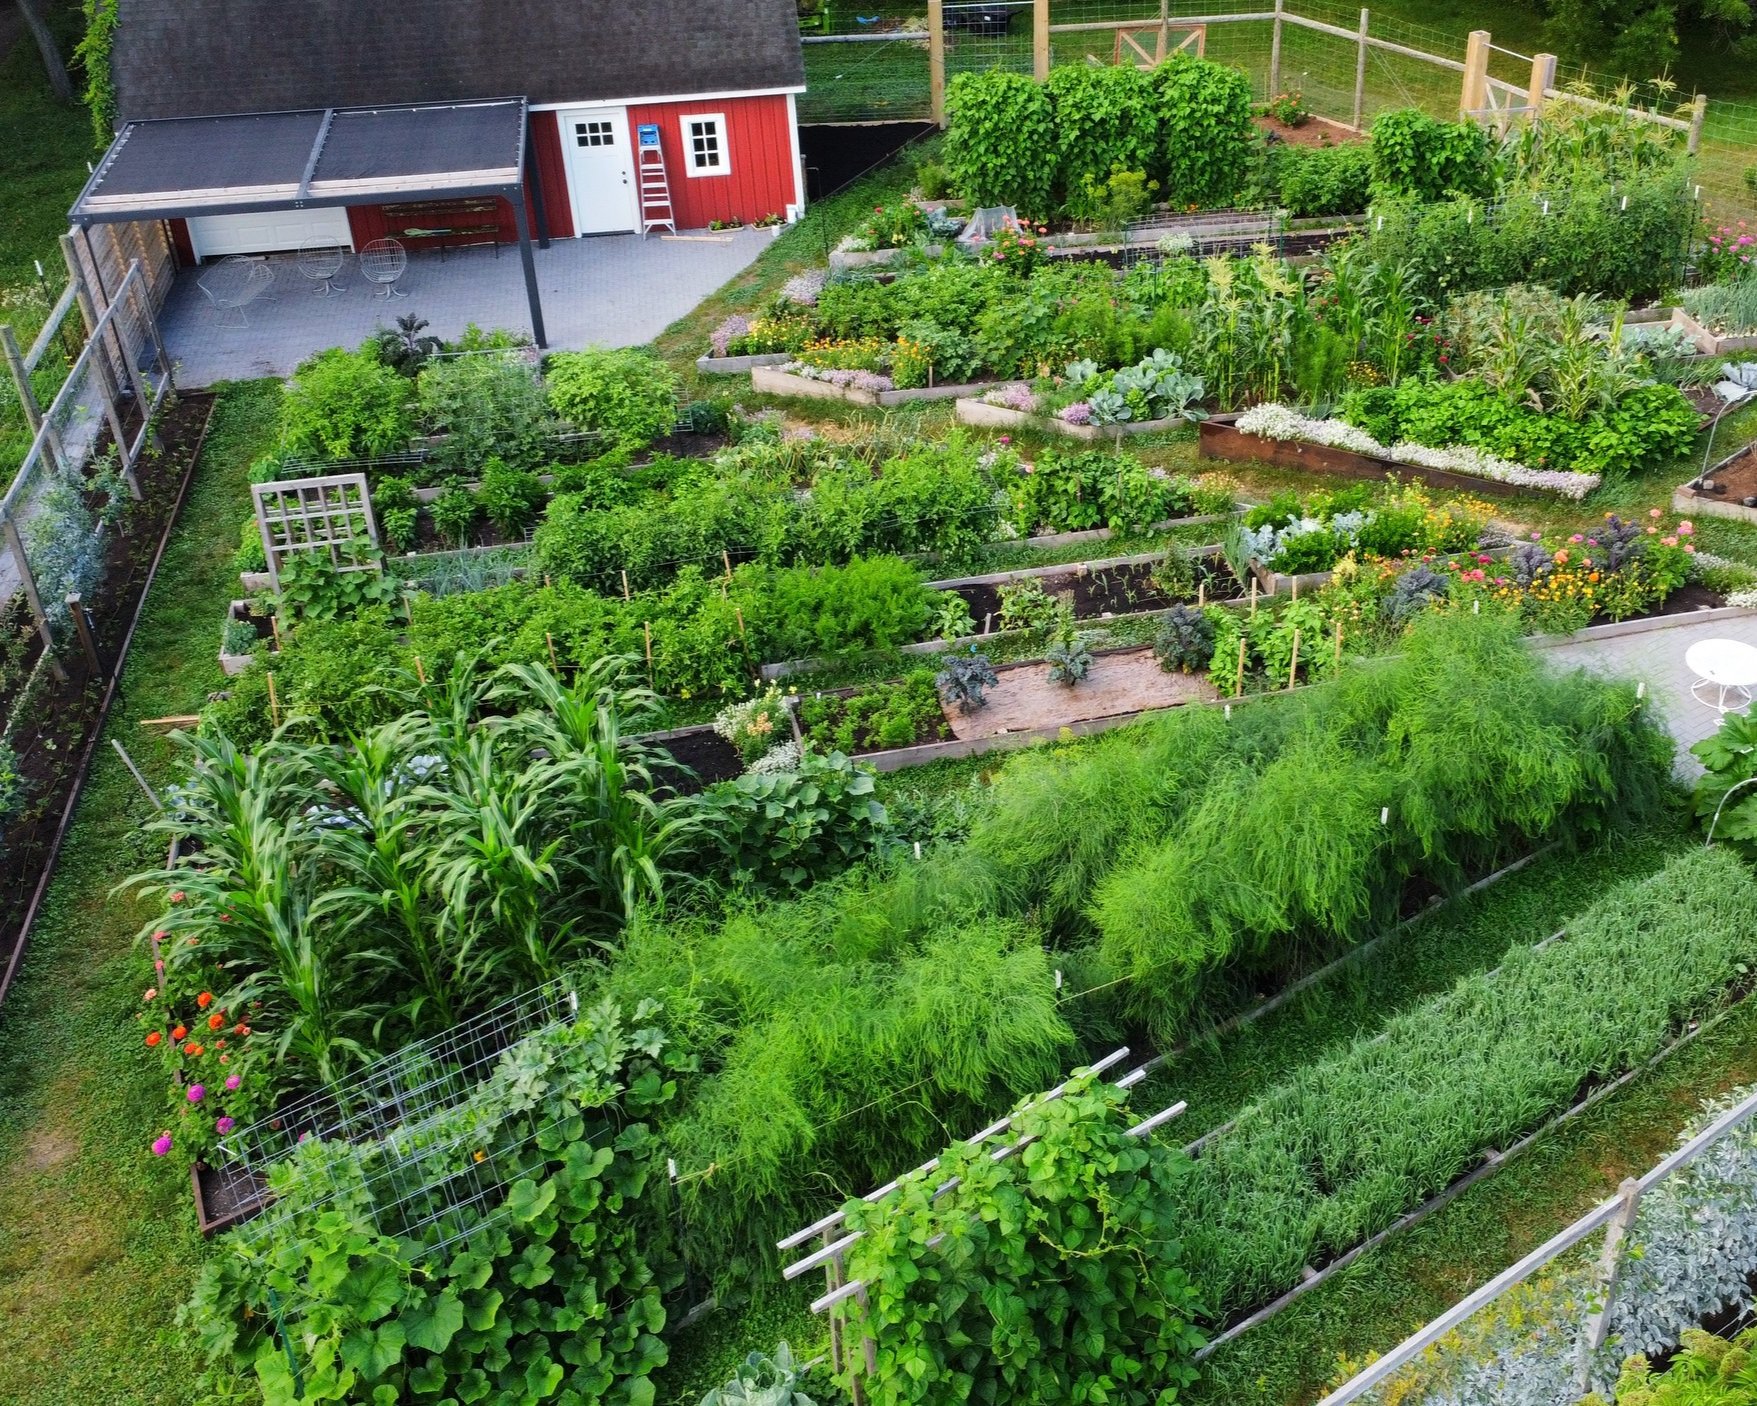
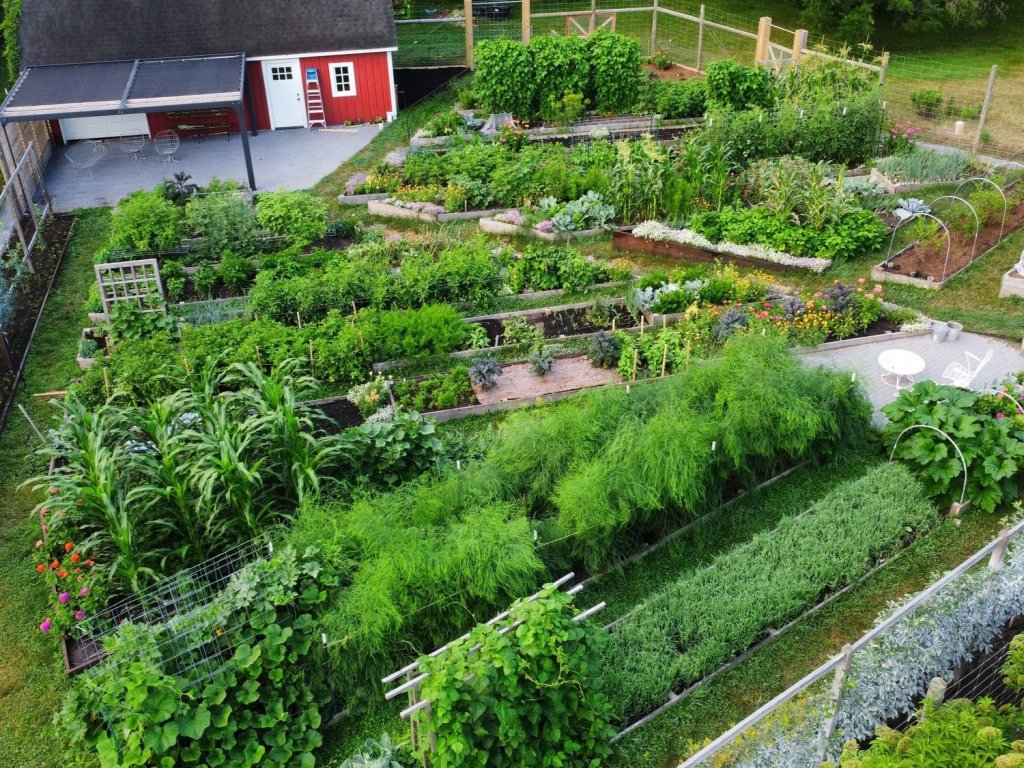
Summer Garden Tour
It’s been almost a year since I’ve made a video garden tour. And with a growing number of members who’ve eschewed social media entirely, I felt it was the perfect time to return to video creation, giving you early access to these monthly tours.
These tours are never exhaustive because the garden is too big to cover it all. I left out many crops, including the state of our eggplants (they’re bananas!), peppers (coming into season more and more everyday, and smoking and dehydrating has commenced), potatoes, and much more.
I tried to highlight the major fails and surprising successes that have made this season so unique.
I hope you enjoy seeing the garden in this longer form content! Please let me know what you think. (And yeah, it was windy at times and there was a bit of background noise but hopefully the captions, which are new, help alleviate that excess noise.)
-

Fattoush Salad
Nothing beats this super fresh Lebanese salad on a hot summer day. We make this a few times a week as soon as the cukes and tomatoes are rolling in faster than we can consume them. It celebrates everything that is a summer garden: it’s fresh, it’s filling, and it’s full of flavor. It ends up replacing our green salads if (when) the lettuce stops producing in the heat of it all.
Fattoush Salad
Ingredients
- 3 cups cucumbers, peeled, seeded, &diced
- 3 cups tomatoes, diced (halved cherries work great too)
- 1 cup parsley, finely chopped
- 2 T mint, julienned
- 1/2 cup scallions, diced
- 1 T sumac
- 1/4 cup fresh lemon juice
- 1/2 tsp dijon mustard
- 1/2 tsp salt
- 1/2 tsp fresh grated pepper
- 3/4 cup extra virgin olive oil
Instructions
- Combine tomatoes, cucumber, scallion, parsley and mint. Mix to combine.

- For vinaigrette, combine lemon juice, mustard, salt and pepper in a 2 cup measuring cup. Whisk in olive oil to combine. Continue to slowly whisk in the olive oil until homogenized. You can also use an immersion blender for this.
- Toss in dressing, sprinkle with sumac, and let sit for 30 minutes before serving.
Holds well in fridge for several days. Expect the olive oil may separate out and clump in the fridge; leftovers should be pulled out 15 minutes before serving to help olive oil warm up.
Notes
This recipe is inspired by Joy of Cooking.
-

Direct Seeded Garden Update
For the past few years I’ve been experimenting with direct seeding more vegetables.
Direct seeding seems like a great solution to reducing my carbon footprint and easing the burden of raising, hardening off, and then transplanting tender seedlings. I am continuing to bend this concept as far as I’m currently comfortable. The biggest challenge for me is how it will affect my seasonality. That is, what will my seasons look like if I move more and more things to direct seeding?
When will my zinnia start flowering? Would I only direct seed basil, making its timing mismatched with my garlic scapes and my massive batches of garlic scape pesto? What are the best-suited vegetables to direct seed, those that give me some breathing room indoors but don’t hamper the diverse summer bounty? These are the kinds of questions I am swirling around as I observe this year’s direct seeded plants grow alongside their indoor-seeded counterparts.
But, direct seeding is not always a slam dunk for gardeners who struggle with cutworms who mow stems down overnight, birds and rodents who will dig up bean and corn seedlings to feed themselves or their young, and so on. I know direct seeding can be a downright impossibility for many people, and I am equally working on thinking that through as I watch my experiments play out across the seasons.
This year, the three main season vegetables I am growing from direct seeding are onions, roma tomatoes, and a red bell pepper. For romas, these are the only roma tomatoes in the garden, so this was a bit of a gamble I took this season, leaning into what I learned the last 2 summers direct seeding tomatoes with great success. This year is a bit cooler, and the tomatoes are reflecting those sub 90 temperatures.
I also grew some spring crops directly seeded as well, but they have all been harvested. They matured about 2 weeks behind my indoor sowed brassicas, and included kohlrabi, tiara cabbage, and cauliflower. My cauliflower was pretty badly foraged by insects, and was wind-blown and didn’t get nearly as large as last year’s fall cauliflower, but it worked. Worked enough for me to strongly consider continuing that trend for next spring.
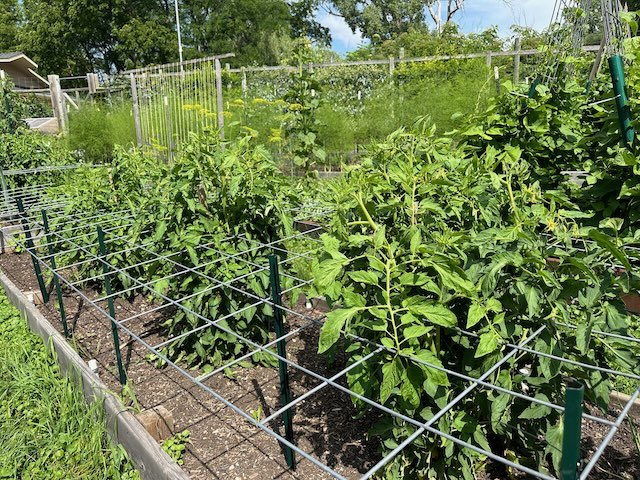
The tomatoes are doing well, but I had slow germination. As a result, the planting looks like a staggered succession: some have fruit set while others are a good 12” shorter and just starting to flower. I expect this to equate to smaller harvests over a longer time, which means, I think, more time processing. We will see how it goes, but it does look like it might come into season right after I get home from getting our oldest settled into college in Oregon.
I am growing onions as a three-way experiment: indoor sowed, direct seeded uncovered, and direct seeded covered. The covered ones were in the same low tunnel where I planted our spring peas, and germinated about a week or so ahead of the uncovered onions.
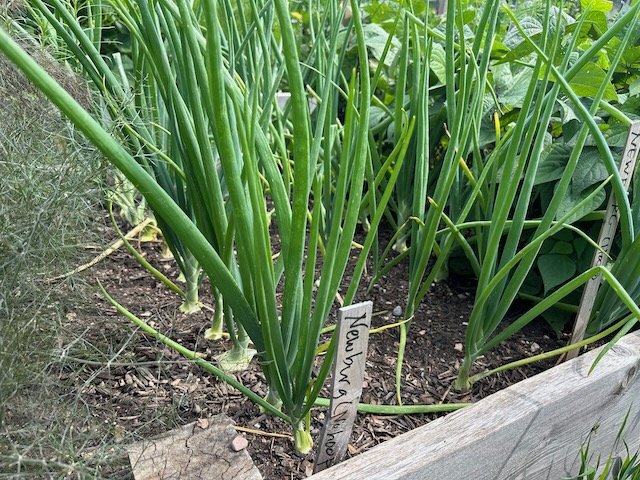
One row of uncovered (no hoop) onions and 2 rows of covered (hooped) Newburg storage onions. Interestingly, the onions seem to be bulbing more underground with these, even though I always deeply plant my onion transplants. These were transplanted at a much younger age — though not sure that explains it. Unsurprisingly, the onions I transplanted as healthy seedlings in late April, about a week after the others germinated, are doing tremendously well and will be flopping over before long. This is my gold standard for onion growing — and for succession planting. I rely on this bed for transplanting napa cabbage and kohlrabi in August, as well as direct seeding some of my winter radishes like daikon and watermelon radish.
Some onions are as large a softballs, though let’s be honest: how many dishes besides homemade salsa or ketchup require a 2-3 lb onion? But will the later plantings produce onions large enough in time for curing? They are bulbing, responding to our long day length (I always grow long-day onions), so that is a good sign
The indoor sowed (in late February) and transplanted onions are many many weeks ahead of the direct seeded onions.
So far, the uncovered and covered onions seem to growing at about a similar rate; I don’t see a large size difference, but they are about a month behind. It will be interesting to see if they store longer, as they won’t be harvested until later in August, or if their storage time is about the same as the ones that are harvested sooner.
On a whim, I decided to start more bell peppers in April, April 11 to be exact. This is the latest I’ve ever sowed bell peppers indoors. Then, about 2 weeks later, on April 24, I direct seeded the same variety, Wisconsin Lakes, in our cold frame. The direct-seeded cold frame pepper germinated in about 2 weeks in the cold frame, which honestly was pretty good. I transplanted it into the pepper bed in late May, and it was a tiny seedling at that time. It has been slowly gaining height on the indoor sown seedlings. Currently, the direct seeded plant has open flowers while the indoor sown plants have fruit set already.
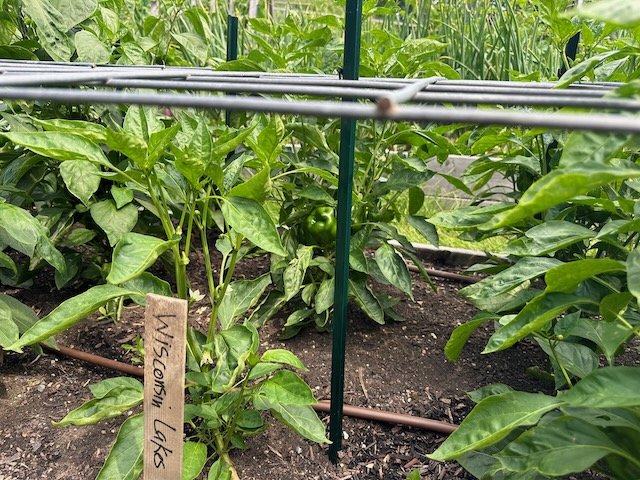
Front: direct-seeded pepper with open flower. Behind: indoor sowed pepper with fruit set already. I’m rooting for the direct-seeded pepper to prove me right, that direct sowing fast maturing peppers is possible here.
The big question with these peppers is will they produce ripe peppers before the days grow cooler? I’m anticipating September peppers on this plant, but September can be a wild ride — hot and humid or cool and rainy. And I anticipate much of this trial’s success to hinge on the climate in late summer, which wildly varies from season to season.
All that being said, I can see potential in direct seeding some peppers, continuing to direct seed my roma tomatoes, and might start to grow more of my onions direct seeded if we can make our succession planting needs align with the later harvests.
I’ve also just recently direct seeded some bok choy, Spigariello broccoli, Di Ciccio broccoli, stem broccoli, iceberg lettuce, beets, and tiara green cabbage. These are all fall vegetables I almost always indoor sow and transplant. Bok choy has been the one breakthrough over the last 3 years that, along with kohlrabi, has helped me deconstruct my entrenched belief that indoor seed starting is supreme for growing a fall garden. I am thinking I’m a little late for the broccoli, but these are fast-maturing varieties so they may produce for us in late September. The bok choy, unsurprisingly, germinated in under 3 days!
I am excited to continue to study, explore, and assess all the ways direct seeding can help me grow as a gardener. It’s all about considering what vegetables we need in season when, and how we can coordinate those needs in combination with indoor seed starting and direct seeding. The biggest lifts for me are in August and September when I’m reaching for bushels of tomatoes and pounds of onions for my salsas and ketchup. If it’s possible to direct seed more, and I can manage pest pressure easily, it feels like the right direction to take the garden, not entirely, but in key areas where we have flexibility and space to direct seed our succession plantings.
-
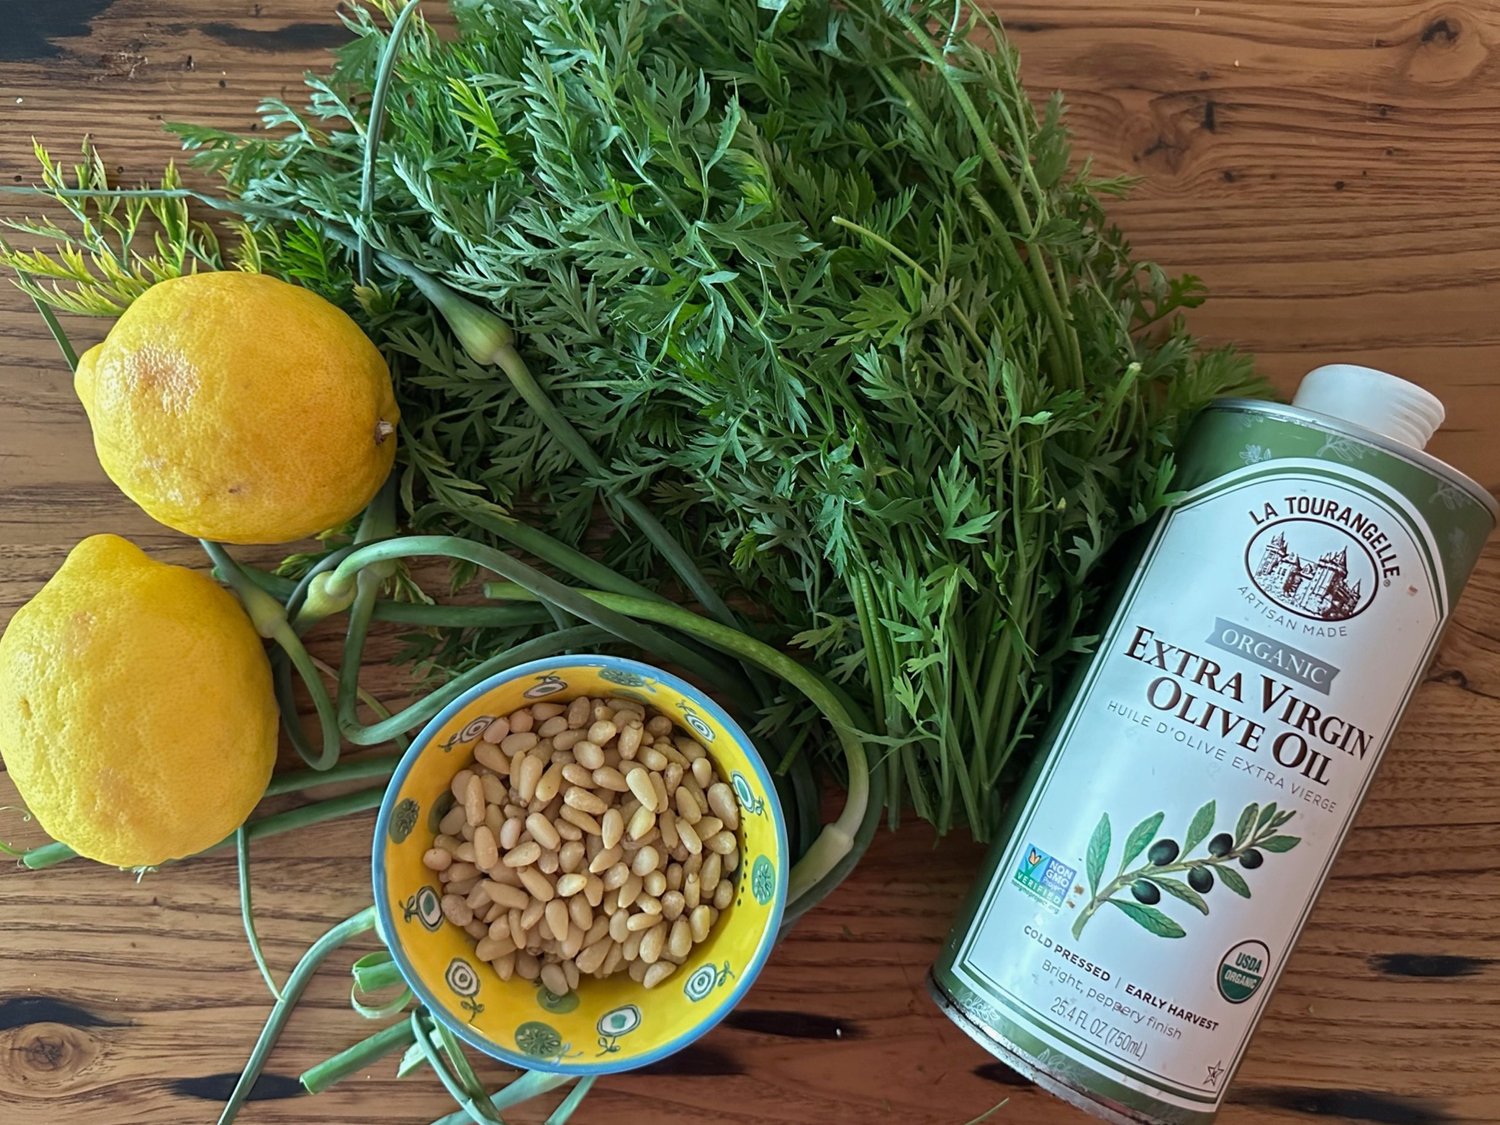
Carrot Top Pesto
I love this fresh, vegan pesto recipe so much! It is a smaller amount than my other pesto recipe, and has quite a different, somehow fresher, flavor.
Truth be told, the family doesn’t enjoy it as much as me, thought our oldest will enjoy some with me on pasta or pizzas. Carrot Top Pesto has more of a vegetal flavor than my Garlic Scape Pesto recipe, but the beauty is that if you are growing carrots in spring and need to thin them out — and have even just a few garlic scapes — you can whip up a pint of this in no time!
Yield: 1 pintCarrot Top Pesto
 Prep Time 10 minutesCook Time 1 minuteTotal Time 11 minutes
Ingredients
- 4 ounces carrot tops, about a bunch (chop off the bottom few inches of the stems)
- 3 ounces blanched garlic scapes (about 5 scapes)
- 1/2 cup pine nuts
- 1/3 cup lemon juice (fresh is best)
- 1/3 to 1/2 cup olive oil
- 2 tsp sea salt
Instructions
- Blanch garlic scapes and chop into 1” pieces. Note: I have started to cut off the more fibrous bottom 6” or so of my scapes, the part that is lighter in color. Some years my pesto is more fibrous and I’m certain this tougher part of the stem is why. So I strongly recommend cutting off the firmest part of your scape after blanching, the part that doesn’t bend as easily.
- Place garlic scapes and carrot tops in your food processor or Vitamix and pulse to fully chop fine — this takes about a minute to do. Scrape down sides a few times to ensure an even chop.
- Add pine nuts and pulse again until fully chopped and combine.
- Slowly add the olive oil and puree until well blended, again scraping down sides to ensure a smooth consistency.
- Lastly, add the lemon juice and salt and blend again.
-

Summer Pruning in the Orchard
It’s that time of the season: time to prune back the vigorous growth and water sprouts on our fruit trees to maintain and improve shape of both our espalier and our open grown apples (of which there are 2). Now through early July is a good time to get this task done in our zone. This is the final pruning until Winter 2025.
Like winter pruning, this is somewhat of an art form in that you are taking into account your particular tree and its growth habit, and shaping it into a pleasing form for your garden.
General rule of thumb is to prune the vigorous stems back to about 3” from the winter prune. This should be 3 buds or leaf nodes. Sometimes it will be a little longer, and sometimes you might decide to cut it all the way back to the winter cut.
Our plums and apricots are by far the most vigorous fruit trees and thus most challenging to maintain shape, and so are the best examples of summer pruning. Our apple trees that are now fully branched out and trained are less vigorous and thus require fewer cuts to maintain the shape. Basically, they are at maturity. It’s not clear if the plums or apricots will ever grow into such a chill state of being, but so far there’s no indication they will ever slow down.
NOTE: I will update this blog post next week (after I get home) with a second video of our youngest espalier trees and how they are growing so far this year, and how we are training the top branches and what the pruned water sprouts look like, as those trees are much more sparse and thus a bit easier to see the form and what the ambitions are intentions are when pruning.
-

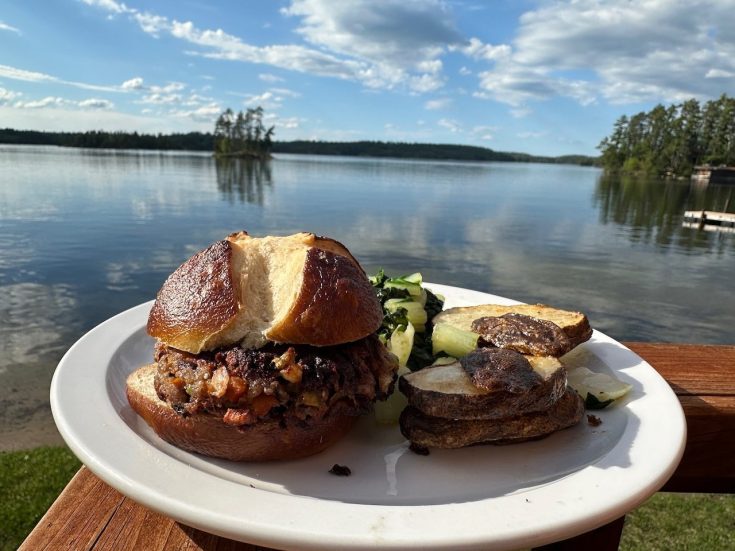
Black bean + Mushroom Burger
I’ve been working on refining this recipe for a few months, and it’s finally ready for you! The shredded cheese and oven roasted creminis are what bring the flavor to these burgers.
Black Bean and Mushroom Burgers
Ingredients
- 1.5 cups oven roasted cremini mushrooms (start with 2 cups raw shrooms, about one pound)
- 1 cup finely diced onion
- 1/2 cup finely diced carrot
- 1 15 ounce can black beans, drained
- 1/2 cup chopped nuts (pistachio, cashew or pecan)
- 1 cup finely shredded parmesan/pecorino blend (50/50 is nice)
- 3/4 – 1 cup panko
- 1 egg, whisked
- 1 tsp salt
Instructions
- Preheat oven to 425. Chop mushrooms and lightly toss in olive oil. Lay on parchment and roast for about 25 minutes until well softened and darkened in color. When done, add to the cooked onions and carrots.
- While mushrooms are roasting, preheat a skillet to medium high heat. Dice onions and carrots and saute until softened. Set aside.
- Chop nuts and place in bowl with cooked veggies.
- Run the mushrooms, carrots, onions, and nuts through a food processor, pulsing about 5-10 times until well chopped but still with some fine pieces remaining.
- In a large bowl, press the drained beans into this mixture with a potato masher to mash up some but not all of the beans. Now mix in the shredded cheese, egg, salt, and as much panko as you need to be able to make a ball that holds pretty well when squeezed.
- Like other veggie burgers, these are a bit on the tender side, but they formed really well for me.
- Cook in a medium hot skillet with about 1/8” of avocado oil covering the bottom, flipping once a few minutes in. Use a meat thermometer and cook until internal temperature reads 160F.
-
Selecting the Right Trellis
This direct message requesting a run through of why I choose what trellis for which crop felt like a great, timely blog post, so here it is!
We use a handful of different trellis methods for vining crops. Some are older methods and some newer. Some can be used for many different crops and others more limited due to their design.
Classic Twine with Cross-Bracing
This is our OG trellis system, dating all the way back to our first urban gardens in 2003 in Minneapolis. Simple and modular, we had many 8’ long boards that we cut with either a table saw or circular saw with a clamp to yield 2×2 vertical posts and one cross brace for the top. We screw them together after burying them a good 12” deep. Finally, add a second cross brace about 4” above the soil line to hold the twine in place.
We’ve used this for tomatoes and beans most of all, but cucumbers would be quite happy on these, as well as summer squash (vining types, which I think most are), as well as vining flowers such as climbing nasturtium or sweet peas. I would be a bit weary of growing butternut supported only by hemp twine, as well as watermelons or muskmelons.
Cattle Panels
Cattle panels in any shape are the most versatile type of trellis system. In addition to being durable, they can hold any and every vining crop we grow from winter squash to beans, from watermelon to cucumbers. Tomatoes, when tied up to them, also grow happily and appreciate the added support.
And as many of you know, I’ve also started turning them horizontal (parallel with the ground) as a flat trellis for bush type crops like determinate tomatoes, tomatillos, and more. I’ll be trying this with my bell peppers this year, too!
If you want easy, I highly recommend these.
Here’s a blog post to how we built our cattle panel archway: DIY Cattle Panel
Wooden trellises
Beauty over function is the best description for this trellis. We use this trellis solely for cucumbers — I grow 4 slicing type cucumbers on this trellis every year. It’s gorgeous but a bit too thick for beans to cling to. I’ve never considered tomatoes on these, but with having to tie them up, they might work on this.
This one was also quite expensive and time-intensive to build considering the cost of lumber these days.
Horizontal Stringing
This is best used for crops like peas and beans, legumes that claim to be bush but in reality are easier to manage and harvest if supported up off the ground. I also use this method for containing floppy crops like my potatoes that would otherwise fully obscure their paths come late summer.
Freyr Trellis
This is the only not DIY trellis in our garden. I couldn’t pass up an offer to try one and give feedback for free. These trellises cost several hundred dollars. Made from powder coated aluminum, they’re lightweight and ingeniously designed as a modular system.
Last year I used them at 5’ tall for my half-runner dry beans, Tiger’s Eye. This year we went for 7’ tall and I’m training several tomatoes on it, going back to my single leader days. I plan to try cucumbers on it next year and will continue trialing different crops for many years to come.
It would work best if you had 4×8 beds and could screw the base to the side of your beds. I installed these completely level but they still bent over winter with heaving and are no longer plumb. I won’t be bothered by it once the tomatoes fill in.
Here’s a video where I covered each of these trellises:
-
Fall Garden Guide
I know, I haven’t even planted my summer tomatoes, yet I want us each to have this long term foresight front and center in our minds as we plunge into planting season. Planting a fall garden is a cornerstone of our garden plans each year, and I hope you will consider some of the crops mentioned and timings suggested in this guide. Remember, you don’t have to do all or even most of what we do. It’s your garden, and thrives under your unique dreams, goals, and tending, so keep it sacredly yours.
This guide will walk you through the various stages of fall garden planning and planting: my late season successions that I’m planting now, where I’m earmarking for summer transplanting, as well as where and how I’ll eek out ever more square footage for the fastest fall garden.
The Long Game
I aim to have a sizable percentage of our entire raised beds in late succession crops. I estimate it’s at least 1/3 of the garden. These include the crops dry/shelling beans, popcorn, leeks, brussels sprouts, winter squash, watermelons, potatoes, and sweet potatoes. Most of these (except leeks, brussels, and potatoes) are frost intolerant and warm season crops, but they are in their beds from sometime in May until October most years — or longer, as in the case of the brussels, leeks, and potatoes. I dedicate space for these singular successions each year, and don’t grow in them before or after these crops.
As I think about it, my tomato beds often behave like a late succession crop too because I don’t tend to utilize that space after its main succession is done, in large part, because at that point, I’m feeling done, too. And, because space isn’t a constraining factor for my fall garden at that point.
Dry corn, squash, tomatoes, potatoes, and dry beans are scattered about this garden. They are often some of the earliest things I plant, often before my pepper seedlings that I’ve been tending for a few months now.
These crops are all planted in mid-May through early June. It’s critical to partition off space for these crops now. That’s why I wander the garden with a sheet of paper and stakes to literally stake a claim for a crop. It’s honestly one of my favorite activities of the growing season, dreaming up where everything will live and grow and with whom they will co-mingle.
Also, these crops are largely not interplanted at all — rather, their beds are dedicated to just one crop (a method I called Blocking in my book). Watermelon and sweet potatoes are the exception here as I often like to interplant those with flowers. Because, every garden needs more flowers. And because the leeks and potatoes need hilling, interplanting is not viable in those beds.
These are my late succession foods. And they are a cornerstone of our garden.
Spring into Fall
Fall gardening starts now, not only with the late succession crops, but also with how we plant our fast maturing spring garden too.
Be strategic as you tuck transplants and sow seeds into your bare beds this month. Clump plants together that will mature at similar rates, especially for things that will be done well before fall like your onions, sweet corn, spring peas, and so forth. These are the areas where I direct seed my later fall successions such as carrots, daikon, and even kohlrabi, napa cabbage, bok choy, and head lettuce.
At the same time, take into consideration your sunlight. Main season, frost intolerant plants like winter squash, tomatoes, beans, and peppers can go in areas that will be shady come fall, as there’s a chance – at least for me – that a frost will descend around the time the beds get shaded out for much of the day. This is a strategy I’m getting better at with each year, but is something I’ve had to learn by doing. I used to plant my garden from the top down, meaning I’d work from my northern most beds and plant toward the barn which is not only further south but also lower down so more prone to shoulder season shade.
As I watched my brassicas get shaded out in early October, it dawned on me to rethink how I plant the sunnier beds thinking ahead for the fall garden. Meaning, I want to have those spaces open for my quicker fall crops as well as some of the spaces open up in mid-August for those 50-day varieties too. This has been a big change in my mindset, and something I may have to remind myself (aka make the same mistake) a more few times before it sticks.
The northernmost bed before our triangle bed this year is planted exclusively with crops that will be mature between June and August. This bed will be succession planted with carrots, greens, napa cabbage, and probably some overwintering spinach later in summer.
In this way, you are partitioning off the sunniest part of your garden to be growing food for the longest possible time, rather than using it for just one, longer crop that will be mature before fall frost. You’re extending your growing season in one or more beds by considering how crops will mature and how you can utilize that space even with weeks left in the frost-free season.
Things I now try to remember to plant in the sunniest spots are: onions, garlic, early brassicas, spring peas, and cucumbers. These are my heaviest succession planting beds, the ones that will get 2-4 successions each growing season, including interplanting successions.
The Sneaky Space Saver
One essential spring planting is a buckwheat cover crop where I will transplant my cabbages, cauliflower, and broccoli for fall (and beyond, being root cellar crops). Buckwheat is an insanely fast cover crop, going from seed to flowering in under 6 weeks usually. I plant it in mid-May so the pollinators can enjoy the nectar before I cut it all down in early July to prepare for transplanting.

Buckwheat is the perfect spring garden cover crop for someone who wants to fall cabbages and cauliflower but doesn’t want empty space now.
We didn’t eat all of our cabbage in winter this year; some of it molded enough that we tossed them out in the compost heap, so I’m partly rethinking my square footage. That being said, I usually earmark 4’x20’ (80 square feet) for our fall brassica transplants. This ends up being about 5 broccoli, 5 cauliflower, and 12 cabbages (green, red, and napa).
I was successful last summer with hooping them, and I plan this year to potentially cover more brassicas because the cabbage whites are so intense for us. And this will somewhat impact my plant spacing as I won’t want them growing outside of the raised bed so I’ll need to plant them differently so the foliage doesn’t flop outside the raised bed.
As I covered in last summer’s guide, I also find space for the fall garden through strategically timing my cururbits: planting a LOT of pickling cucumbers only to tear them out when enough jars have been canned; planting early summer squash and pulling them out, opening up a hefty 4×4 space come late July — meanwhile thwarting any squash vine borer eggs that might be lingering; and onions and garlic that naturally mature by August or so, thereby being prime beds for 50-day root crops and kohlrabi, as well as quicker maturing greens. And, finally, sweet corn plantings are out by August too, carving out even more space for fall crops — I usually plant my head lettuce in the ample space between the corn stubbled rows.
Interplanting
Some fall crops can be interplanted. They are a short list, to be sure. And they are short-growing plants too, which means they don’t need large trellises and, generally, that they crop faster, which is why they make great companion plants for other longer season veggies.
Celery
For a spring harvest, I will often plant celery in a block. Last summer was my very best celery garden; this spring I have about half a dozen plants in need of transplanting. And, it’s almost time to sow my fall celery starts! (More on that timing below…) Celery can be interplanted for fall … it does need some good light and plenty of water, but it can be planted in the understory of tomatoes (trying this for the first time this year), at the edge of a bean trellis, edges of garden beds, and so on. I wouldn’t recommend trying to get a good crop between squash plants, as they
Beets
Beets work great interplanted, and they grow well this far north any week of the growing season. I interplanted them last summer in the gaps in my garlic bed and I was floored at how well they produced, both their speed and size impressed me.
Chard
Other than the fact that I don’t like this veggie and therefore don’t grow it, it’s a great choice for interplanting so I felt obligated to add it here. I’d even go so far as to say it could work well in with your tomatoes, cucumbers, and planted under other vining crops that you trellis, especially as you prune them and disease sets in … if you can handle the flavor, that is. (Just kidding. If you love it, lucky you. I wish I did because it’s so beautiful!)
Fennel
I love fennel as much as an ornamental as an edible. And for this reason, it tends to get planted in prime spots, interplanted among flowers at my “end caps”. It’s foliage and gorgeous bulb demands prime real estate. It is pretty ow growing so those ends of beds tend to be places where sunlight will be strongest, especially if you’ve got taller crops growing in the same space. Go for a south-facing end rather than north-facing for something like this.
Head lettuce
Except for iceberg, I tend to interplant my romaine and bibb type head lettuces. Under trellises, on the north side of vining crops, under young tomato plants, lettuce can handle some light shade, and in the case of a quickly warming summer, it helps curb the bitterness if you’re not growing heat tolerant varieties. My first head lettuce succession is iceberg, and then I switch to heat tolerant varieties through August, at which point I’ve moved back to iceberg types.
Cilantro
I plant cilantro about every other week now through September. It basically will go anywhere I have some decent light and open space. It needs 30-40 days to produce in warmer months, so it’s rather quick. Right now it’s between rows of peas, but later in spring it will be under tomatoes, and between later successions of beans. I just keep finding space wherever I can, and it doesn’t have to be much to be effective. Even just a strip 12” long can produce several bunches of cilantro for your pico de gallo salsa needs in August.
Arugula
This stuff grows faster with each passing week! Sowing often and in shadier spots will give it the best chance at continuing to produce. I tend to take some time off arugula in July, but I will be sowing it a few more times here this spring, anywhere I feel I have enough sunlight and space for 40 days or so. It will likely go between fall iceberg lettuce at that point or the final succession of bush beans, or between our fall peas. Similar places where it’s currently growing.
Bunching Onions
This is another keep planting it veggie I’ve grown to love. Loads of recipes call for scallions, though we often just use the chives that have run amuck in our garden beds along the driveway. I tend to direct sow these nowadays, and like arugula and cilantro, can be seeded in small amounts and grown, gloriously, in bunches for ease of harvest and space saving. I will start sowing them again in July for fall harvests as we have a few plantings in seedling stage at the moment, interplanted in my main flower/veg garden bed just off the garden patio.
Timing Transplants
I have developed a staged approach to starting my fall transplants. It was not without years of soft-ball sized cabbages in December, and broccoli and cauliflower sowed in late July with a late August transplant, timing that seemed to “make sense” based on current weather, rather than considering the plant’s needs in the weeks and months ahead.
I now sow 3-4 successions of fall transplants, because it’s not a one-size fits all adventure, much in the same way I don’t plant my spring or even summer garden in one day. If I sowed them all at the same time, some crops would crop in August (way too soon), while others would not be happy trying to grow in the hottest weeks of summer and bolt or grow terribly bitter. This is kind of the fun but also the exhausting thing about it, and the fact that doing it all makes for a very hectic schedule every week from now until sometime in August. But I enjoy the complexity of the timing and the diversity of produce that results from this extraordinary effort.
Speaking of summer, it’s challenging to accept that during our hottest weeks in summer is exactly when hardening off and transplanting many of our precious fall brassicas needs to happen. Yes, it will feel wrong, and you might second-guess yourself like I do most years, but it works. Not only does it work, it’s needed. Especially for cauliflower and cabbage.
Celery and late season brassicas (they should note if they are late/full season cabbages, usually over 90 days to maturity) are best sowed in mid- to late May, a solid 6 weeks before transplanting. I will be sowing my celery next week in soil blocks, and might do some cabbages at the same time although knowing their germination rates vary so wildly it’s best to put them in separate trays. I’ve learned from watching and talking with my local organic farm friends that fall cabbages are often started in May sometime. I still find this odd, but after having given it a try, it does work. However, with the shifting climate and later falls, they end up quite large and our root cellar not cool enough for storage when they are ready to be harvested, so every year ends up being a little different. I’d rather have slightly smaller cabbages in October than really big ones, because smaller cabbages actually are the best storage quality. But I’m guessing that’s not a priority for most home growers, even though it’s an interesting fact.
June 1 is when I aim sow my cauliflower indoors, along with most of my cabbages. These cabbages include my red cabbage and main season (75-90 days to maturity) varieties. They get transplanted about 4-5 weeks later, around the same time I transplant the longer season ones.
Late June is when I sow my iceberg lettuce and broccoli, because sowing broccoli any sooner will result in summer harvests, not fall. And sowing later in July will result in lackluster harvests, neither will size up due to diminishing light in late September and October. Trust me, I’ve screwed this one up both ways, more than once.
Mid-July is when I start my kohlrabi, napa cabbage, and last fall head lettuce (not iceberg). This can easily be direct seeded or indoor sowed and transplanted.
Timing of direct-seeded fall crops, especially carrots, can start sooner than later too. I’ve sowed my main/early season carrot bed already, and we will eat out of that bed in June, July, and August. But starting in about a month, sowing carrots for late summer and fall harvests is a great plan! They really keep so well in the ground, and are a joy to harvest.
I hope this has given you new insight into how you can enrich your fall garden and succession planting plans this growing season.
-
Crepes {savory or sweet}
This is another staple recipe in our household. If we have a busy day or want to have a fully customizable dinner that everyone will like, this is what we often do. It works great for breakfast, of course, too. And don’t forget it’s also a vehicle for chocolate, fruit, or jam.
The thing I love about this is that we always have the ingredients on hand. So when we are having one of those weeks, we can lean on this recipe to allow us to not have to order food — and can use up ingredients like leftover cooked veggies or extra shredded cheese.
This base recipe makes about 8 crepes, so enough for a family of four to each have 2, but none for dessert crepes, which are usually my point of arrival with this meal. (Just me?) Also, I will often halve it for a quick weekday breakfast for one of the teenagers. And, I’ve also started to make a batch and a half so we have leftover batter in the fridge. In other words, recipe is completely scalable!
Bonus: it keeps for 1-2 days so making a larger batch is never wasted here.
Here are some filling combinations we love:
- Jarlsberg, arugula + caramelized onions
- Ham + cheese
- Broccoli + cheddar
- Spinach, onion, and cheese (feta seems like it might be a good one here, but we rarely buy it)
- chocolate & strawberry jam
- cooked apples, cinnamon, and brown sugar
- just jam — any flavor
- just chocolate chips
Crepes (Savory or Sweet)

Ingredients
- 4 large eggs
- 1 cup milk
- 1/2 cup warm water
- 4 tablespoons salted butter, melted
- 1 cup all purpose flour
Instructions
- In a blender, add wet ingredients and then flour. Blend on low speed, increasing to medium as the flour gets fully incorporated. Blend for a total of 10-12 seconds. Not long at all. If need be, stop and scrape down any clumps of flour and blend for a few seconds more.
- Prepare veggies and shredded cheese of your liking and set aside.
- Preheat a cast iron skillet (or your skillet of choice) to medium. Turn down to medium low when you’re ready to cook the first crepe.
- Melt a small pad of salted butter into the skillet. It should sizzle but not brown right away (that’s a sign the pan is too hot).
- Using a soup ladle, pour the batter into the front of the pan and swirl around about half a dozen times until you have batter going up the sides of the pan. This will make flipping a lot easier!
- In about 1-2 minutes, you will check the sides of the pan to see if the crepe is cooked. You’re looking for some nice golden brown spots underneath.
- Using your fingers or a spatula to flip the crepe from the back side forward. I’ve tried it many different ways, and I find this the easiest way to do it.
- Cook for another minute or so and then add toppings. you may want to turn the heat down (or up?) at this stage depending on the color of the cooked side.
- Fold the crepe into thirds, and flip in half to continue to cook and melt the cheese. Serve immediately!